How to Check Your Active Subscription and Upgrade Plan
Overview
CloudStick separates billing into two independent plans: your Account Plan (which determines how many servers you can connect, how many team seats you have, and which features are available) and your Backup Plan (which determines how much backup storage you have across all your servers). Both plans are visible from the Subscriptions section of your profile.
This guide shows you how to navigate to your active subscriptions, understand what your current plans include, and upgrade either plan when you need more capacity or features.
Upgrading your Account Plan takes effect immediately. Upgrading your Backup Plan also activates immediately upon payment. Always review the plan details and pricing before confirming any upgrade.
Step 1: Open Your Profile
All account-level settings — including billing and subscriptions — are accessed through the profile menu at the bottom-left of the dashboard.
1. Log in: Sign in to your CloudStick account at app.cloudstick.io.
2. Click your profile: At the bottom-left corner of the dashboard, click your profile avatar or account name to open the profile popup.
3. Enter Account Settings: Click the arrow icon next to your name to navigate into the full profile settings view.
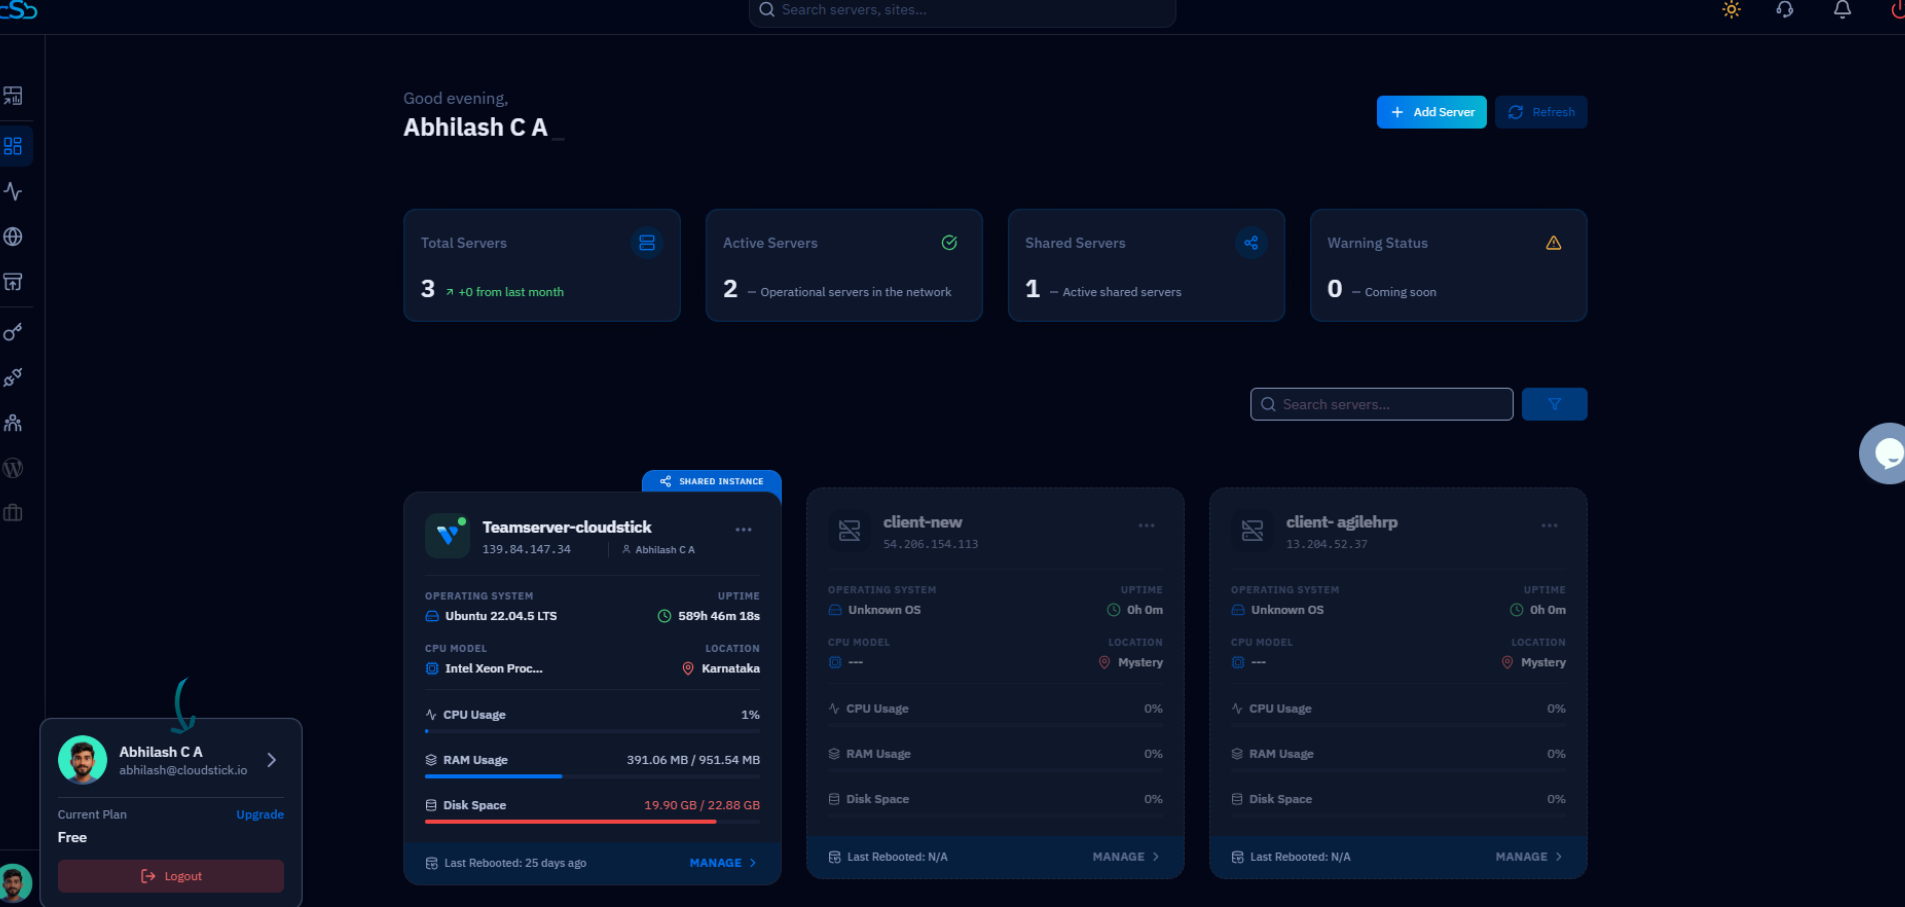
Fig. 01 — CloudStick dashboard with the profile popup open at the bottom-left corner.
Step 2: Navigate to the Subscription Section
The profile settings page organizes all account options into cards. The Subscriptions card links directly to your Plans and billing page.
1. Locate the Subscriptions card: On the profile page, find the card labelled "Subscriptions" with the description "See all active subscriptions of your account."
2. Click the arrow: Click the arrow (→) on the Subscriptions card to open the Plans and billing view. You can also click Subscription in the right-hand navigation panel.
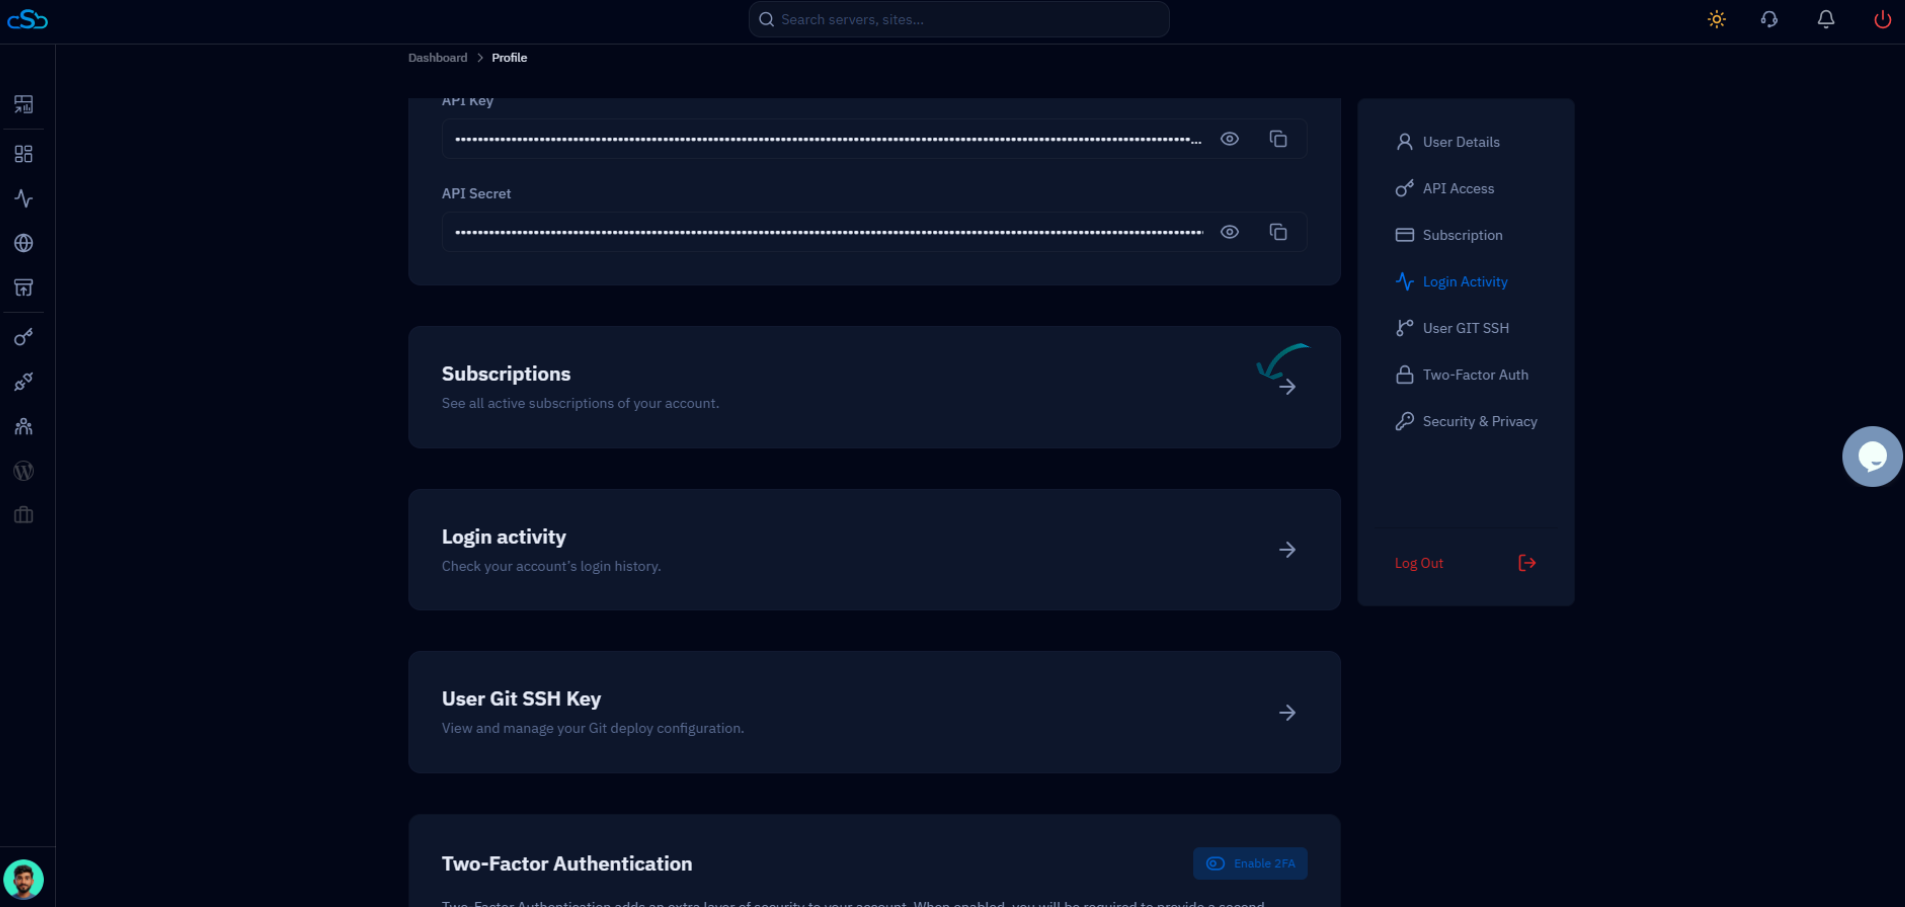
Fig. 02 — Profile page showing the Subscriptions card with the navigation arrow.
Step 3: View Your Active Subscription
The Plans and billing page gives you a full snapshot of your current CloudStick subscription status — both your account plan and your backup storage plan side by side.
Account Plan card: Shows your current tier (e.g., "Free" or "Basic"), its billing status, and an Upgrade Plan button.
Backup Plan card: Shows the name of your active backup plan, total storage allocated, payment method, next billing date, and an Upgrade Plan button.
Billing History: The lower section lists all past invoices. If no payments have been made yet, it will show a No Invoices Yet message.
The Free plan includes 0 GB of backup storage. To enable backups for your servers and databases, you need at least a Basic, Pro, or Business account plan — or purchase a standalone backup plan from this page.
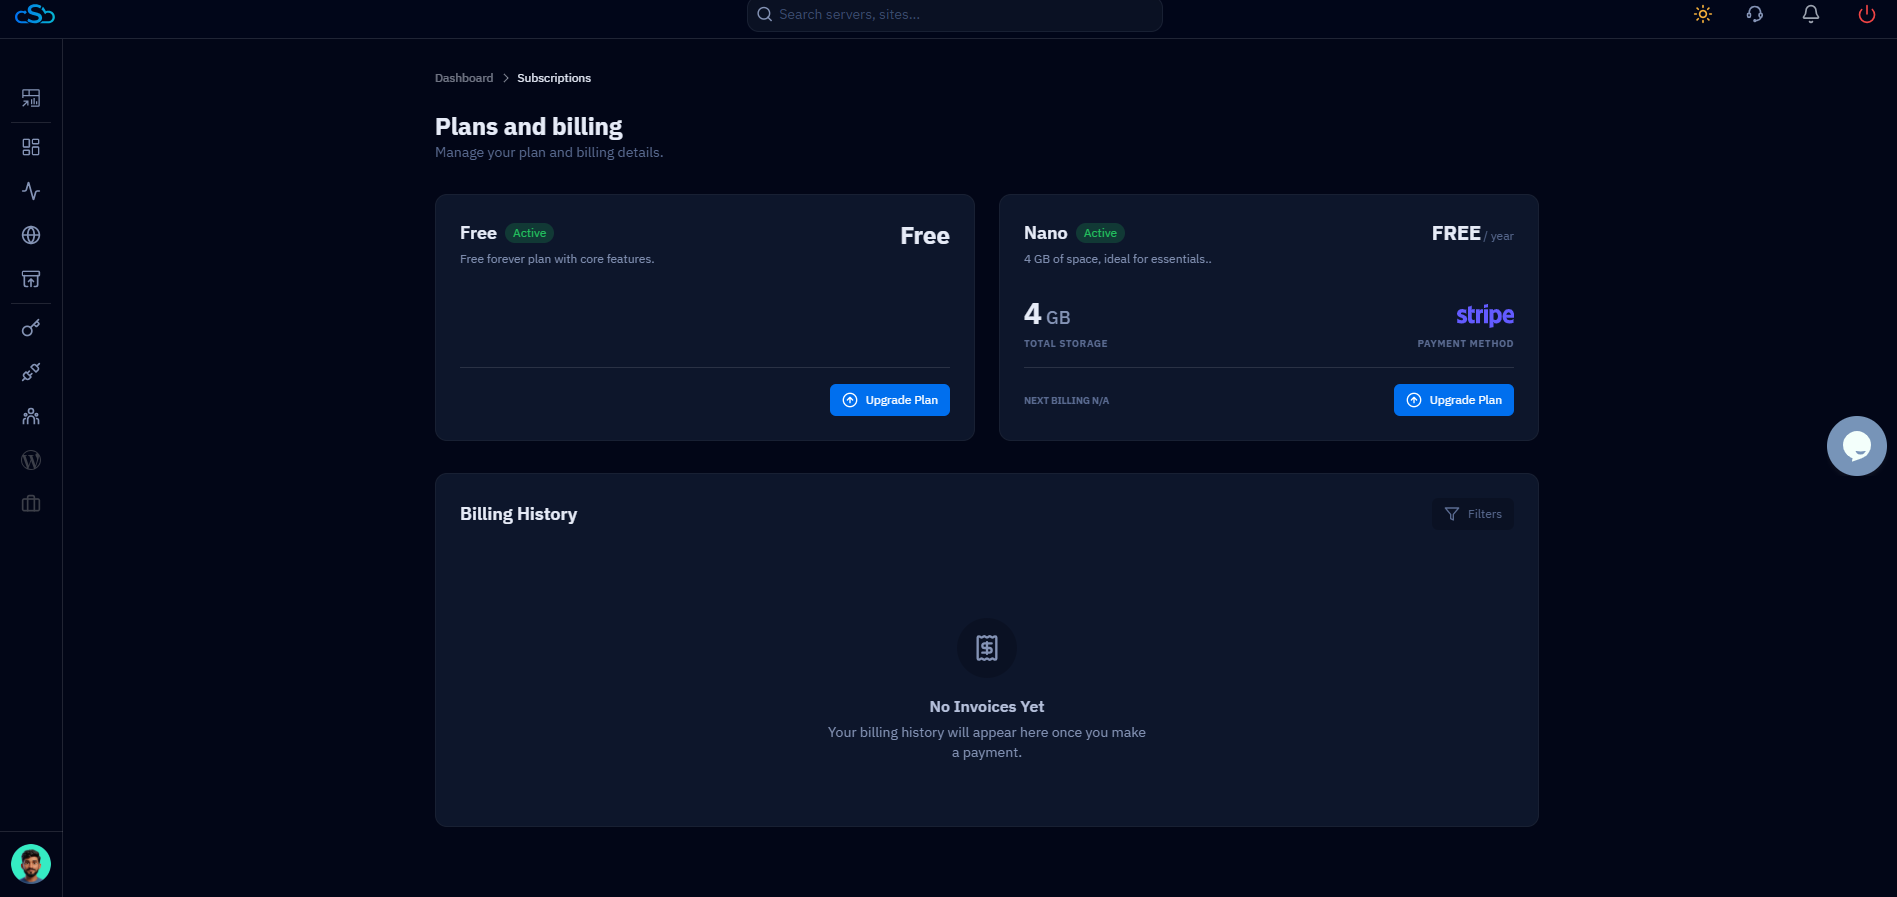
Fig. 03 — Plans and billing page showing active Account Plan and Backup Plan cards with Upgrade Plan buttons.
Step 4: Upgrade Your Account Plan
If you need more servers, more team seats, or features like White-Label or WordPress Magic Link, upgrading your Account Plan unlocks those capabilities immediately.
1. Click Upgrade Plan: On the Account Plan card, click the blue Upgrade Plan button to open the plan selection screen.
2. Choose a plan: Review the Free, Basic ($9/mo), Pro ($19/mo), and Business ($49/mo) tiers. The Pro plan is highlighted as the recommended choice for teams managing multiple servers.
3. Select billing cycle: Toggle between Monthly and Annually at the top. Annual billing saves 20% compared to monthly.
4. Click Get Started: Click the Get Started button on your chosen plan to proceed to the payment confirmation screen.
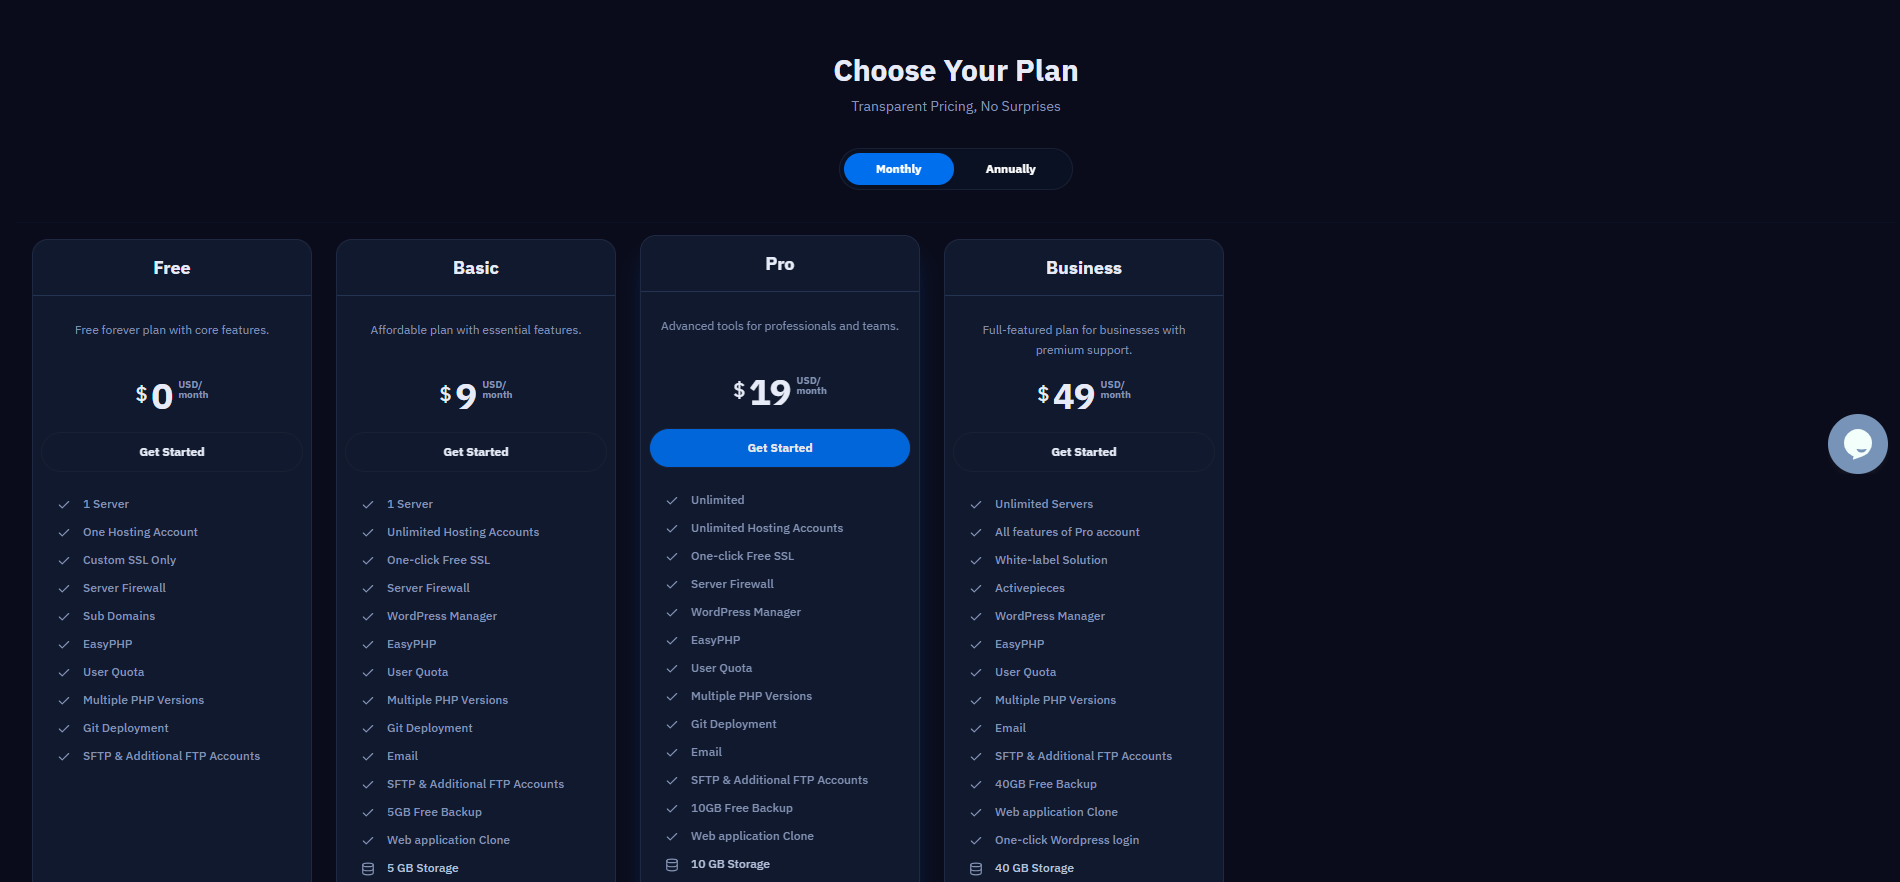
Fig. 04 — Choose Your Plan screen showing Free, Basic, Pro, and Business tiers with feature lists.
Complete Payment
The payment screen shows a summary of your selected plan before you commit.
Review the User Account Plan Subscription details — plan name, today's date, next due date, and total amount.
Select your preferred payment method: Pay with Stripe or Pay with PayPal.
Click the blue Pay $XX button to confirm. Your new plan activates immediately.
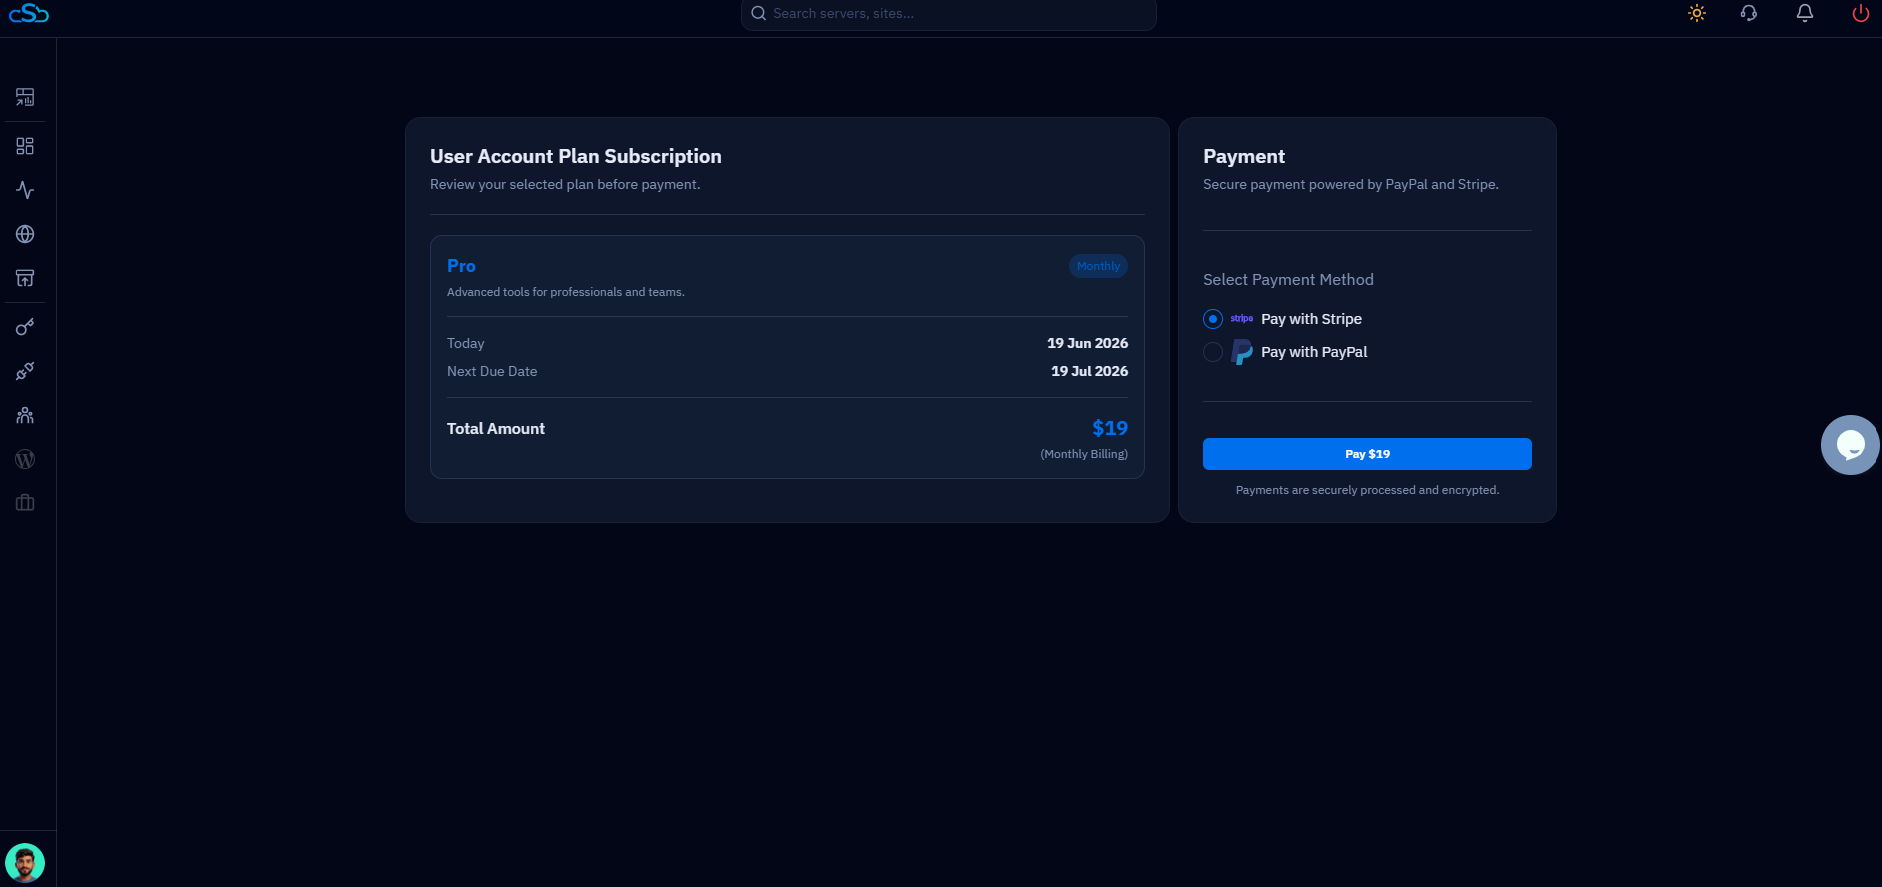
Fig. 05 — Payment confirmation page for the Pro Monthly plan showing total amount and payment method selection.
Step 5: Upgrade Your Backup Plan (Optional)
If your servers are generating more backup data than your current quota allows, you can independently upgrade your backup storage plan without changing your account plan.
1. Click Upgrade Plan on the Backup card: From the Plans and billing page, click the Upgrade Plan button on the Backup Plan card.
2. Choose a backup plan: The Scale Your Backup screen offers four tiers — Light (100 GB, $2/mo), Core (500 GB, $8/mo), Plus (1 TB, $12/mo), and Ultra (beyond 1 TB, $20/mo). Select the tier that fits your storage needs.
3. Toggle billing cycle: Switch between Monthly and Annually using the toggle at the top of the screen.
4. Click Continue: Click the blue Continue button to move to the order summary.
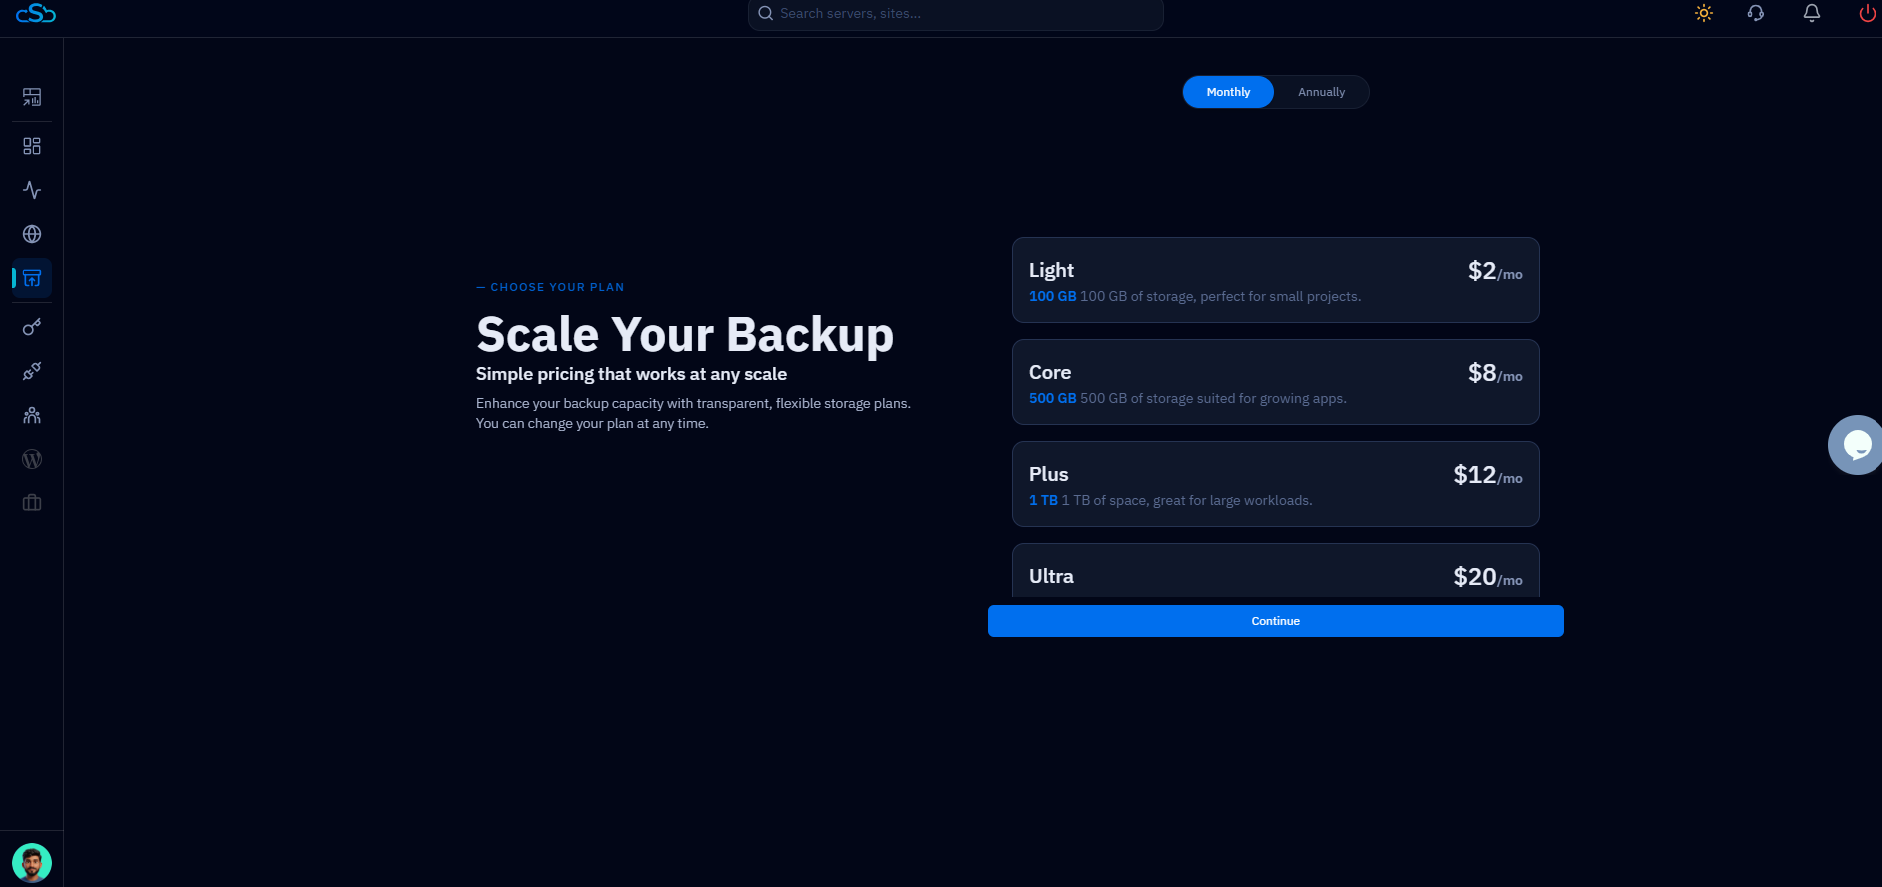
Fig. 06 — Scale Your Backup screen showing Light, Core, Plus, and Ultra backup storage plans.
Confirm the Order
Before payment is taken, CloudStick shows an order summary so you can verify the details.
Review the Order Summary card — it shows the selected plan (e.g., Core), storage amount (e.g., 500 GB), billing cycle (Monthly), and total cost.
Click Proceed to Payment to continue to the secure payment screen, or click Cancel to go back.
Your new backup storage takes effect immediately upon payment. Existing backups are preserved and additional capacity is added to your quota right away.
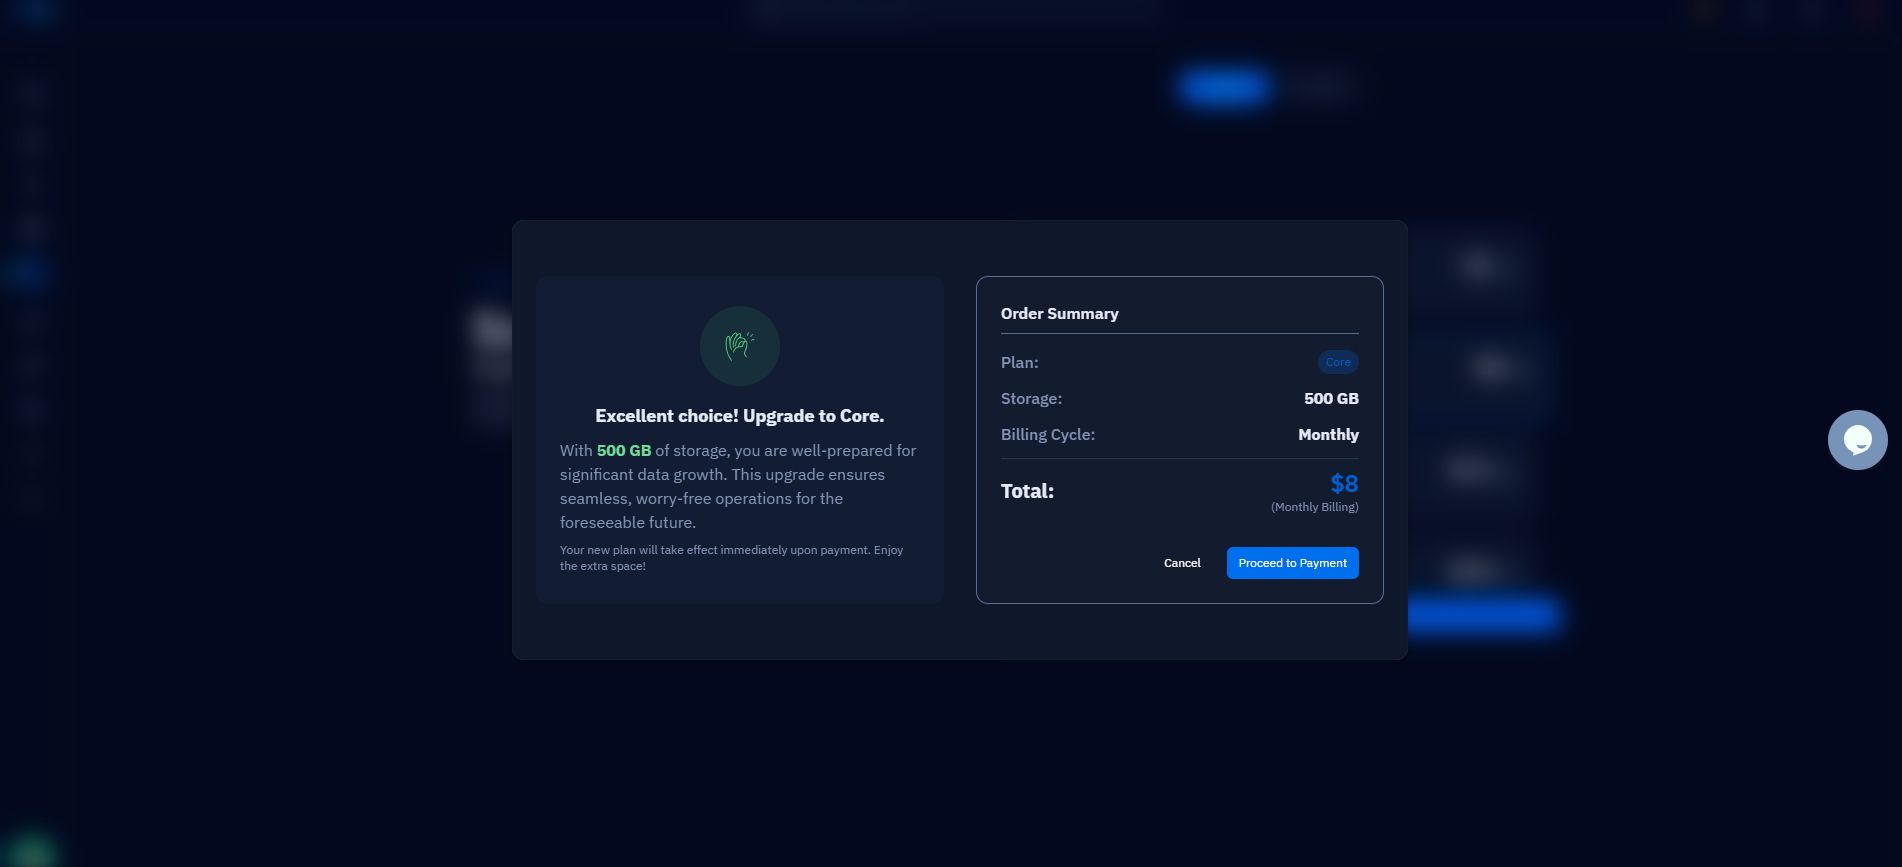
Fig. 07 — Order Summary dialog for the Core backup plan showing 500 GB storage at $8/month.