How to Update Your Account Details
Overview
Your CloudStick profile is the central record for your account — it stores your personal details, company information, and billing address that appear on invoices and account communications. Keeping this information accurate ensures that your subscription, receipts, and team notifications always reach the right place.
This guide walks you through updating your account details from within the CloudStick dashboard, including your full name, email address, company name, tax or VAT number, and postal address.
Ensure your email address is correct before saving — CloudStick uses it for login verification, billing receipts, and critical account notifications.
Step 1: Open Your Profile
Your profile is accessible directly from the main CloudStick dashboard — no need to navigate through any server panel.
Log in to your CloudStick account and land on the main dashboard.
Look at the bottom-left corner of the dashboard where your profile avatar and name are displayed.
Click on your profile avatar or name to open the profile flyout panel.
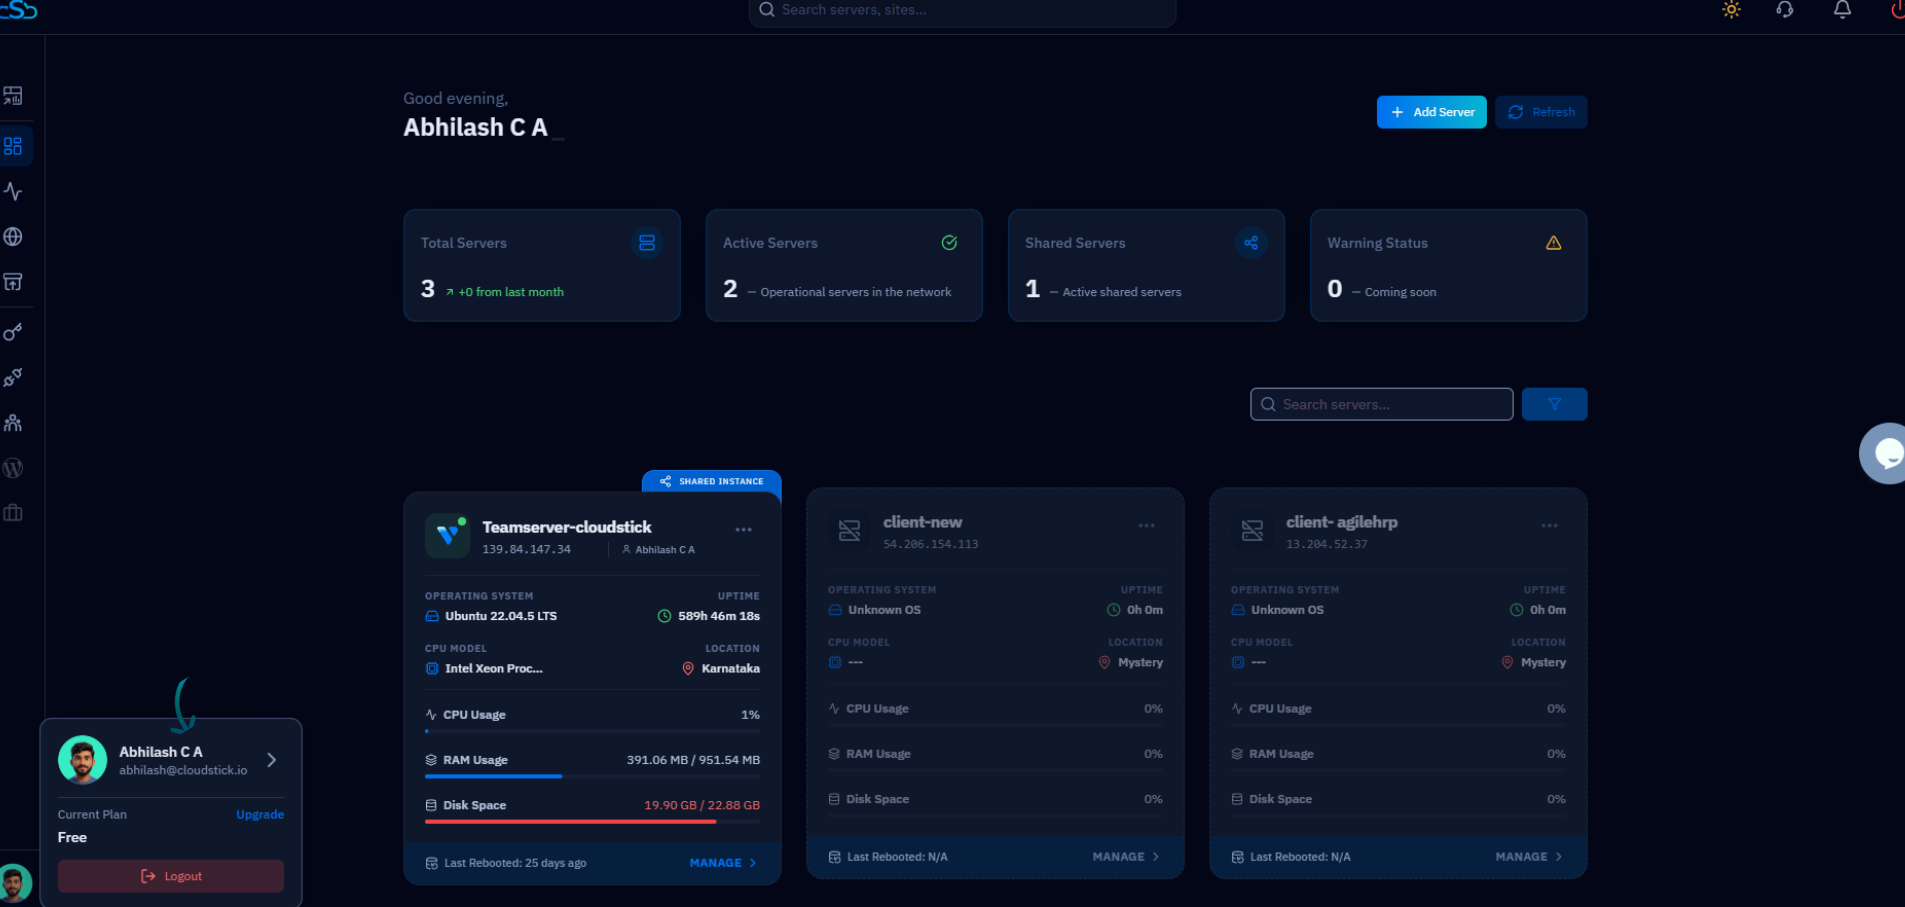
Fig. 01 — CloudStick dashboard with the profile avatar at the bottom-left corner highlighted.
Step 2: Access Profile Settings
The profile page gives you a complete view of your account, including user details, API access credentials, and subscription status.
Click on Profile Settings in the flyout panel that appears after clicking your avatar.
You will be taken to the Profile page, which shows your personal details, company information, and the right-hand navigation panel with sections including User Details, API Access, Subscription, Login Activity, User GIT SSH, Two-Factor Auth, and Security & Privacy.
Click on User Details in the right-hand panel (it is selected by default when you land on this page).
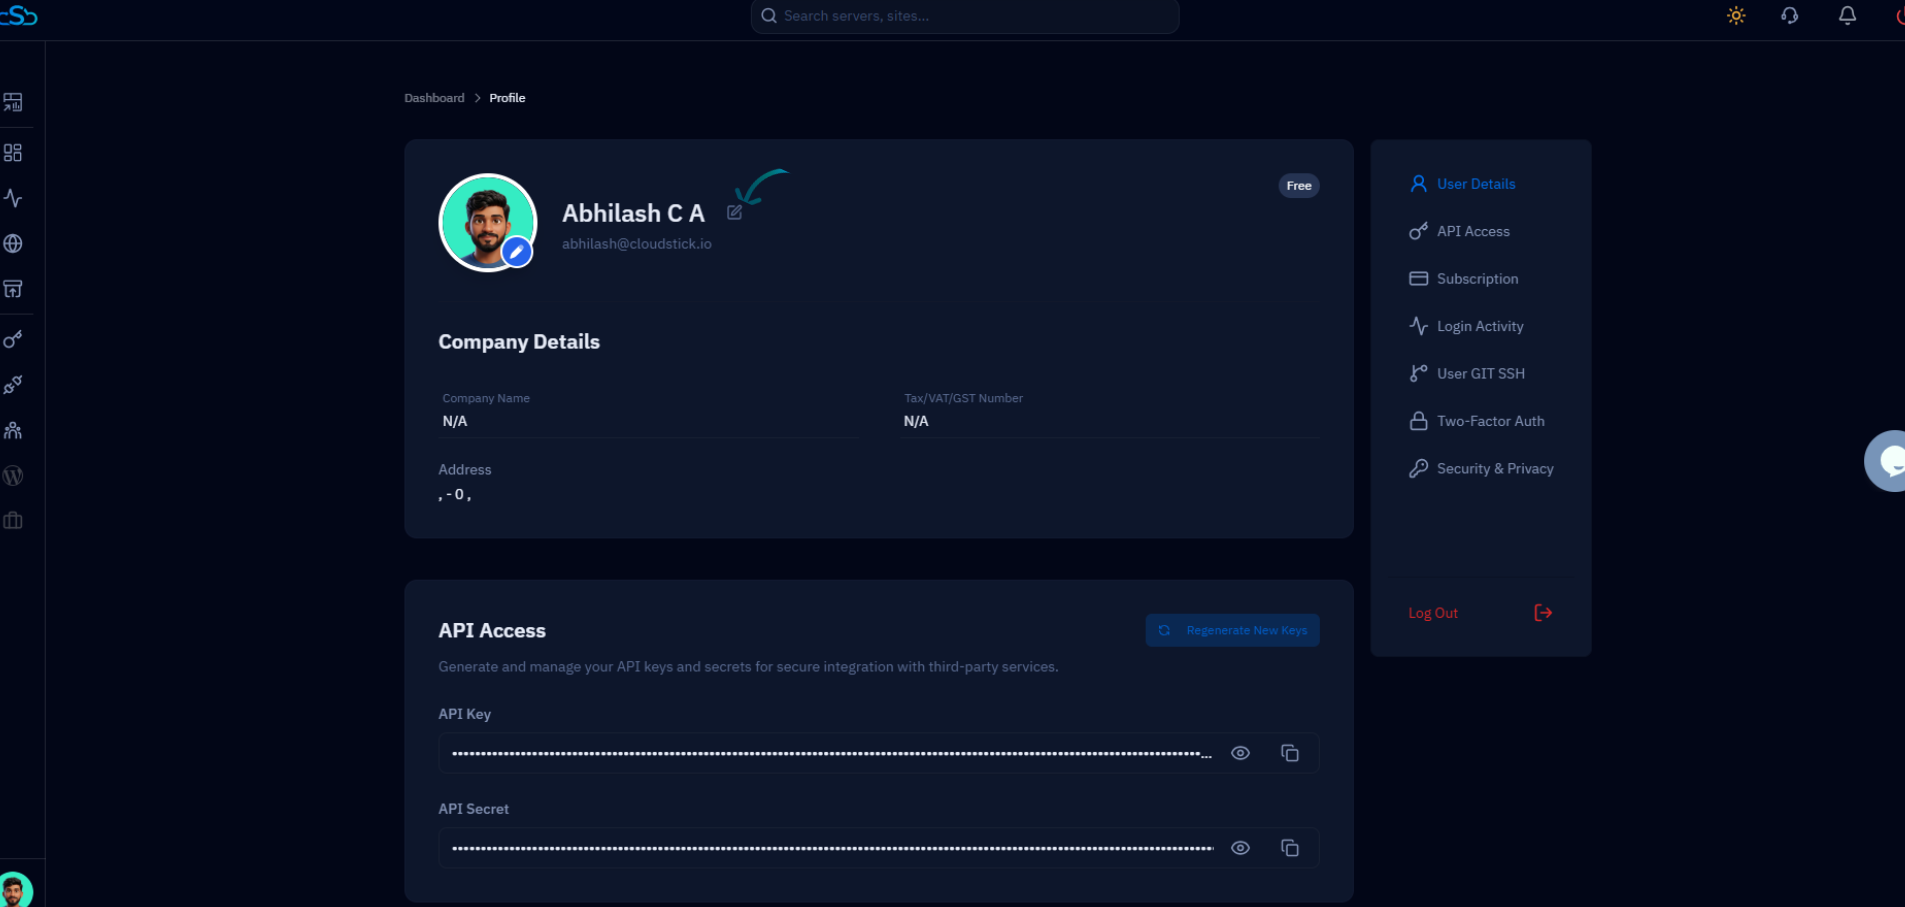
Fig. 02 — Profile page showing the User Details section with company information and the API Access section below.
Step 3: Update Your Information
The Edit User Details form lets you update all of your personal and billing information in one place. Edit any of the fields that need updating.
Full Name: Your display name within the CloudStick dashboard.
Email Address: The email used for login and account notifications.
Company Name: Your business or organization name (appears on invoices).
Tax/VAT/GST Number: Your tax identification number for invoice compliance.
Address Line 1 & Address Line 2: Your street address.
City, State, Postal Code, Country: Complete location details for billing records.
After editing the fields you need to update, click the blue Save Changes button at the bottom of the form to apply your updates.
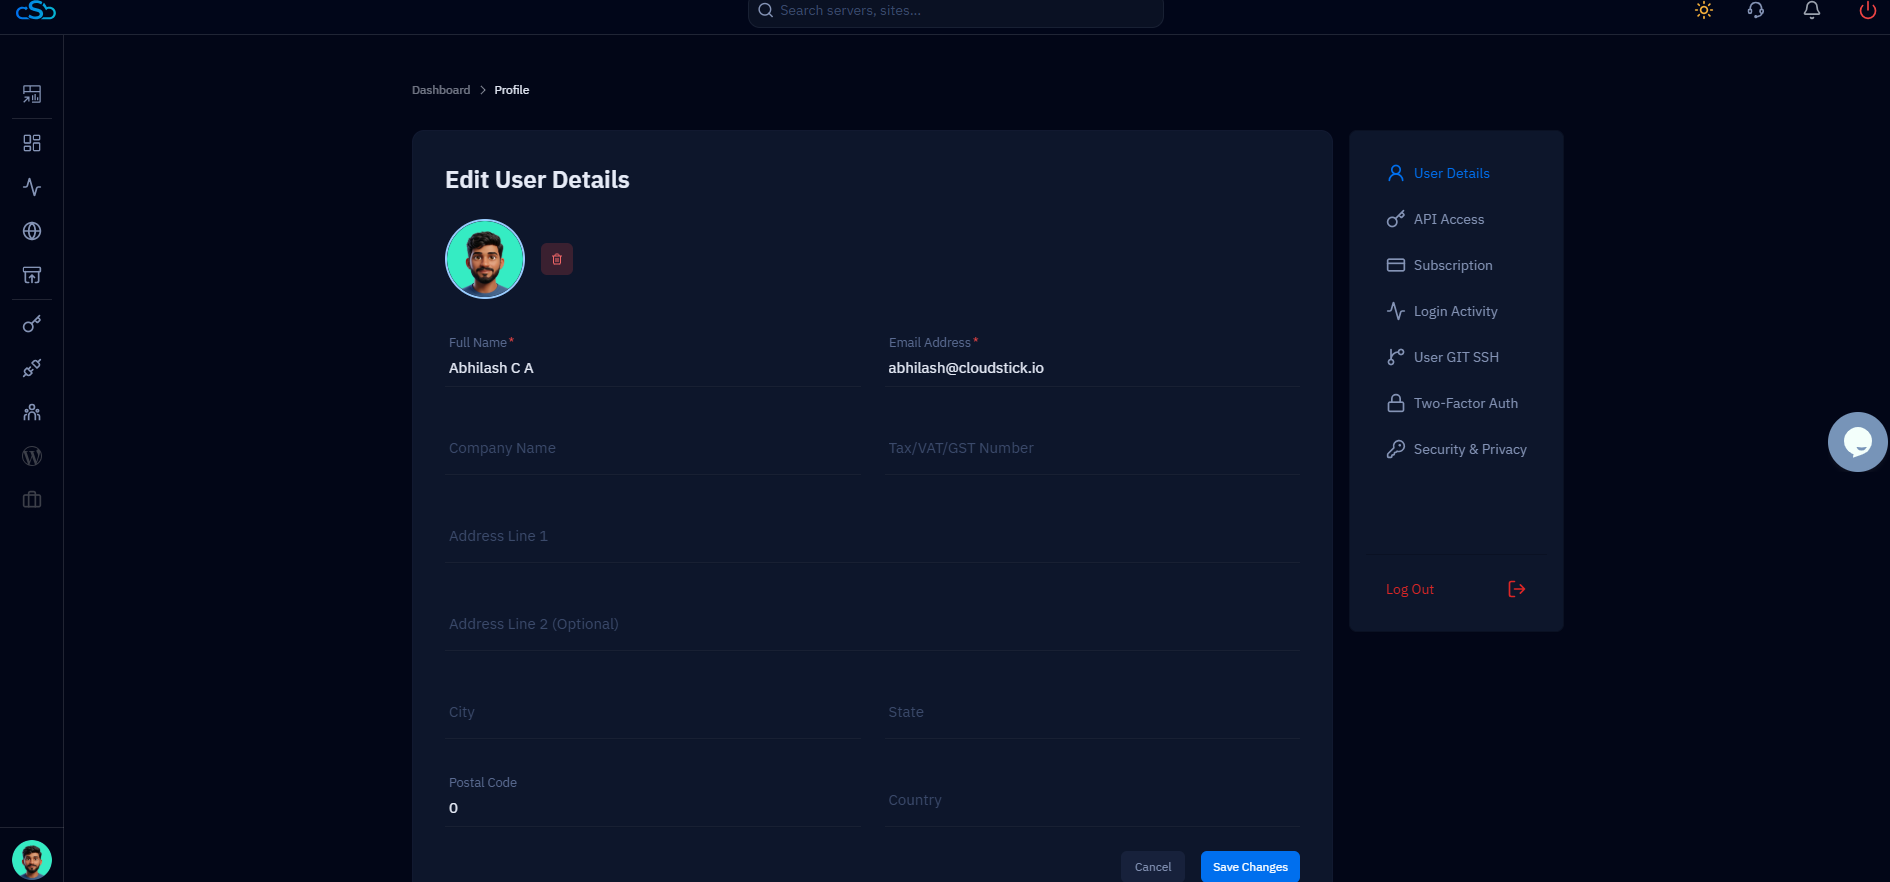
Fig. 03 — Edit User Details form showing all editable fields including name, email, company, tax number, and address.
Step 4: Verify the Update
Once you click Save Changes, CloudStick will immediately apply your updated details to your account profile.
Navigate back to your Profile page to confirm that the updated information is now reflected correctly.
Your name, company details, and address will appear in the User Details section with the values you just saved.
Ensure all information is accurate, especially your email address and billing details, to avoid any account or invoice-related issues.