How to Update Your Profile Photo in CloudStick
Overview
Your profile photo appears throughout the CloudStick dashboard — from the server listing to team collaboration views — making it easy for teammates to identify you at a glance. Keeping it up to date helps maintain a professional presence, especially on Business plan accounts where team seats are shared across multiple collaborators.
This guide shows you how to update your profile photo directly from the CloudStick dashboard in just a few clicks. No settings page navigation required — the option is accessible right from the main dashboard view.
You must be logged in to your CloudStick account to change your profile photo. The photo you set will be visible to all team members who share servers with you.
Step 1: Open Your Profile
The profile menu is always accessible from the bottom-left corner of the dashboard, no matter which page you are currently on.
1. Log in to your CloudStick account: Navigate to your dashboard. You will see all connected servers listed on the main screen.
2. Locate your profile avatar: At the bottom-left corner of the screen, find your profile avatar or name. It displays your account name, email address, and current plan.
3. Click on your profile avatar/name: Clicking this area expands a small panel showing your account details and a Logout button. This also navigates you to the full Profile page.
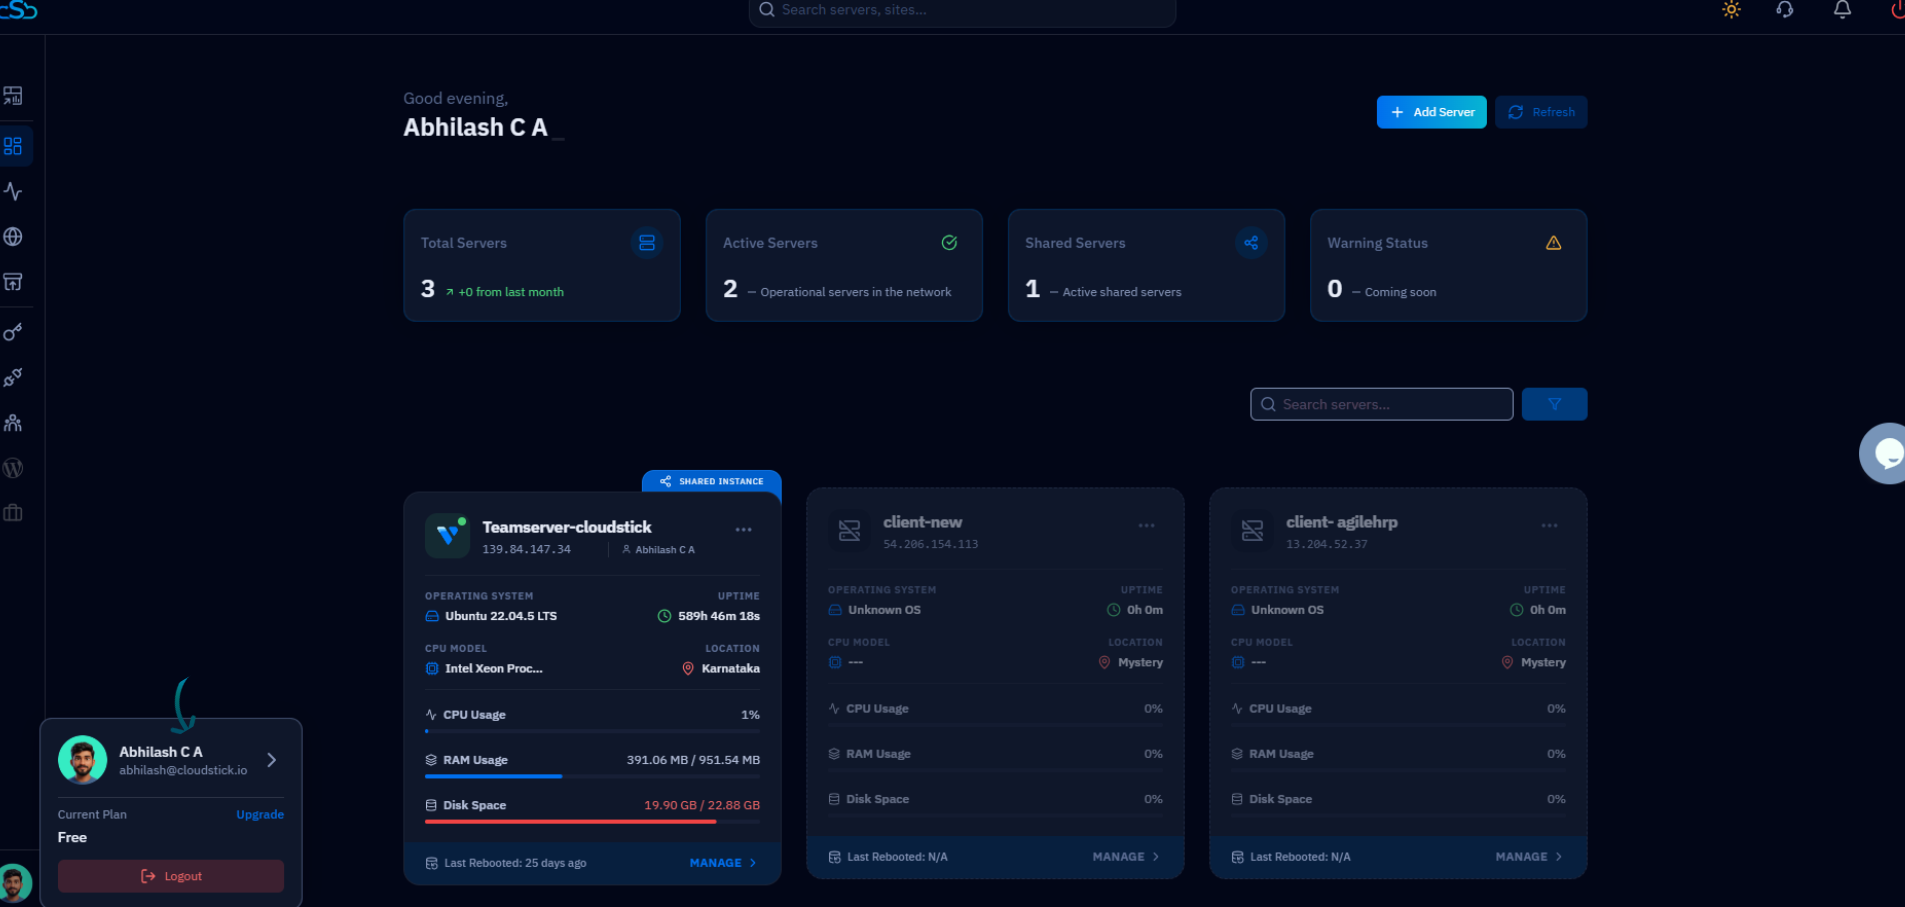
Fig. 01 — Dashboard with the profile panel expanded at the bottom-left, showing account name, email, current plan, and Logout option.
Step 2: Change Your Profile Photo
Once you are on the Profile page, you can update your photo directly by clicking on the current avatar image.
1. Locate the profile photo: On the Profile page, your current avatar is displayed prominently next to your name. A small camera icon overlay indicates it is clickable.
2. Click on the profile photo: Clicking the avatar opens the Set Profile Picture panel. This panel displays a grid of preset avatars you can choose from, as well as an option to upload your own image from your computer.
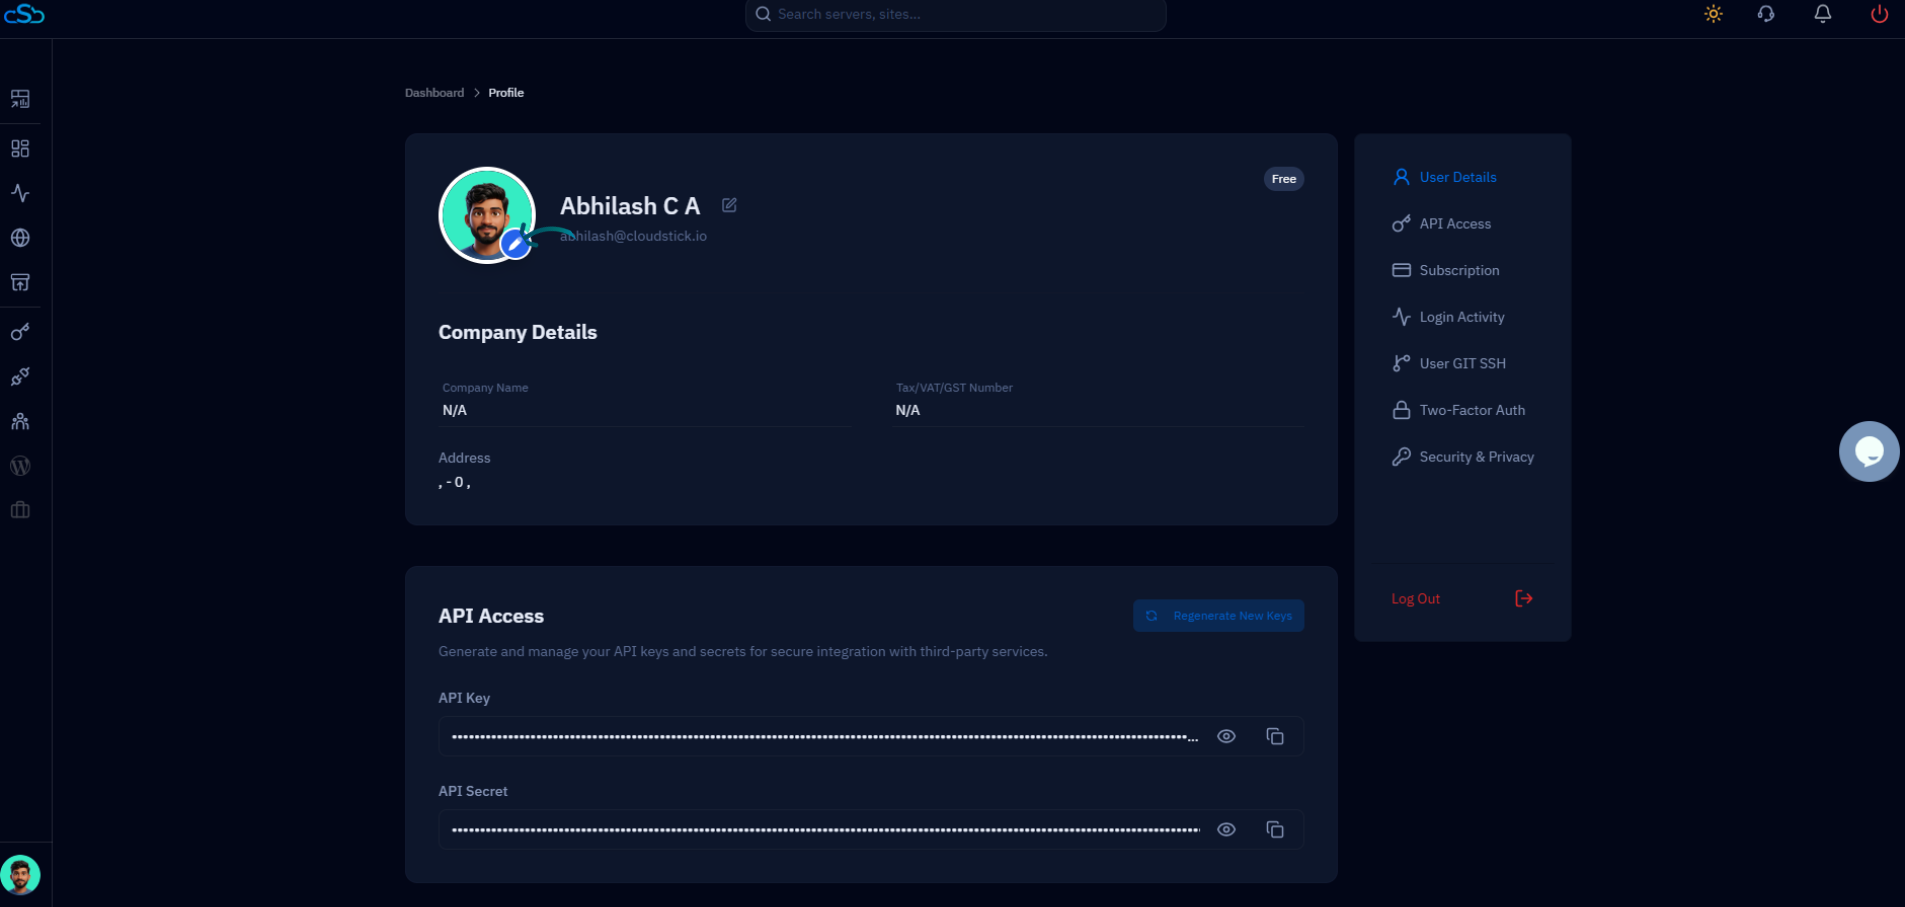
Fig. 02 — Profile page showing the avatar with camera icon overlay, indicating where to click to change the photo.
3. Select or upload your image: Browse the preset avatar grid to pick a pre-made image, or click the upload icon (camera outline) in the top-left of the grid to choose a custom image from your computer.
4. Click Save: Once you have selected your desired photo, click the blue Save button at the bottom of the panel to apply the change.
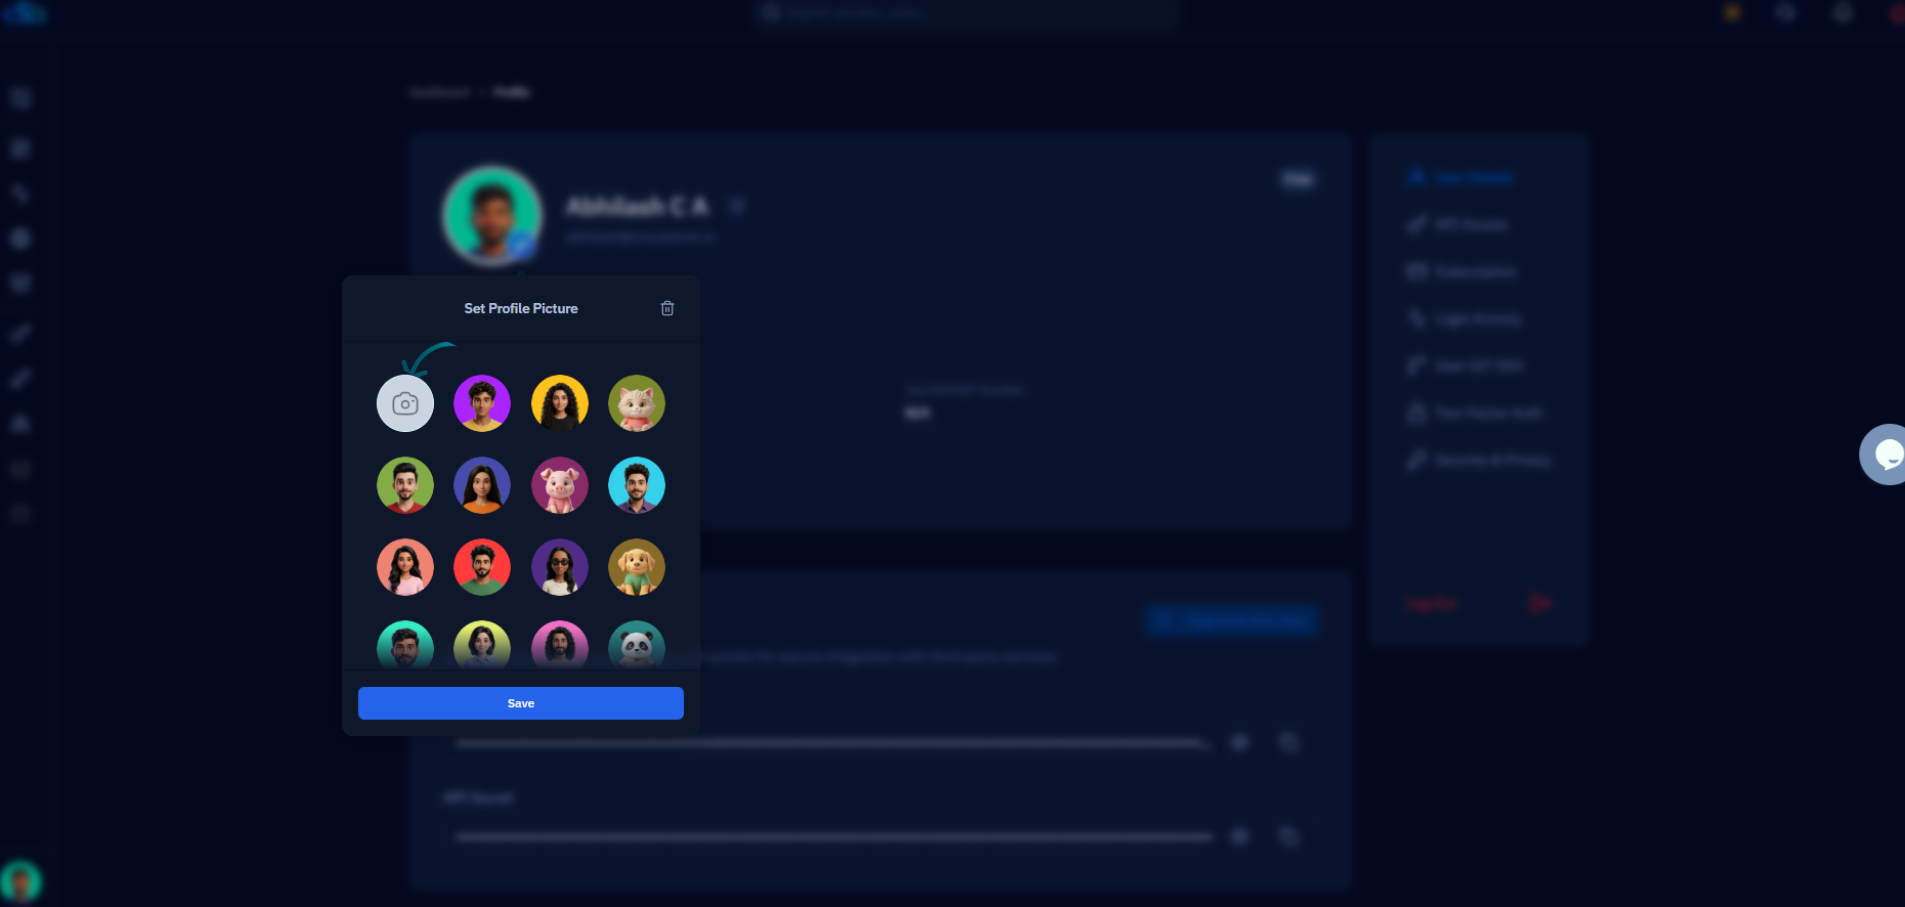
Fig. 03 — Set Profile Picture panel showing the avatar selection grid with the Save button highlighted at the bottom.
For best results, use a clear square image in JPG or PNG format. This ensures the photo displays correctly in all dashboard views and team collaboration screens.
Step 3: Verify the Update
After saving, your new profile photo takes effect immediately across your CloudStick account — no page refresh is required.
1. Check the profile header: Your updated photo will now appear next to your name in the Profile page header.
2. Confirm in the dashboard: Navigate back to the main dashboard. Your new avatar will be visible in the bottom-left corner profile area, confirming the update was applied successfully.
If the photo does not update immediately, try a hard refresh (Ctrl + Shift + R on Windows/Linux or Cmd + Shift + R on Mac) to clear the browser cache.