How to View Invoices in CloudStick
Overview
Every payment you make in CloudStick — whether for a server purchase, a backup storage plan, or an account subscription — generates an invoice. Keeping these records close at hand makes it easy to reconcile your accounts, claim expenses, and confirm exactly what you were charged for and when.
CloudStick keeps all of your invoices in one place under the Subscription section, in the Billing History list. This guide walks you through opening your profile, reaching the billing section, and using filters to quickly narrow down to the exact invoices you need.
Invoices only appear once you have made a payment. If your account is on a free plan and has never been charged, the Billing History will show a "No Invoices Yet" message until your first paid transaction.
Step 1: Open Your Profile
The profile menu is the gateway to all account-level settings in CloudStick, including your billing and subscription details.
1. Log in: Sign in to your CloudStick account to open the dashboard.
2. Locate the profile avatar: At the bottom-left corner of the dashboard, click on your profile avatar or account name.
3. Profile popup appears: A small popup will appear showing your account name, email, current plan, and a Logout button.
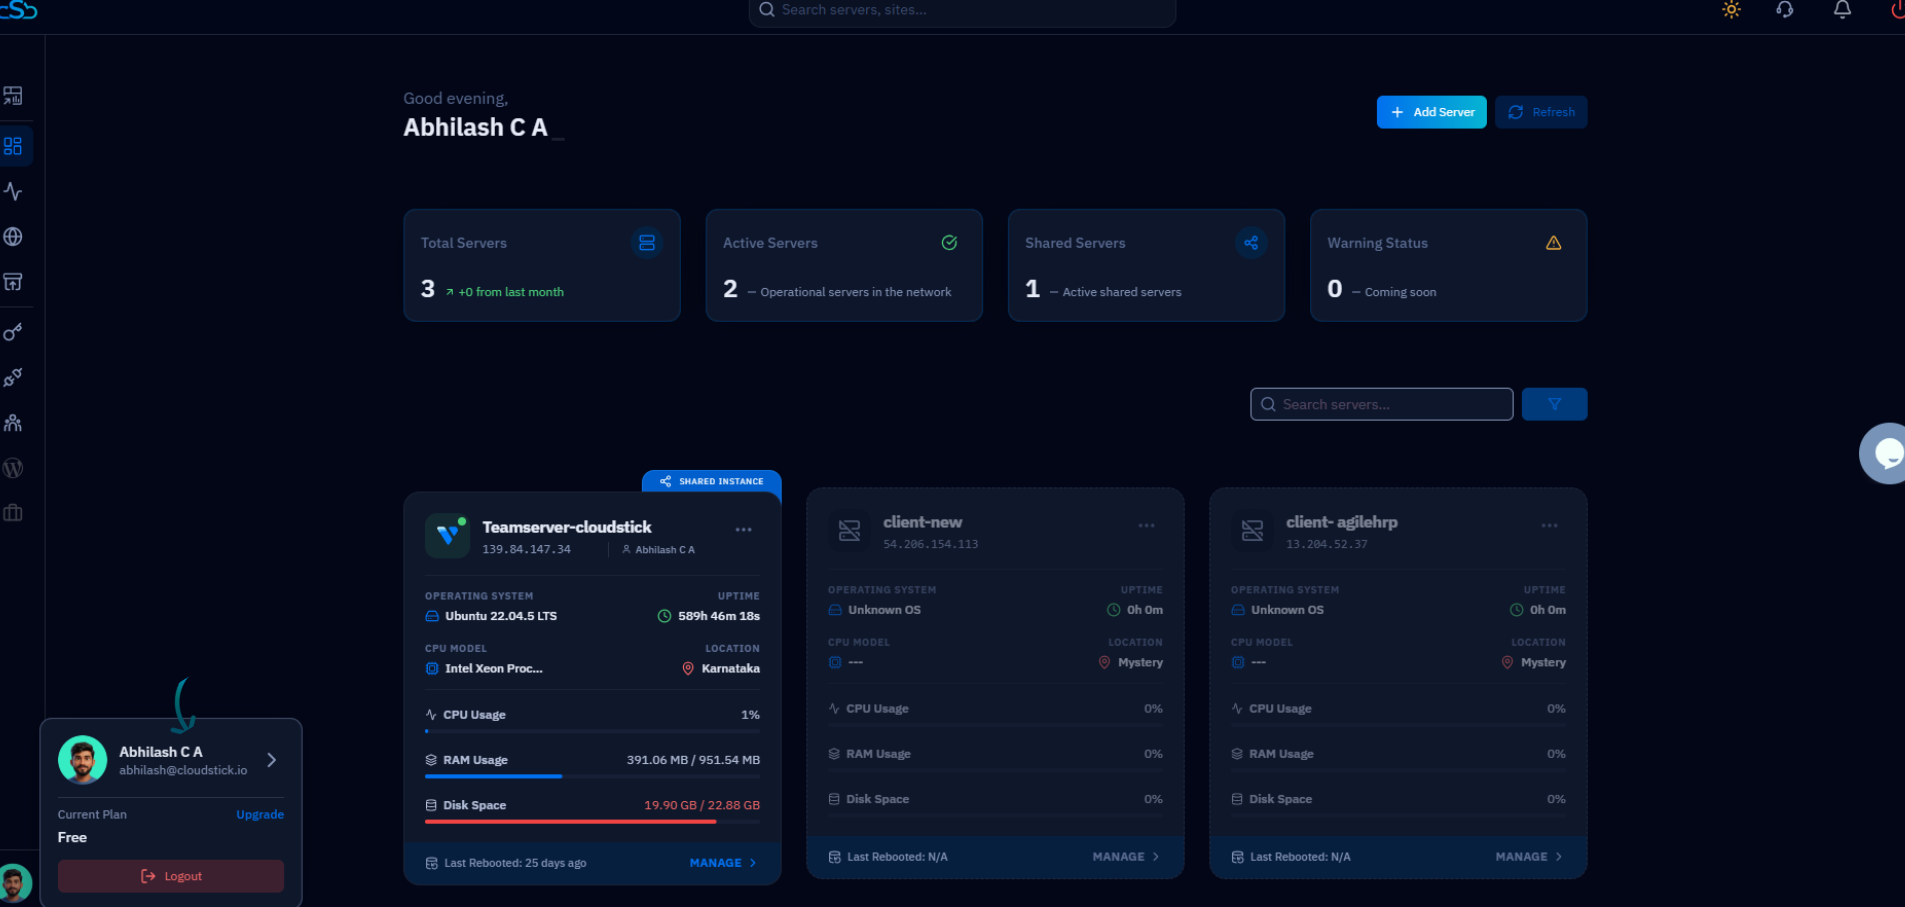
Fig. 01 — CloudStick dashboard with the profile popup open at the bottom-left corner.
Step 2: Open Subscription Section
Your invoices live alongside your plan details, so the path runs through the account's subscription settings.
1. Open Account Settings: From the profile popup, click the arrow icon next to your name to enter the full profile view.
2. Select Subscription: In the right-hand navigation panel, click Subscription (also labelled Billing & Subscription). You can also open it from the Subscriptions card, which is described as 'See all active subscriptions of your account.'

Fig. 02 — Profile page showing the Subscription option in the navigation and the Subscriptions card.
Step 3: View Invoices
The Subscription page opens on the Plans and billing view, where your active plans and full payment record are shown together.
1. Review your plans: At the top you will see your active plans — such as your account plan and any backup storage plan — along with the payment method on file.
2. Open Billing History: Scroll down to the Billing History section, where all of your invoices and past transactions are listed.
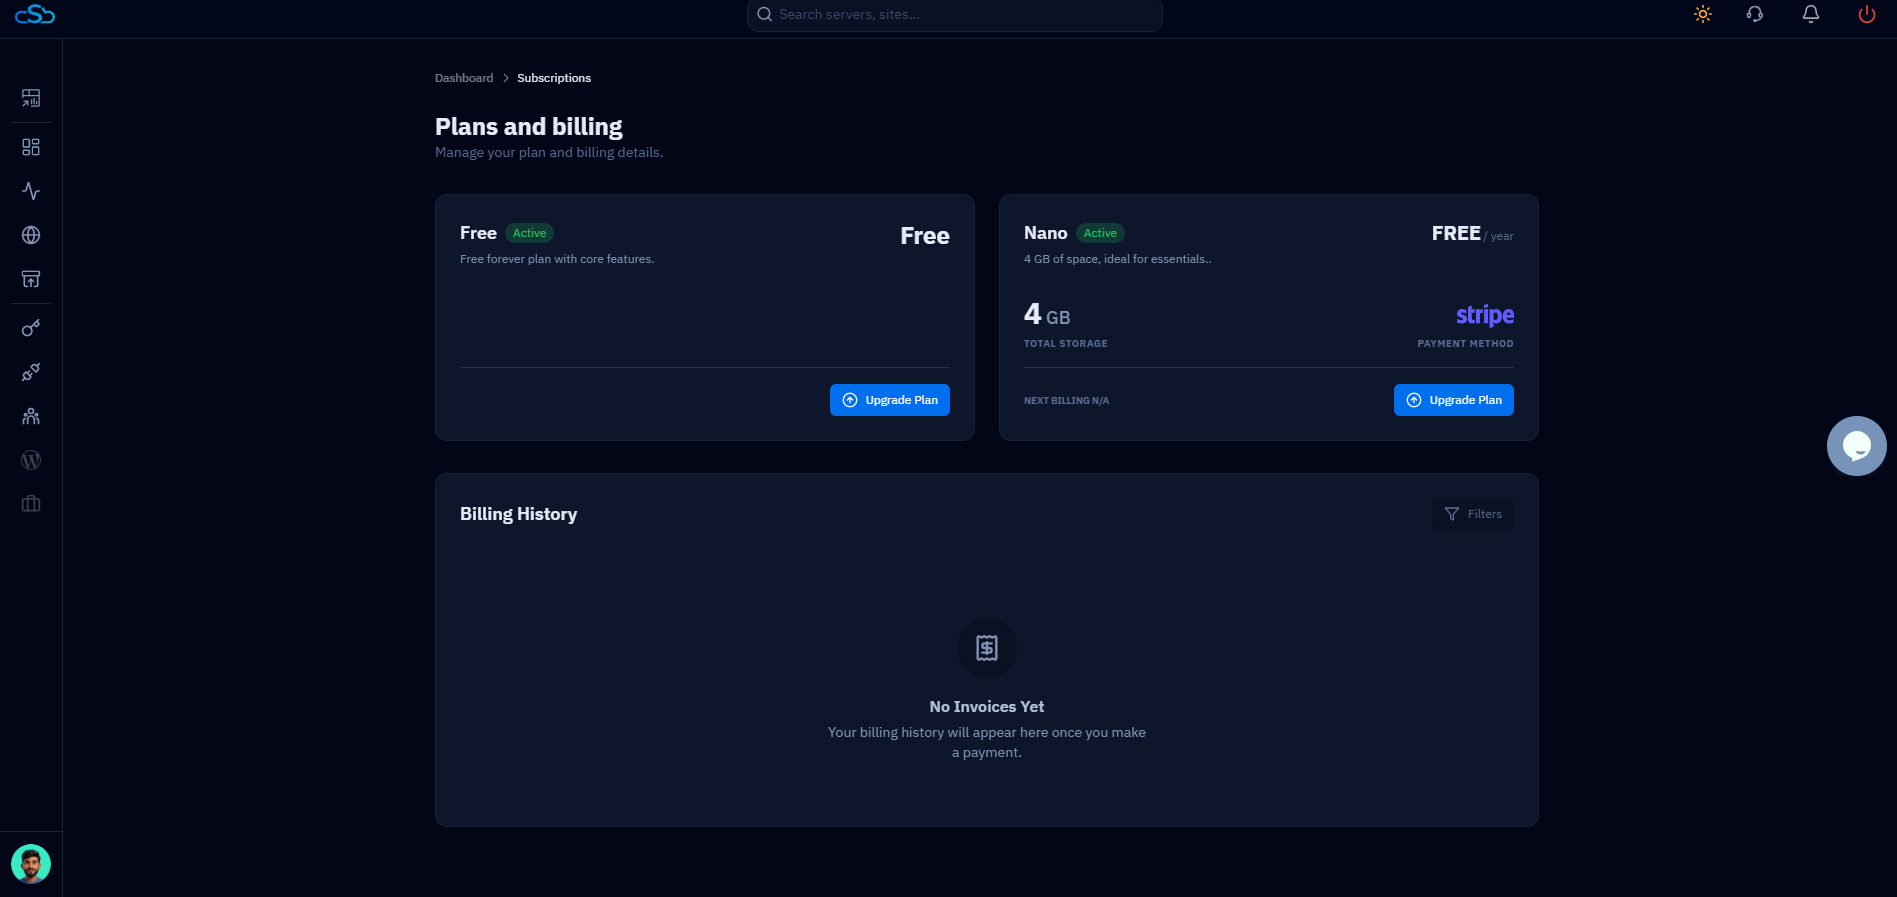
Fig. 03 — The Plans and billing page with the Billing History section listing your invoices.
Step 4: Use Filters
When your billing history grows, filters let you narrow the list down to exactly the invoices you are looking for.
1. Open the Filters panel: Click the Filters button at the top-right of the Billing History section to reveal the filter options.
2. Filter by Service Type: Under the Service Type tab, choose a category such as Server Purchase, Backup Plan, or CloudStick Plan to show only invoices for that service.
3. Filter by Status: Switch to the Status tab and select Paid or Unpaid to filter invoices by their payment status.
4. Clear filters: Use Clear All to reset the filters and view your complete billing history again.
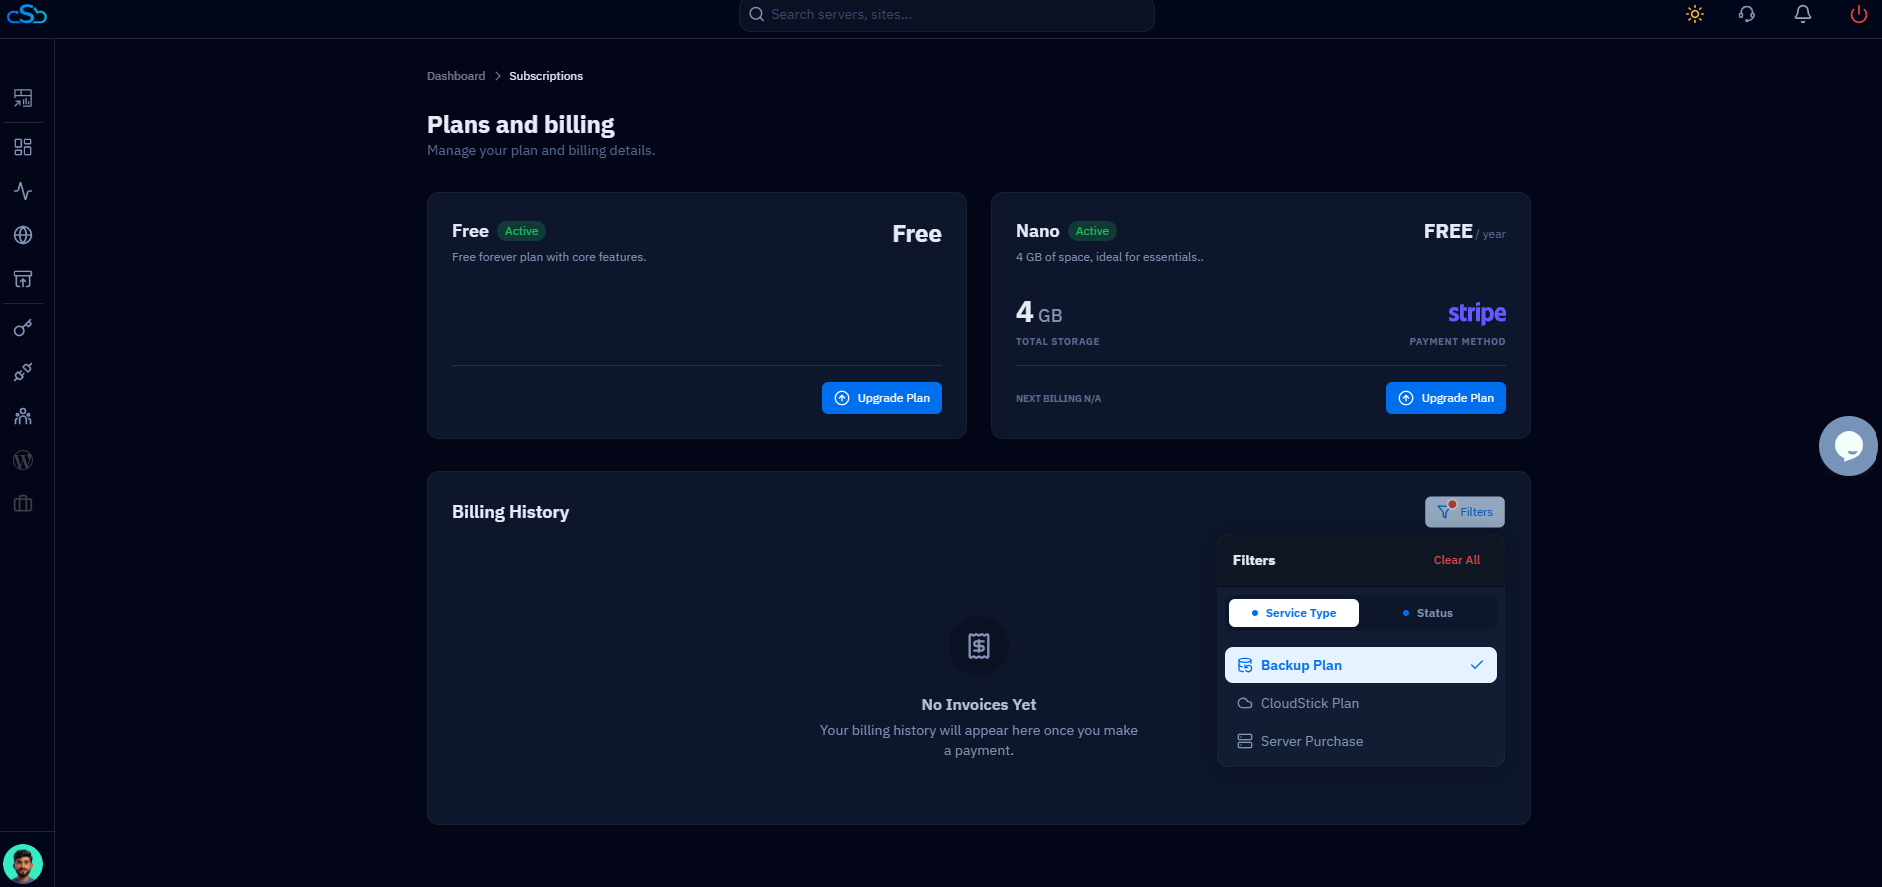
Fig. 04 — The Filters panel on the Service Type tab, showing Backup Plan, CloudStick Plan, and Server Purchase options.
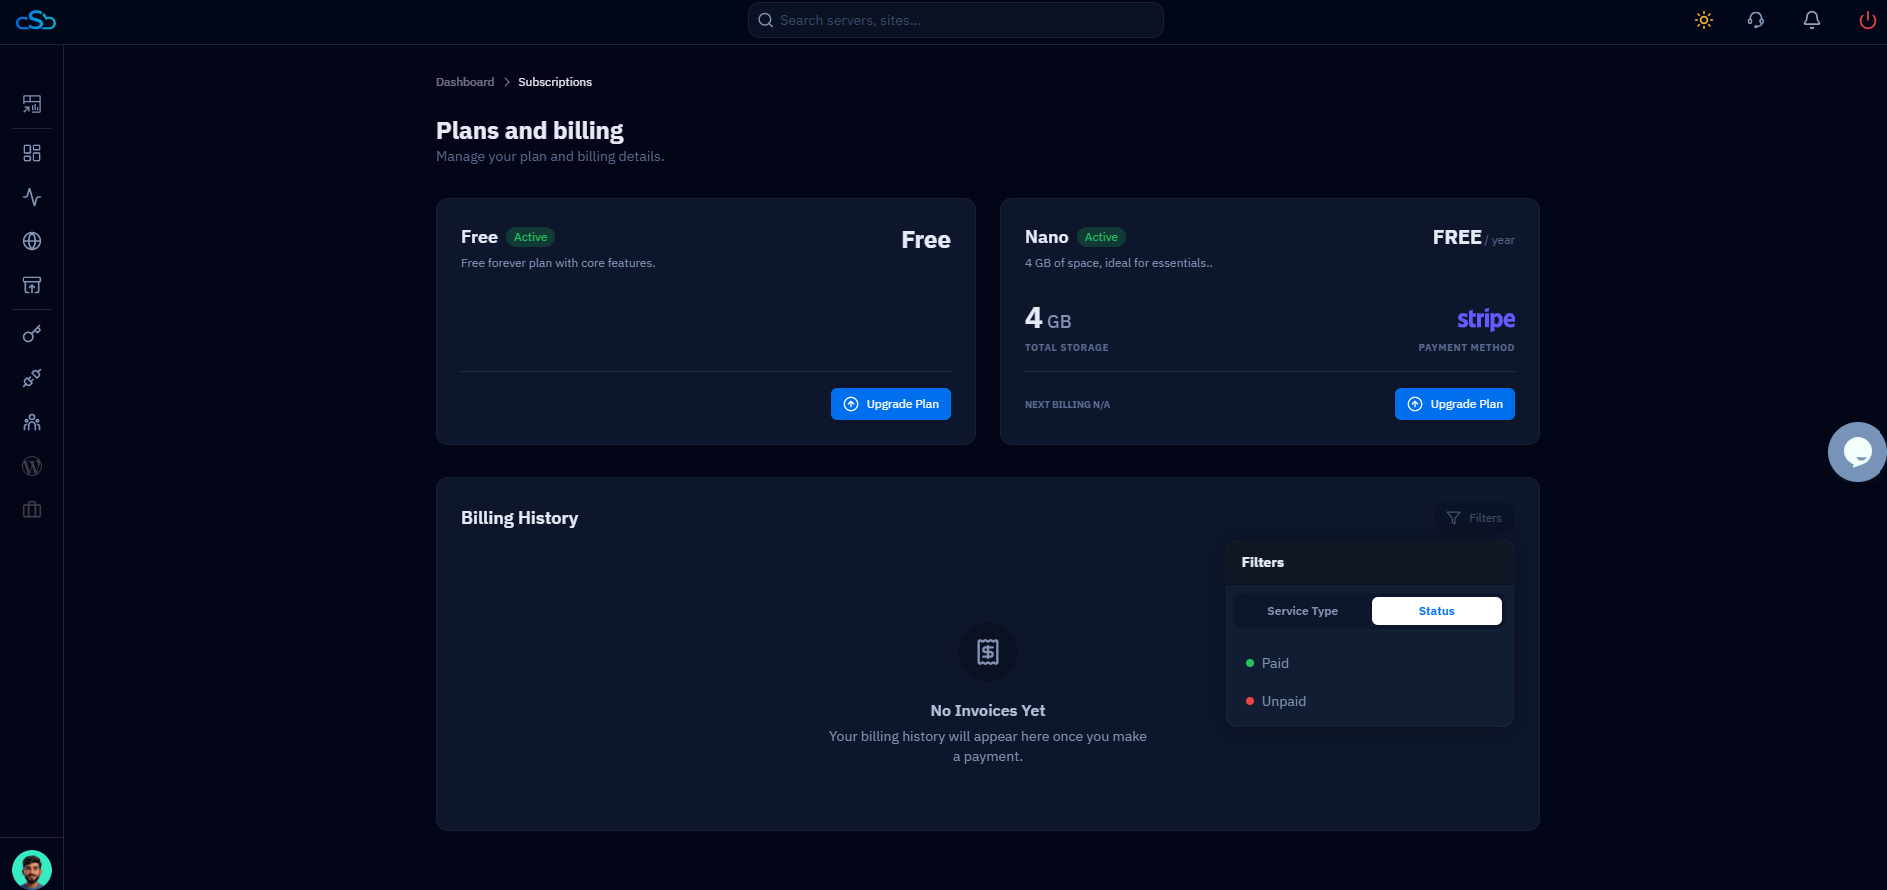
Fig. 05 — The Filters panel on the Status tab, used to filter invoices by Paid or Unpaid status.
Using filters helps you quickly find specific invoices related to servers, services, or payment status.
Step 5: Review Invoice Details
Once you have located the right invoice, you can open it to see the full breakdown of the charge.
1. Open an invoice: Click on any invoice in the Billing History list to view its full details.
2. Review the details: The invoice shows complete information including the billing details, transaction date, and the amount charged.
Keep these records for your own bookkeeping — they confirm exactly which service was paid for and when, which is useful for reconciling your CloudStick spend against your accounts.