How to Clean Up Disk Space
Overview
Over time, a server accumulates log files, package caches, and temporary data that quietly consume disk space. Left unchecked, a full disk is one of the most common causes of sudden outages — websites stop serving, databases refuse writes, and even backups and updates can fail once there is no room left to work. Routinely clearing out files you no longer need keeps the server healthy and avoids these storage-related failures.
CloudStick's Cleanup disk space tool lets you reclaim storage directly from the dashboard by removing unwanted logs and temporary files — no SSH or manual rm commands. This guide walks you through selecting your server, opening Server Settings, choosing which log types and retention period to apply, and running the cleanup.
This process helps improve server performance by removing unused files. Review the items you select carefully before cleaning, as some logs may still be useful for debugging recent issues.
Step 1: Select Your Server
Start from the CloudStick Dashboard, where all of your connected servers are listed.
1. Open the Dashboard: Sign in to your CloudStick account to view all connected servers.
2. Select the server: Click the server you want to manage to open its server panel.
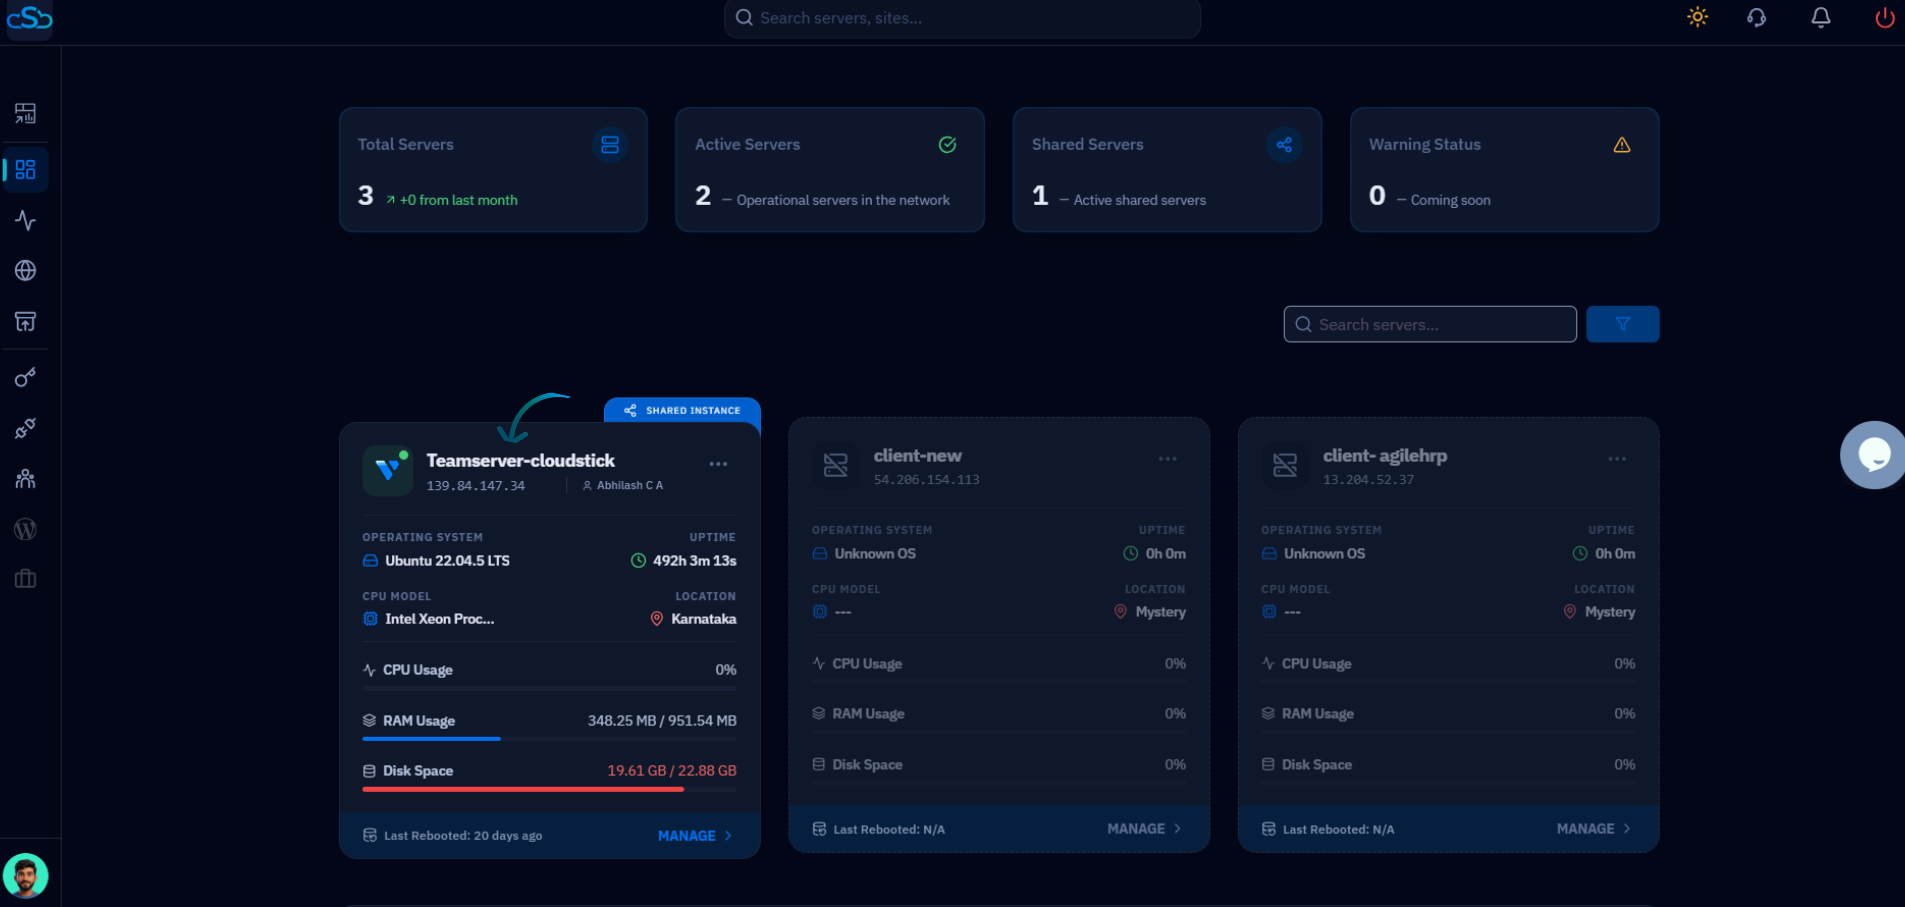
Fig. 01 — The CloudStick Dashboard listing connected servers; click the server card to open its management panel.
Step 2: Open Server Settings
The cleanup tool lives in the server's settings area, alongside other server-level options such as Change IP and Auto Update.
1. Scroll to Server Settings: Within the server panel, scroll down to the Server Settings section.
2. Open Cleanup disk space: Locate the Cleanup disk space card and click the Clean up button to reveal the cleanup options.
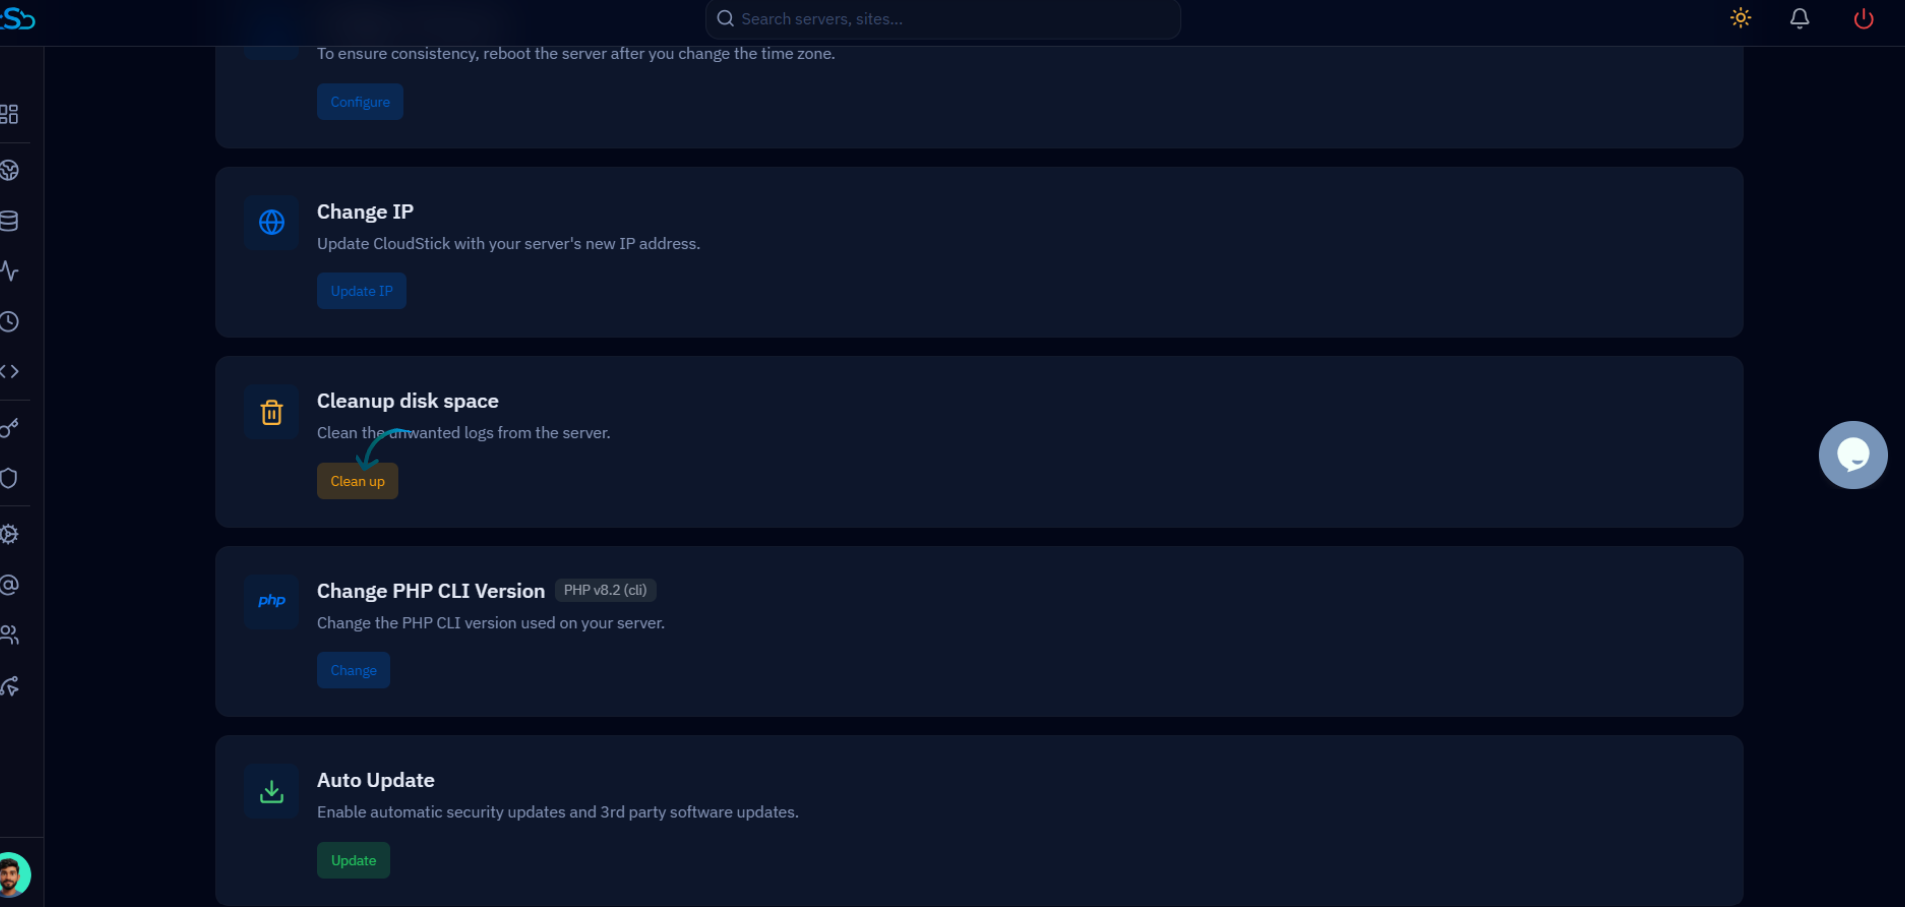
Fig. 02 — The Server Settings section showing the Cleanup disk space card and its Clean up button.
Step 3: Choose Cleanup Options
Decide exactly what to remove so you free up space without deleting logs you may still need.
1. Select log types: Open the Select Log Types dropdown and choose the items you want to remove — for example ALL, APT Cache, Journal Logs, Nginx Logs, Apache Logs, Website Logs, or MySQL Logs.
2. Set the retention period: Use the Log Retention Period dropdown to keep recent entries — choose a window such as 1 day, 7 days, or 14 days, or select ALL to clear everything.
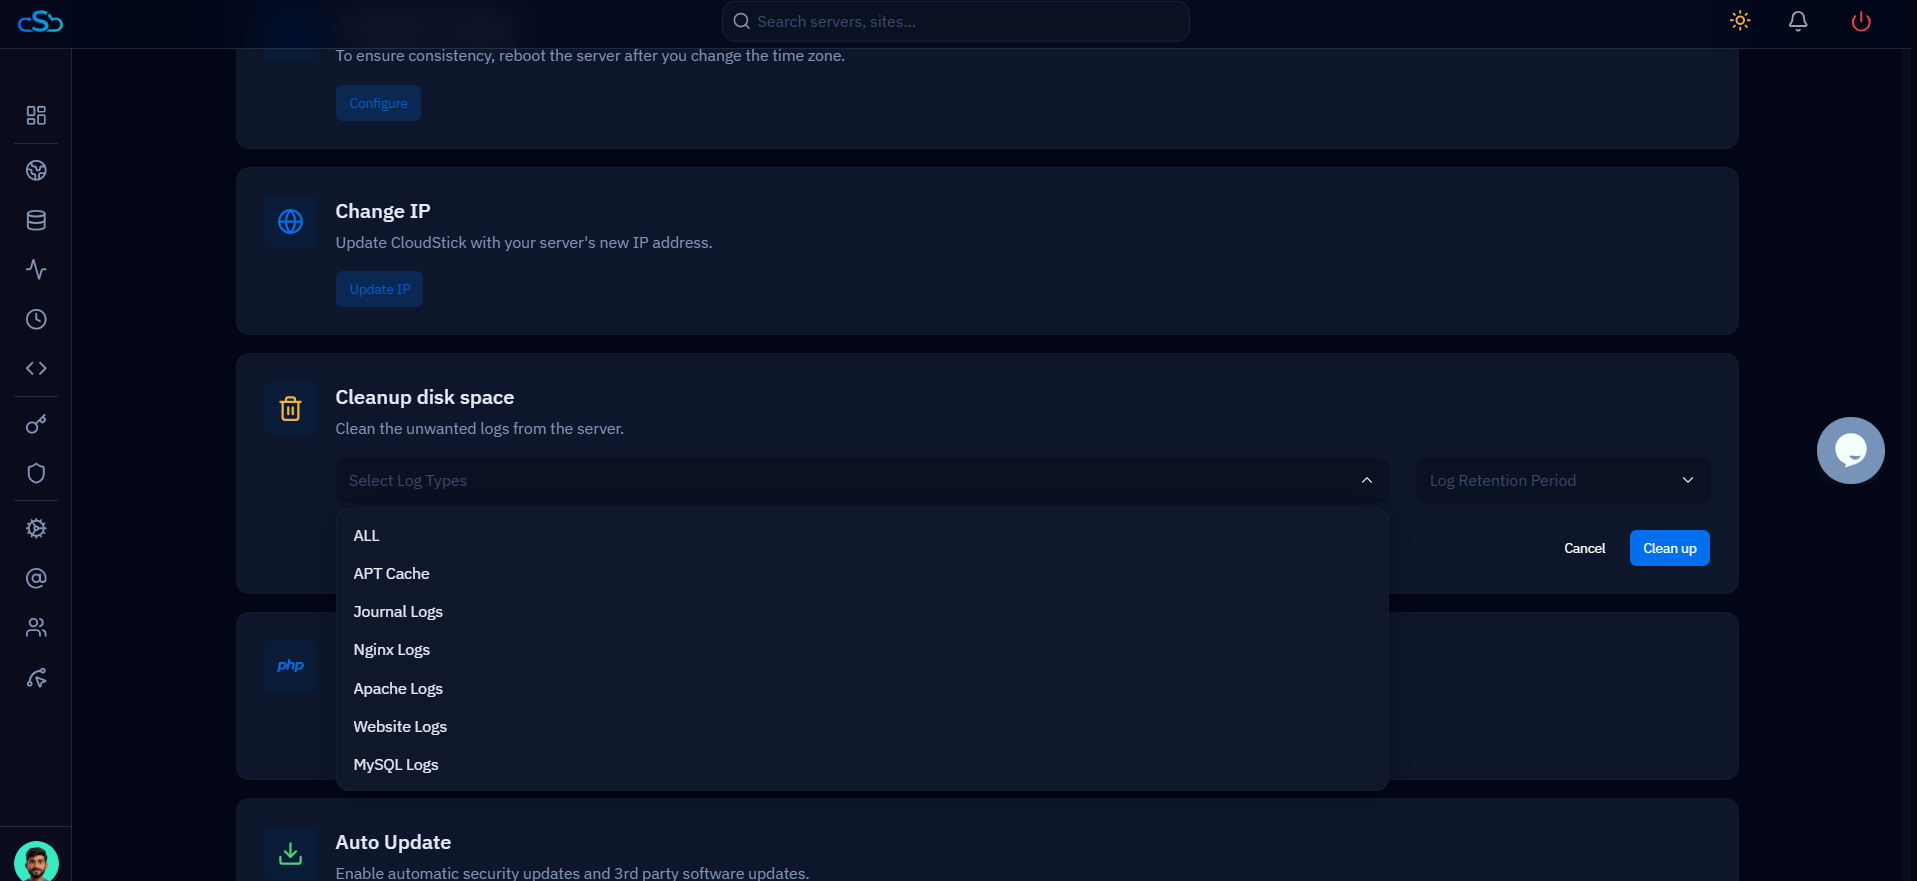
Fig. 03 — The Select Log Types dropdown expanded, listing the categories of logs you can remove.
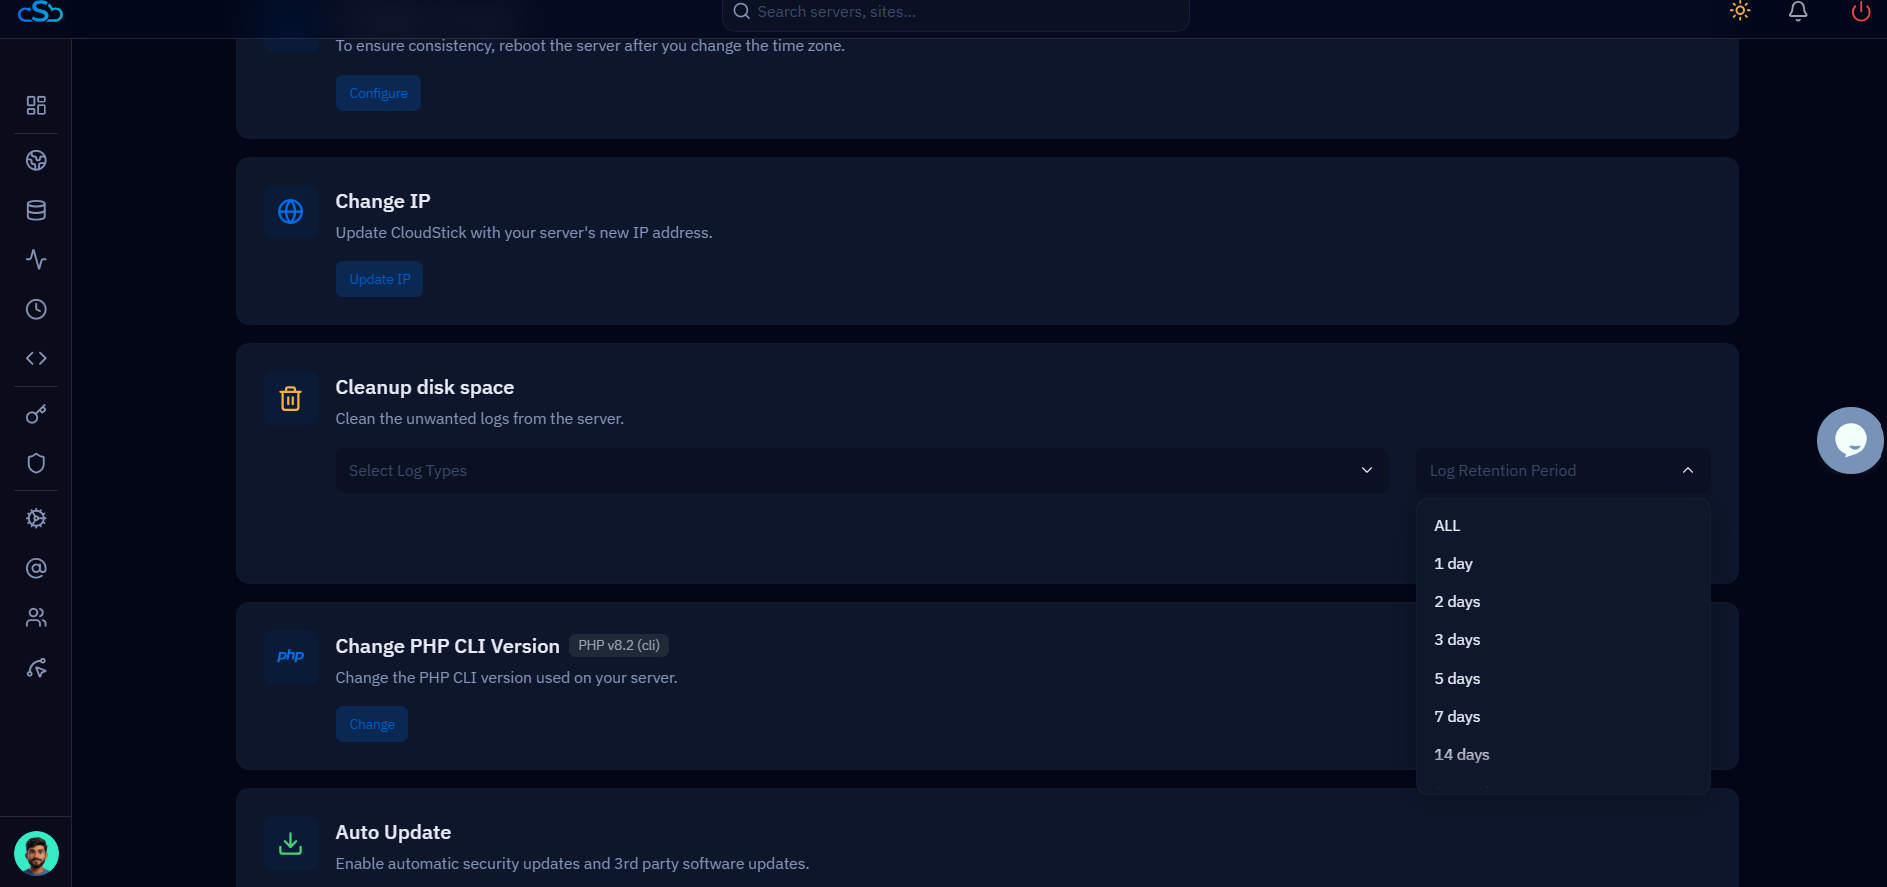
Fig. 04 — The Log Retention Period dropdown, used to keep logs newer than the chosen window while clearing older ones.
Step 4: Start Cleanup
Run the cleanup so CloudStick removes the selected files and reclaims the space.
1. Start the cleanup: With your log types and retention period selected, click Clean up to begin the process and free up disk space on the server.
2. Cancel if needed: If you want to discard your selection without removing anything, click Cancel instead.
Once the cleanup finishes, the selected logs and temporary files are removed and the freed-up space is reflected in the server's Disk Space usage.