How to create a WordPress user in CloudStick
Overview
Managing WordPress users typically requires logging into the WordPress admin dashboard — but with CloudStick's WordPress Manager, you can create new users directly from the CloudStick control panel without ever touching the WordPress backend. This is especially useful when onboarding team members, setting up client accounts, or managing multiple WordPress sites from a single interface.
This guide walks you through the complete process of creating a new WordPress user — from navigating to your server to assigning the correct role and confirming the account.
Your server must already be connected to CloudStick and the target website must be a WordPress installation. WordPress Manager is available on all paid CloudStick plans.
Step 1: Navigate to Your Server
Start from the CloudStick Dashboard, where all your connected servers are listed with their real-time status.
1. Log in to CloudStick: Go to app.cloudstick.io and sign in with your credentials.
2. Open your server: From the Dashboard, locate the server hosting your WordPress website and click Manage to open its server panel.
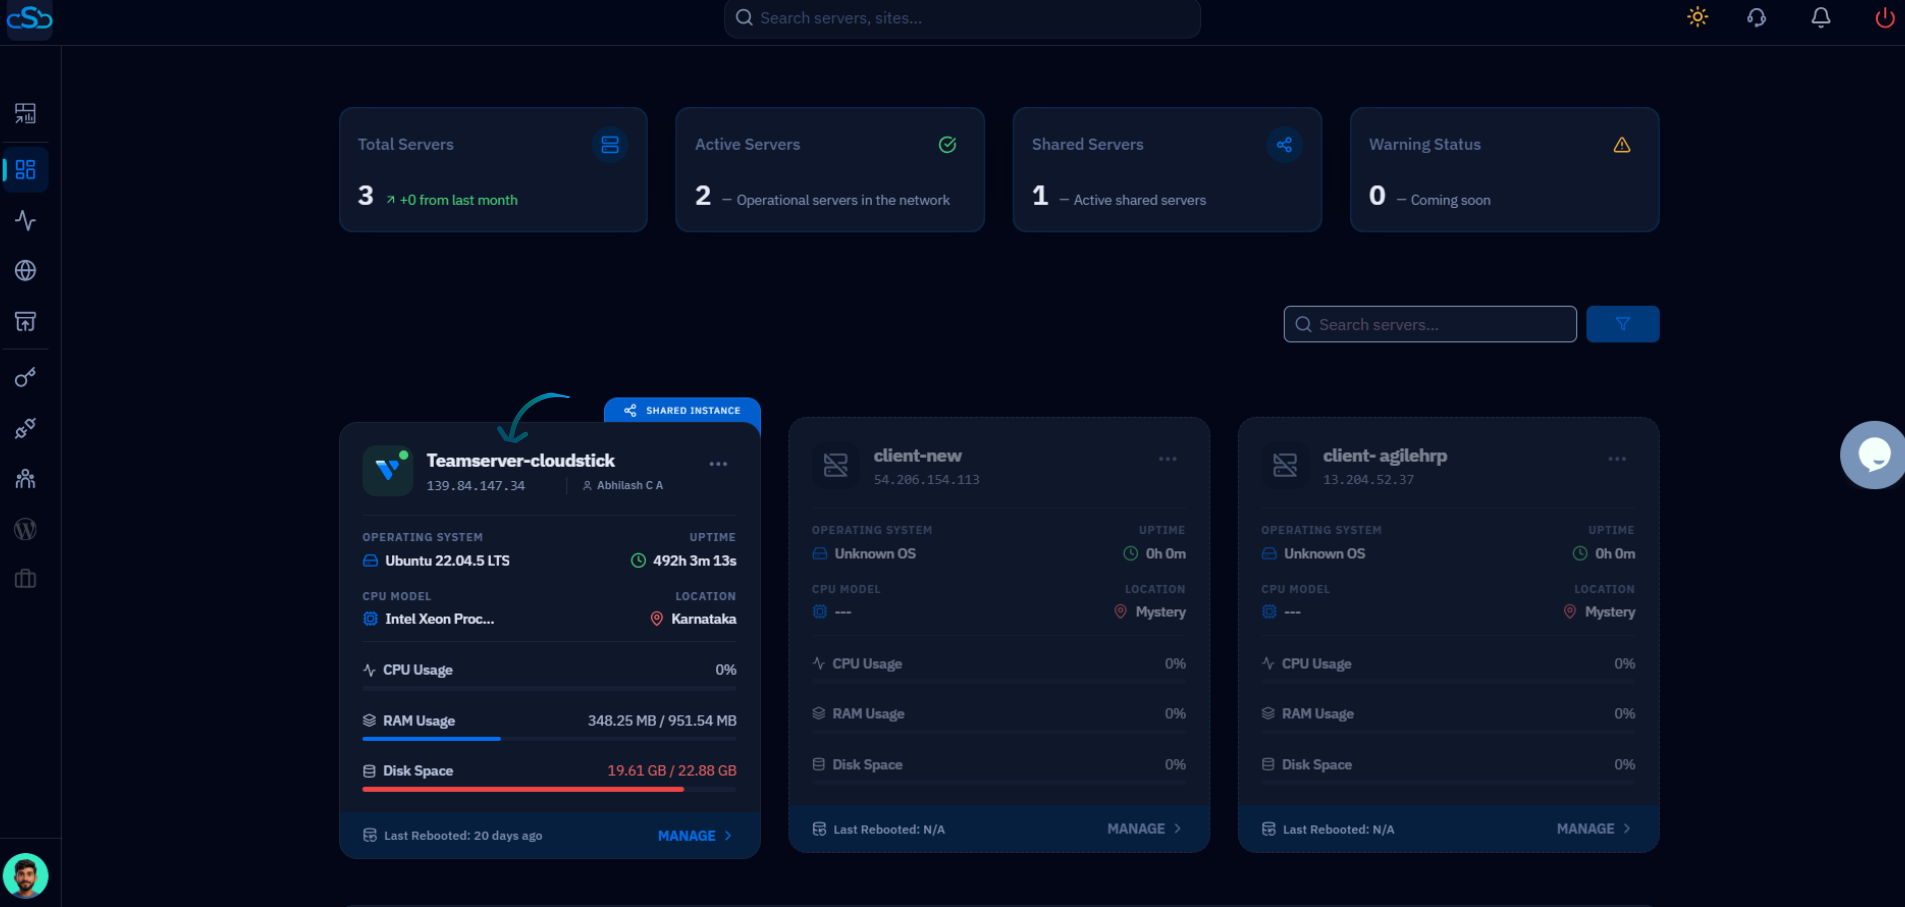
Fig. 01 — CloudStick Dashboard showing the list of connected servers with their status and resource usage.
Step 2: Select Your WordPress Website
Once inside the server panel, navigate to the Websites section to find the WordPress site where you want to add a user.
1. Open Websites: In the left-hand navigation of the server panel, click on the Websites icon to open the WebApp List.
2. Select your WordPress site: Find your WordPress website in the list and click on it to open the site management view.
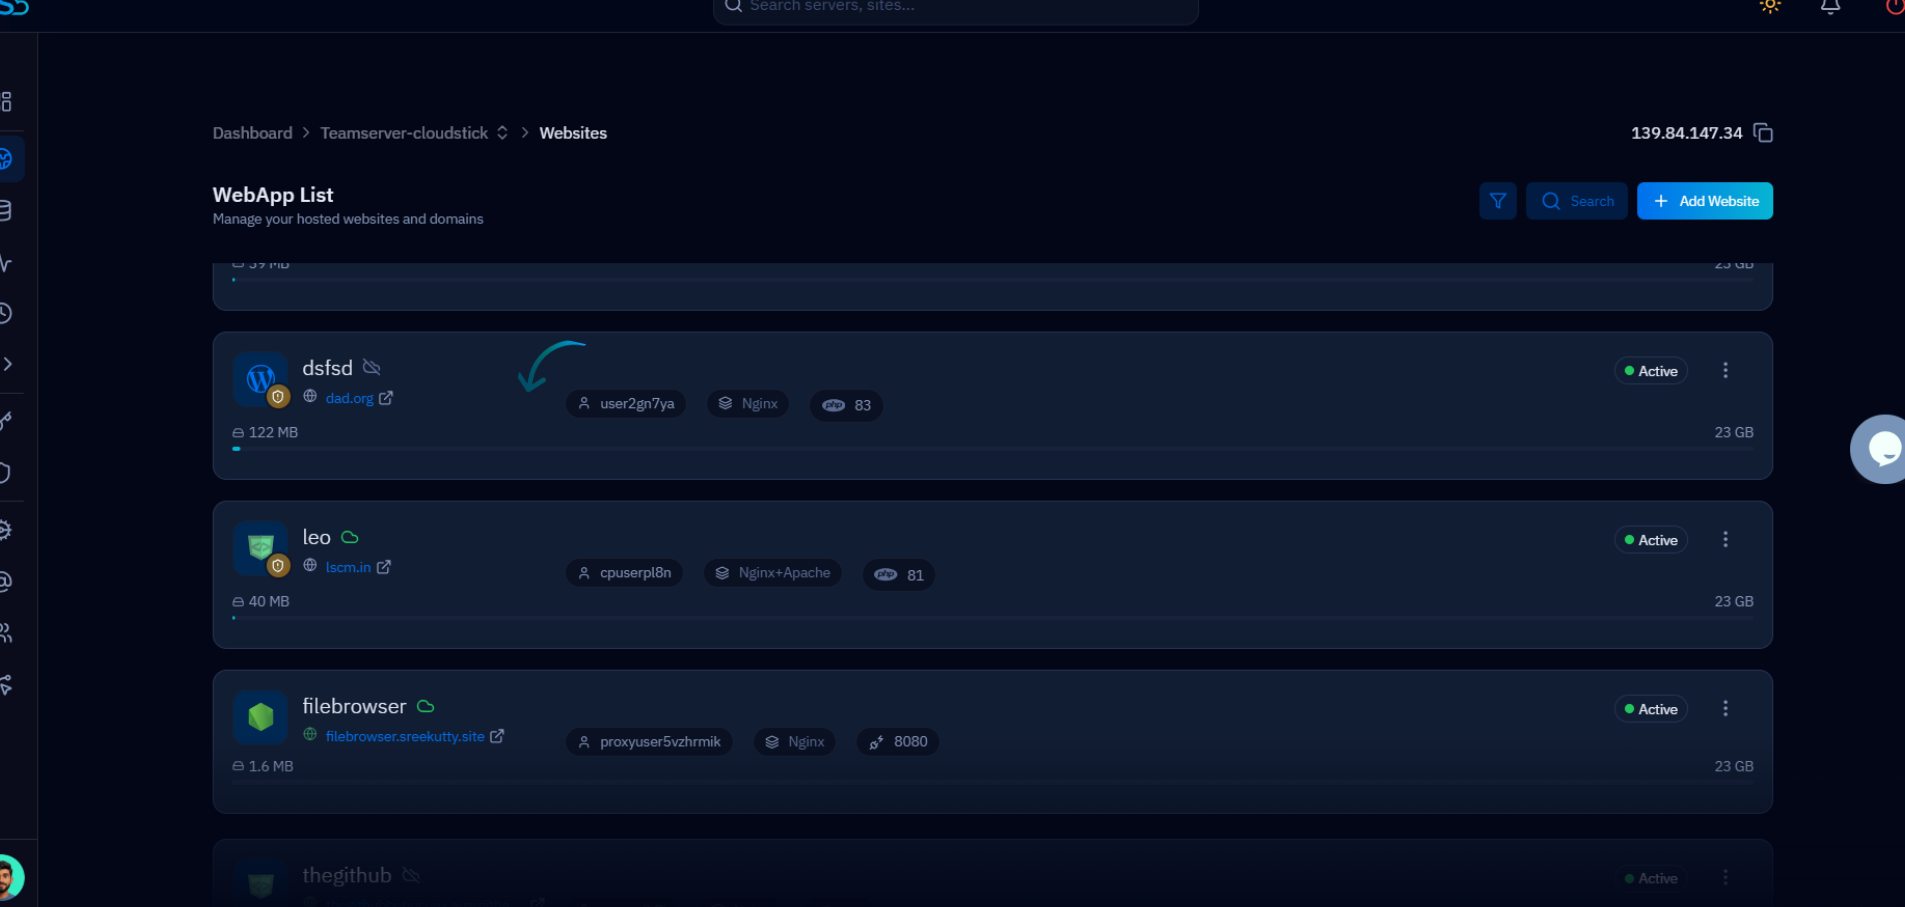
Fig. 02 — WebApp List showing all websites hosted on the server. Click the WordPress site to open its management view.
Step 3: Open WordPress Manager
The WordPress Manager tab gives you direct control over your WordPress installation without needing to log in to the WordPress admin panel.
1. Click WordPress Manager: In the website management tabs at the top, click on WordPress Manager. The tab is marked with the WordPress icon.
2. Switch to the Users tab: Inside WordPress Manager, click on the Users tab (next to General and Plugins) to open the WordPress User Management section.
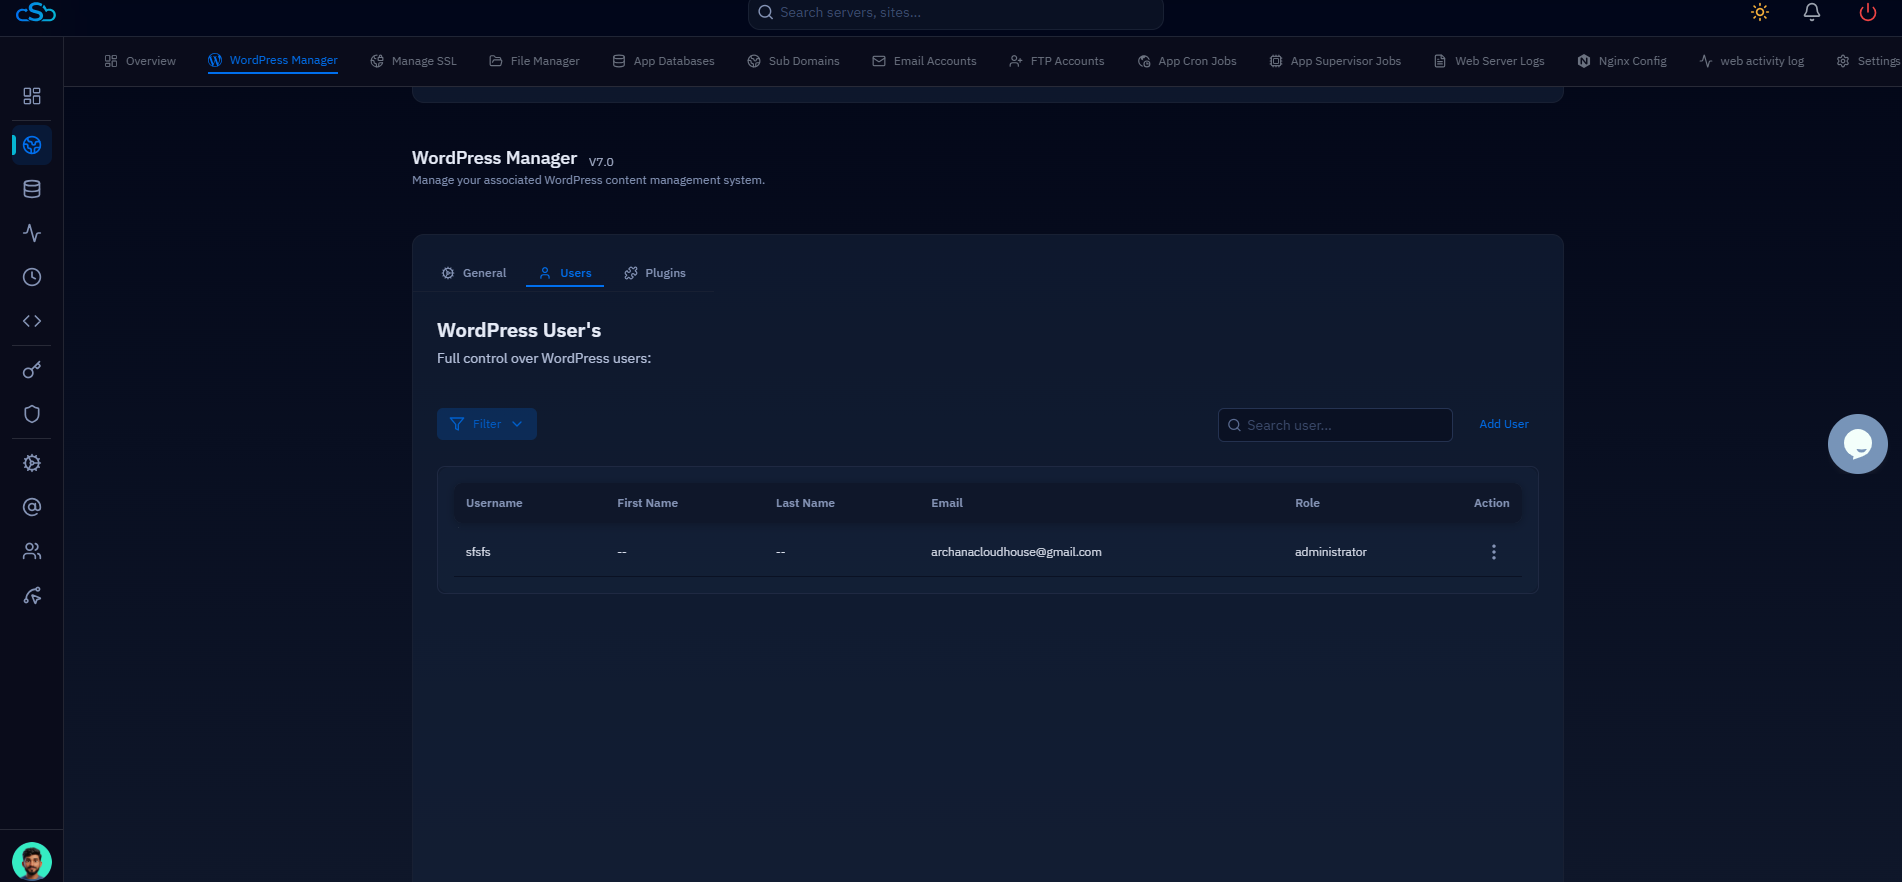
Fig. 03 — WordPress Manager showing the Users tab with the WordPress User's list and existing accounts.
Step 4: Initiate Adding a New User
The Users tab shows all existing WordPress accounts on this site. From here you can add, search, and manage users without leaving CloudStick.
1. Locate Add User: In the top-right corner of the WordPress User's section, click the Add User button to open the new user creation form.
You can use the Search user field and the Filter button to find existing users before creating a new one — this helps avoid duplicate accounts.
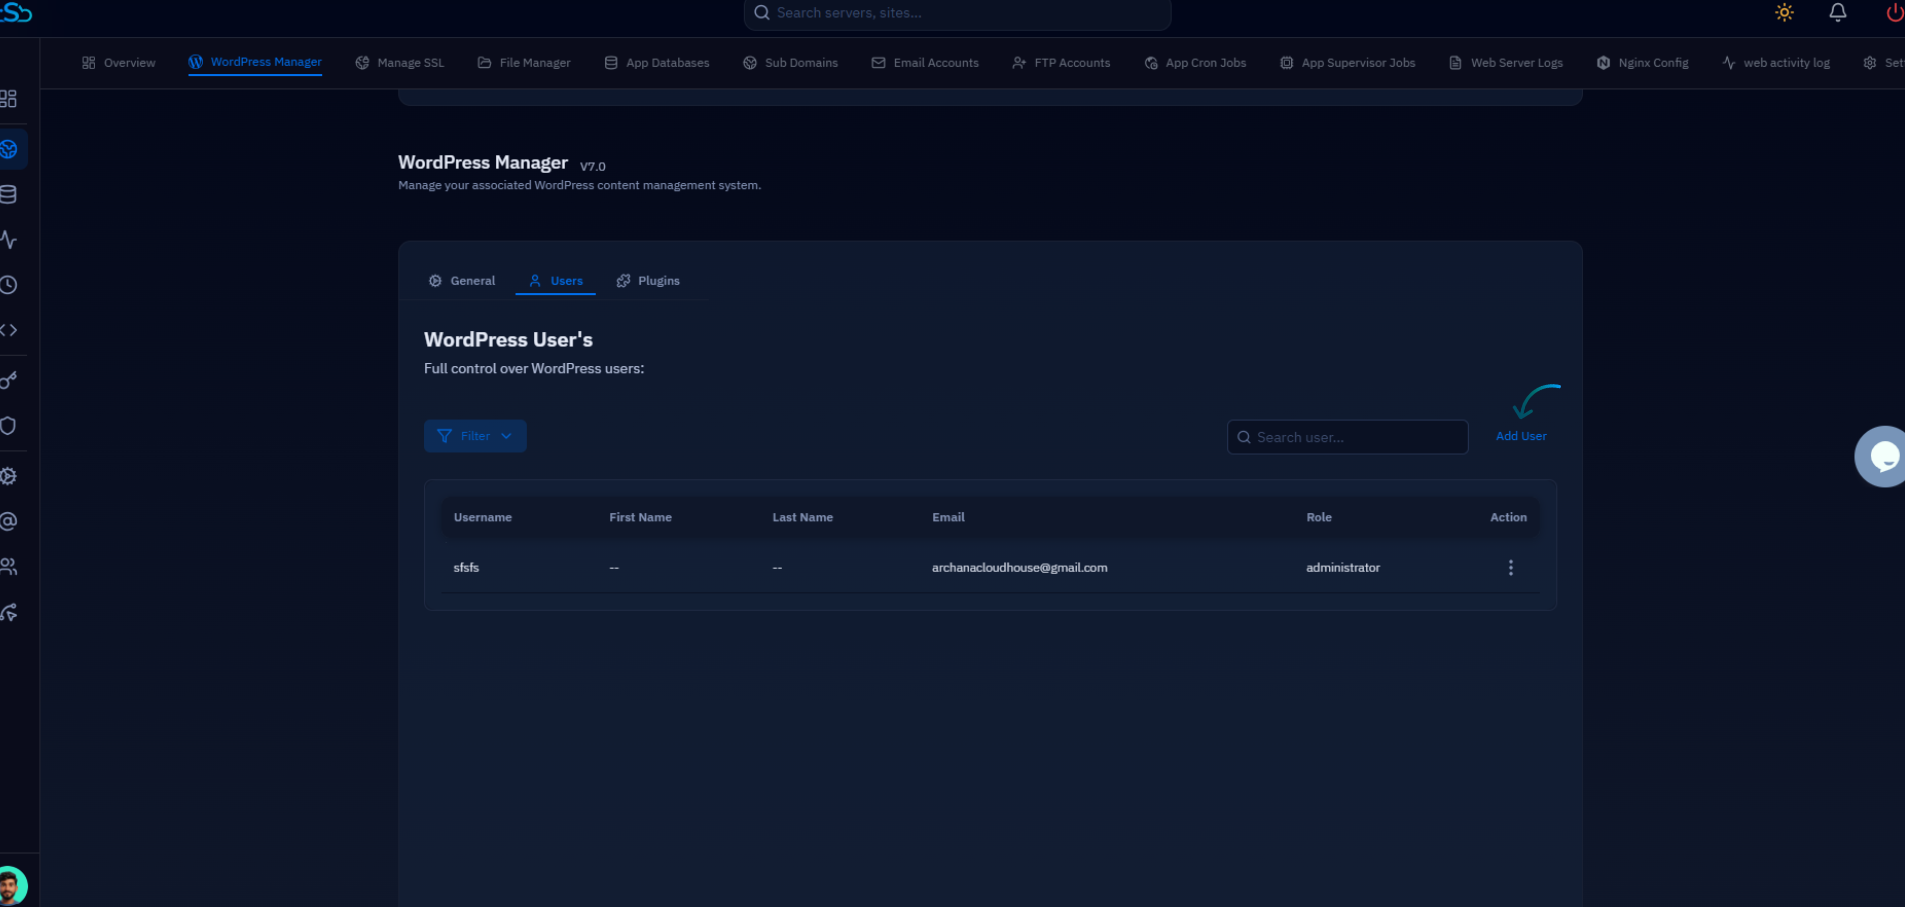
Fig. 04 — WordPress User's page with the Add User button highlighted in the top-right corner.
Step 5: Fill In User Details and Assign a Role
The Add New WordPress User form collects the information needed to create the account and determines what the user can do within WordPress.
Username (required): Enter a unique username for this account. This is used to log in to WordPress.
First Name / Last Name: Optional fields for the user's display name within WordPress.
Email Address (required): Enter the user's email address. WordPress will send the account notification to this address.
User Role (required): Select the appropriate role from the dropdown:
Administrator — Full control over the WordPress site, plugins, themes, and users.
Editor — Can publish and manage all posts, including those by other users.
Author — Can publish and manage their own posts only.
Contributor — Can write and edit their own posts but cannot publish.
Subscriber — Can only read content and manage their own profile.
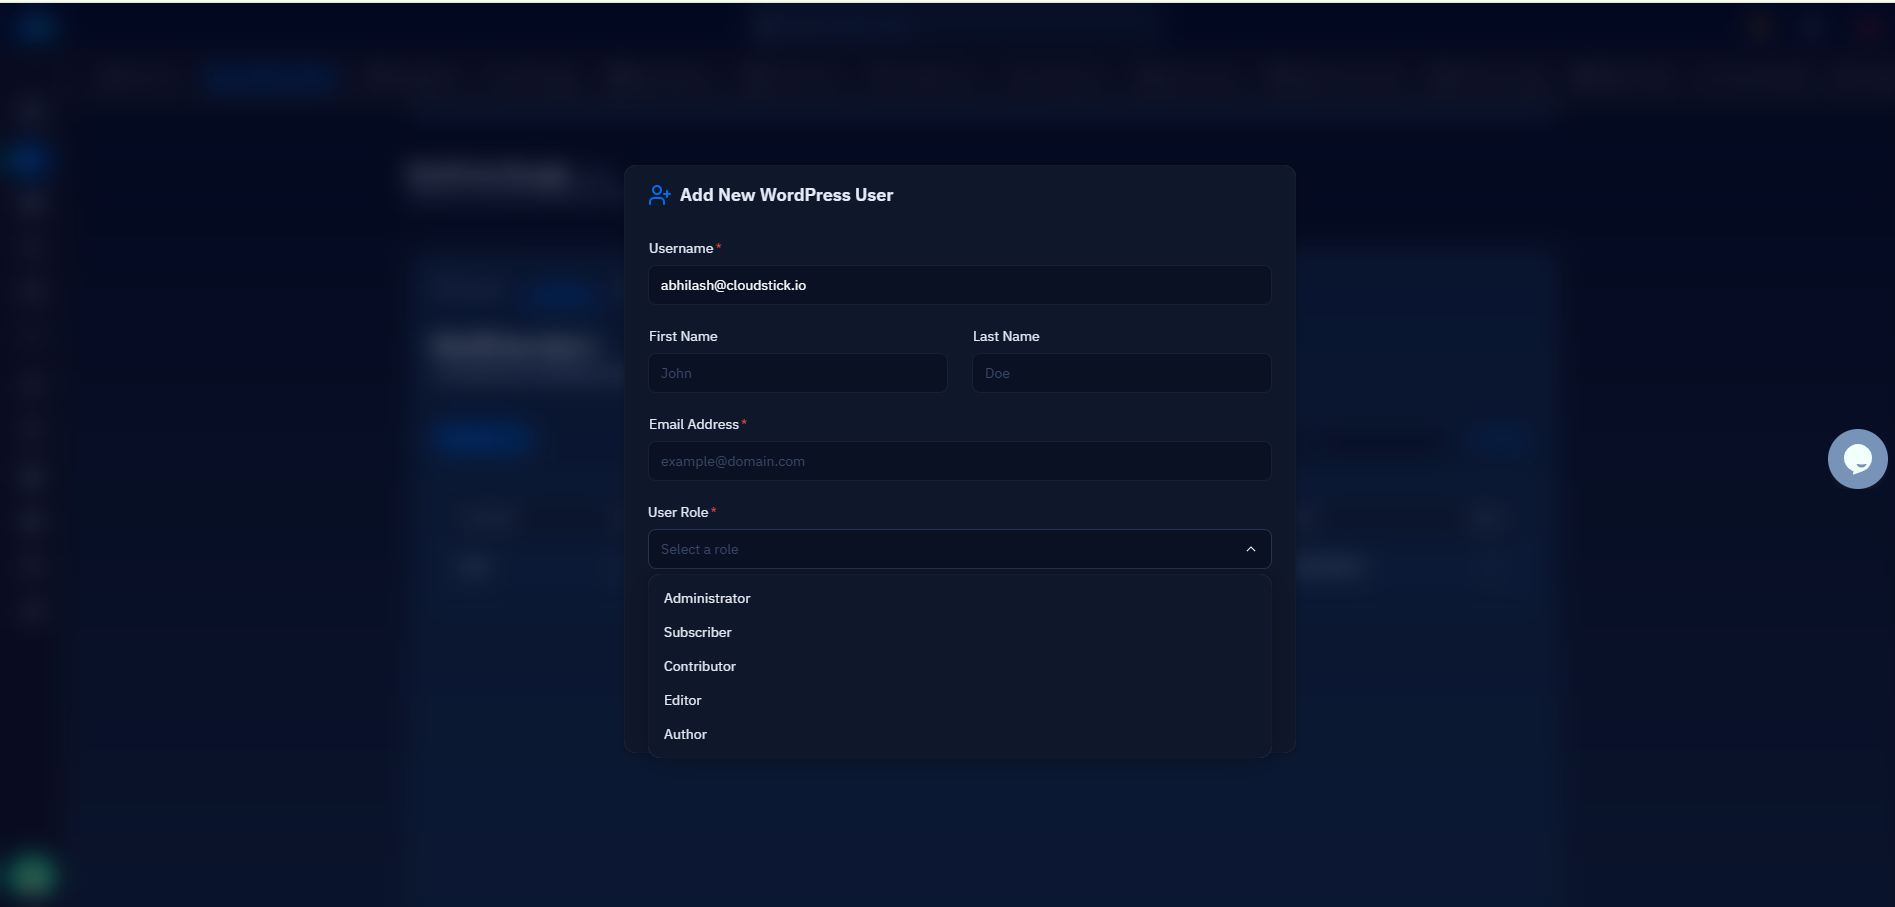
Fig. 05 — Add New WordPress User modal showing the User Role dropdown with all available role options.
Step 6: Set a Password and Create the User
After filling in the user details and selecting a role, set a secure password and confirm the account creation.
1. Enter a password: Type a strong password in the Password field. The eye icon lets you toggle visibility to verify what you have typed.
2. Click Create User: Click the blue Create User button to save the account. The new user will immediately appear in the WordPress User's list and will be able to log in to the WordPress admin panel.
The new user will receive a WordPress account notification at their email address. Make sure the email is correct before creating the account.
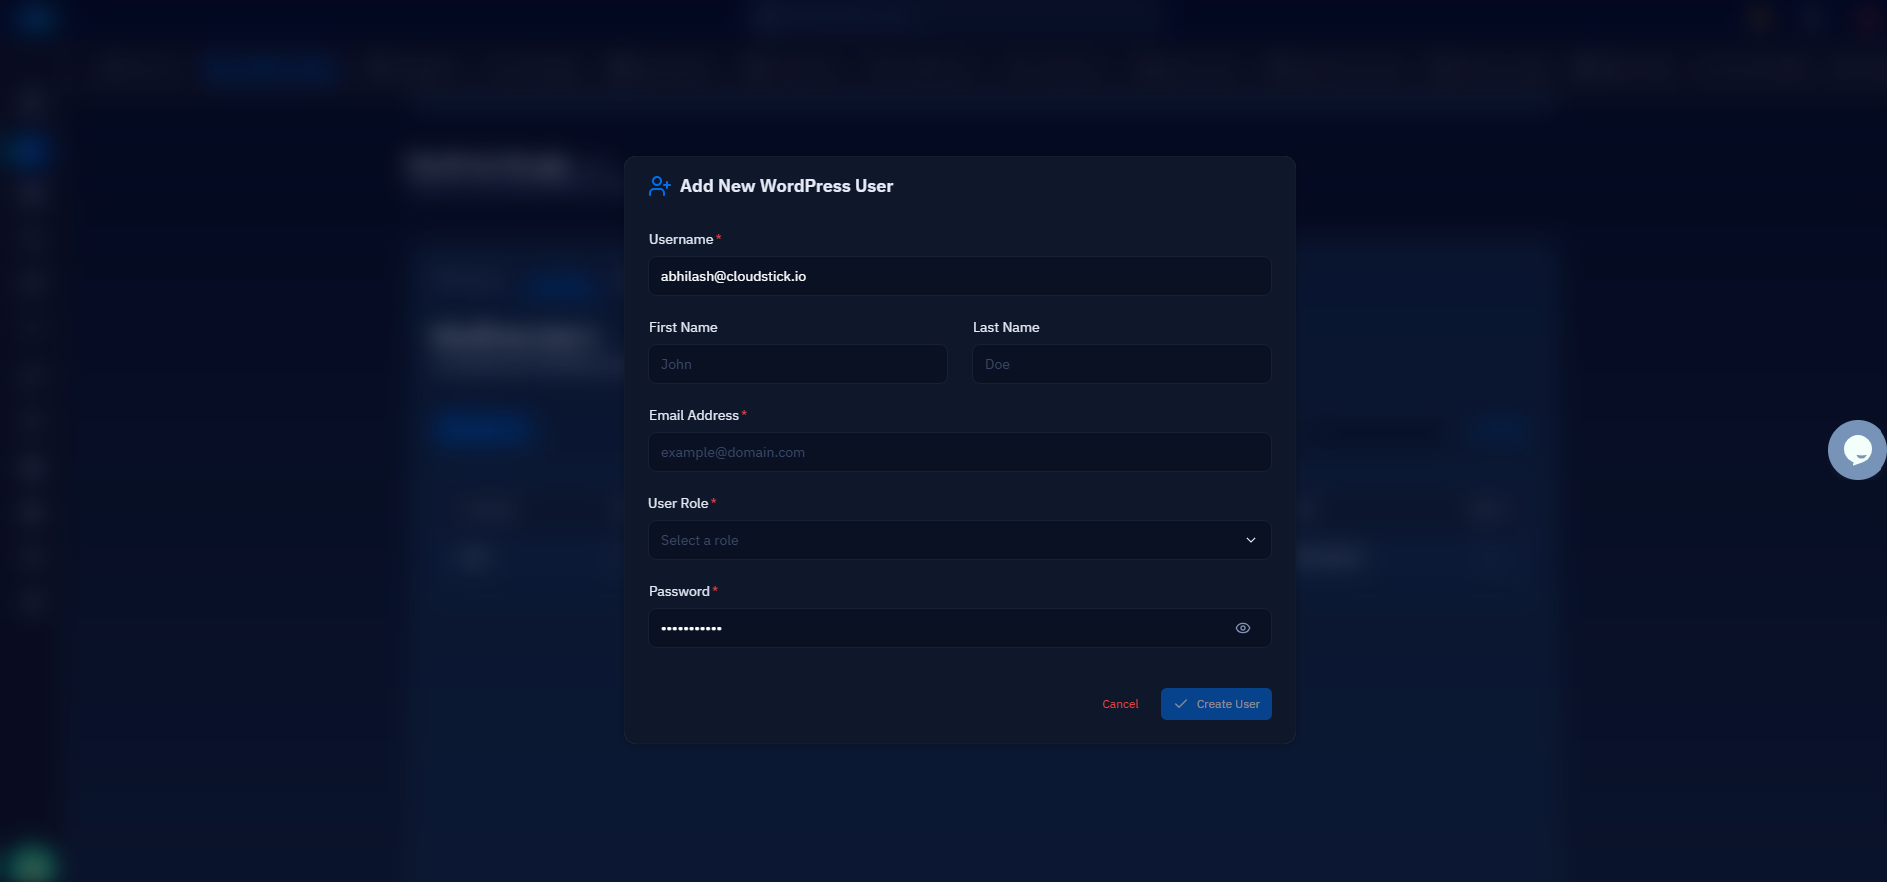
Fig. 06 — Add New WordPress User form with all fields filled in, showing the Create User confirmation button.