How to Delete a Database User in CloudStick
Overview
Over time, a server can accumulate database users that are no longer needed — left over from removed applications, old staging sites, or one-off tasks. Removing these unused accounts is good security hygiene: every active user is a potential entry point, so keeping the list lean reduces your attack surface. CloudStick's built-in visual database manager lets you delete database users directly from the dashboard, with no command line or phpMyAdmin required.
This guide walks you through selecting your server, opening the Database Users view, locating the user you want to remove, and confirming the deletion in a few clicks.
Deleting a database user removes its access to associated databases but does not delete the databases themselves. Make sure the user is no longer required by any application before removing it, as this action cannot be undone.
Step 1: Log In to CloudStick
Everything starts from your CloudStick account, where all of your connected servers are managed in one place.
Open dash.cloudstick.io and log in with your CloudStick credentials.
You'll land on the main Dashboard, which lists every server connected to your account.
Step 2: Select Your Server
Database users are managed per server, so the first step is opening the server where the user you want to remove exists.
From the Dashboard, find the server that hosts the database user in the server list.
Click Manage on that server's card to open its server panel.
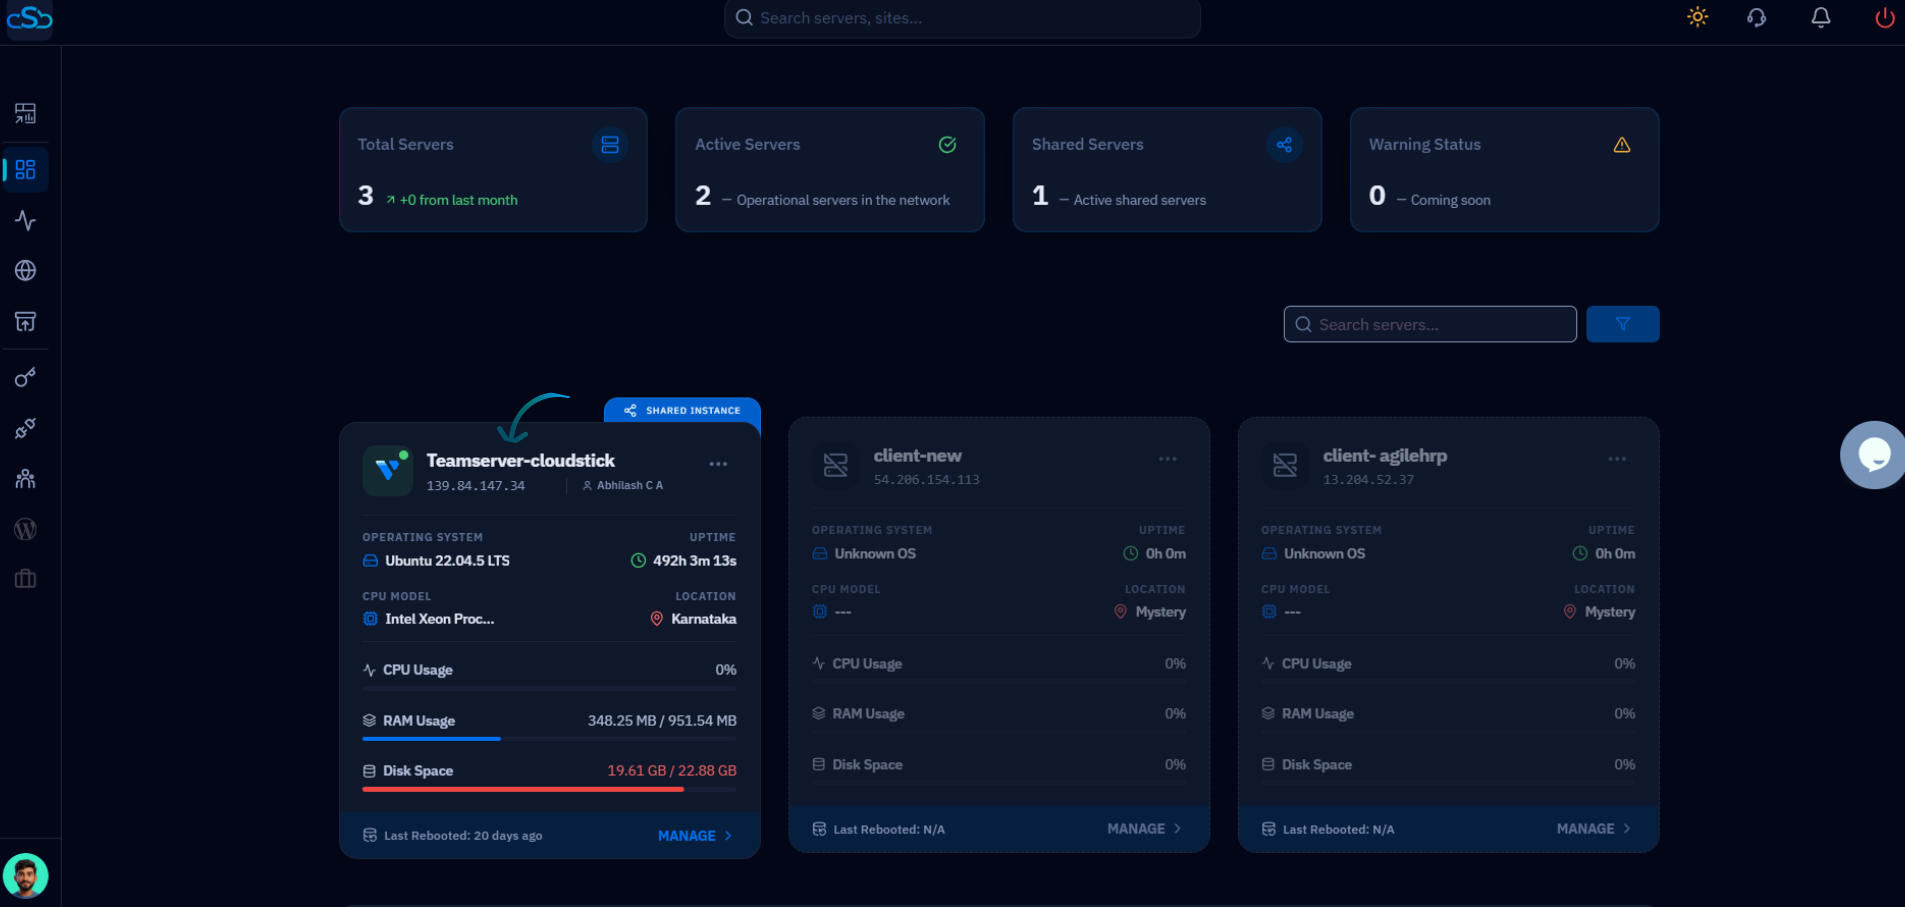
Fig. 01 — CloudStick Dashboard showing connected servers. Click Manage on the server you want to work with.
Step 3: Open the Databases Section
Inside the server panel, the Databases section is where every MySQL database and its users live. You reach it from the server panel's left-hand navigation.
In the left-hand navigation of the server panel, click the Databases icon.
This opens the Databases page, listing all databases hosted on the server.
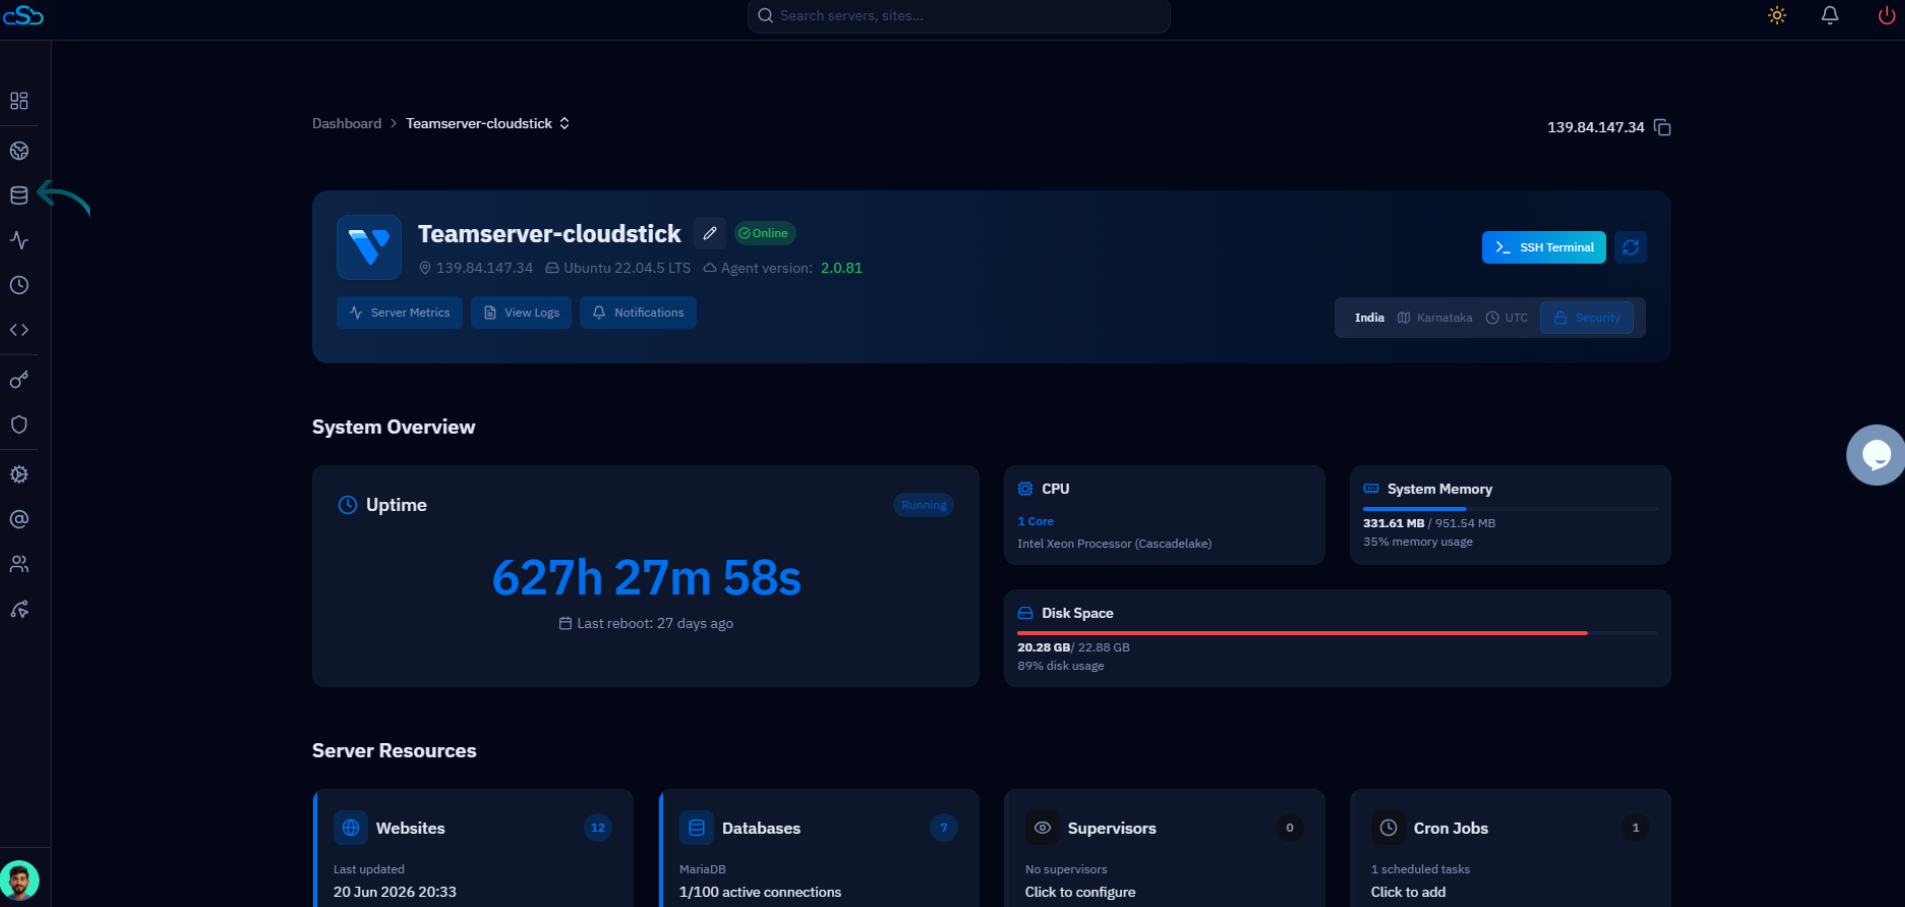
Fig. 02 — Server panel with the Databases icon highlighted in the left-hand navigation.
Step 4: Open Database Users
The Databases page has a dedicated view for managing user accounts, separate from the database list itself. This is where you can see and remove existing users.
On the Databases page, click the Database Users link at the top-right of the page.
You'll be taken to the Database Users page, which lists every user along with its creation date.
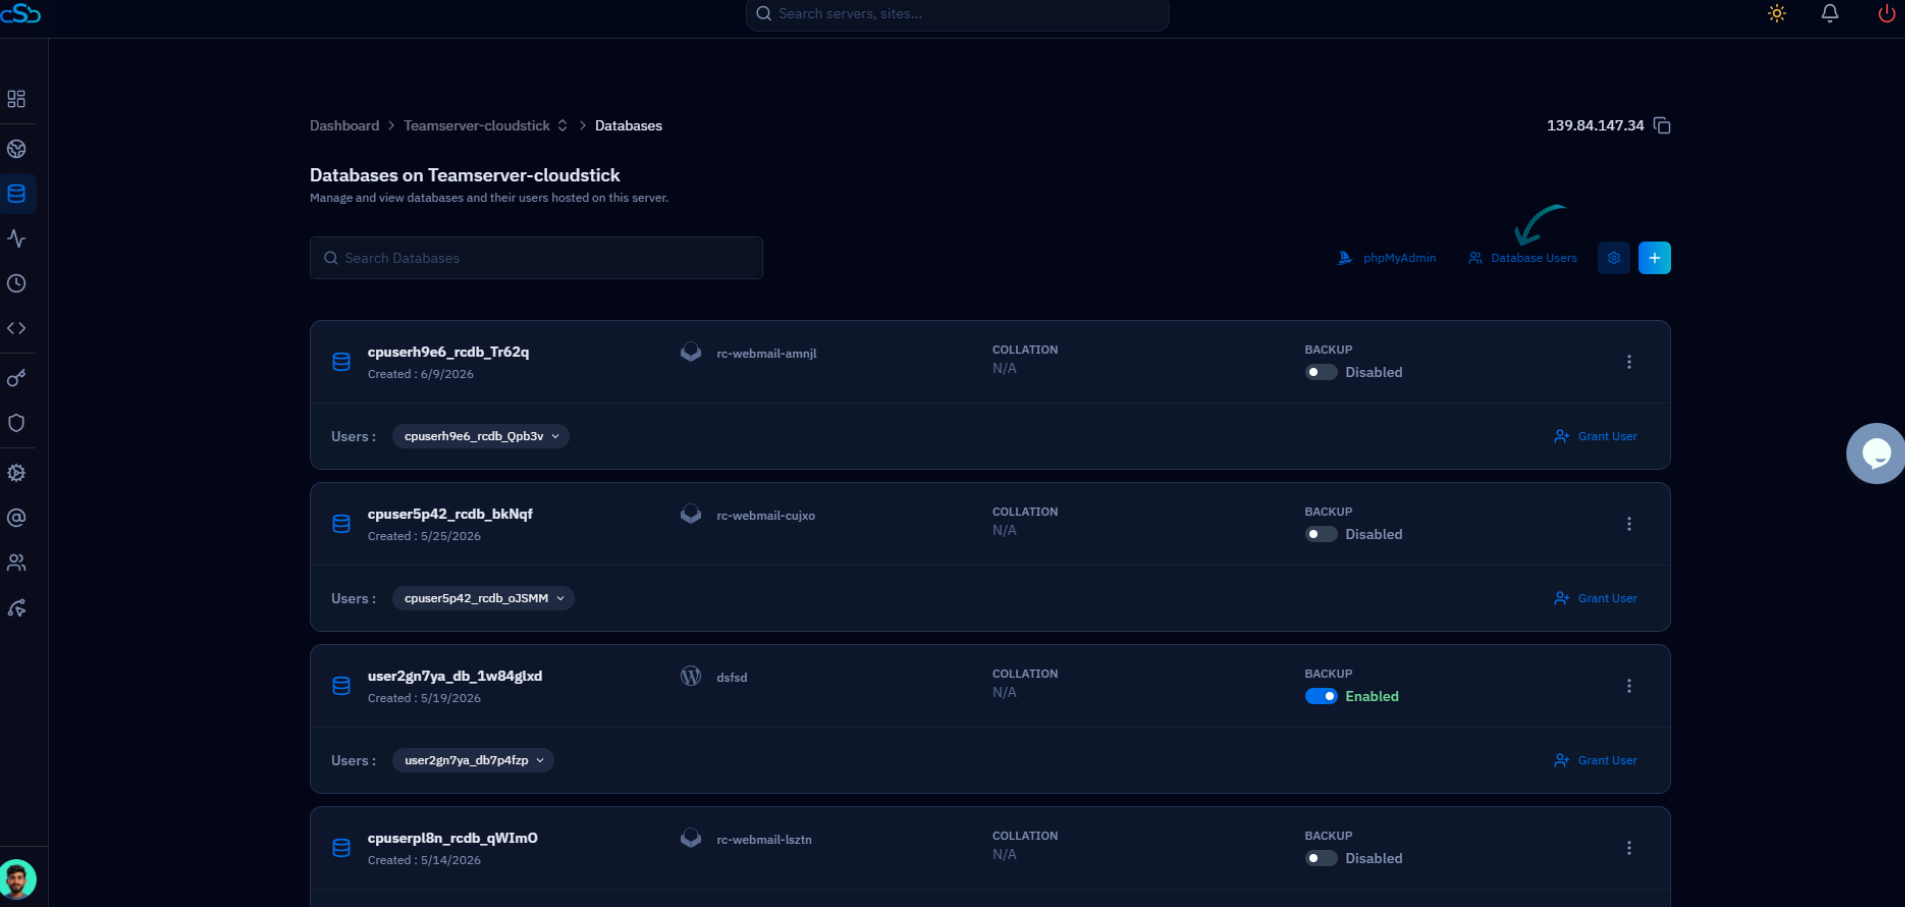
Fig. 03 — The Databases page with the Database Users link highlighted at the top-right.
Step 5: Locate the User
The Database Users page shows every user configured on the server, so the next step is finding the specific account you intend to remove.
Scan the list, or use the Search Database Users box to filter by name.
Identify the exact user you want to delete, and double-check it is not still in use by any live application.
Step 6: Delete the User
Each user row has an Actions column on the right. The delete control sits here, alongside the option to change the user's password.
In the row for your chosen user, look at the Actions column.
Click the red delete (trash) icon to begin removing the user.
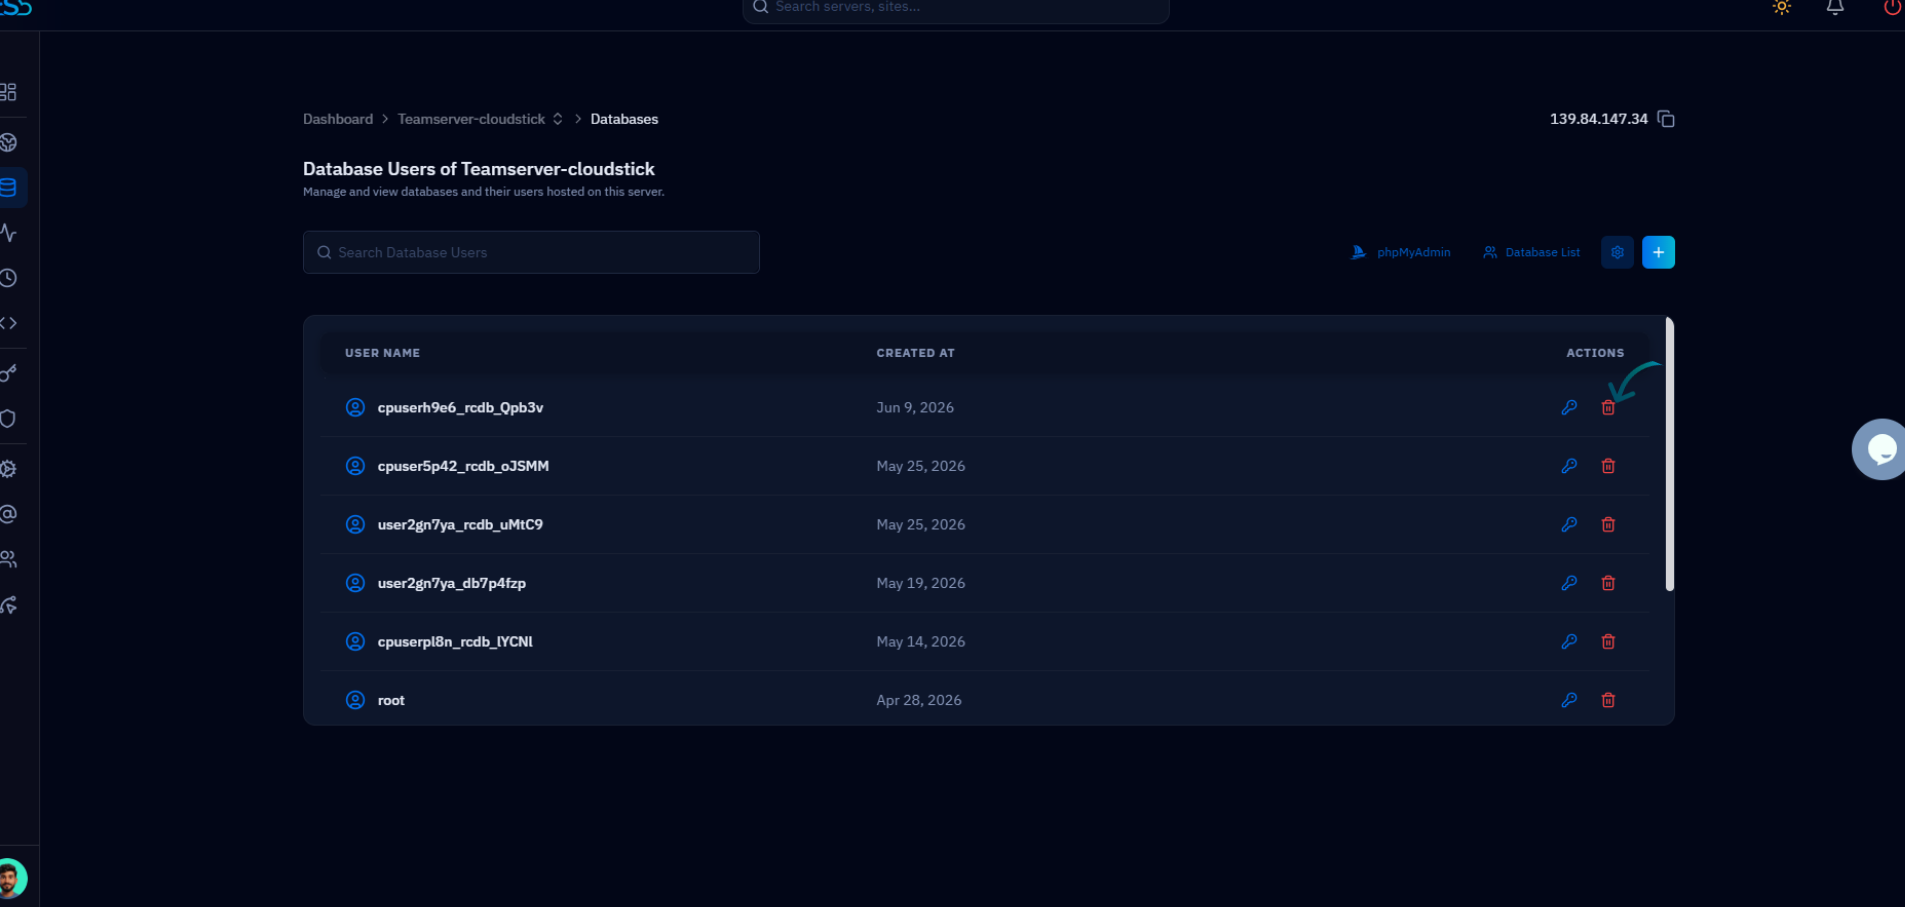
Fig. 04 — The Database Users page with the delete (trash) icon highlighted in the Actions column.
Step 7: Confirm Deletion
Because removing a user is permanent, CloudStick asks you to confirm before it carries out the action.
When the confirmation prompt appears, review the username one final time.
Confirm the action to permanently remove the user. It will immediately disappear from the Database Users list.
The user's databases remain untouched — only the user account and its access are removed. If you also want to delete a database, do so separately from the Databases page.