How to Fix File Permission Issue
Overview
A file permission issue is one of the most common sources of trouble on a website — it can block scripts from running, prevent uploads from saving, or stop a CMS from writing its own configuration and cache files. Tracking down and correcting the permissions on each individual file manually is slow and error-prone, especially after a migration or a bulk file upload leaves permissions inconsistent across the webroot.
CloudStick includes a built-in Fix Permissions option that resolves a file permission issue in one click by resetting every directory and file in a website's webroot to the standard, secure values. This guide walks you through finding the option in the dashboard and using it to fix a file permission issue on any website hosted on your server.
Fix Permissions sets every directory in the website's webroot to 755 and every file to 644. Any custom permissions you have configured for specific files or directories will be overwritten.
Step 1: Navigate to Your Server
Start from the CloudStick dashboard to locate the server that hosts the affected website.
1. Log in to your CloudStick Dashboard: Open your CloudStick account and sign in with your credentials.
2. Locate the server: From the dashboard, find the server where the website with the permission issue is hosted.
3. Click Manage: Click the "Manage" button on the required server to open its management panel.
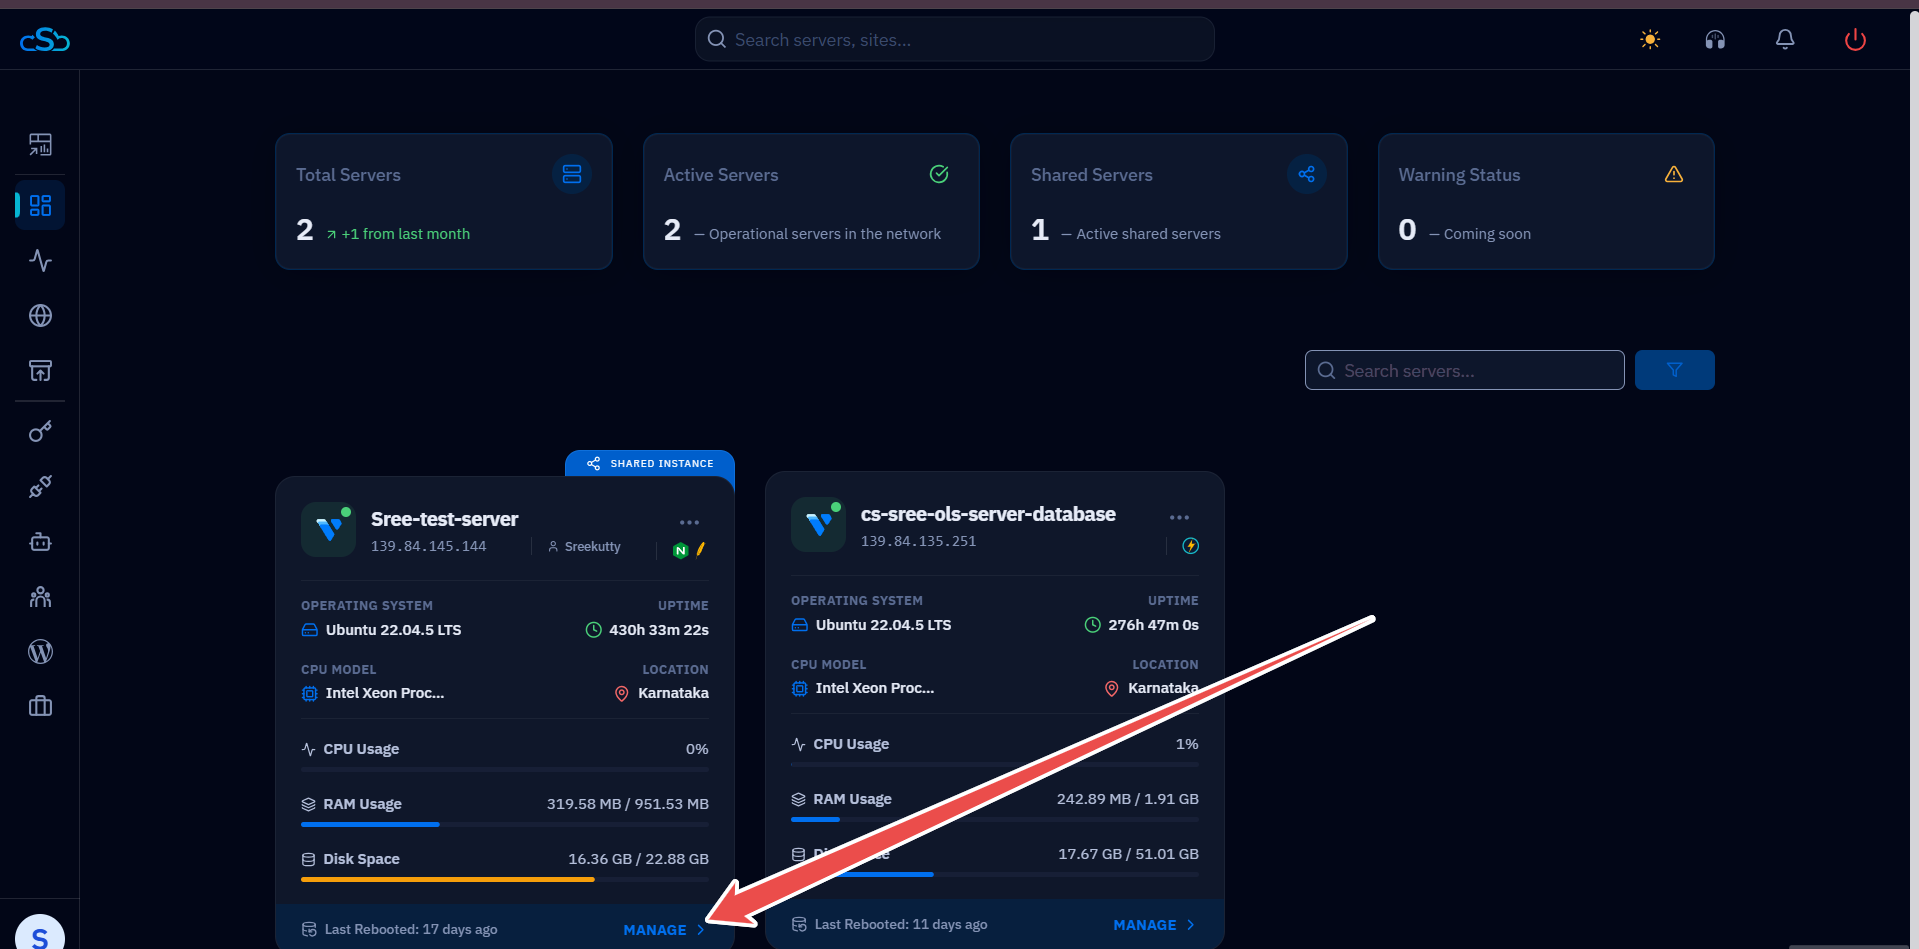
Fig. 01 — CloudStick dashboard showing the available servers and the Manage option.
Step 2: Open the Websites Section
Once inside the server management panel, move to the list of hosted websites.
1. Open the Websites section: In the left-hand navigation, click "Websites" to view every website hosted on this server.
2. Locate the affected website: Scan the list for the website that is experiencing the permission issue.
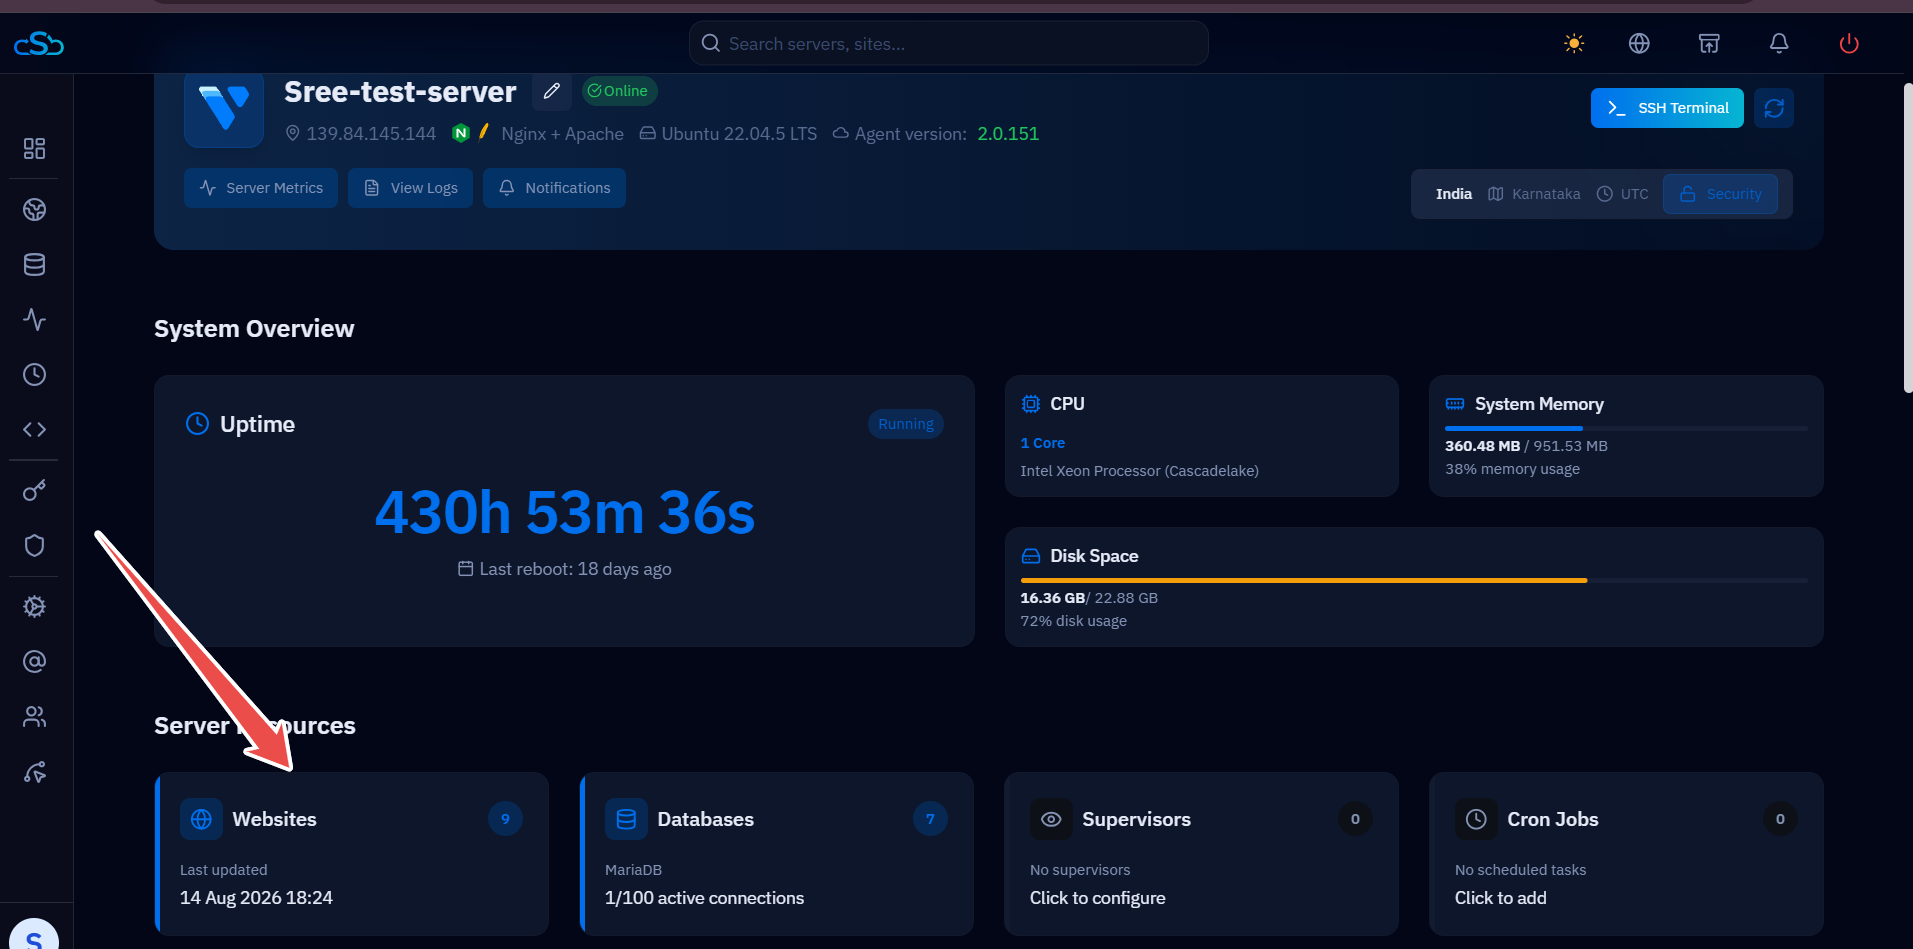
Fig. 02 — Websites section displaying the websites hosted on the selected server.
Step 3: Select the Website
Open the specific website you want to fix — in this example, the testashsite website.
1. Click on the website: Selecting the website from the Websites list opens its Website Summary page.
2. Review the details: Check the website's details and available management options before proceeding.
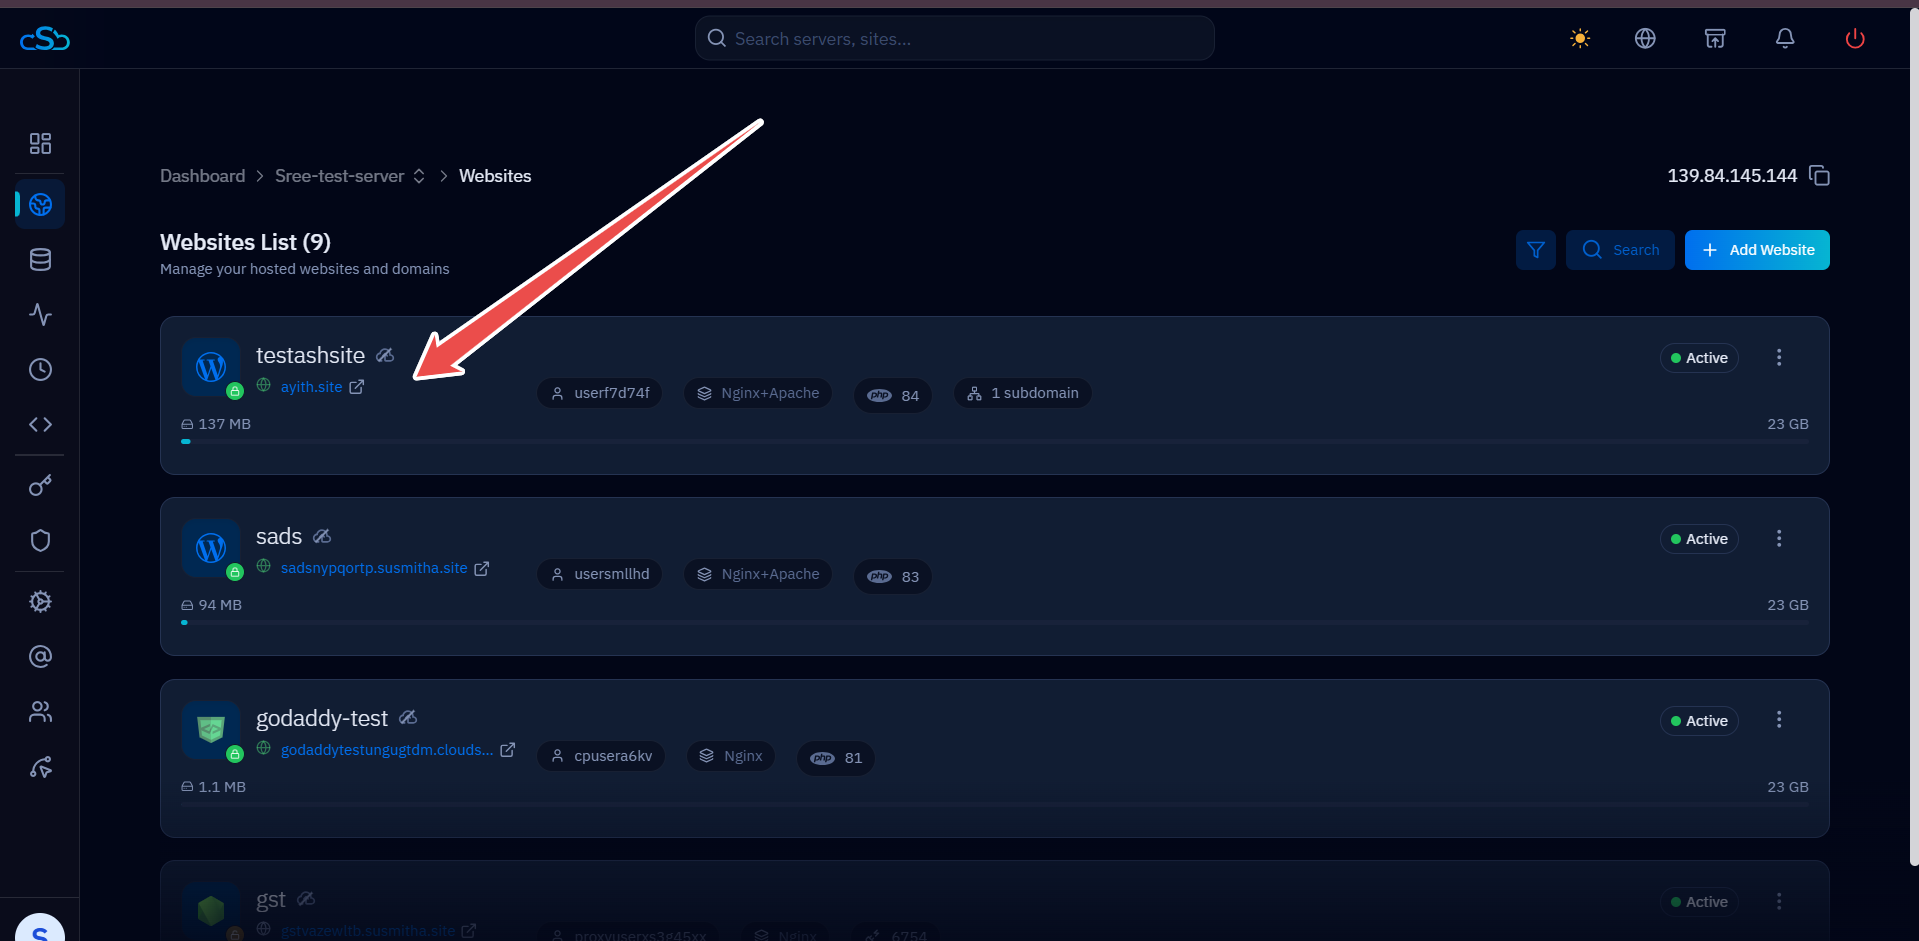
Fig. 03 — Websites list showing the testashsite website.
Step 4: Fix Website Permissions
On the Website Summary page, the Fix Permissions button resets the website's webroot permissions in a single click.
1. Locate the Fix Permissions button: Find it alongside the other website actions such as Rebuild Now and Backup Now.
2. Click "Fix Permissions": CloudStick will show a confirmation dialog before applying any changes.
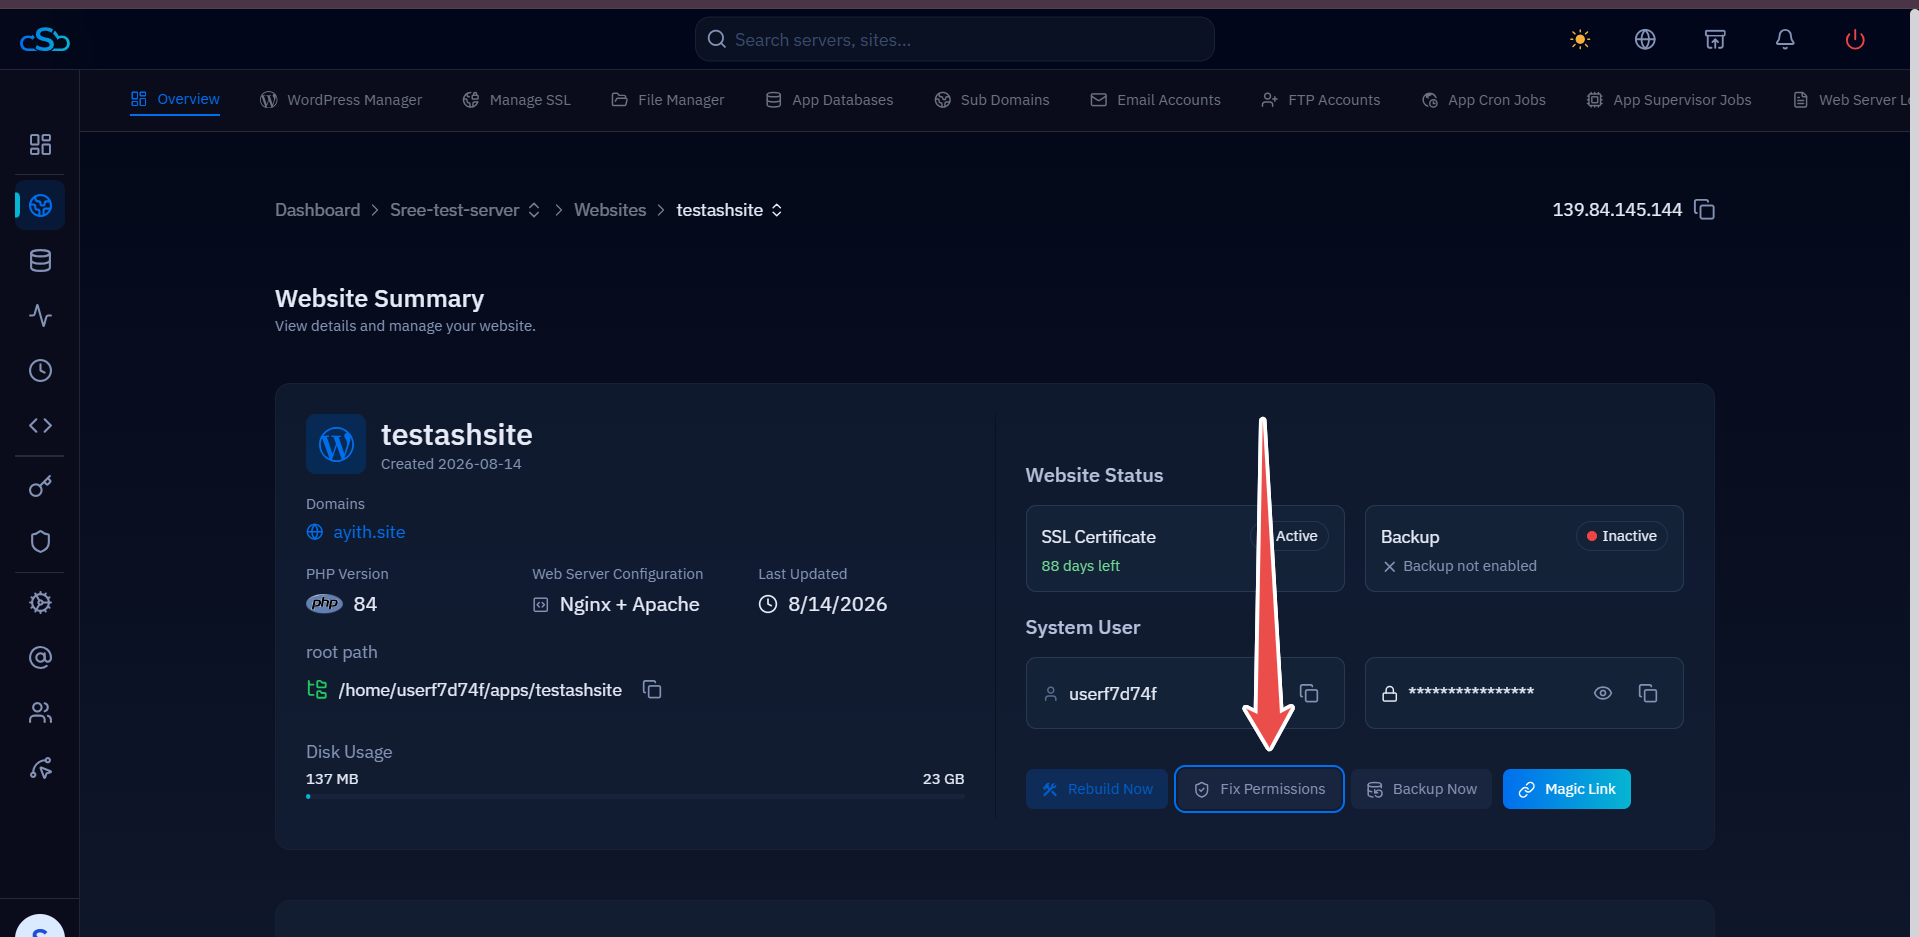
Fig. 04 — Website Summary page showing the selected website and available management options.
3. Review the warning: The dialog reads: "This will set all directories in this website's webroot to 755 and all files to 644, overwriting any custom permissions. Proceed?"
4. Confirm the action: Click "Fix Permissions" again in the dialog to apply the standard permissions across the webroot.
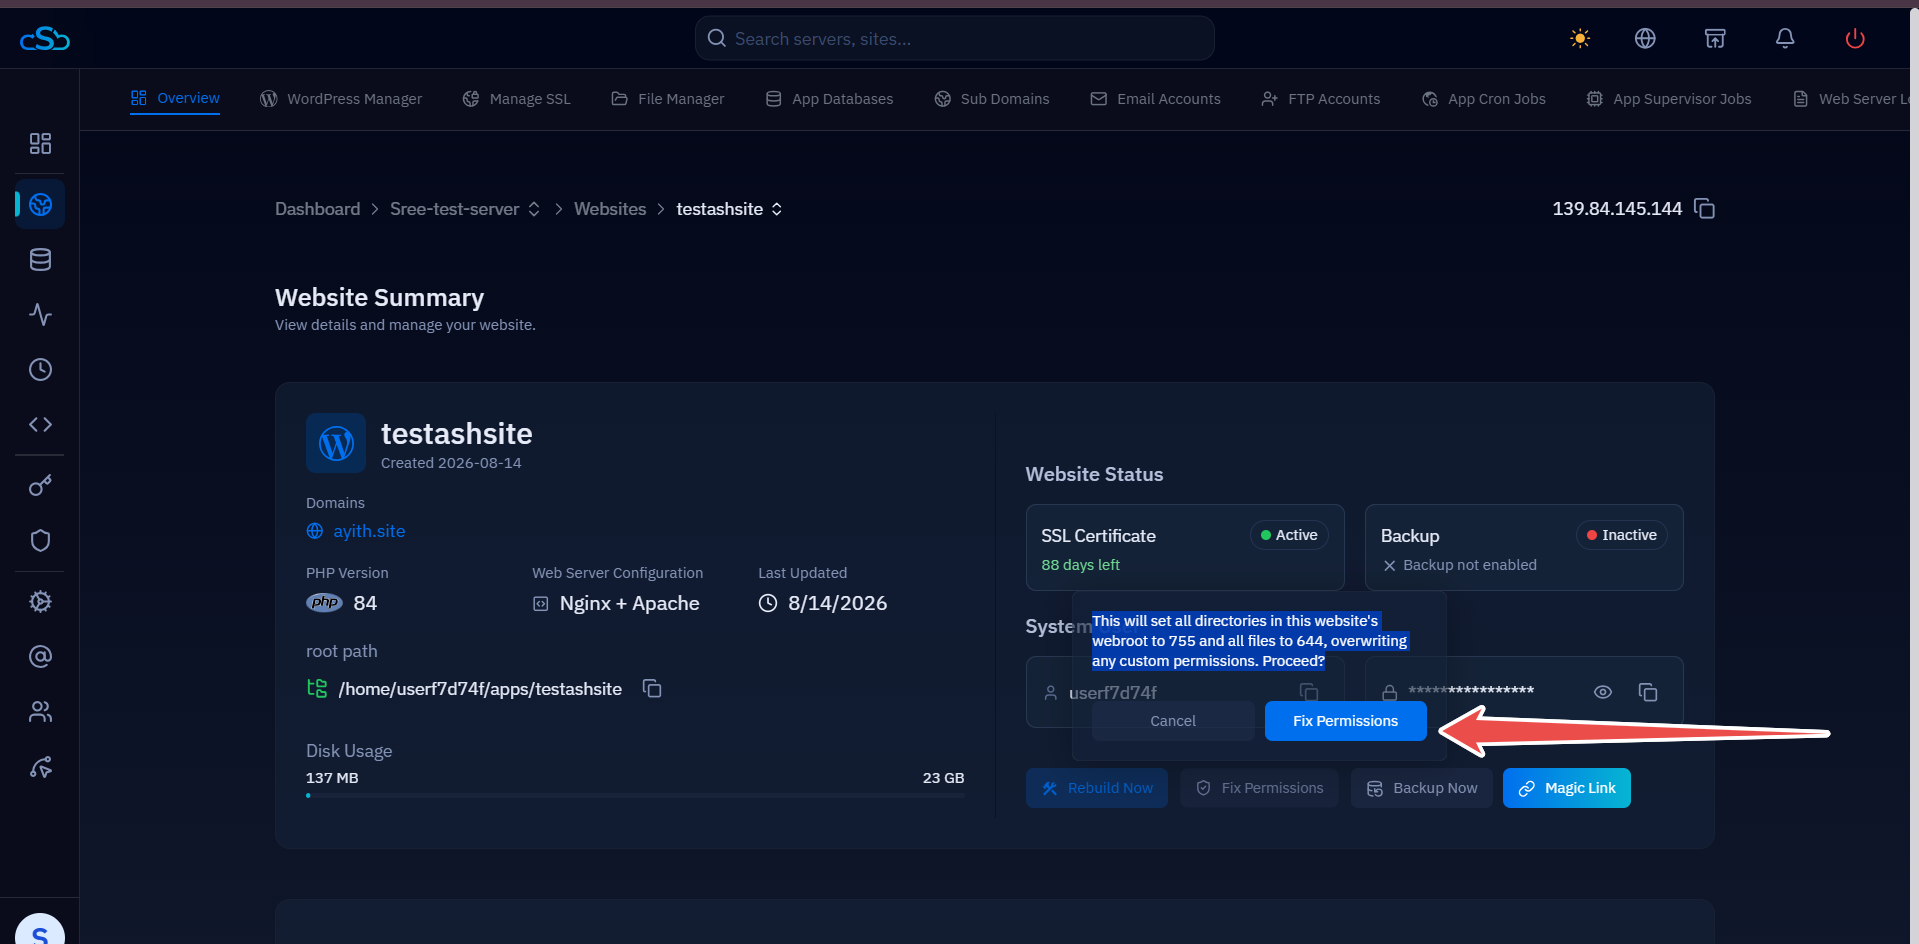
Fig. 05 — Fix Permissions confirmation dialog showing the permission changes that will be applied.
What Does Fix Permissions Do?
Once confirmed, CloudStick applies the following permissions across the selected website's webroot:
Directories — set to 755.
Files — set to 644.
Before using Fix Permissions, make sure the website does not intentionally rely on custom permissions for specific files or directories — this action overwrites any existing custom permissions across the entire webroot.