How to Install a Custom SSL Certificate in CloudStick
Overview
While CloudStick can issue free, auto-renewing Let's Encrypt certificates for any website, there are times when you need to install your own certificate instead — for example, a paid certificate from a commercial Certificate Authority such as Verisign or GoTrust, a wildcard certificate covering multiple subdomains, or a certificate mandated by your organization. CloudStick supports this directly through the Custom SSL option in the dashboard.
This guide walks through the complete process of installing a custom SSL certificate on a website using the CloudStick dashboard — from selecting your server and website, to opening Manage SSL, choosing the Custom SSL provider, and pasting your certificate, CA bundle, and private key to deploy it.
Before you begin, have your certificate files ready: the certificate (with its CA bundle / intermediate chain) and the matching private key. The certificate, CA bundle, and private key must all belong to the same certificate — a mismatched key will cause the installation to fail.
Step 1: Log In and Select Your Server
Start from the CloudStick main dashboard, where all your connected servers are listed. This is the first screen you see after logging in.
1. Log in to CloudStick: Sign in to your CloudStick account to open the main dashboard.
2. Locate your server: Find the server card for the server hosting the website you want to secure.
3. Click MANAGE: Click the MANAGE button on the server card to open the server management panel.
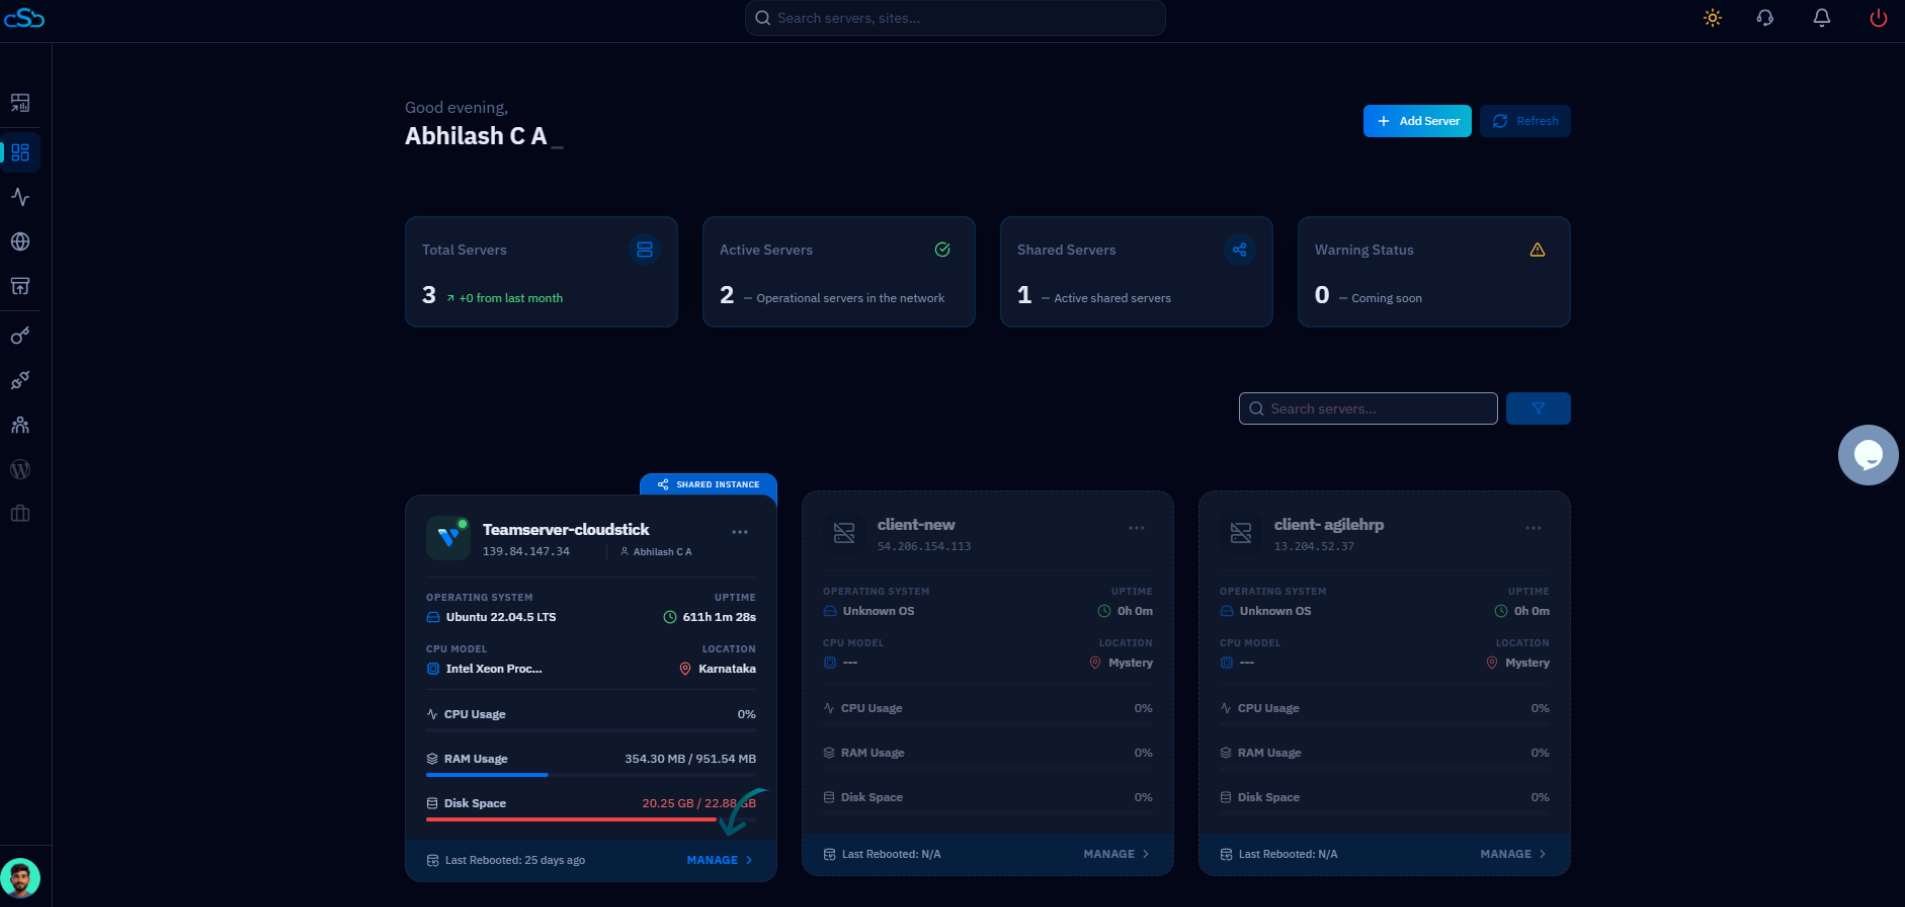
Fig. 01 — CloudStick main dashboard showing connected servers, each with a MANAGE button to open its panel.
Step 2: Open Websites
Inside the server management panel, you can see all the resources hosted on this server. Navigate to the Websites section to find the site you want to secure.
1. Scroll to Server Resources: In the server overview, locate the Server Resources section showing Websites, Databases, Supervisors, and Cron Jobs.
2. Click Websites: Click the Websites resource card to view every website hosted on this server.
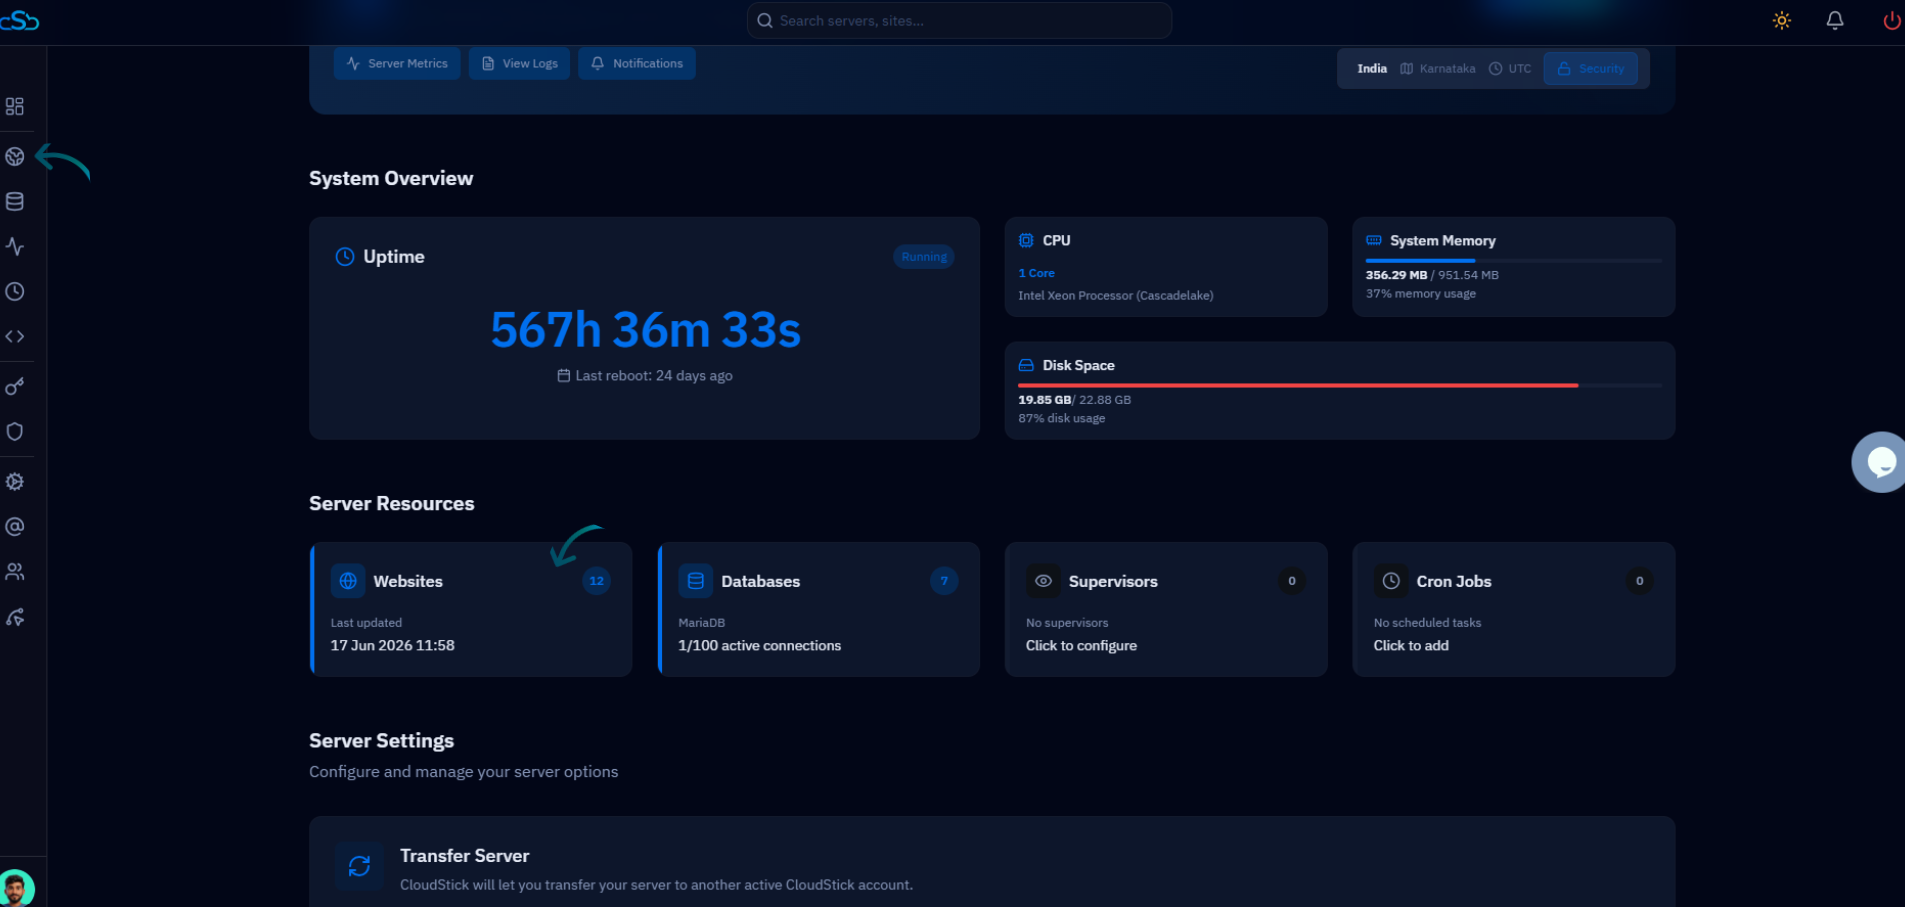
Fig. 02 — Server overview with the Websites resource card highlighted in the Server Resources section.
Step 3: Select the Website
From the list of hosted web applications, choose the specific website on which you want to install the custom SSL certificate.
1. Find your site: In the WebApp List, locate the website you want to secure by its name or domain.
2. Open the website: Click the website to open its management page, where all per-site settings — including SSL — are available.
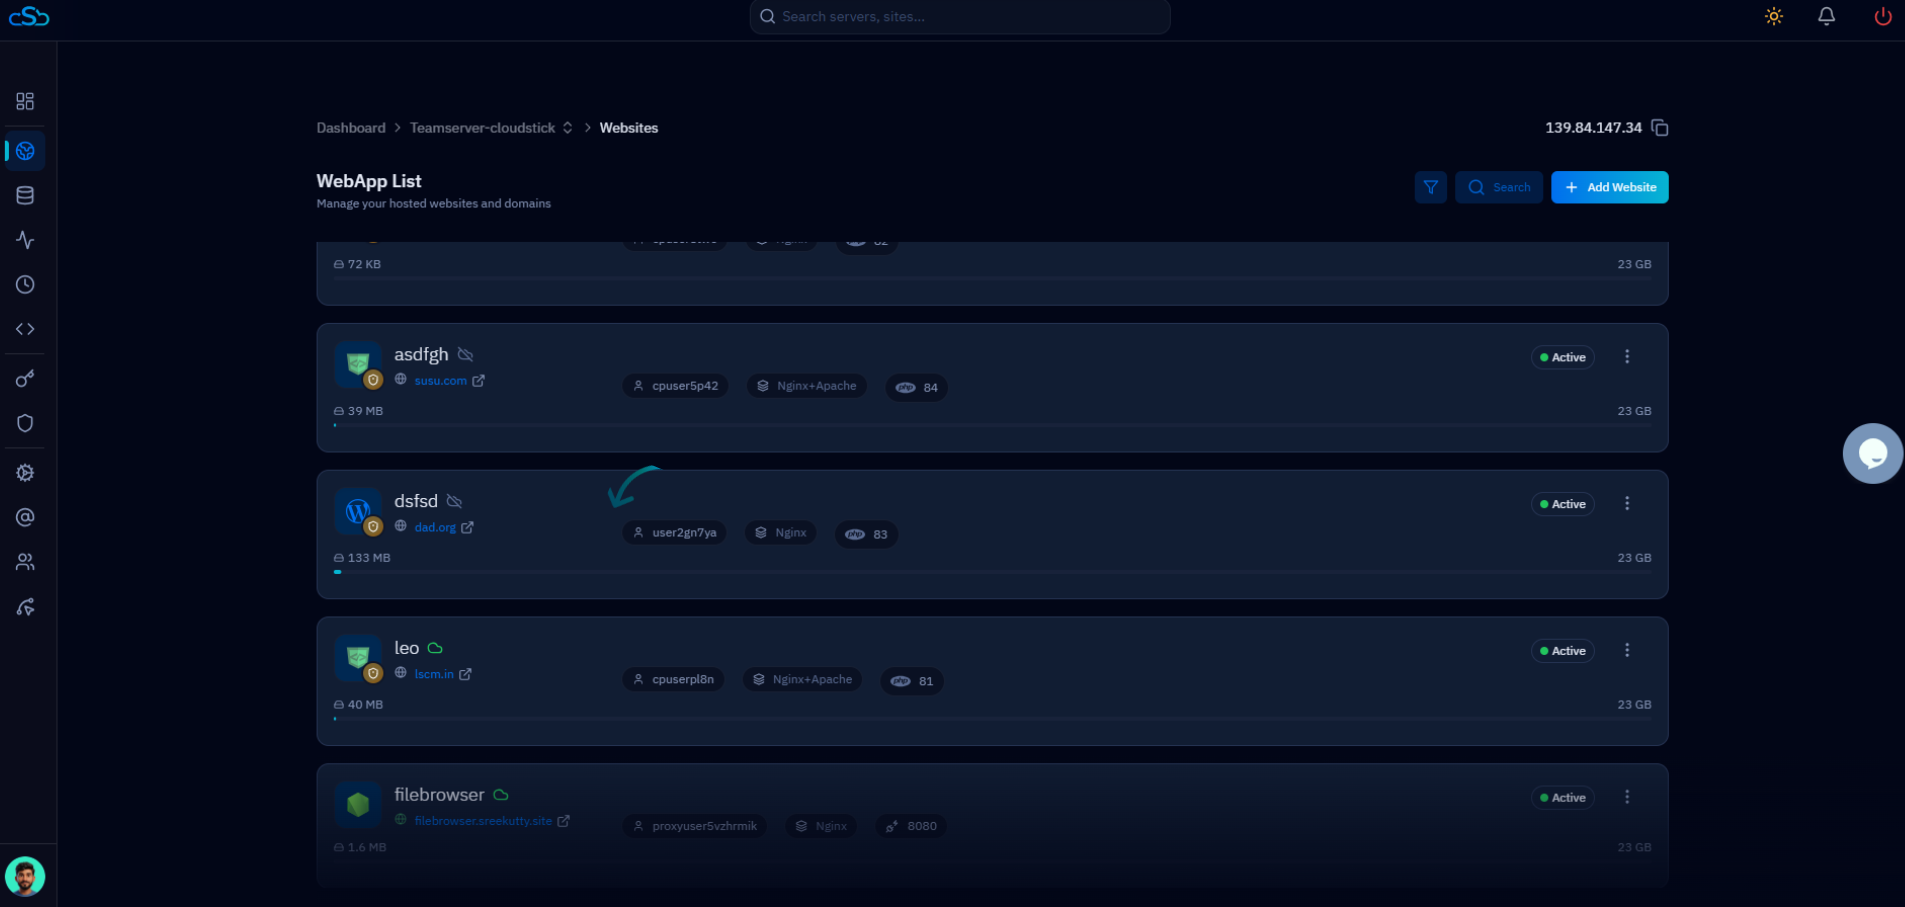
Fig. 03 — The WebApp List showing all websites hosted on the server; click one to open its management page.
Step 4: Open Manage SSL and Deploy New SSL
Each website in CloudStick has its own SSL Management section, accessible from the top navigation tabs of the website page. This is where you start a new certificate deployment.
1. Click Manage SSL: In the top navigation tabs of the website page, click the Manage SSL tab to open the SSL Management section.
2. Click Deploy New SSL: If no certificate is installed yet, the page shows 'No SSL found'. Click the Deploy New SSL button to open the SSL configuration form.
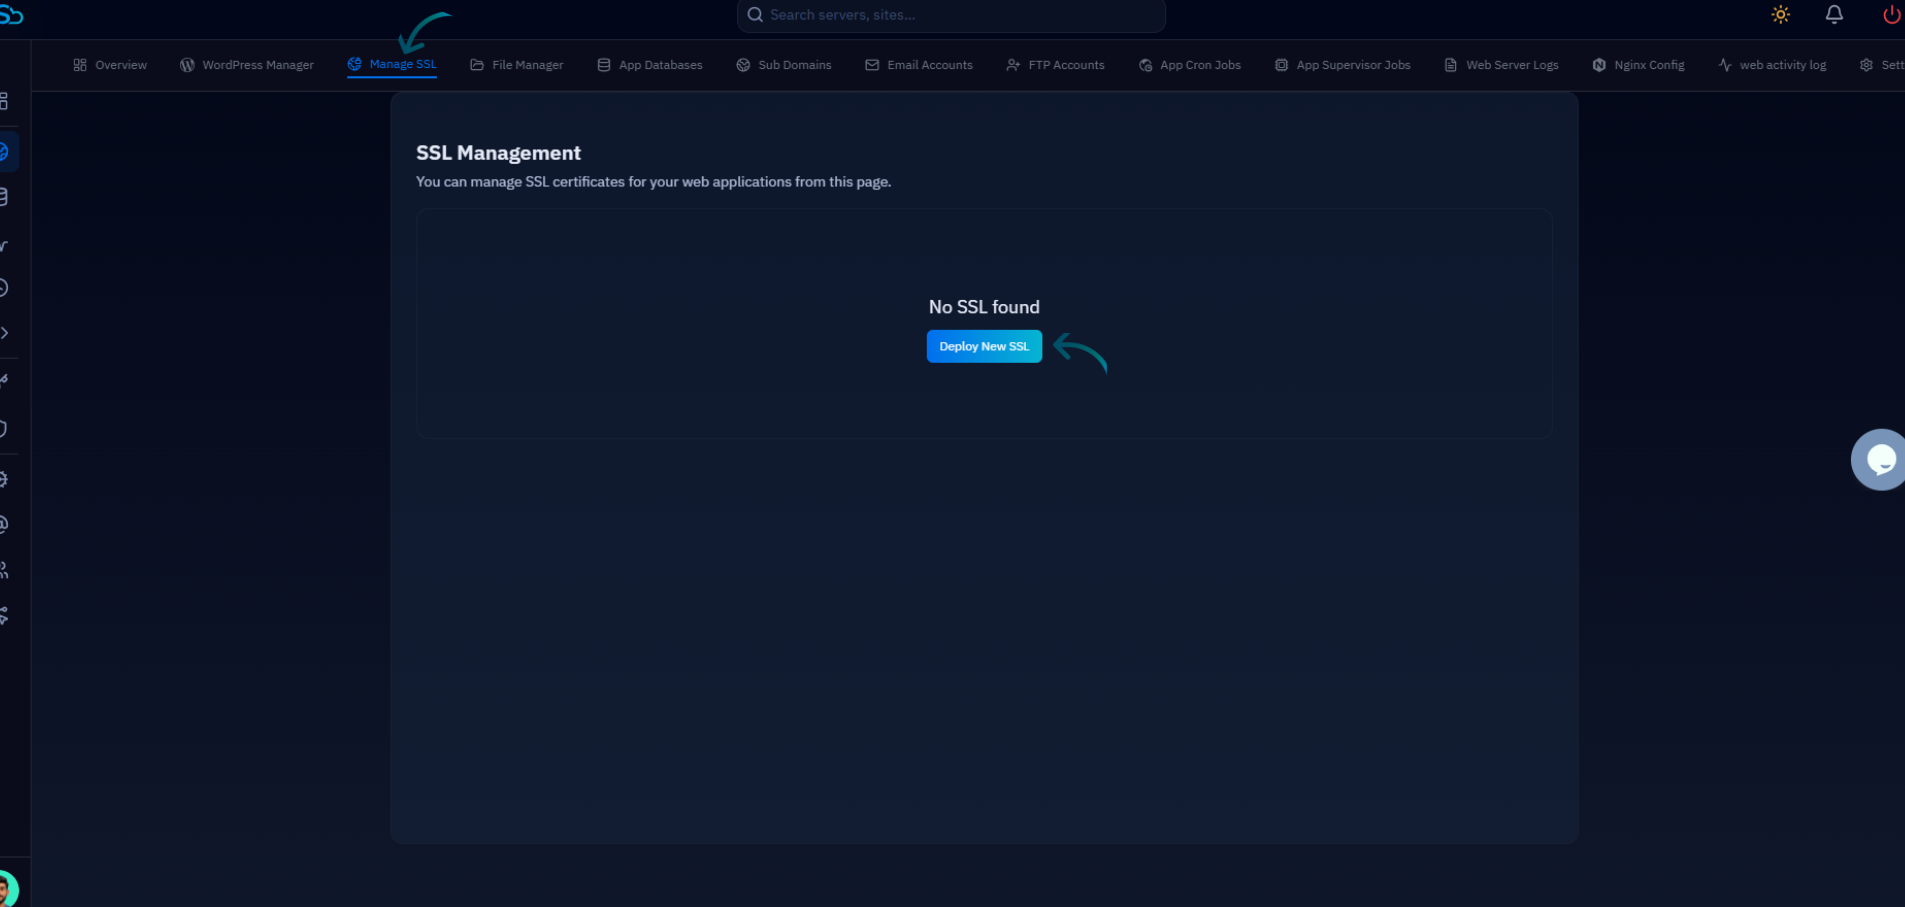
Fig. 04 — The SSL Management section with the Manage SSL tab active and the Deploy New SSL button highlighted.
Step 5: Select Custom SSL and Add Your Certificate
In the SSL configuration form, switch the provider to Custom SSL, paste your certificate details, and save. CloudStick installs the certificate on the website and reflects its status in the SSL Management section.
Select the Custom SSL provider
SSL Provider: Under SSL Provider, select Custom (Verisign, GoTrust, etc.) to reveal the Custom Certificate fields. The default option, Let's Encrypt (Free Certificate), is for auto-issued free certificates instead.
Enter your certificate details
Certificate and CA Bundle: Paste the full certificate followed by the CA bundle (the intermediate chain) into this field.
Private Key: Paste the matching private key into the Private Key field.
Access Method: Choose HTTPS + HTTP to allow both protocols (recommended behind Cloudflare to avoid redirect loops) or HTTPS Only to force all traffic to HTTPS.
After pasting your certificate details, click Save SSL Configuration to install the custom certificate on the website.
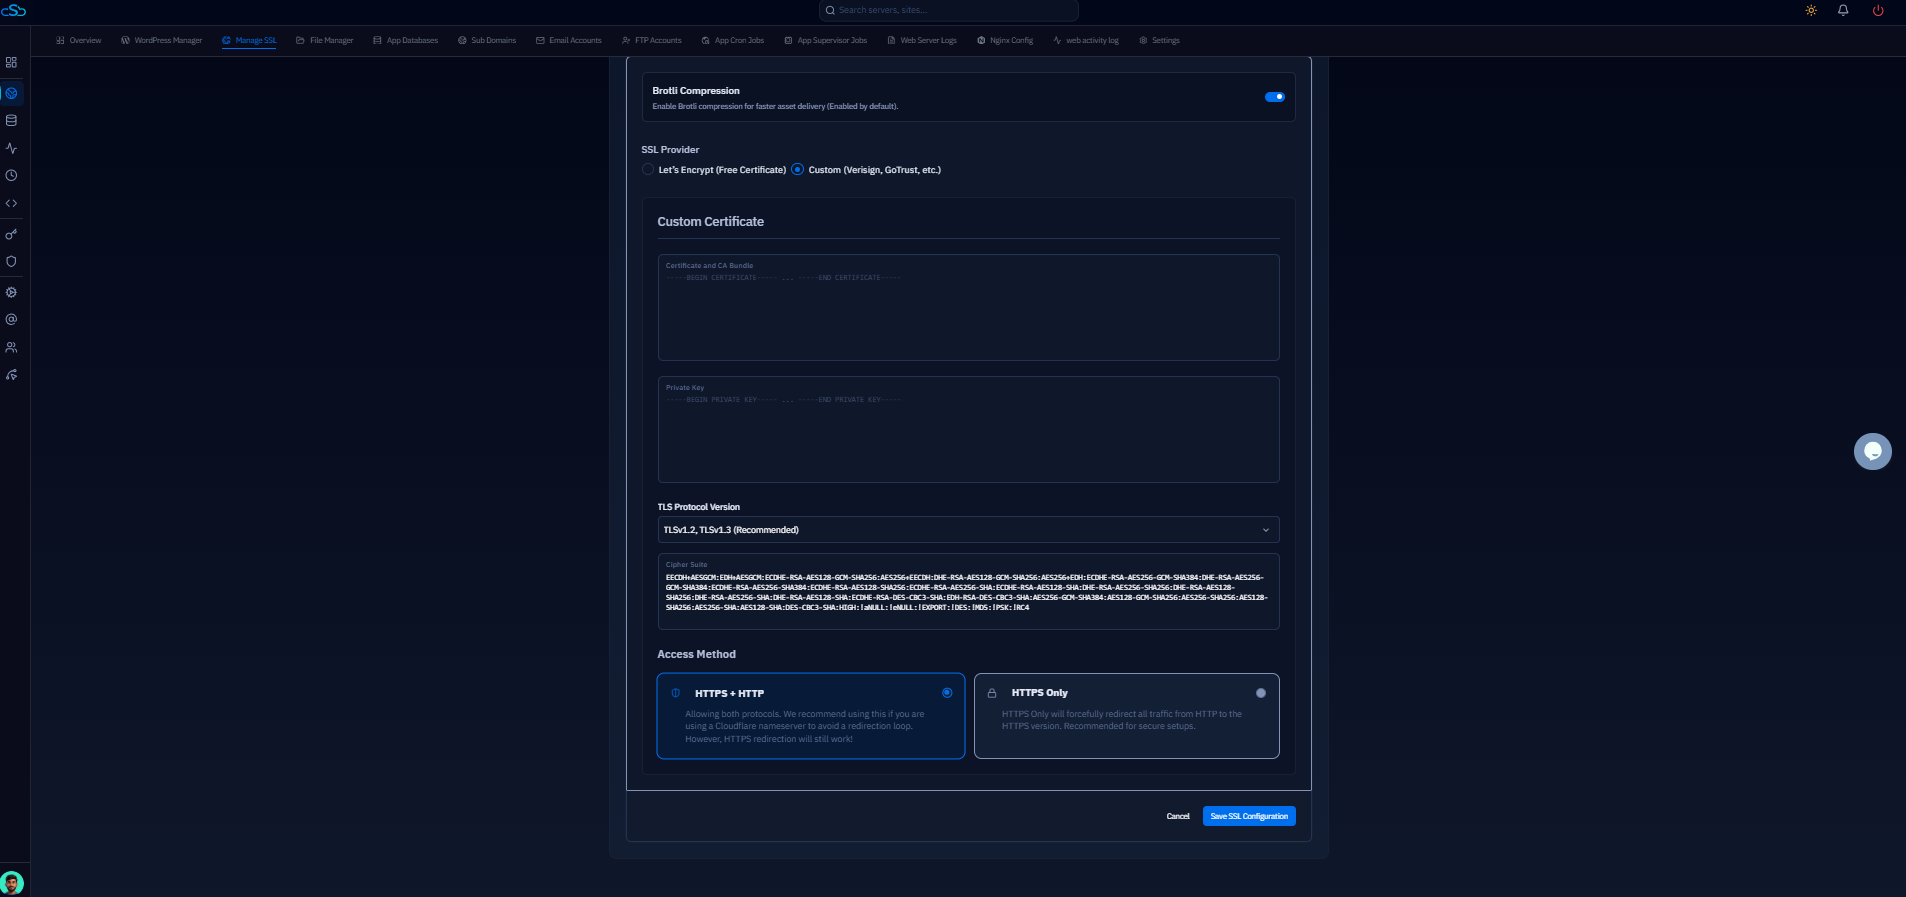
Fig. 05 — The Custom Certificate form with the Custom SSL provider selected, showing the Certificate and CA Bundle and Private Key fields.
Once the installation completes, the certificate's status is displayed in the SSL Management section, confirming that your custom SSL certificate is now active on the website.
Ensure that the Certificate, CA Bundle, and Private Key all belong to the same SSL certificate. An invalid or mismatched certificate and private key will cause the installation to fail.