How to Integrate GitHub with CloudStick
Overview
CloudStick's Git Deployment feature lets you deploy your website straight from a GitHub repository, so shipping a change is a git push instead of a manual file upload. Integrating GitHub with CloudStick has two halves: authorizing CloudStick on GitHub's side with a scoped fine-grained personal access token, then linking that token to your CloudStick account under Third-Party Integrations.
This guide covers the full integration end to end: generating the token from your GitHub account settings, adding it as a GitHub integration in CloudStick, and then managing the connected repository — branches, commits, and Auto-Deploy — from the Website Summary page.
Treat your GitHub personal access token like a password. GitHub displays the token value only once, immediately after it's generated — if you navigate away before copying it, you'll have to generate a new one.
Step 1: Log In to GitHub
The token that authorizes CloudStick is issued by GitHub itself, so this process starts on github.com rather than in the CloudStick dashboard.
Go to github.com and sign in with the account that owns (or has access to) the repository you want to deploy.
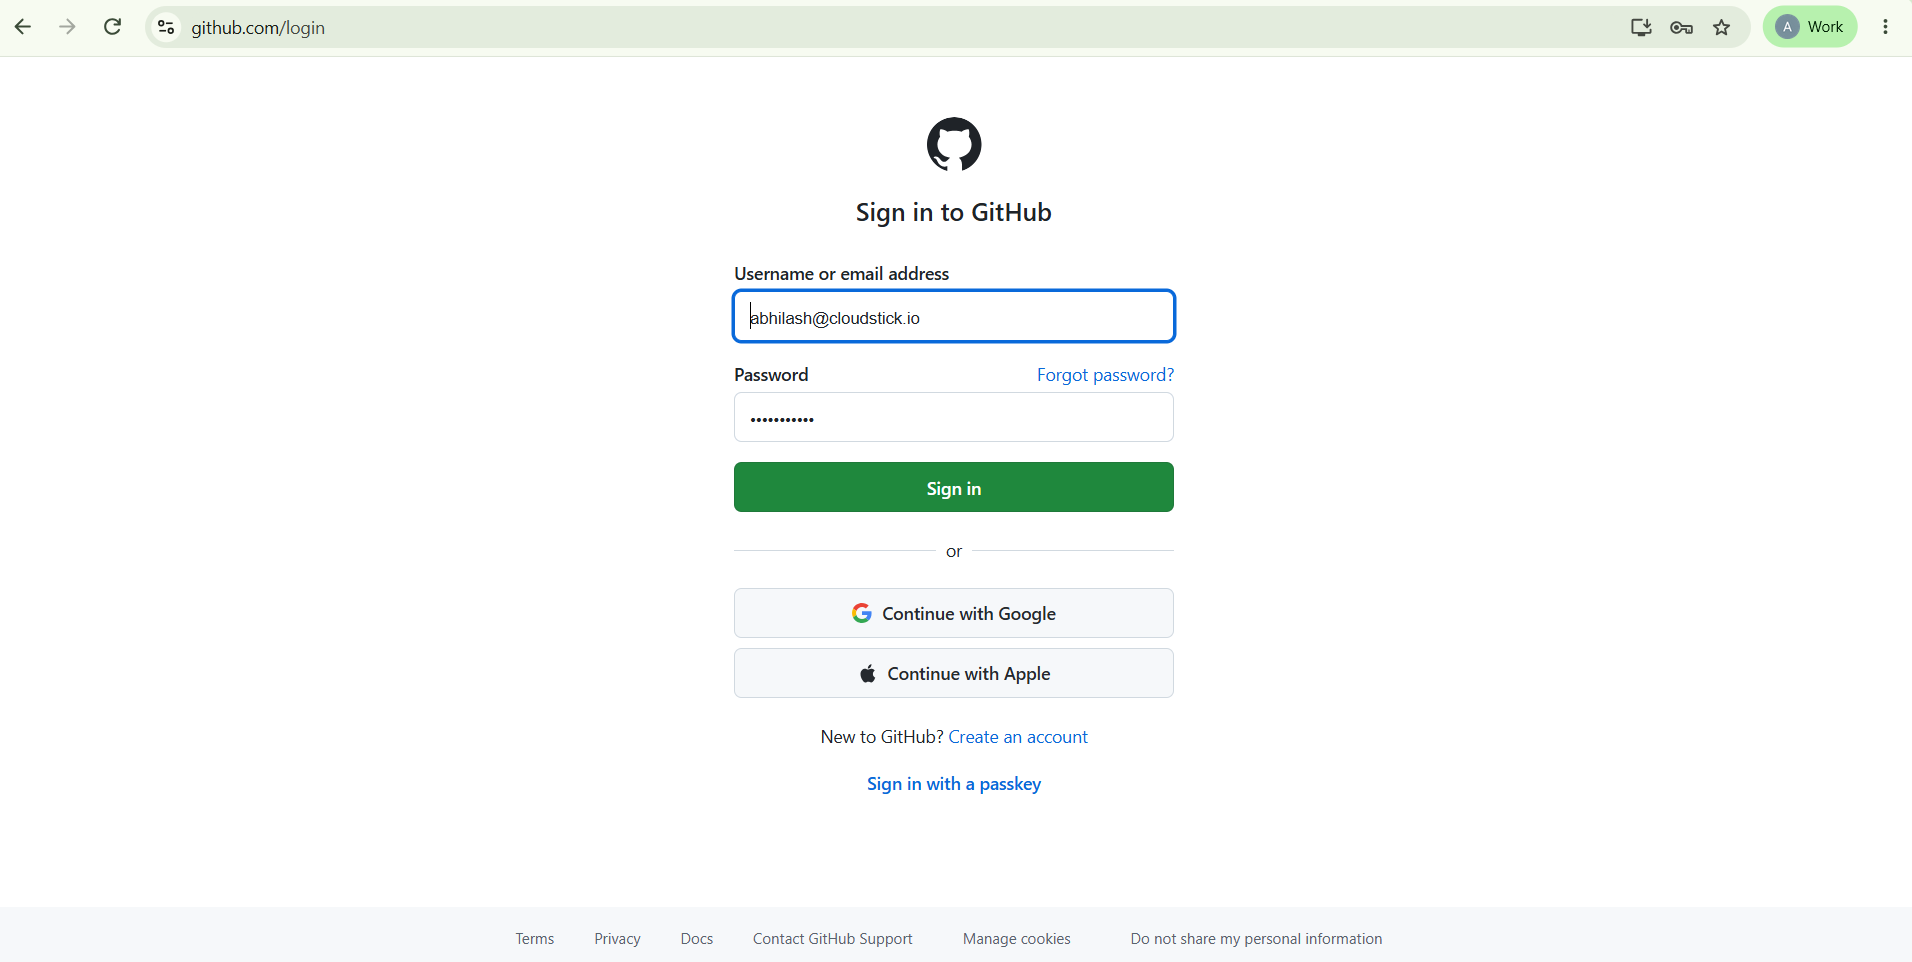
Fig. 01 — Signing in to GitHub with your account credentials.
Step 2: Open Your Profile
Personal access tokens are managed from your account settings, which live one click below your profile picture.
Click your profile picture in the top-right corner of any GitHub page.
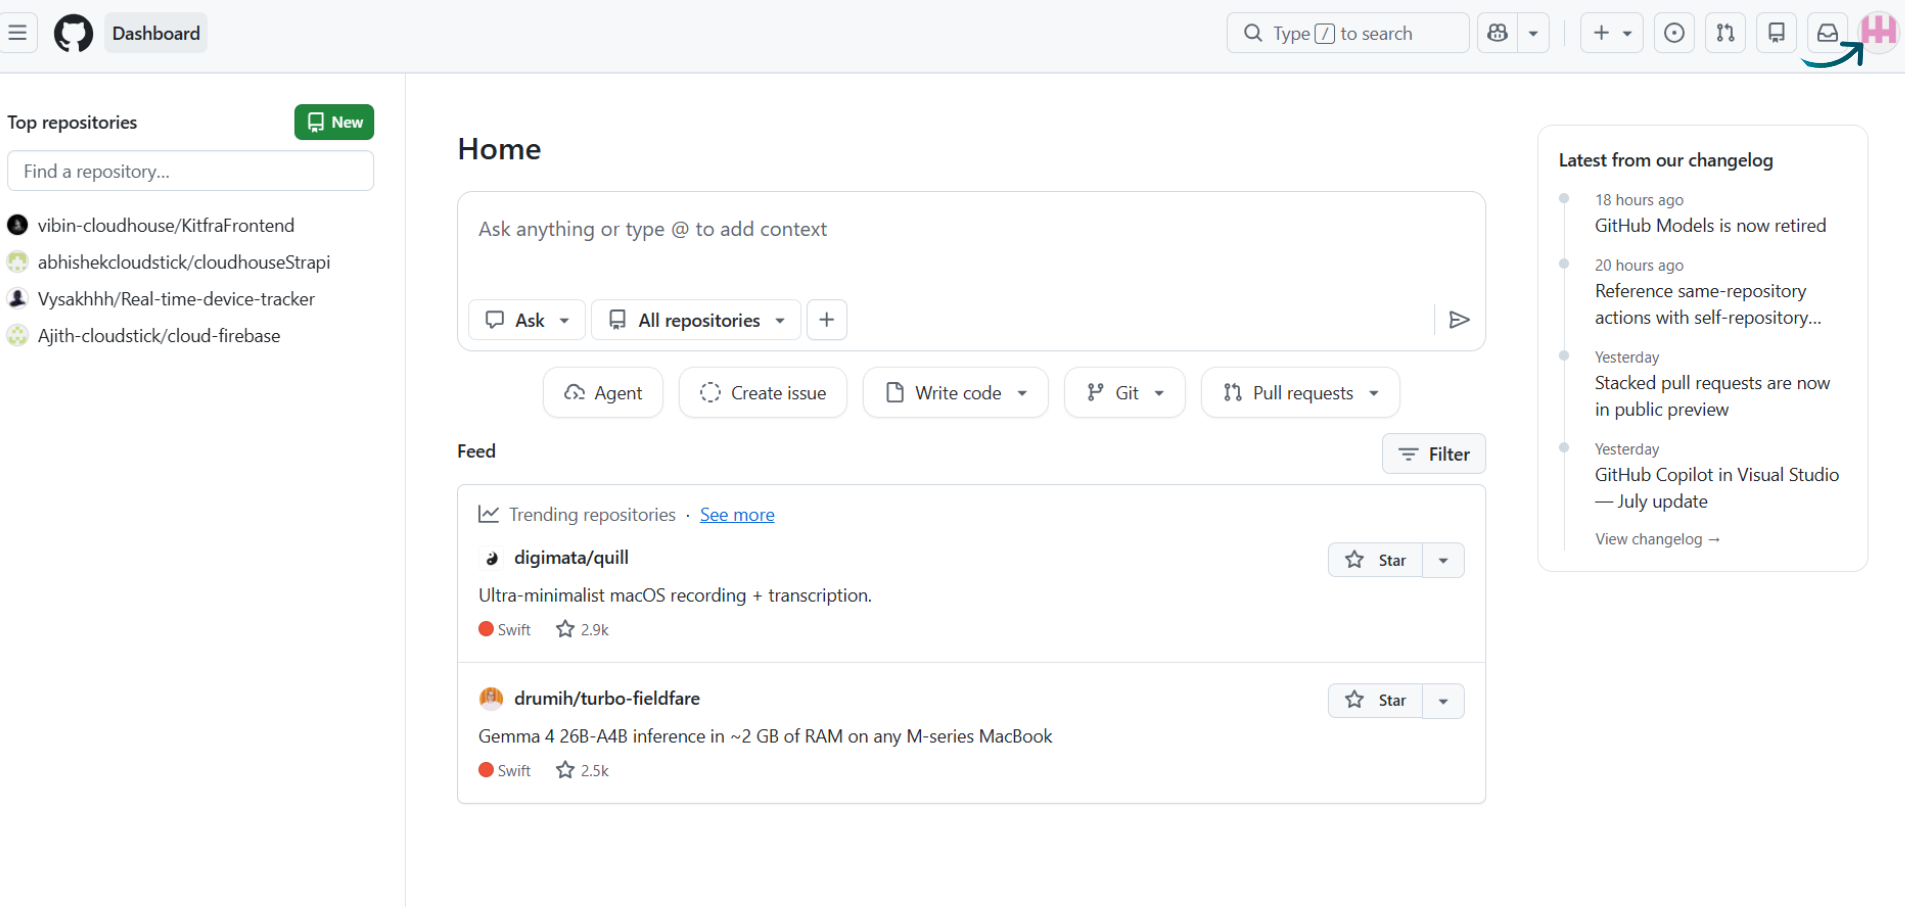
Fig. 02 — The GitHub dashboard with the profile picture highlighted in the top-right corner.
Step 3: Open Settings
The profile dropdown gives quick access to your account, organizations, and settings.
From the dropdown menu, click Settings.
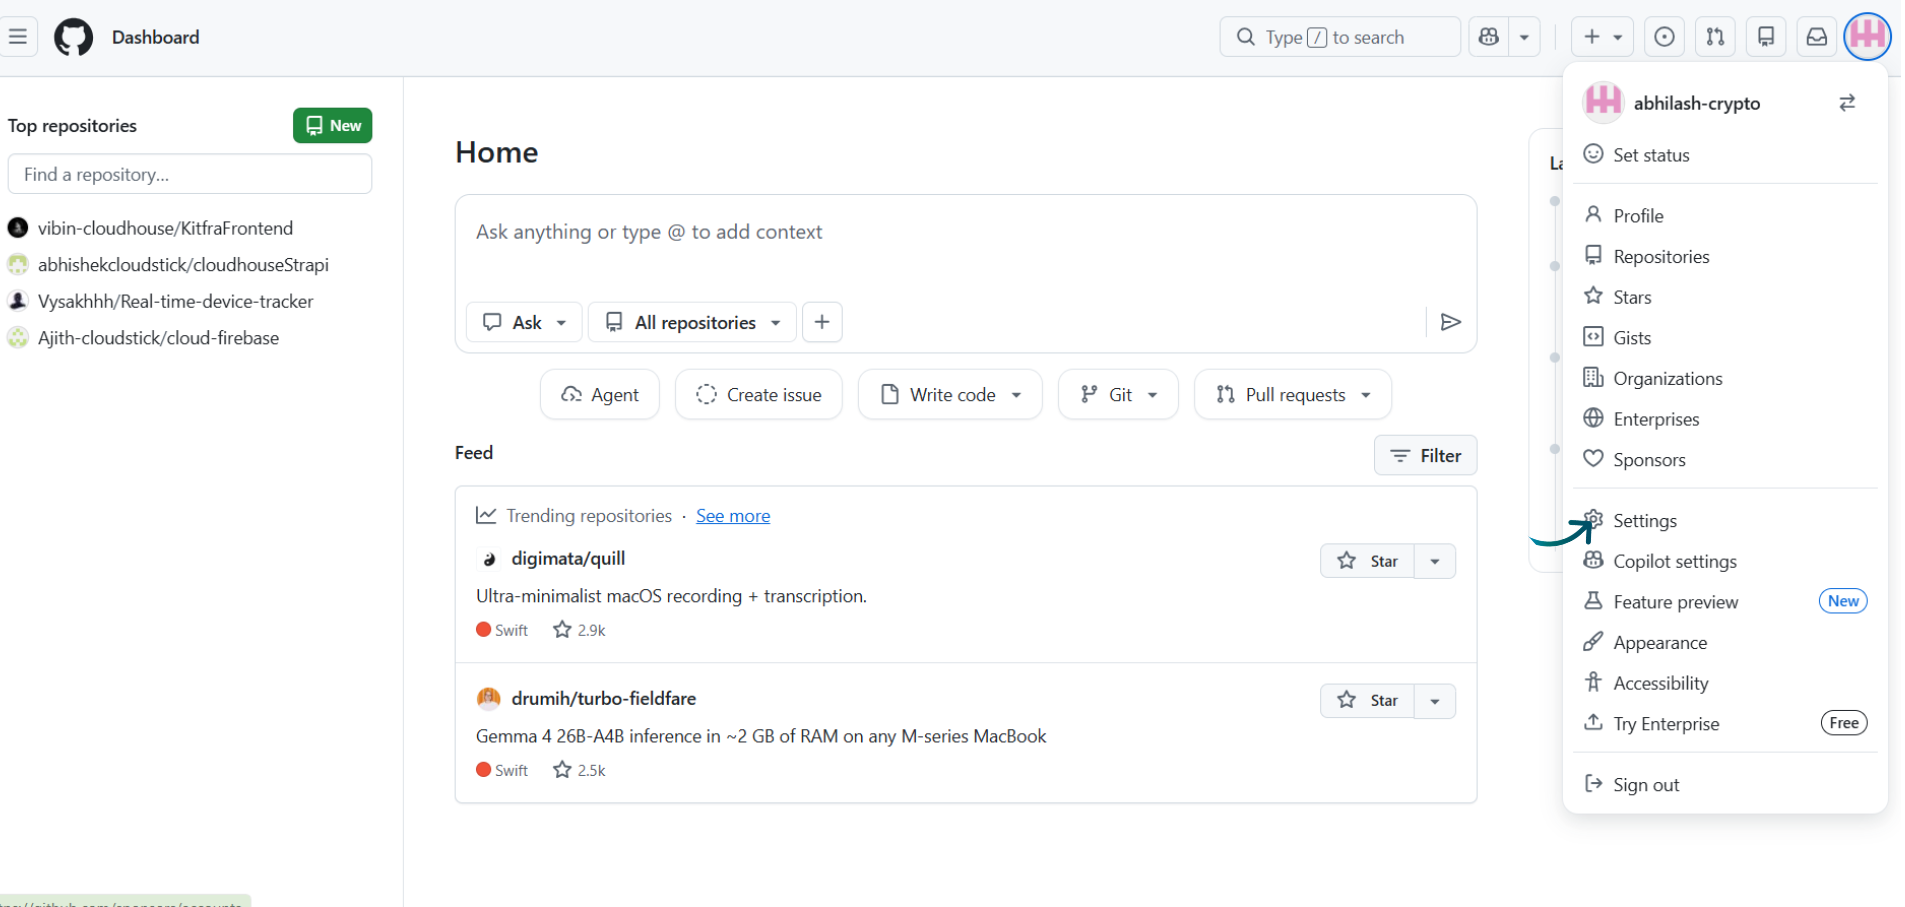
Fig. 03 — The GitHub profile dropdown menu with Settings highlighted.
Step 4: Open Credentials
The Settings page groups every account option into a left-hand sidebar. Tokens are managed from the Credentials section, under Access.
In the left sidebar of your Settings page, scroll down and click Credentials.
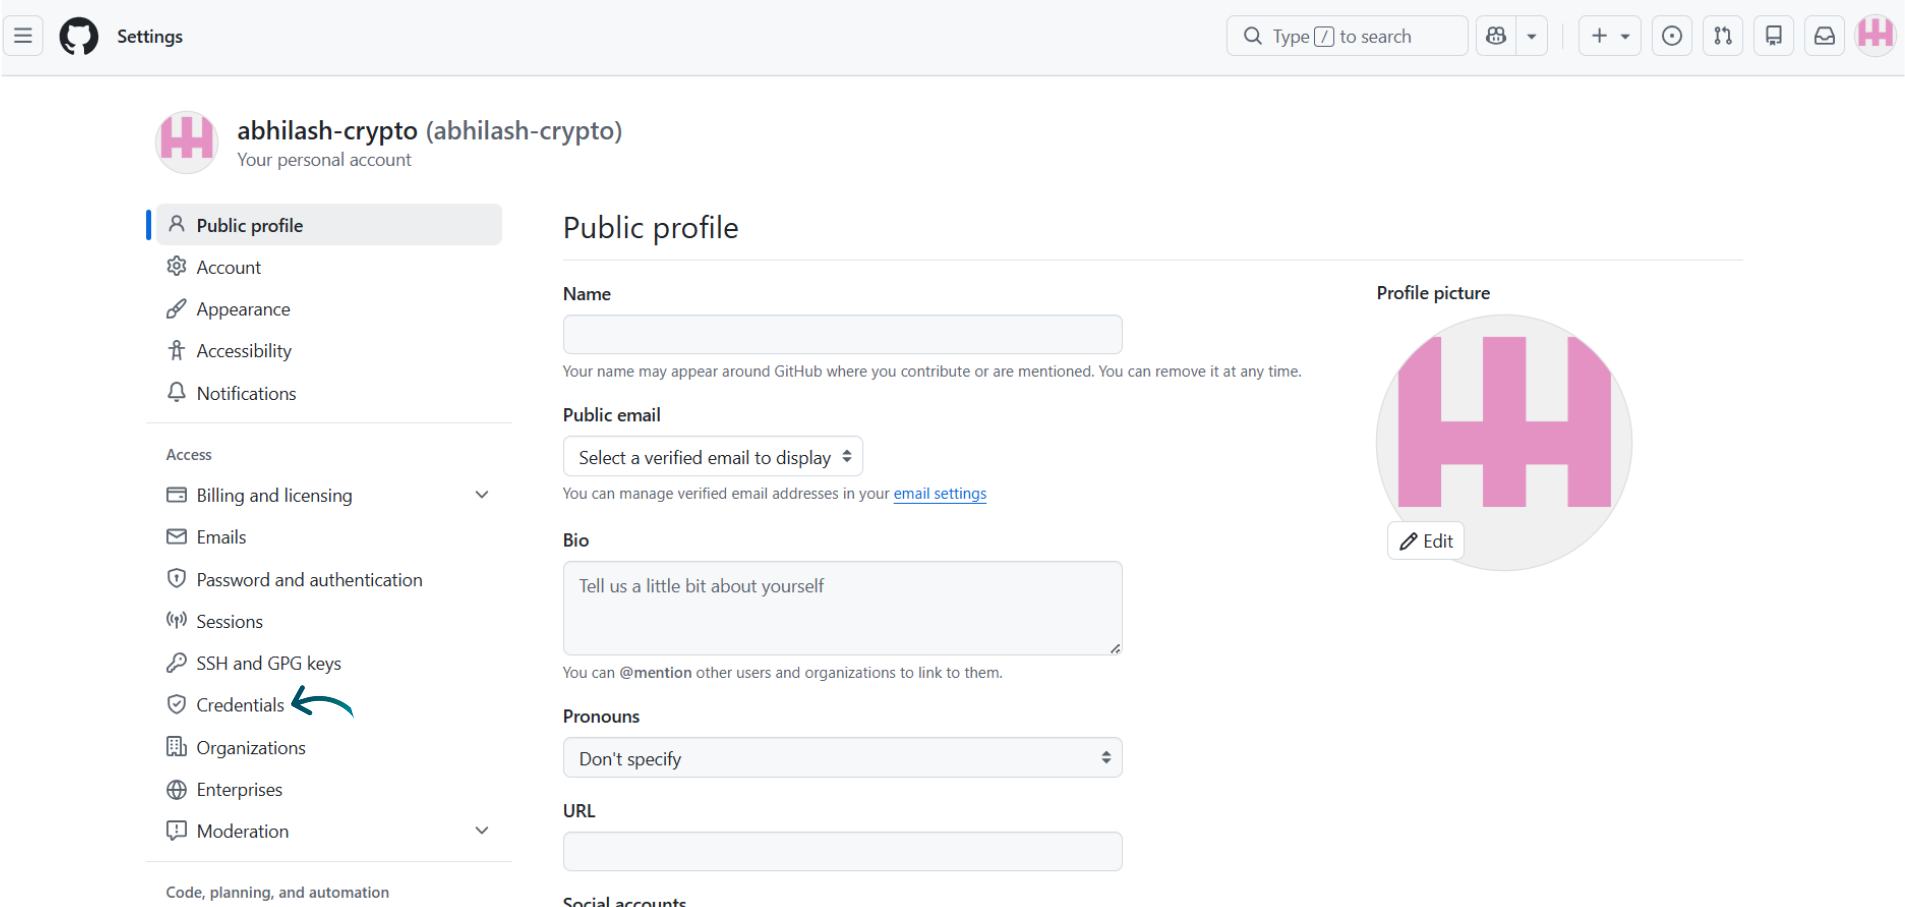
Fig. 04 — The Public profile settings page with Credentials highlighted in the left sidebar.
Step 5: Open Fine-Grained Tokens
The Credentials overview lists every type of access token and authorization tied to your account. Use a fine-grained token for CloudStick, since it lets you scope access to specific repositories instead of granting blanket account access.
From the Credentials overview, select Fine-grained tokens under Personal access tokens.
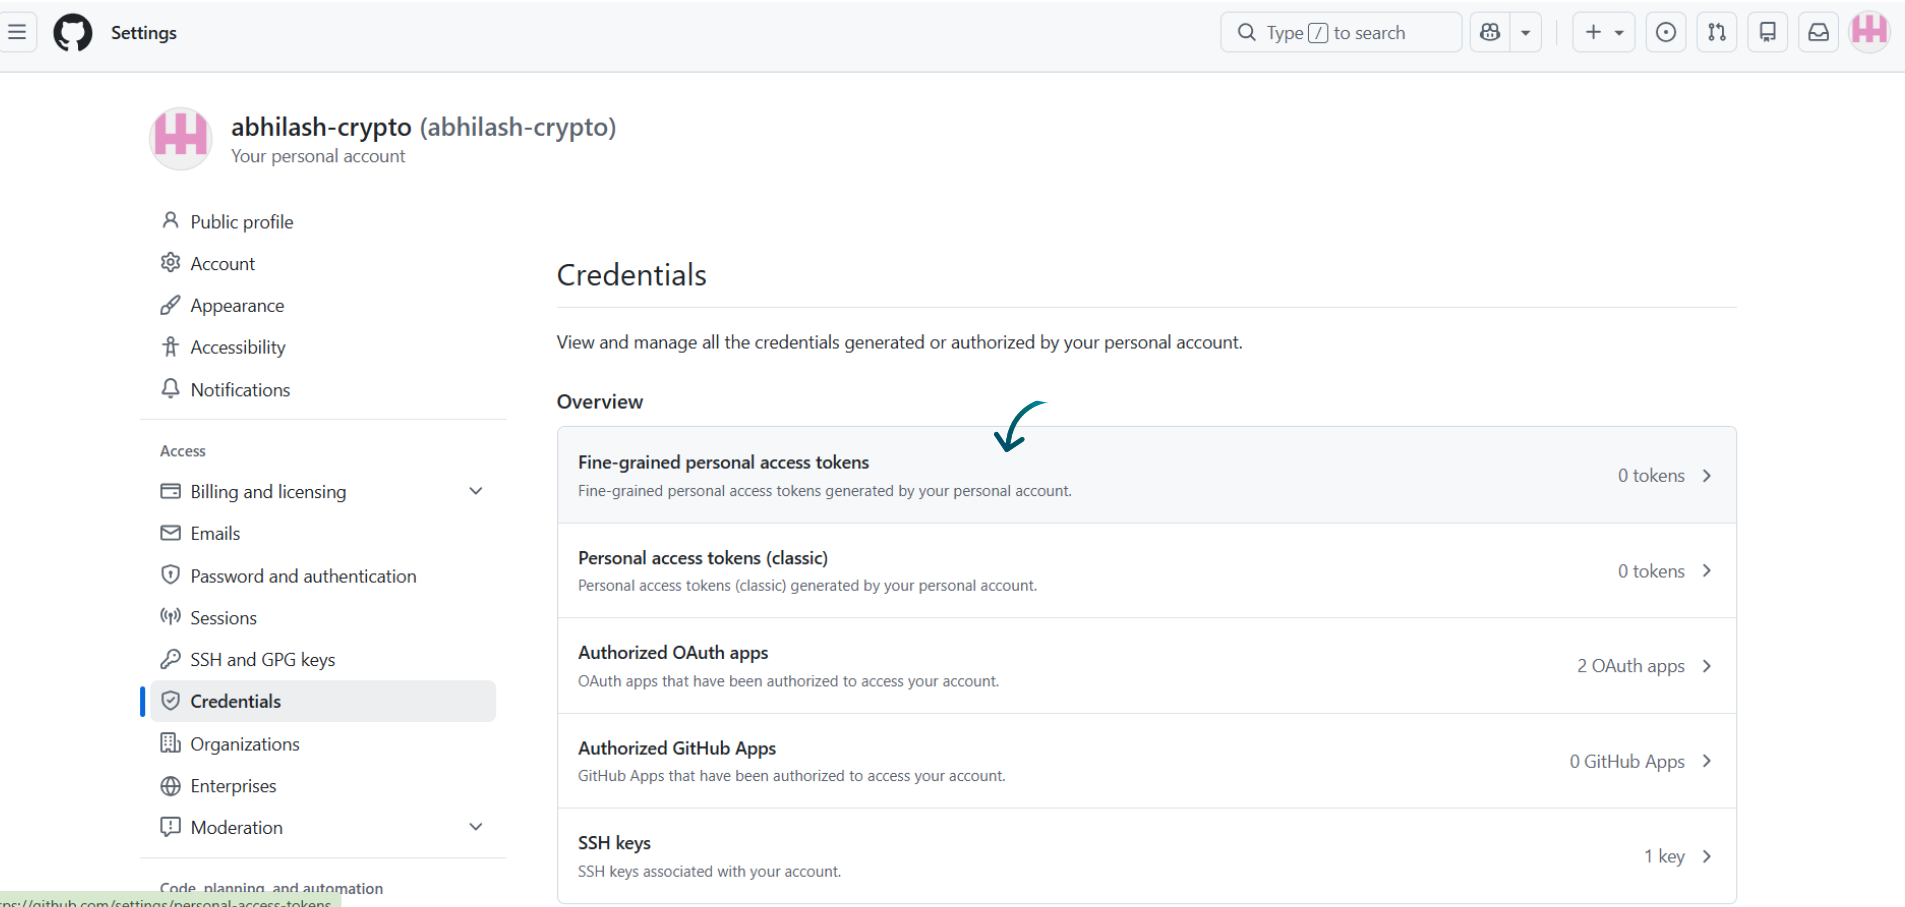
Fig. 05 — The Credentials overview page, with Fine-grained personal access tokens selected.
Step 6: Generate a New Token
If you haven't created a fine-grained token before, this page shows an empty state. Generating one here issues the credential CloudStick will use to authenticate with GitHub.
Click Generate new token to open the token configuration form.
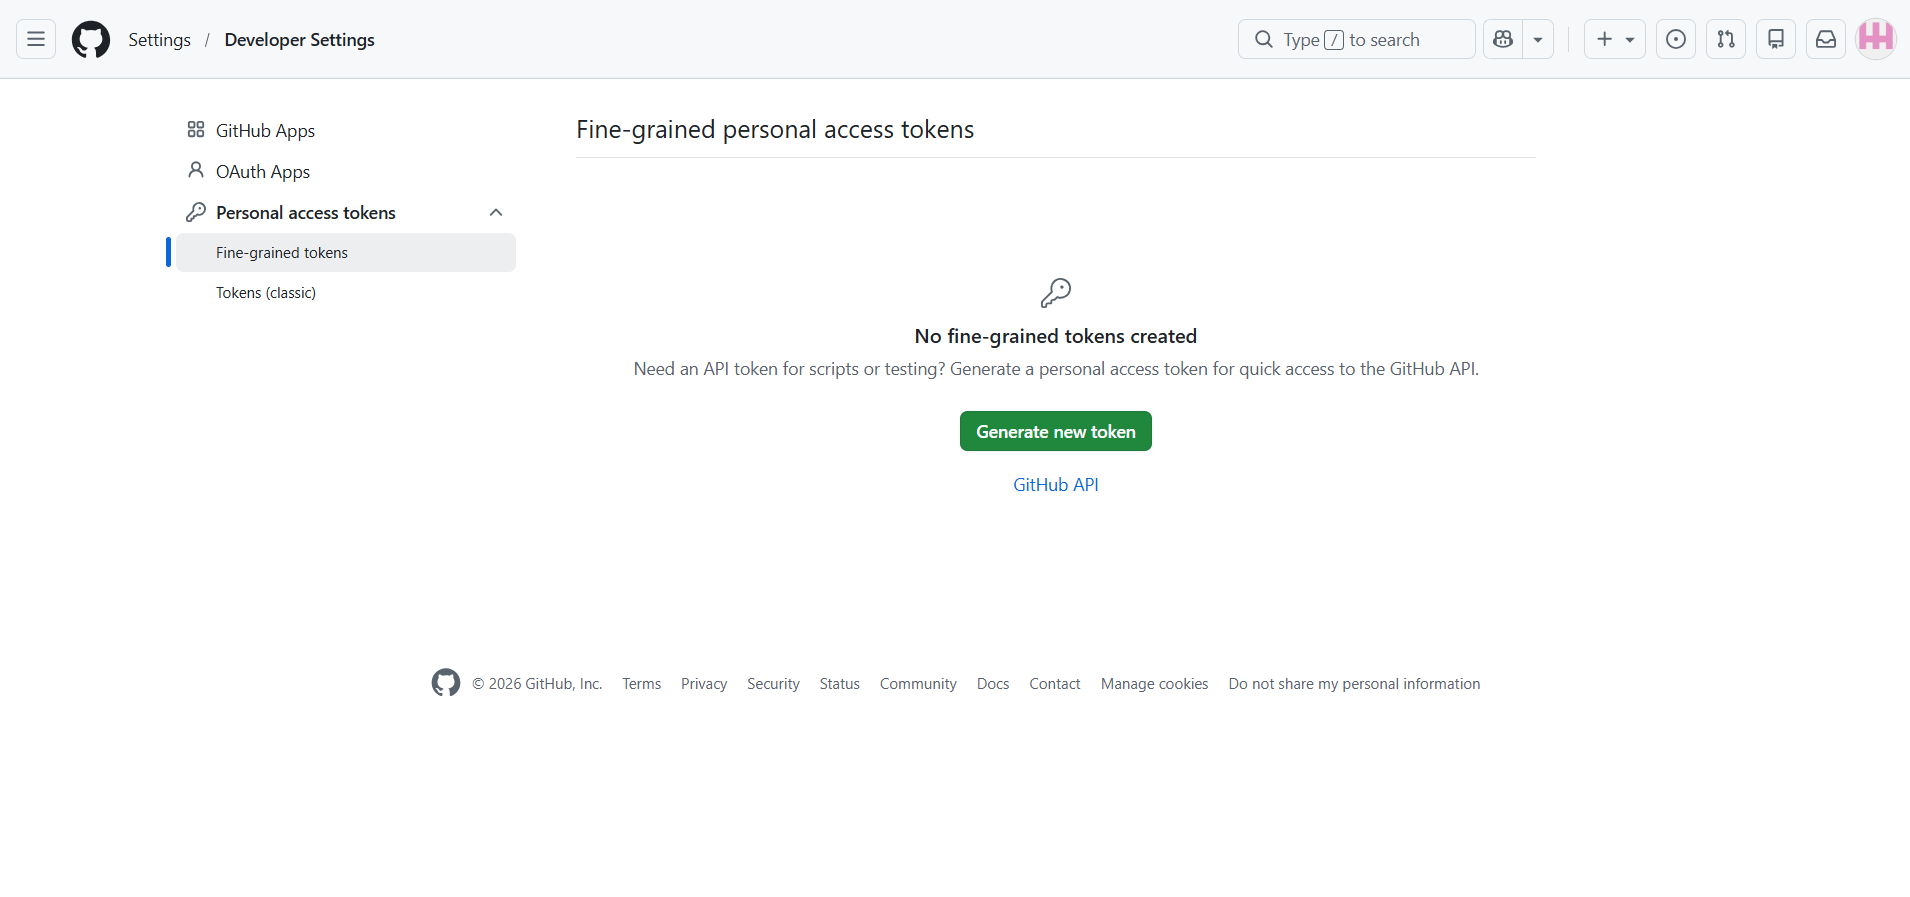
Fig. 06 — The Fine-grained personal access tokens page before any tokens have been created.
Step 7: Configure and Generate the Token
This form defines exactly what the token can do and for how long. Scoping it correctly keeps your account secure while giving CloudStick everything it needs to deploy your code.
Token name: Enter a name that identifies its purpose, for example CloudStick Integration.
Expiration: Select an expiration period that fits your workflow — you can always generate a new token later.
Repository access: Choose All repositories, or Only select repositories if you want to limit CloudStick's access to a specific project.
Repository permissions: Grant the permissions your deployment requires, such as Contents (Read and Write).
Once everything is configured, click Generate token.
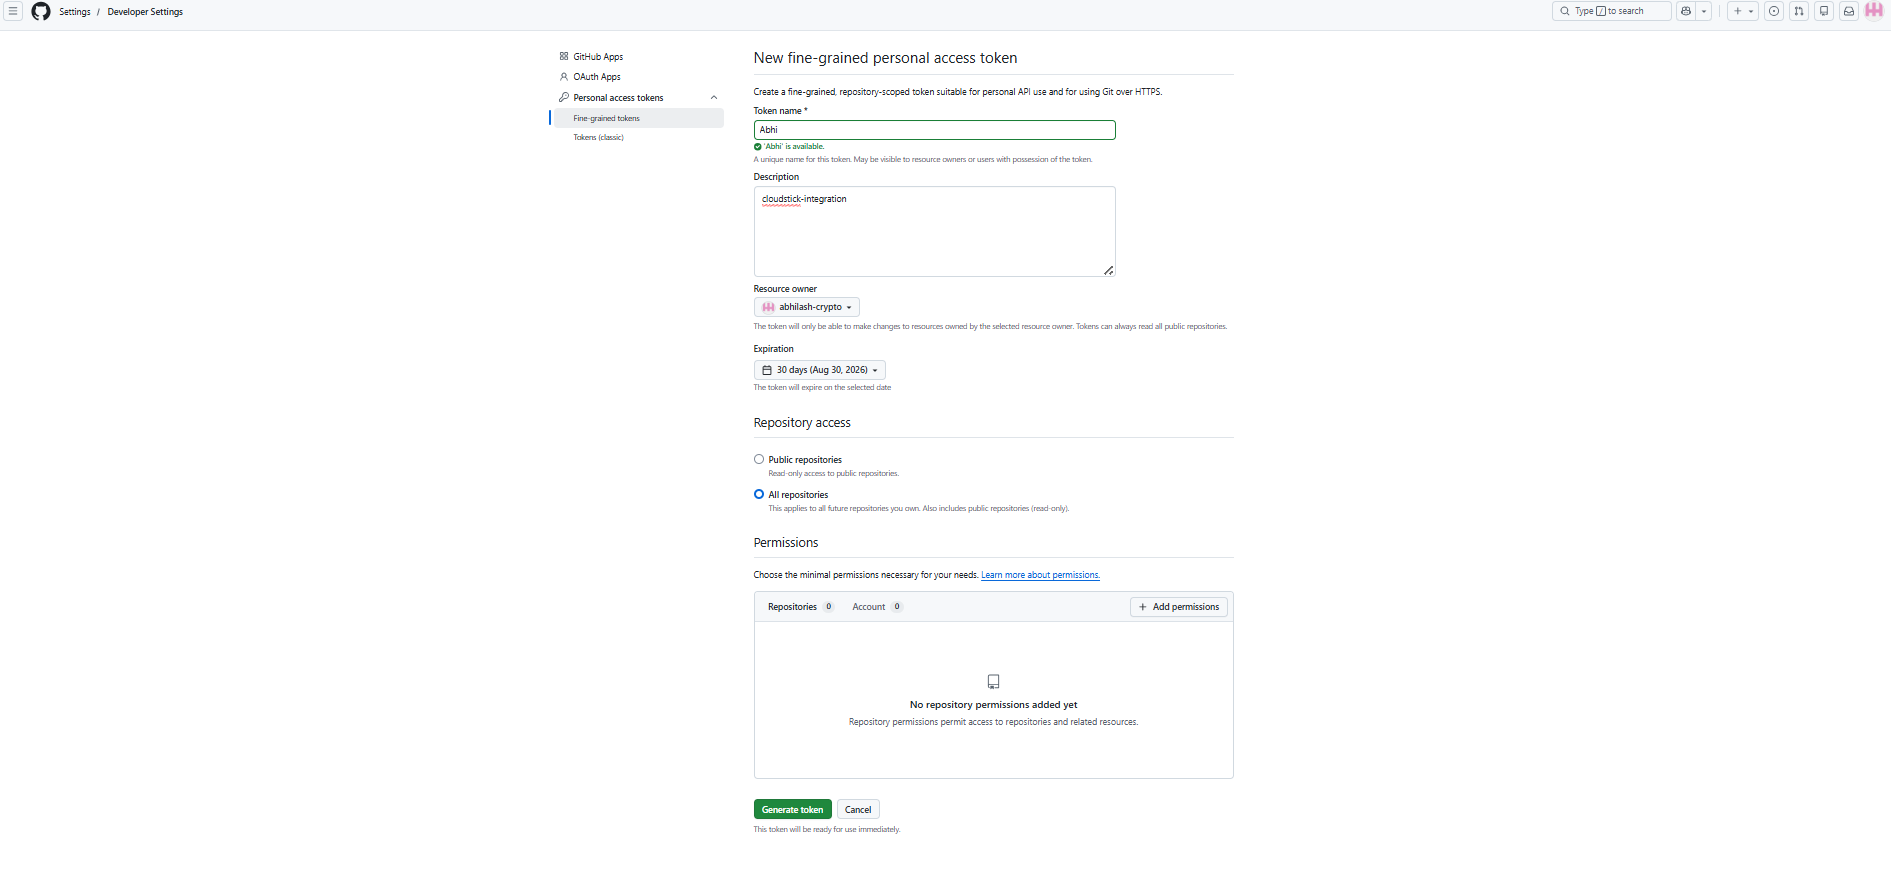
Fig. 07 — The New fine-grained personal access token form with repository access and permissions.
GitHub will display the token only once. Copy it immediately using the copy icon next to the token string and store it somewhere safe — you'll paste it into CloudStick in Step 12.
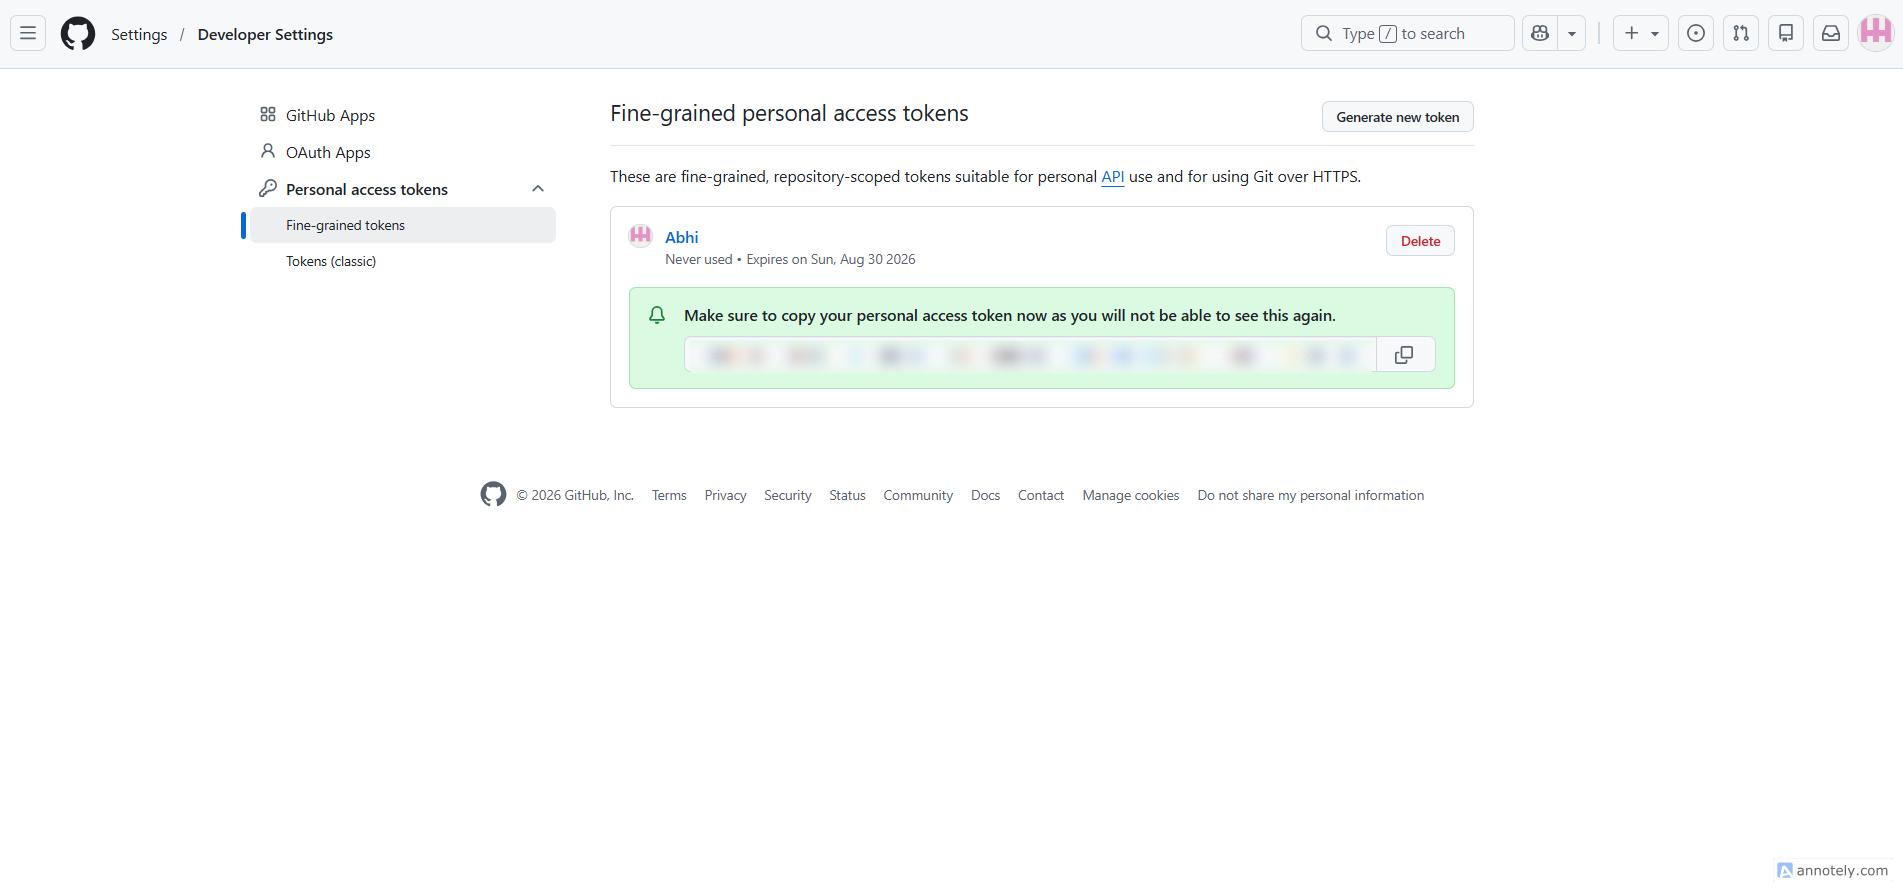
Fig. 08 — The generated fine-grained personal access token, shown once on GitHub (token value redacted here for security).
Step 8: Log In to CloudStick
With your token copied, switch over to CloudStick to link your GitHub account.
Sign in to your CloudStick account to open the main dashboard.
Step 9: Open Third-Party Integrations
Every external provider connection — Cloudflare, GitHub, GitLab, Bitbucket, and more — is managed from one place in CloudStick.
From the left-hand navigation, click the 3rd Party Integration icon.
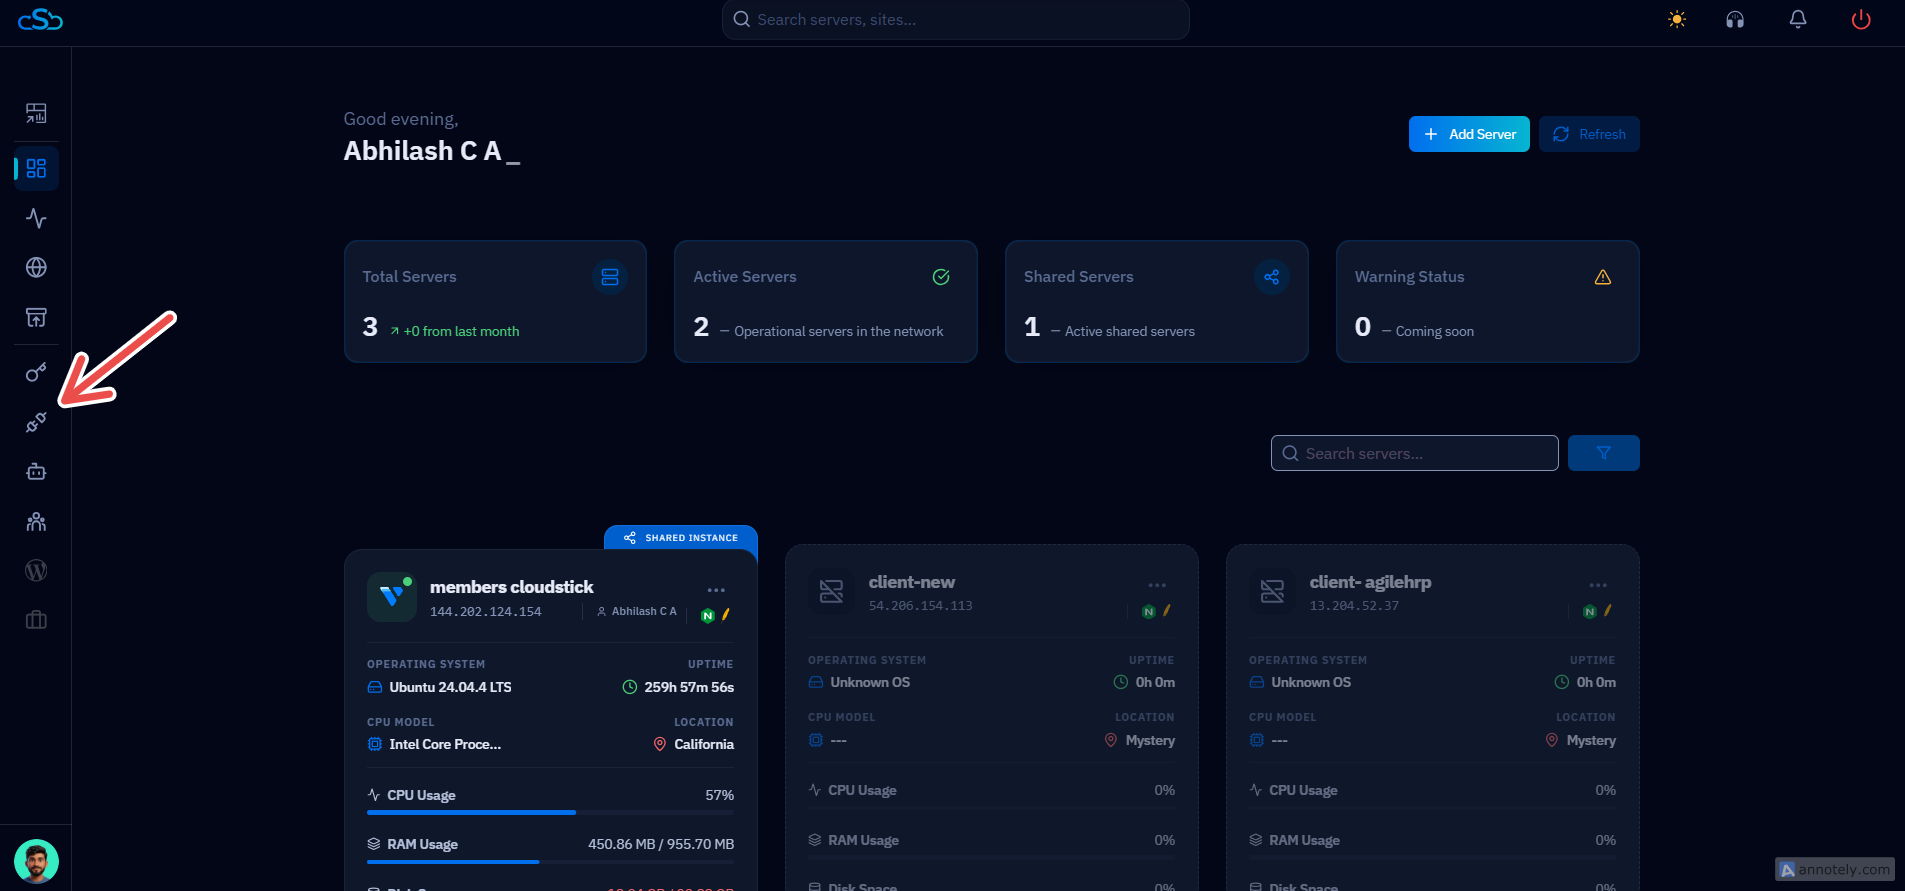
Fig. 09 — The CloudStick dashboard with the Third-Party Integrations icon highlighted in the left navigation.
Step 10: Add a New Integration
The 3rd Party Integration page lists every provider already linked to your account — Cloudflare accounts, GitHub repositories, and VPS providers alike. Adding GitHub follows the same flow as any other provider.
Click + Add New in the top-right corner of the page.
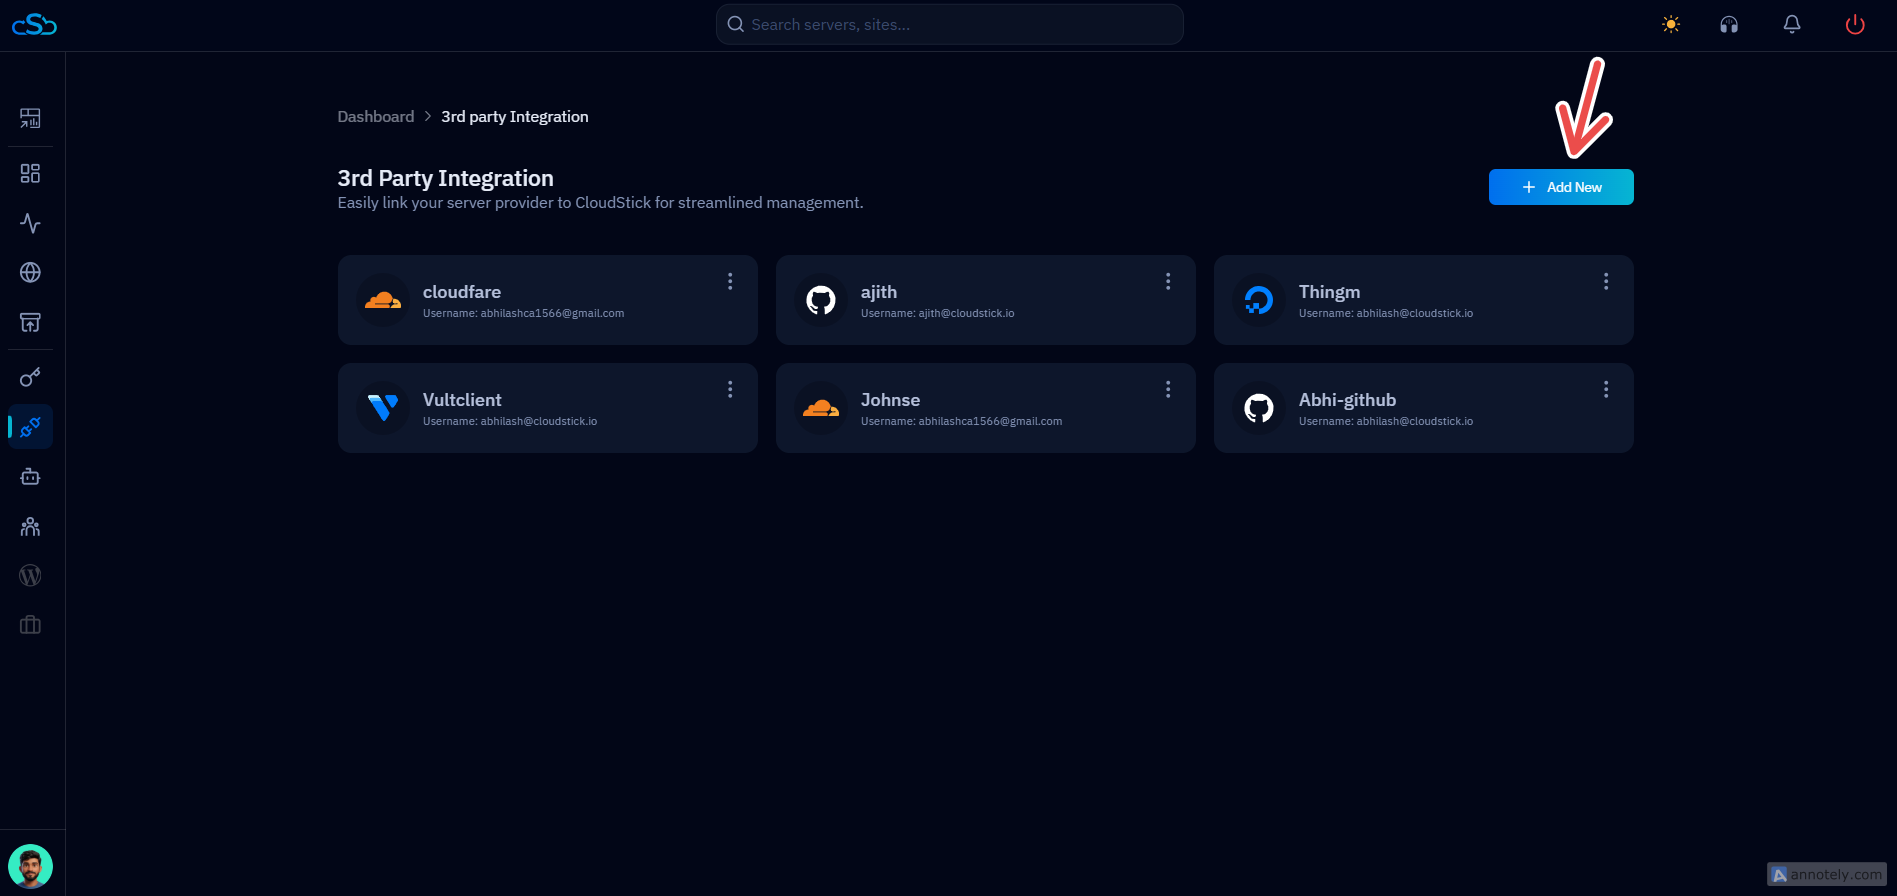
Fig. 10 — The 3rd Party Integration page listing connected providers, with the + Add New button in the top-right corner.
Step 11: Select GitHub as Your Provider
CloudStick supports several Git providers beyond GitHub, including GitLab, self-hosted GitLab, and Bitbucket, alongside VPS providers like Contabo, RackNerd, and AWS Lightsail.
From the Select Provider screen, click the GitHub card to continue.
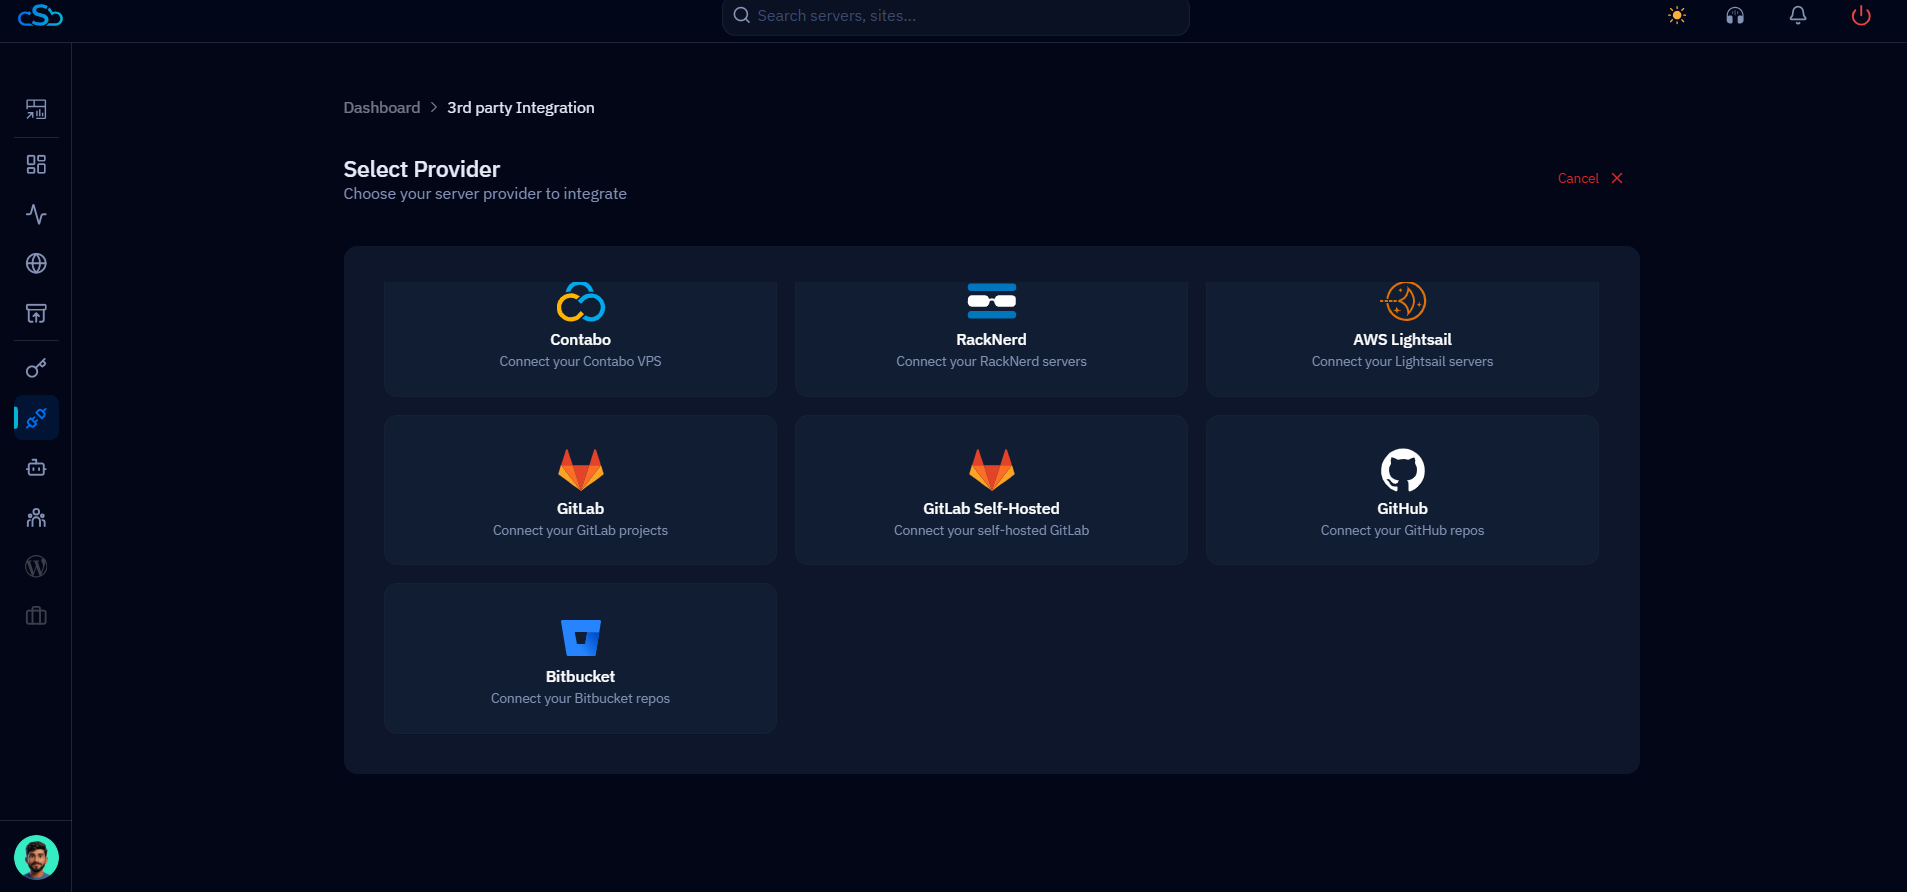
Fig. 11 — The Select Provider screen showing GitHub alongside GitLab, GitLab Self-Hosted, and Bitbucket.
Step 12: Enter Your Integration Details
This is where the personal access token you generated in Step 7 gets linked to your CloudStick account.
Integration Label: Enter a name to identify this integration, for example Abhi-github.
Username / Email ID / Key ID: Enter your GitHub username or the email address associated with your GitHub account.
Secret Key: Paste the fine-grained personal access token you copied from GitHub.
Click Connect Integration to save and finish linking your GitHub account.
Your integration credentials are encrypted and securely stored — CloudStick never displays the raw token again once it's saved.
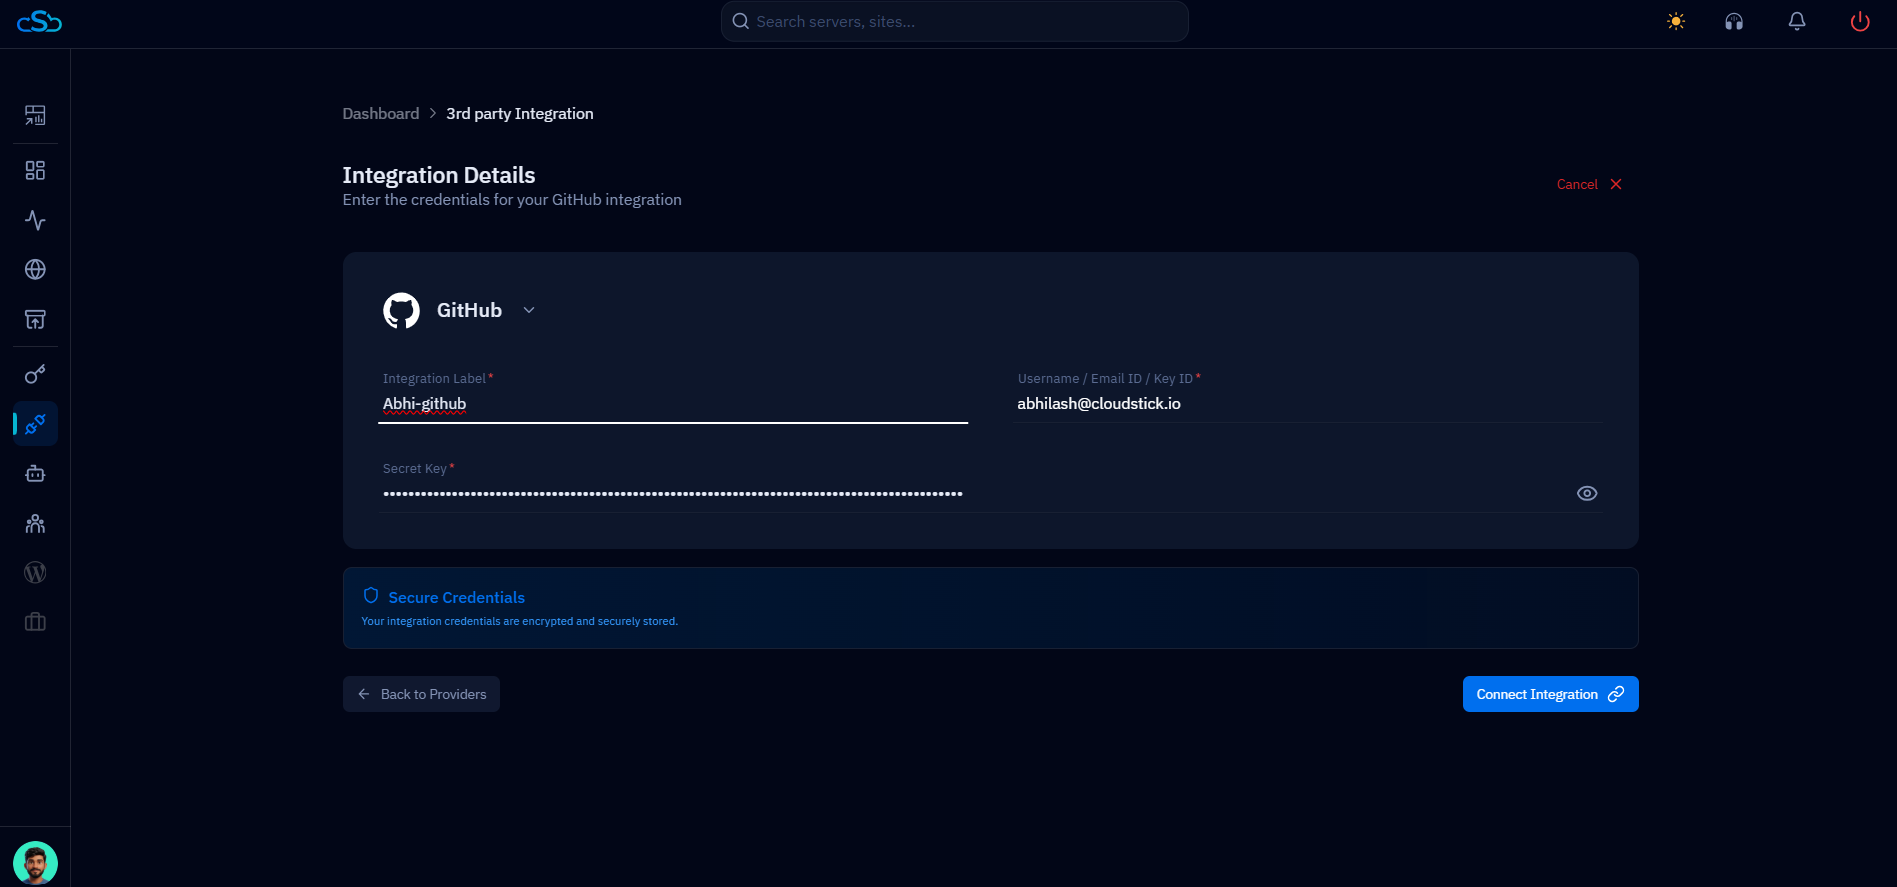
Fig. 12 — The Integration Details form for GitHub, with Integration Label, Username, and Secret Key fields.
Step 13: Manage Your GitHub Repository
Once your GitHub account is connected, open the website that uses that repository and go to its Git tab under the Website Summary page. From here you can manage the entire deployment lifecycle without leaving CloudStick.
Repository overview: View the repository URL, connection status, selected branch, latest commit, branch count, and last updated time.
Auto-Deploy: Toggle Auto-Deploy on to have CloudStick automatically deploy your site whenever new code is pushed to the selected branch.
Manual deployment: If Auto-Deploy is off, click Redeploy to manually push the latest commit live.
Disconnect: Click Disconnect to unlink the repository from this website at any time.
Repository Tabs
Files — Browse your repository's folders and files without opening GitHub.
Overview — View repository information and deployment status.
Actions — Monitor deployment actions and activity.
Pull Requests — View and manage pull requests.
Branches — View available branches and switch between them.
Commits — Review commit history.
Deployments — View previous deployment records.
Pipeline — Monitor your deployment pipeline.
Settings — Configure GitHub deployment settings.
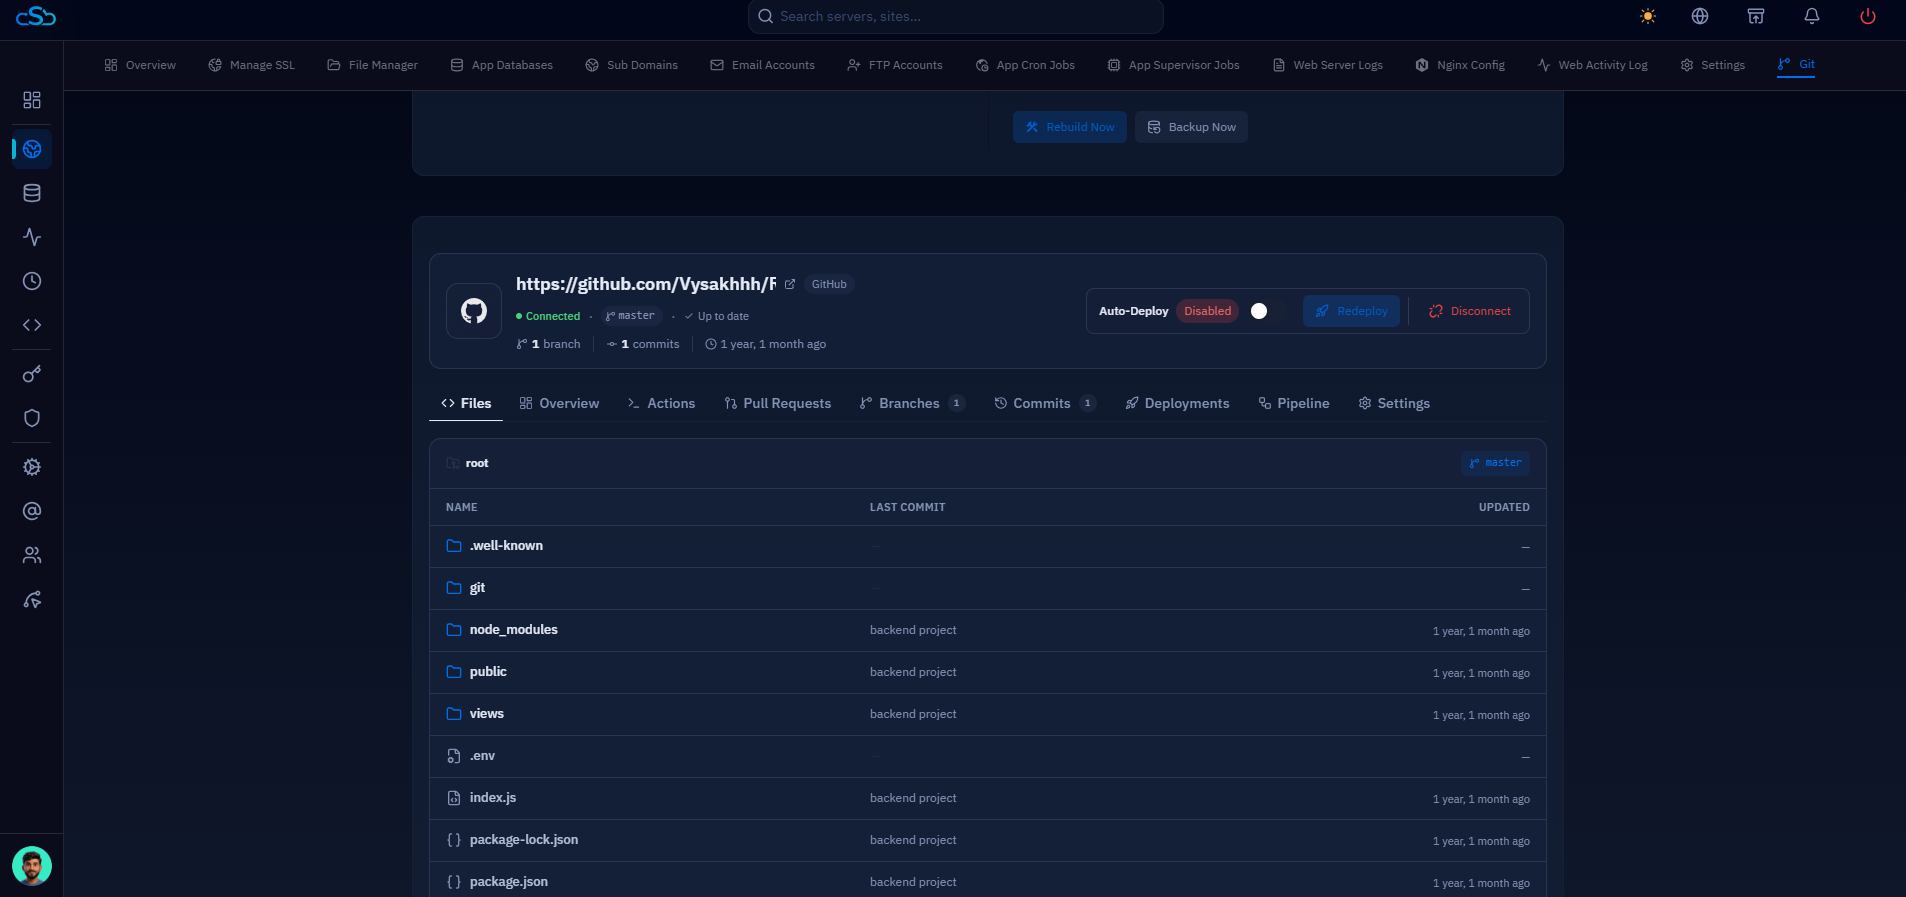
Fig. 13 — The Website Summary Git tab showing the connected repository, Auto-Deploy toggle, and repository tabs.
With CloudStick, you can manage your entire GitHub deployment from a single dashboard — selecting branches, enabling Auto-Deploy, viewing commits, monitoring deployments, and redeploying your website — with no need to log in to GitHub for everyday tasks.