How to Login to White-Label in CloudStick
Overview
Once you have deployed a White Label site in CloudStick, your clients and team members access it through a dedicated login page at your custom domain — not through app.cloudstick.io. The login credentials are the web application's SFTP system user credentials, which CloudStick generates automatically during deployment and stores securely in the Website Summary page.
This guide shows you how to locate your deployed White Label application, retrieve the domain name and login credentials from CloudStick, and use them to sign in to the white-label dashboard.
This guide assumes you have already deployed a White Label site. If you have not yet done so, follow the How to Deploy White Label in CloudStick guide first, then return here to log in.
Step 1: Locate Your White Label Site in CloudStick
Start by navigating to the server where the White Label application is deployed. This is where you will find the domain name to use as your login URL.
1. Log in to your CloudStick Dashboard: Sign in at app.cloudstick.io. Your main dashboard shows all connected servers.
2. Click on the server: Locate the server card where your White Label application is deployed and click the MANAGE button to open the server panel.
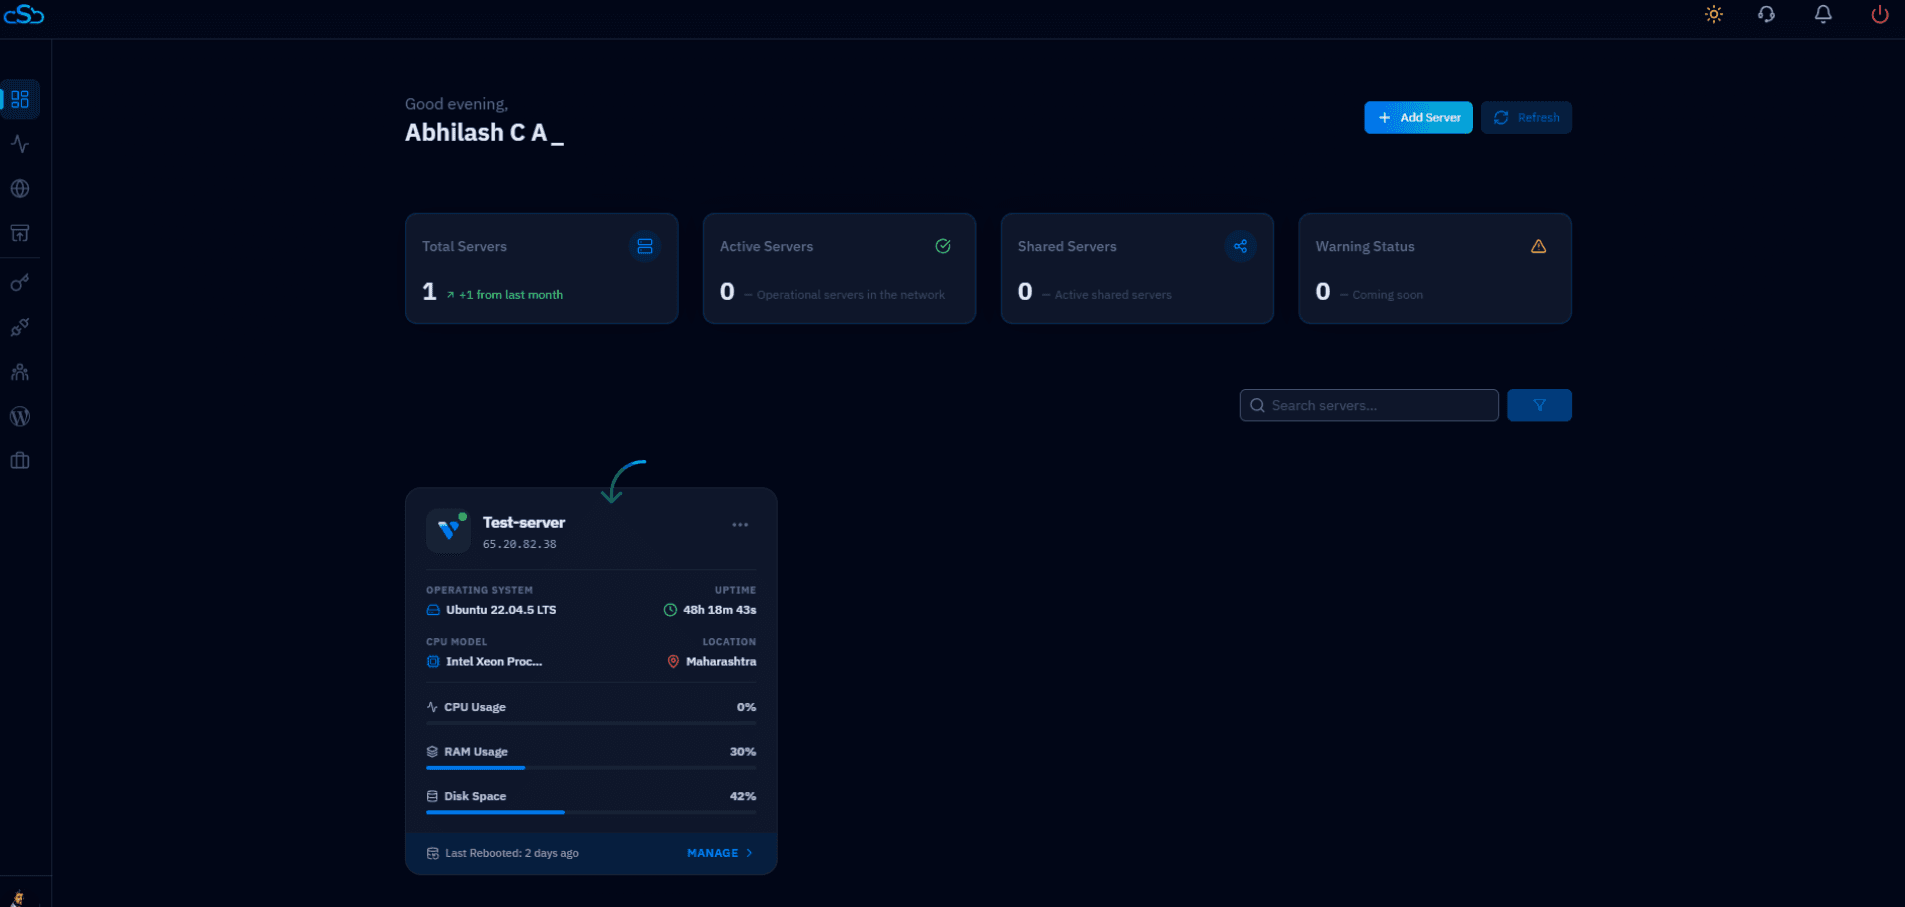
Fig. 01 — CloudStick main dashboard. Click MANAGE on the server that hosts your White Label application.
The server panel opens showing the full system overview — uptime, CPU, memory, and disk usage — along with resource tiles for Websites, Databases, Supervisors, and Cron Jobs.

Fig. 02 — Server panel showing system overview. Click the Websites icon in the left-hand navigation to view hosted applications.
3. Click Websites: In the left-hand navigation of the server panel, click the Websites icon to open the WebApp List.
4. Find your White Label application: In the WebApp List, locate your deployed White Label application — it is identifiable by the briefcase icon and its domain name shown below the application name.
5. Copy the domain name: Note or copy the domain displayed under the White Label entry (e.g. whitelabel.yourdomain.com). This is the URL your clients will use to access the control panel.
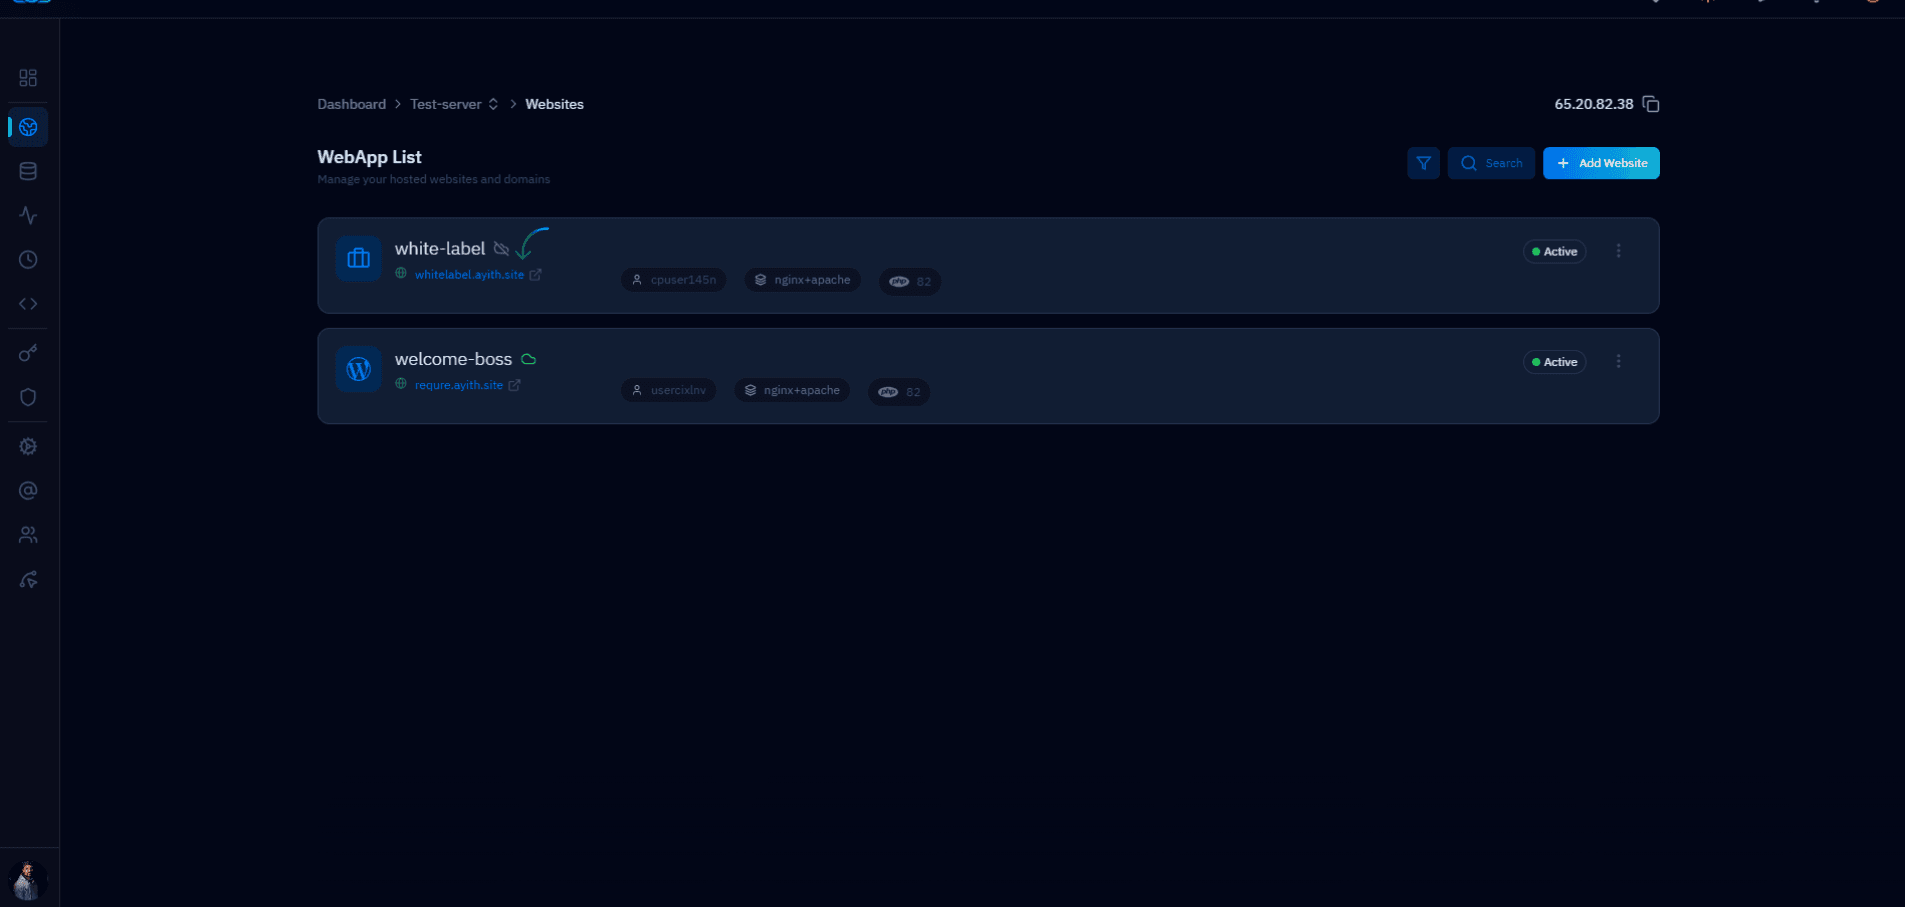
Fig. 03 — WebApp List showing the white-label application with its domain name visible and ready to copy.
Step 2: Find Your Login Credentials
The White Label login uses the web application's system user credentials. These are generated by CloudStick when the site is created and are visible in the Website Summary page. You can also find them in the deployment notification email sent at installation time.
1. Open the Website Summary: Click on the White Label application name in the WebApp List to open its Website Summary page.
2. Locate the System User section: In the Website Summary, scroll to the System User section on the right side. You will see the username displayed in plain text and a masked password field.
3. Copy the username: Click the copy icon next to the username to copy it to your clipboard.
4. Copy the password: Click the eye icon to reveal the password, then click the copy icon to copy it.
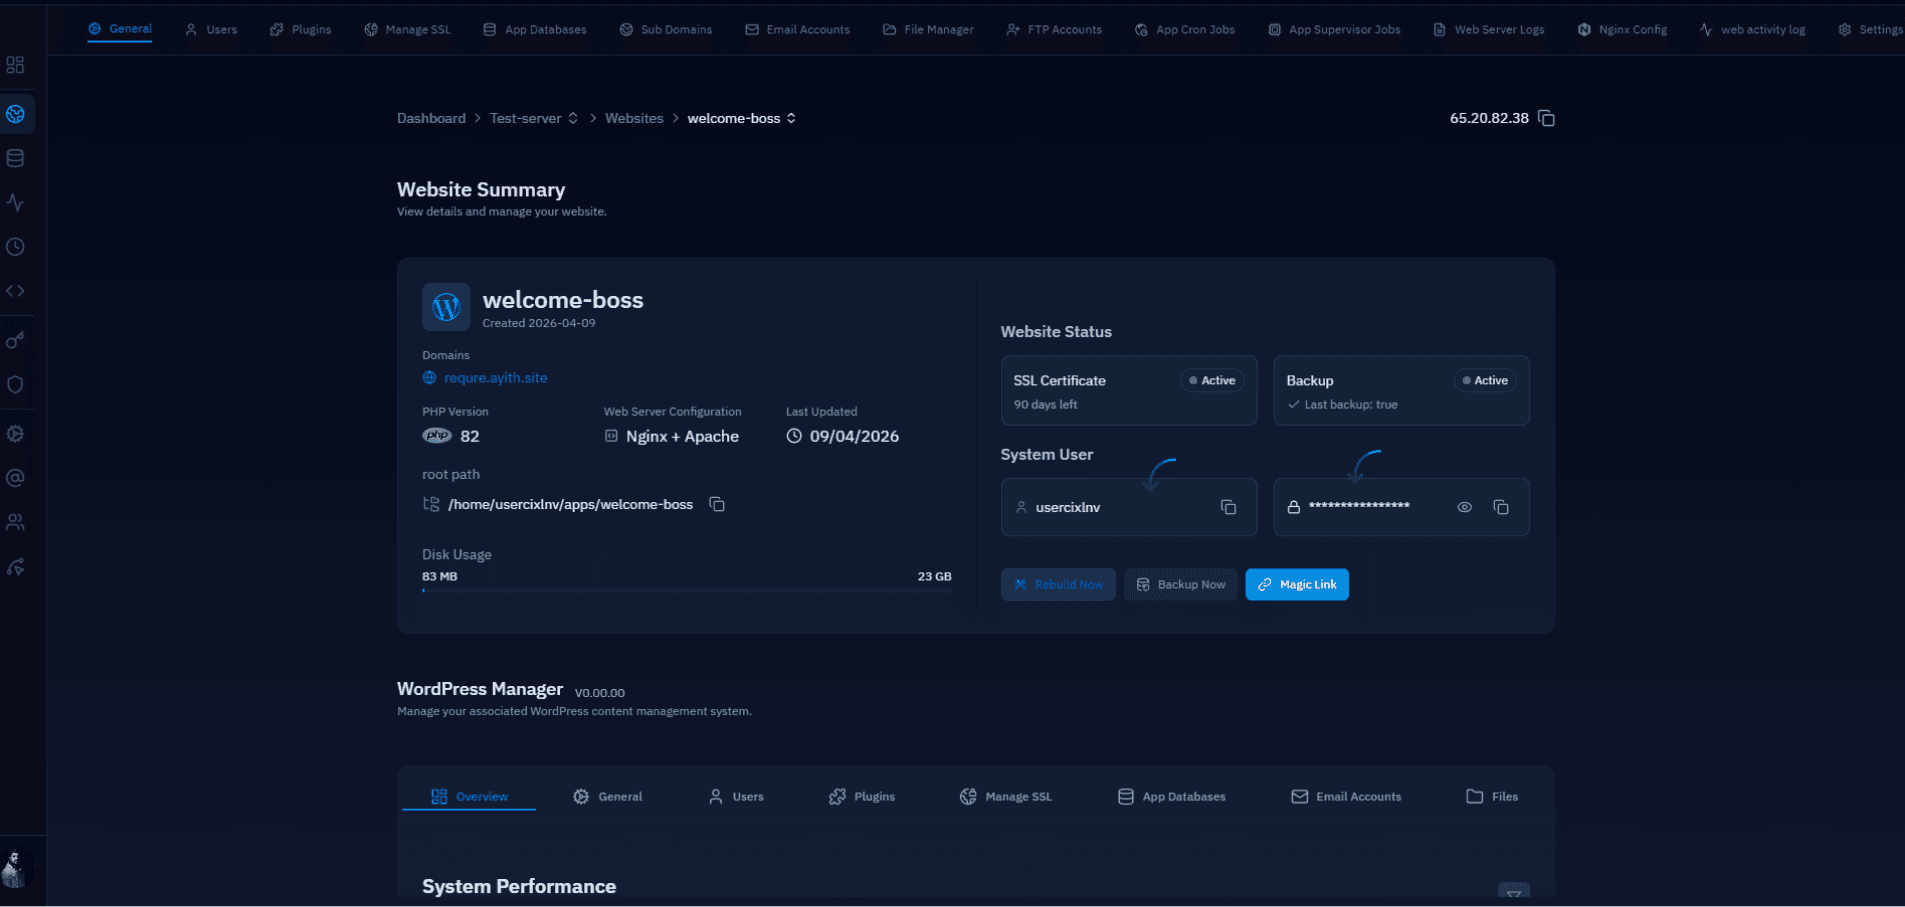
Fig. 04 — Website Summary page showing the System User section with username and masked password, and copy icons for both.
If you set a custom system user password during deployment via Advanced Settings, use that password instead. The password shown here is the one CloudStick generated or you configured at installation.
Step 3: Log In to the White Label Panel
With your domain and credentials ready, navigate to your White Label login page in a browser and sign in.
1. Open the domain in a browser: Paste the copied domain name into your browser's address bar (e.g. https://whitelabel.yourdomain.com) and press Enter. The White Label login page will load.
2. Enter your Username: In the Username field, paste or type the system username you copied from the Website Summary.
3. Enter your Password: In the Password field, paste or type the system password you copied.
4. Click "Sign In": Click the Sign In button to submit your credentials and authenticate.
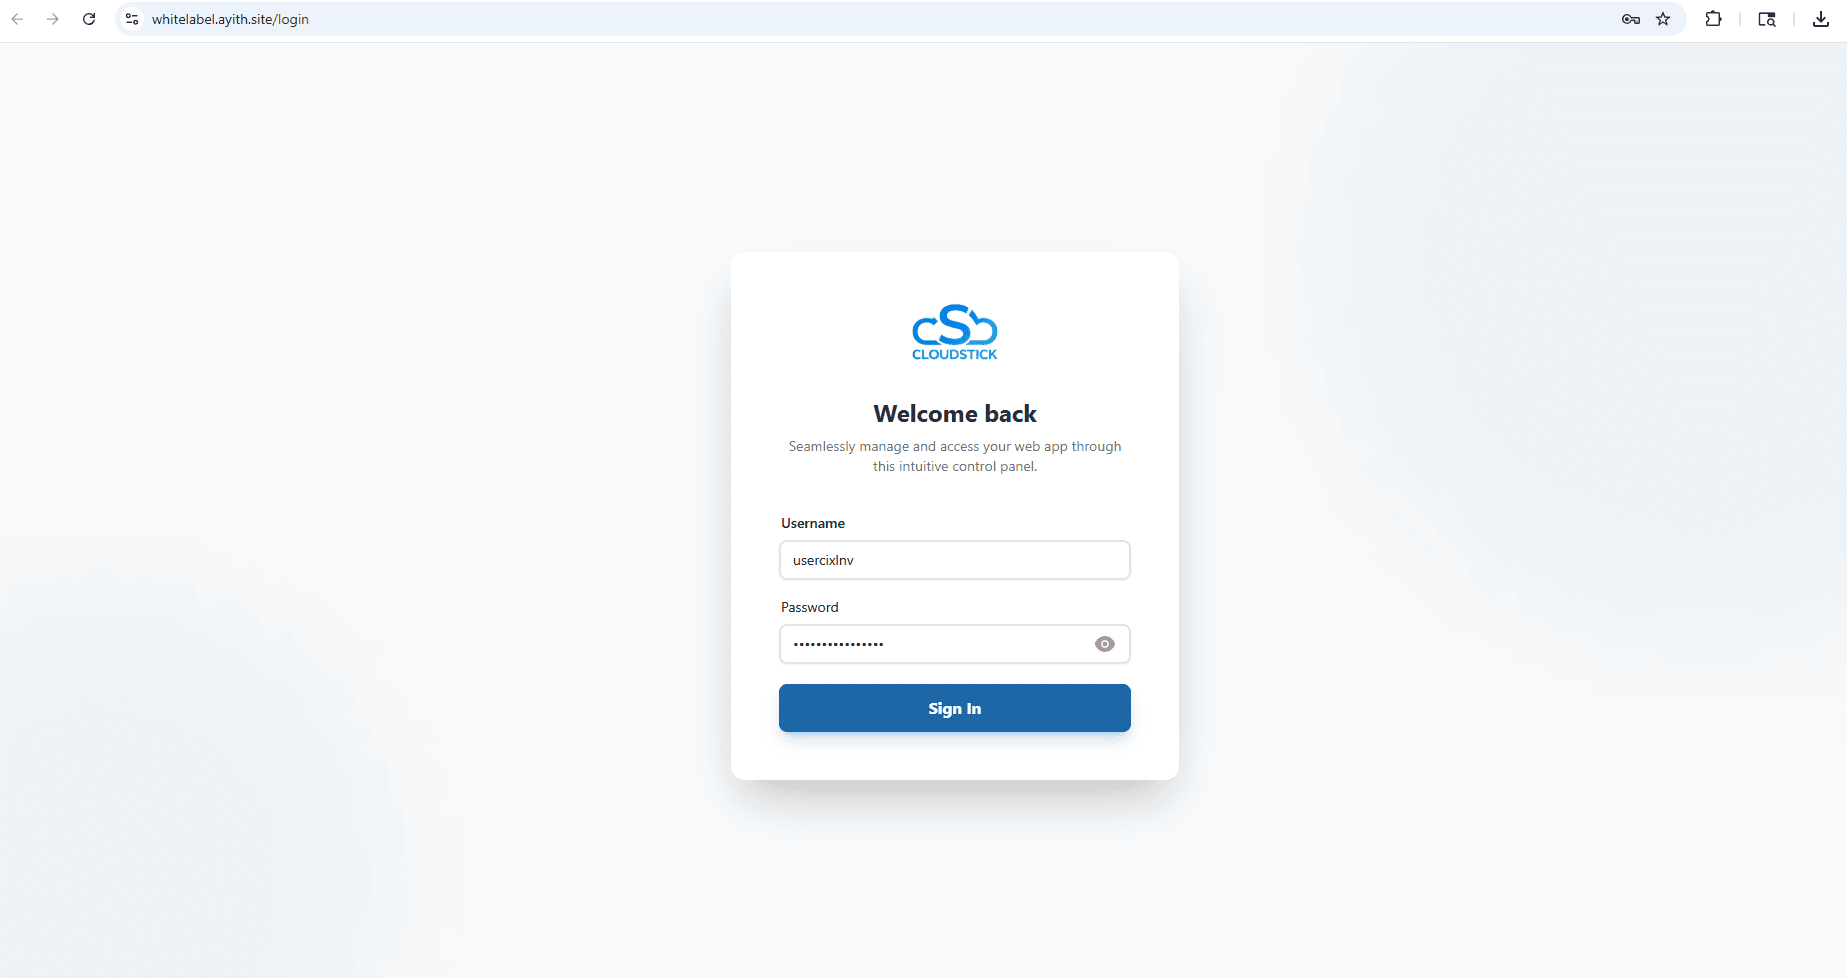
Fig. 05 — White Label login page at the custom domain with Username and Password fields filled in, ready to click Sign In.
Make sure you are accessing the site over HTTPS (not HTTP). If SSL was deployed correctly in the previous setup step, the browser address bar should show a padlock icon confirming the connection is secure.
Step 4: Access the White Label Dashboard
After a successful login, you are redirected to the White Label dashboard — the landing page of the control panel. From here, your clients can manage all aspects of their hosted web application.
The White Label dashboard provides grouped access to all management features for the hosted web application:
Email: Manage Email Accounts, enable Webmail, and configure Email Authentication (SPF, DKIM, DMARC).
Files: Access the File Manager and WordPress Manager for the web application.
Databases: Manage PHP Settings, MySQL Databases, and phpMyAdmin access.
Domains: Configure Sub Domains for the web application.
Security: Manage application-level security settings.
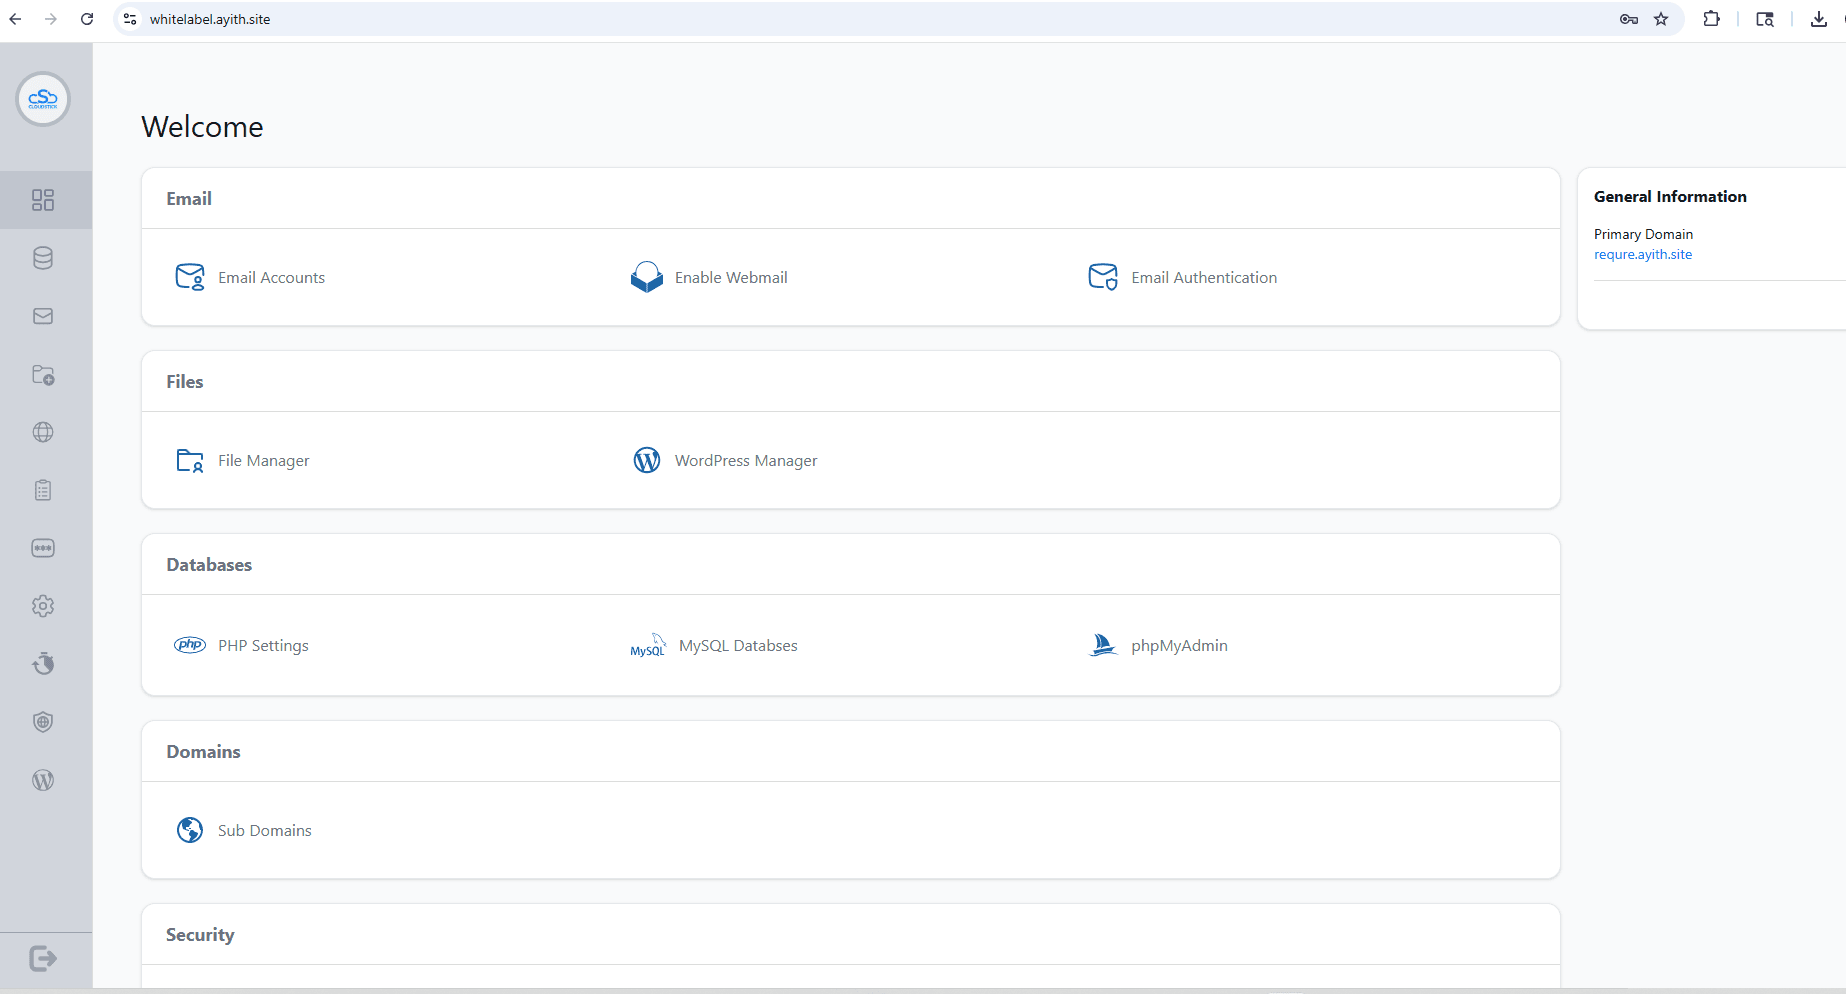
Fig. 06 — White Label dashboard (landing page) showing grouped management sections: Email, Files, Databases, Domains, and Security.
The White Label dashboard your clients see will reflect any Business Branding you have configured — including your company name and logo. If the dashboard still shows the default CloudStick branding, see the How to Set Up White-Label Branding article to apply your custom brand.