How to Manage Nginx Configuration for a Web Application
Overview
Nginx configuration controls how your web server handles every request — from SSL termination and header injection to FastCGI processing and location-based routing. CloudStick exposes a dedicated Nginx Config tab for each web application, giving you direct access to the individual configuration files that govern your site's behavior without ever needing to SSH into the server.
This guide walks you through finding and editing the Nginx configuration files for any website on your server. You can customise request handling, add custom headers, adjust SSL settings, configure reverse proxy rules, and control server block behavior — all through the CloudStick dashboard.
Nginx configuration changes take effect immediately after saving. Incorrect directives can make your website unreachable. Always test changes on a staging site first, and keep a copy of any configuration you modify before editing.
Step 1: Log In and Select Your Server
Nginx configuration is managed at the website level, within a specific server. Start by navigating to the correct server from your CloudStick dashboard.
Log in to your CloudStick account: Visit app.cloudstick.io and sign in with your credentials.
Select your server: From the main dashboard, locate the server card that hosts the website you want to configure, then click Manage to open its server panel.
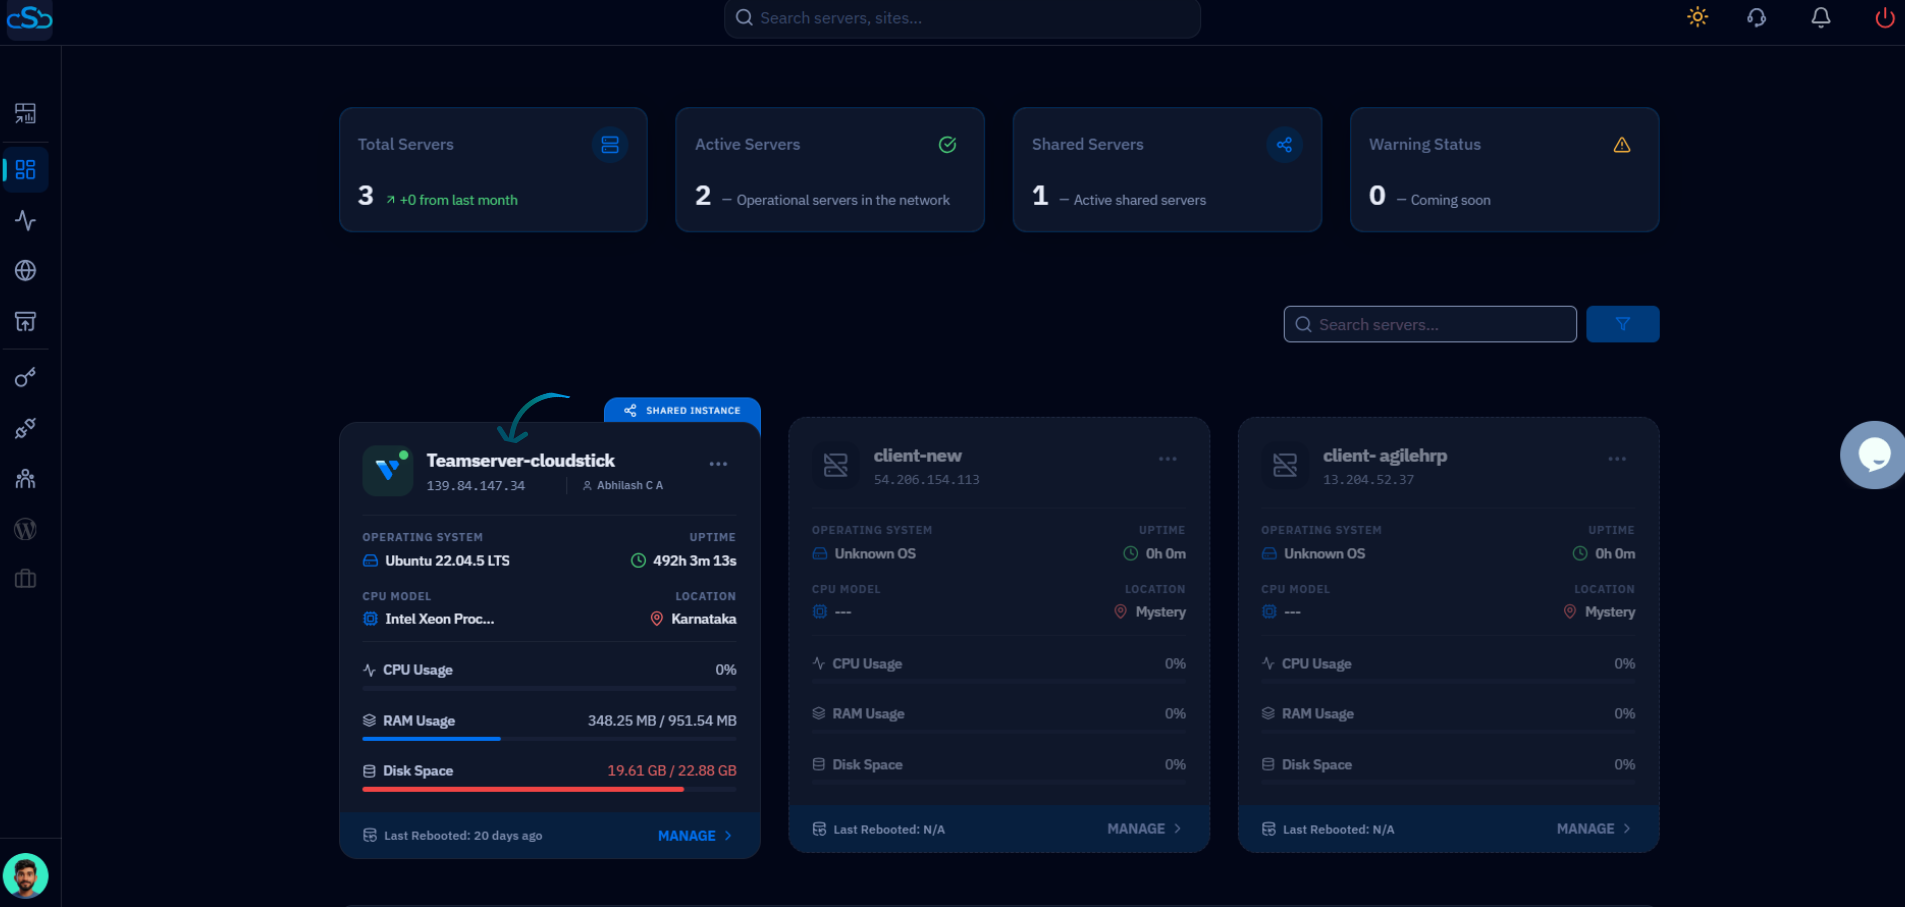
Fig. 01 — CloudStick dashboard showing connected servers. Click Manage on the server hosting the web application you want to configure.
Step 2: Navigate to the Websites Section
Nginx configuration files are accessed per website, so you need to open the Websites section of the server panel first.
Click on Websites: In the Server Resources area of the server panel, click the Websites card to open the WebApp List — a full listing of all web applications hosted on this server.
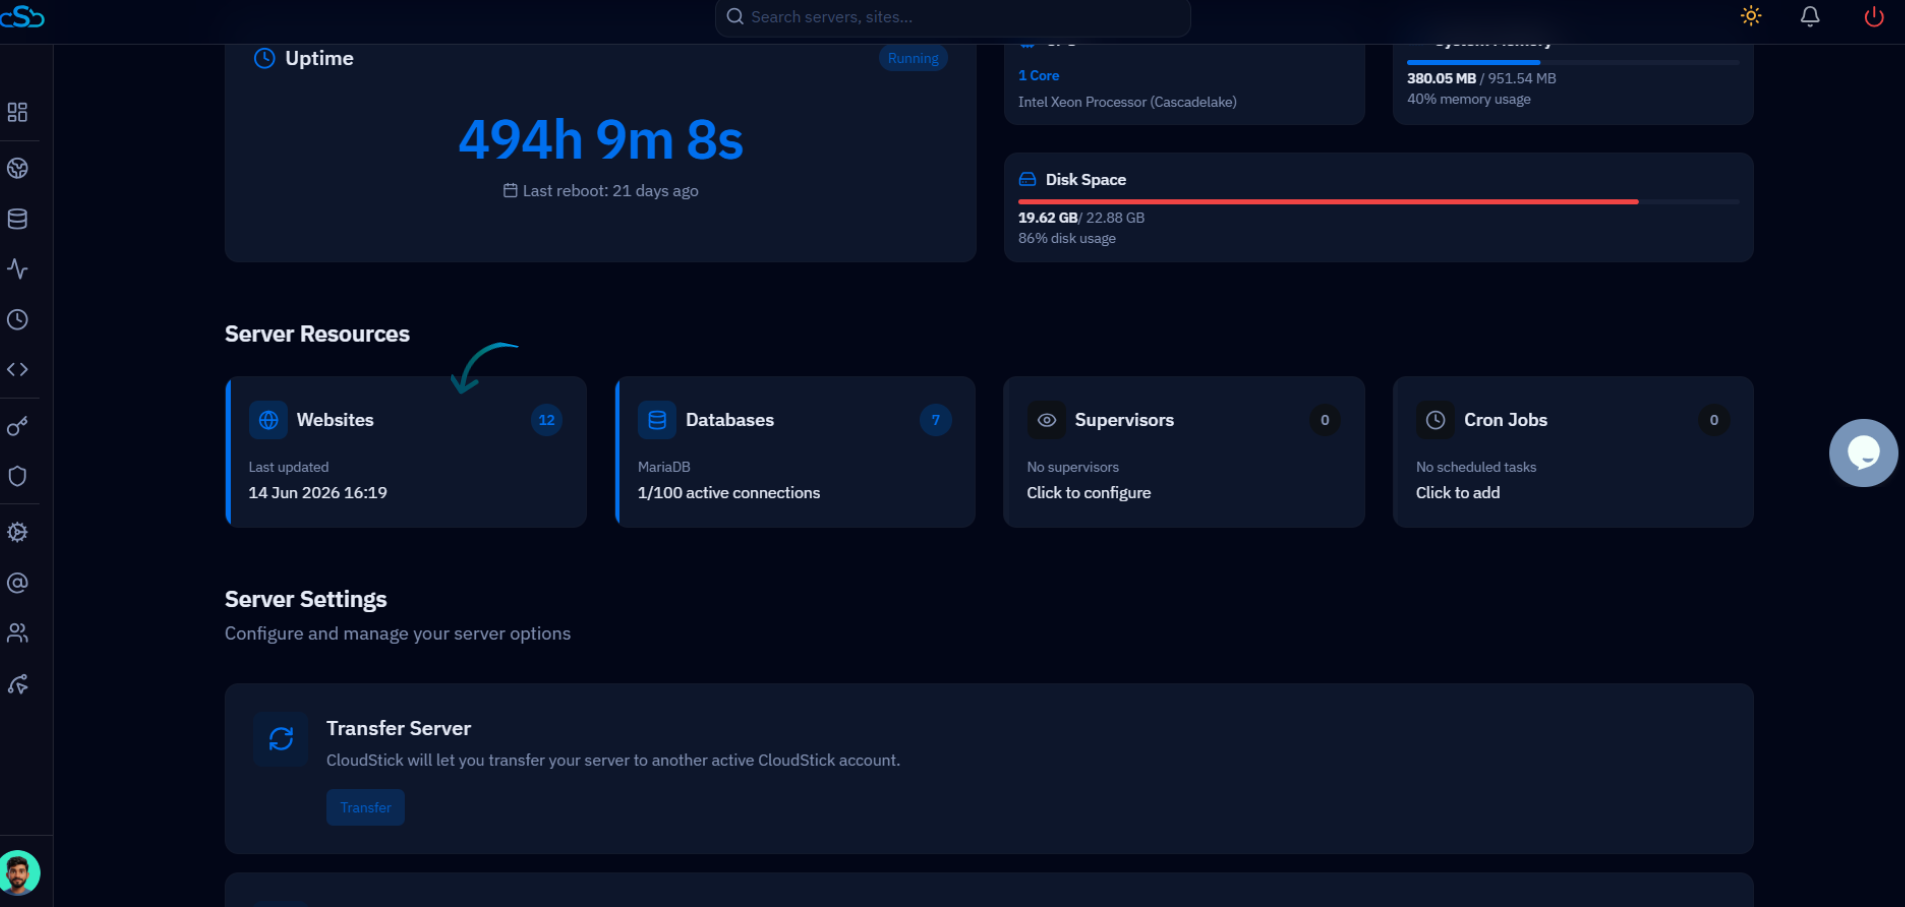
Fig. 02 — Server panel showing the Websites card under Server Resources. Click it to open the WebApp List.
Step 3: Select Your Web Application
The WebApp List shows all websites running on the server. Select the specific site whose Nginx configuration you want to manage.
Find your website: Browse the list of web applications. Each entry shows the site name, domain, web stack, and current status.
Click the website name: Click on the name of the website you want to configure. This opens the website's individual management view with its full set of tabs.
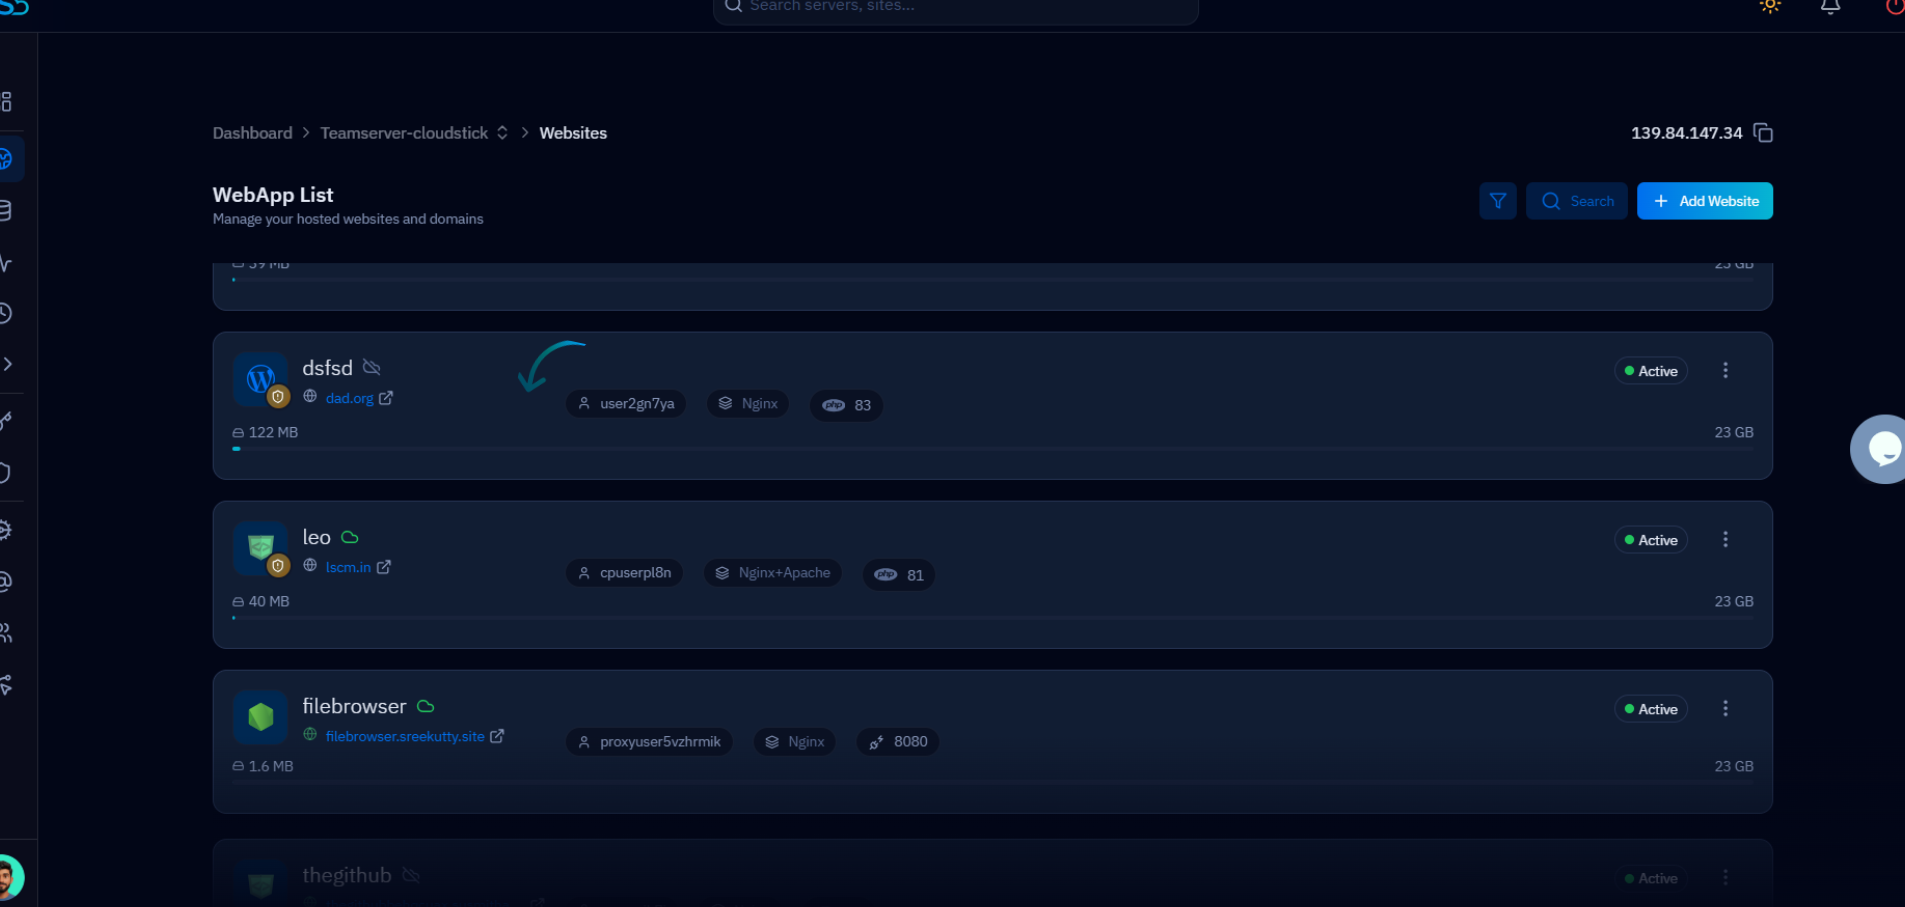
Fig. 03 — WebApp List displaying all hosted websites on the server. Click the website name to open its management view.
Step 4: Open and Edit Nginx Configuration Files
Inside the website management view, click the Nginx Config tab in the top navigation bar. This reveals all the individual Nginx configuration files available for this web application.
Available Configuration Files
CloudStick organises the Nginx configuration into focused, purpose-specific files — each controlling a distinct aspect of server behavior. Click the arrow icon next to any file to open it in the built-in editor:
header-extra.conf: Add or override HTTP response headers — useful for security headers (Content-Security-Policy, X-Frame-Options, HSTS) and custom cache-control directives.
main-fastcgi-extra.conf: Extend the FastCGI configuration used to communicate with PHP-FPM. Add custom fastcgi_param directives or override default timeout values here.
main-location-extra.conf: Add extra location blocks inside the main server block. Use this for custom URL routing rules, file type handling, or deny/allow directives.
main-location-post.conf: Directives that are appended after the main location block. Useful for adding trailing rules that apply after all other location matches.
main-location-pre.conf: Directives that are prepended before the main location block. Use this to intercept specific request paths before any other routing logic applies.
main-post.conf: Content appended after the main server block closes. Use for adding additional server blocks or upstream definitions.
main-pre.conf: Content prepended before the main server block. Use for global-level directives or map blocks that the main server block references.
non-ssl.conf: Configuration for the HTTP (port 80) server block. Modify redirect behavior or add specific rules for non-SSL traffic.
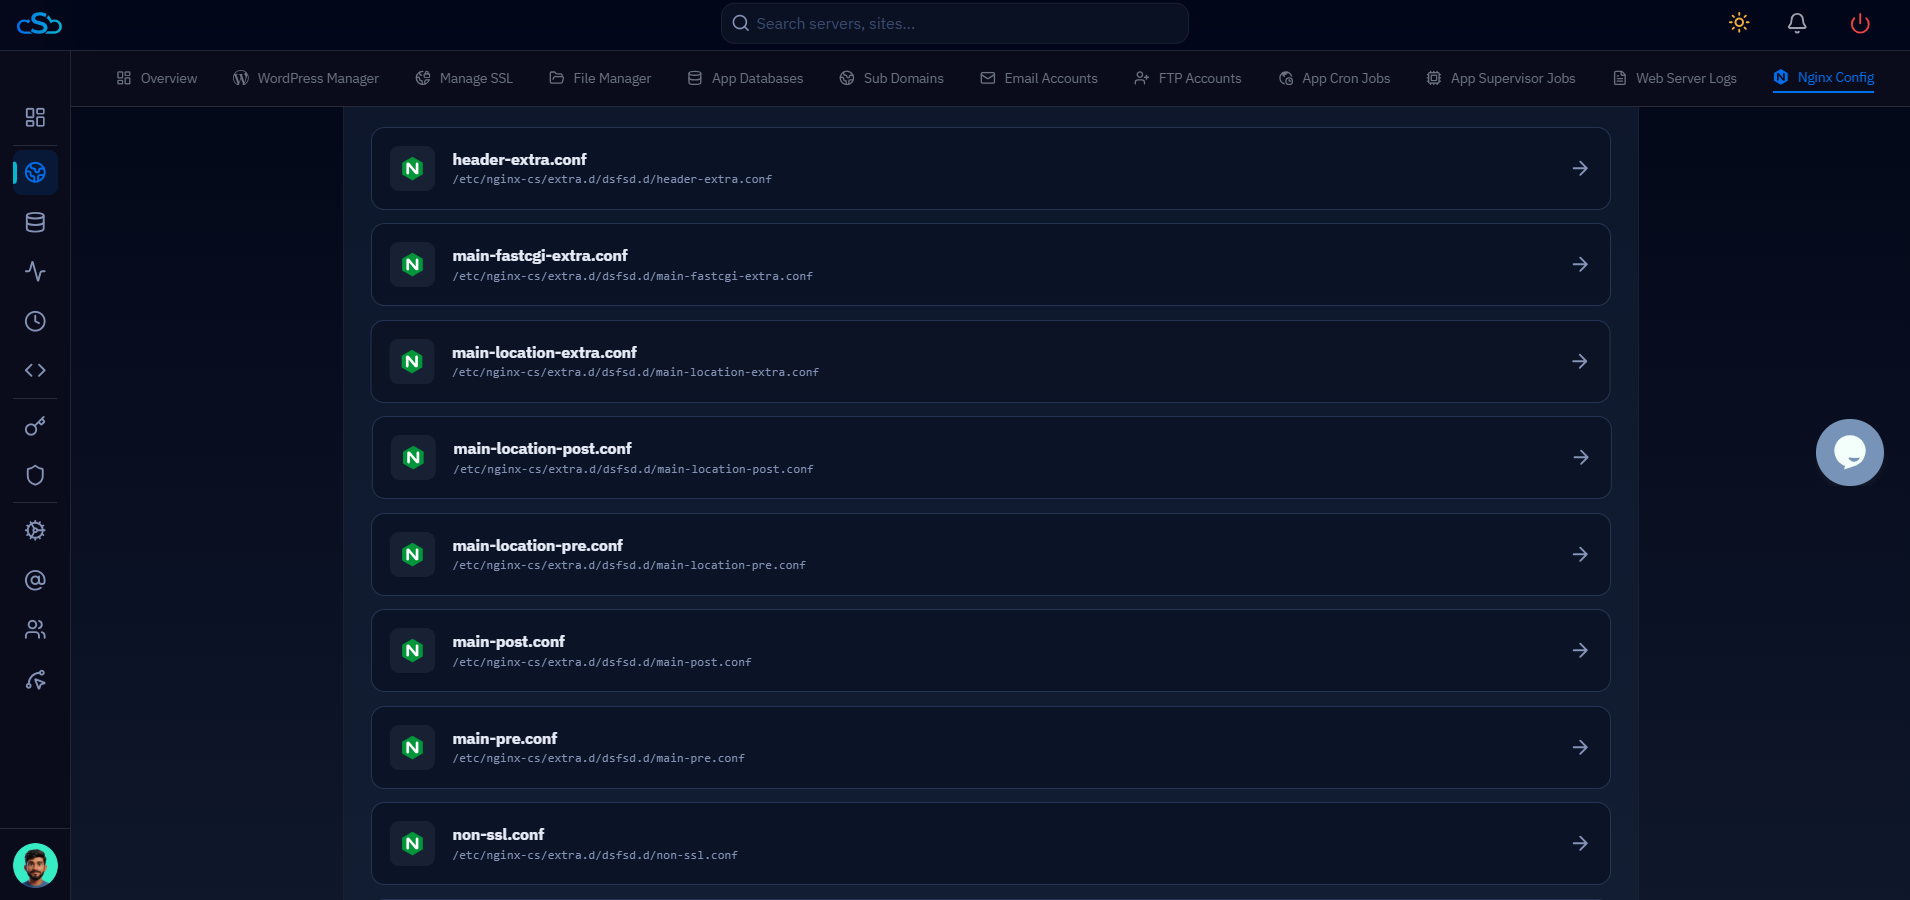
Fig. 04 — Nginx Config tab showing the full list of configuration files with their file paths. Click the arrow next to any file to open it in the editor.
Each configuration file maps directly to a physical file on your server under /etc/nginx-cs/extra.d/. Changes saved in the editor are written to disk and applied to the live Nginx configuration immediately.