How to Rename a Server
Overview
As your infrastructure grows, clear and consistent server names make it far easier to identify the right machine at a glance — distinguishing a production box from a staging environment, or one client's server from another. CloudStick lets you rename any connected server directly from the dashboard, so the label always reflects how you actually use it.
This guide walks you through renaming a server from the CloudStick dashboard in a few quick steps. The change is purely cosmetic — it updates the display name shown across your dashboard without touching the underlying server in any way.
Renaming a server only changes its display name in the CloudStick dashboard. It does not affect the server's configuration, hosted applications, websites, or running services.
Step 1: Log In to Your CloudStick Account
Start by signing in so you can access the servers connected to your account.
Log in: Sign in to your CloudStick dashboard at app.cloudstick.io using your account credentials.
Step 2: Select Your Server
From the Dashboard you will see all of your connected servers listed as cards.
Open the server: Locate the server you want to rename and click on it to open its server details page.
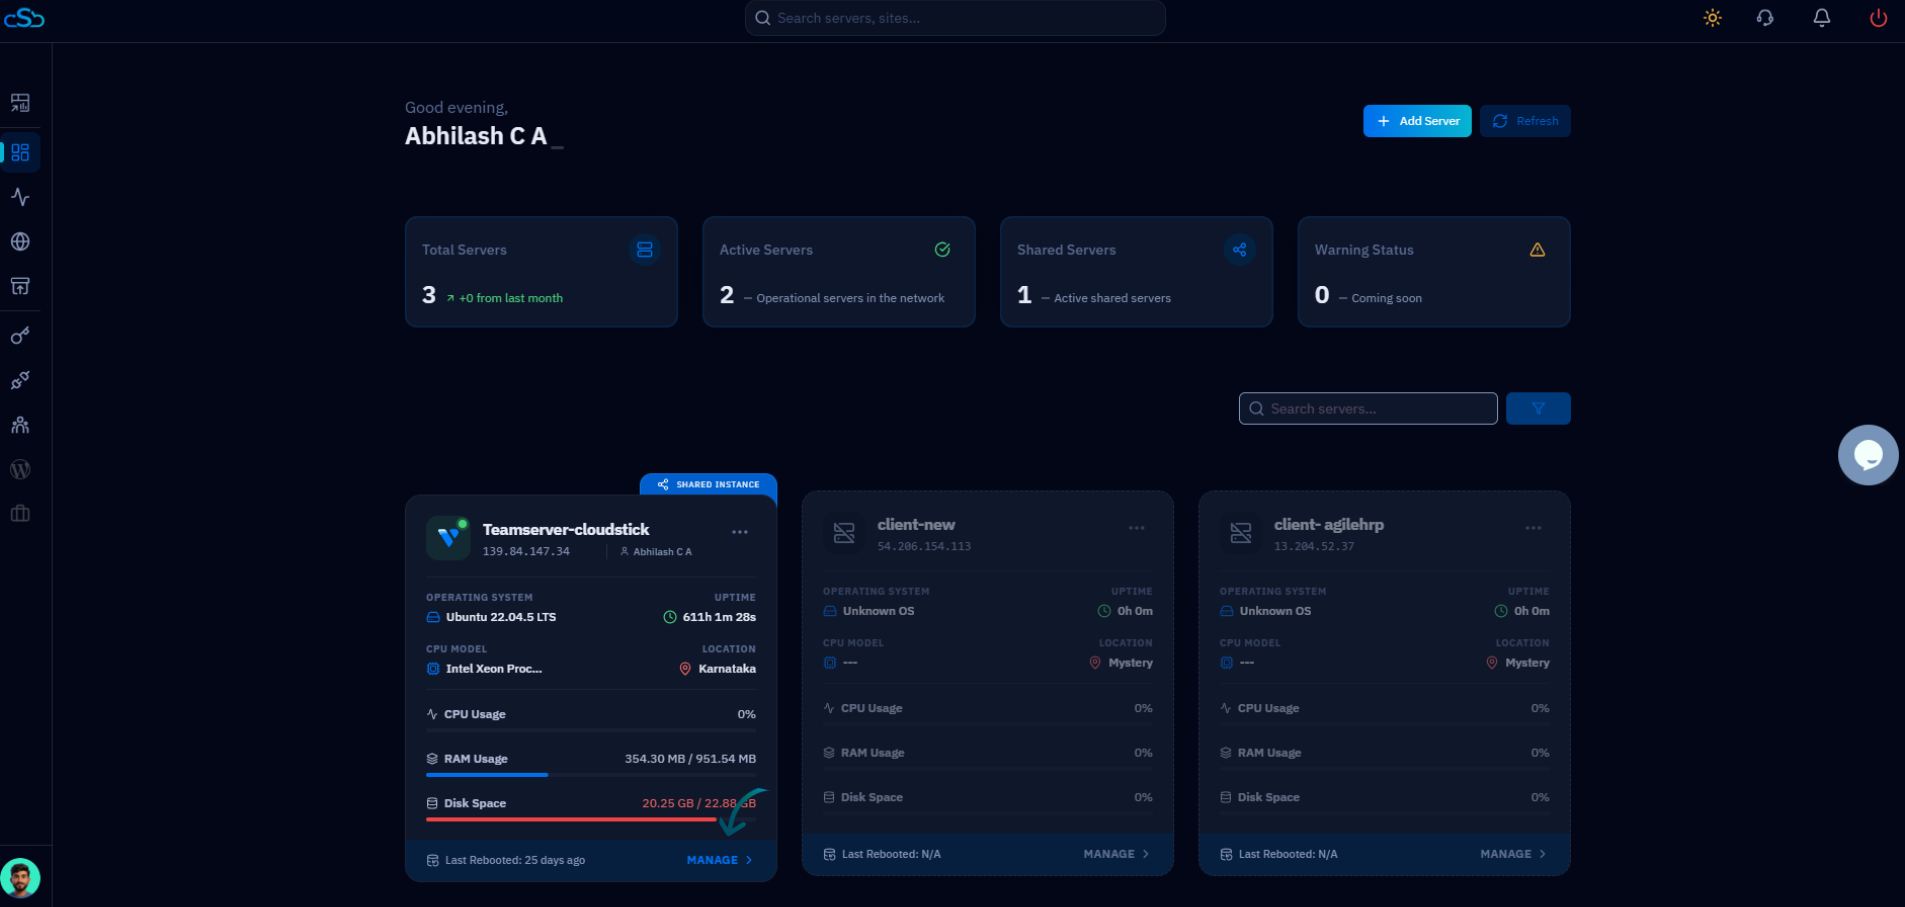
Fig. 01 — The CloudStick Dashboard listing your connected servers; click the one you want to rename.
Step 3: Open Server Details
The server details page opens with the current server name displayed in the header.
Locate the name: At the top of the server details page, you will see the current server name next to its IP address and status.
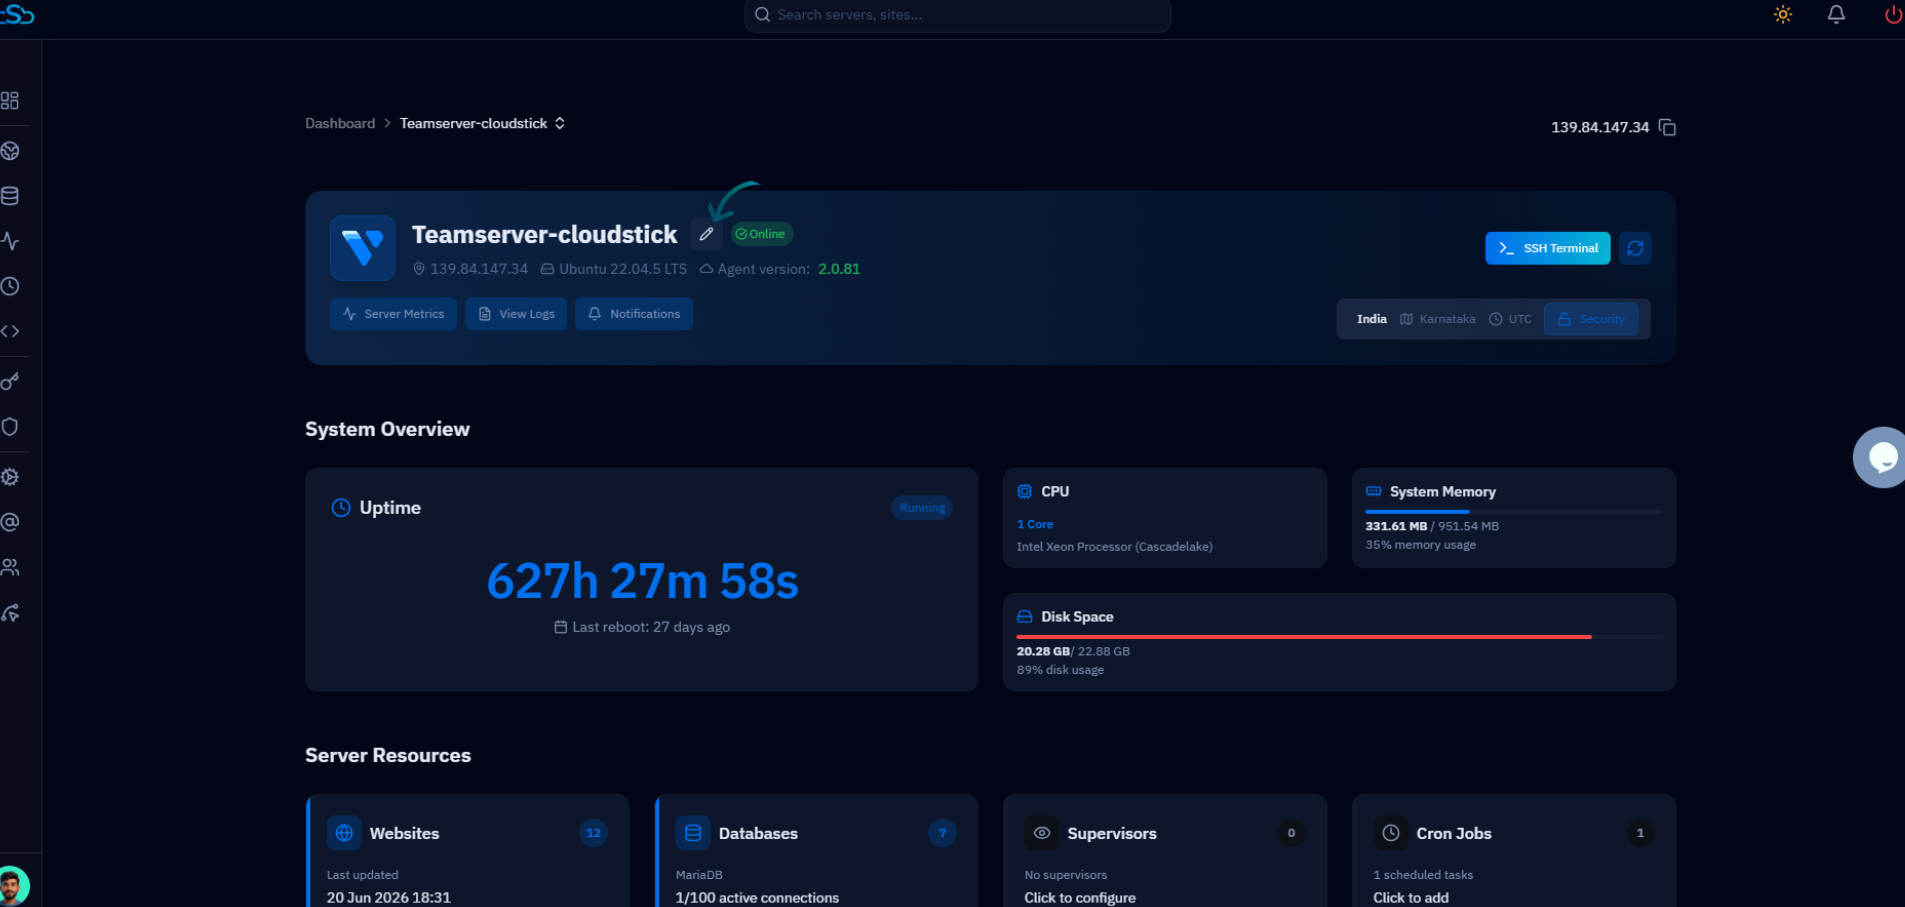
Fig. 02 — The server details page header showing the current server name with the Edit (pencil) icon beside it.
Step 4: Edit the Server Name
CloudStick keeps the name editable inline so you can update it without leaving the page.
Click the Edit icon: Click the Edit (✏️) icon next to the server name to make it editable.
Step 5: Enter the New Name
The name turns into an editable text field where you can type the label you want.
Type the new name: Enter the new server name you want to set. Choose something descriptive so the server is easy to recognise in your dashboard.
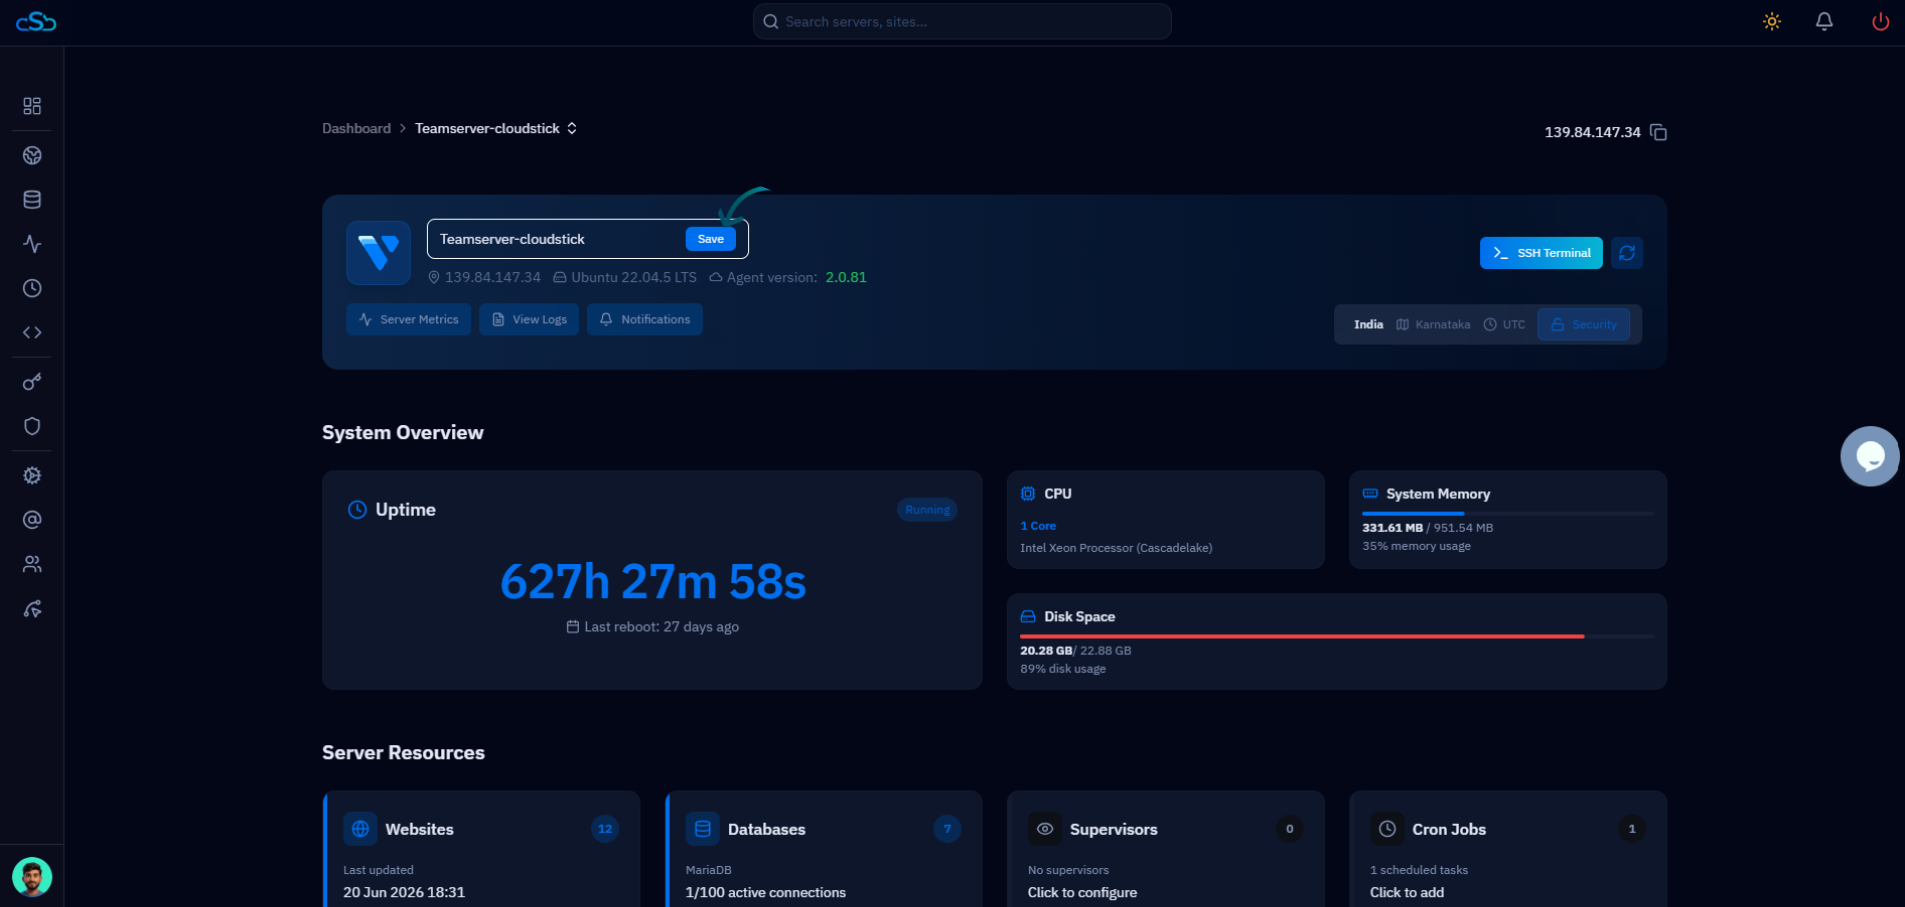
Fig. 03 — The server name shown as an editable field with the Save button ready to confirm the change.
Step 6: Save Your Changes
Saving commits the new name and applies it instantly across your account.
Click Save: Click the Save button to update the server name.
The new name takes effect immediately — there is no need to refresh or restart anything.
Step 7: Confirmation
Your server now displays its updated name everywhere it appears in CloudStick.
Verify the change: The server name is updated immediately and reflected across your dashboard, including the server cards and breadcrumb navigation.