How to Set Up an Email Forwarder in CloudStick
Overview
Email forwarding automatically delivers a copy of every incoming message from one address to another destination inbox. It is useful when you want a professional address — such as info@yourdomain.com — to also land in a personal or team email account, without requiring the recipient to log into a separate webmail interface.
CloudStick makes forwarding straightforward: open the actions menu on any existing email account and add a destination address in seconds. Forwarding does not remove mail from the original inbox — it sends a copy, so the original account continues to receive messages as normal.
Before setting up a forwarder, you must have at least one email account already created under your website. If you haven't done this yet, follow the How to Install Roundcube guide first to create your first mailbox.
Step 1: Go to Email Accounts
Email forwarders are managed at the website level inside CloudStick. Start by navigating to the website whose email account you want to configure.
1. Open your website: From the CloudStick dashboard, click on your server, then click on the website name to open its dashboard.
2. Click Email Accounts: In the top navigation bar of the website dashboard, click Email Accounts. You will see a list of all email addresses created under that website.
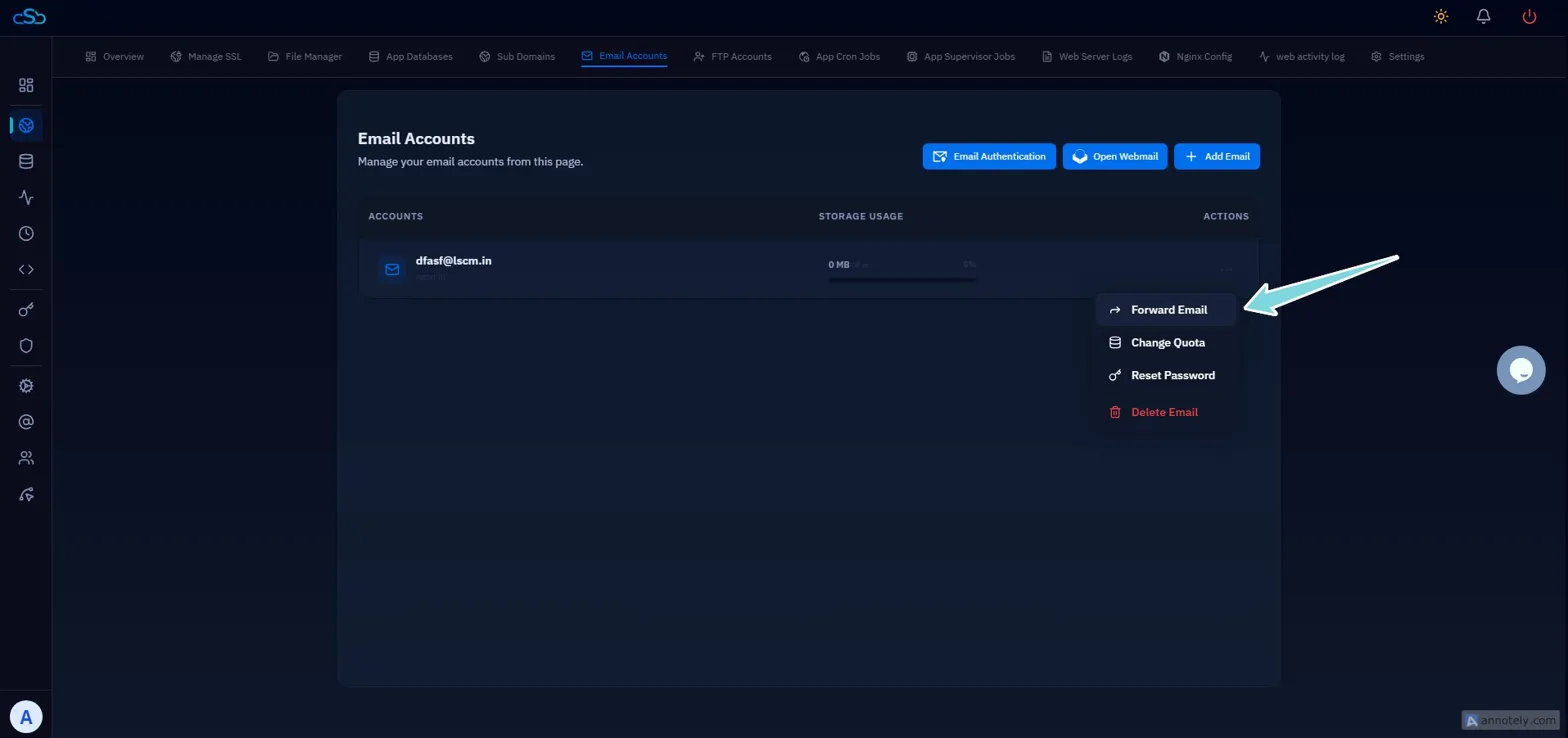
Fig. 01 — Email Accounts page listing all mailboxes created under the website.
Step 2: Open the Actions Menu
Each email account has a context menu that reveals account management options including forwarding, quota changes, password resets, and deletion.
1. Locate the account: Find the email account you want to set up forwarding for in the list.
2. Click the three-dot menu icon: Click the three-dot (⋮) icon on the right side of that account row.
3. Review the dropdown: A dropdown will appear with the following options: Forward Email, Change Quota, Reset Password, and Delete Email.
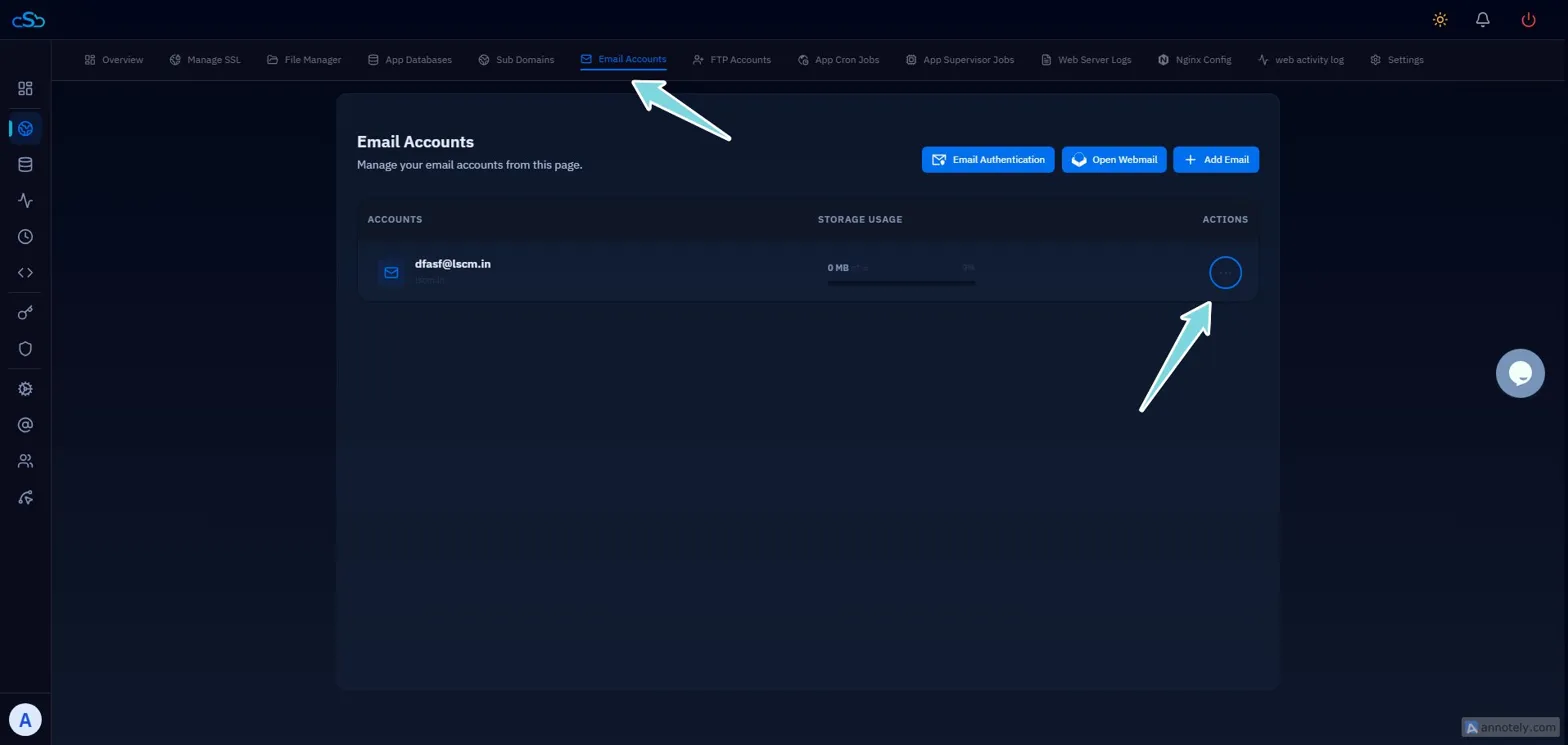
Fig. 02 — Three-dot actions menu expanded, showing Forward Email and other options.
The action menu only appears for accounts that have already been created. If no accounts are listed, create an email account first before attempting to add a forwarder.
Step 3: Click Forward Email
Selecting Forward Email from the dropdown opens the forwarder configuration popup where you will specify the destination address.
Click Forward Email from the dropdown menu.
The Add Forwarder popup will appear.
Step 4: Add the Forwarding Address
Enter the destination address — the inbox where you want forwarded emails to be delivered. This can be any valid email address, including addresses on external providers like Gmail or Outlook.
1. Enter the destination address: In the Email field of the Add Forwarder popup, type the full email address where forwarded messages should be sent.
2. Click Add: CloudStick will save the forwarder immediately. All incoming mail to the original account will now be copied to the destination address.
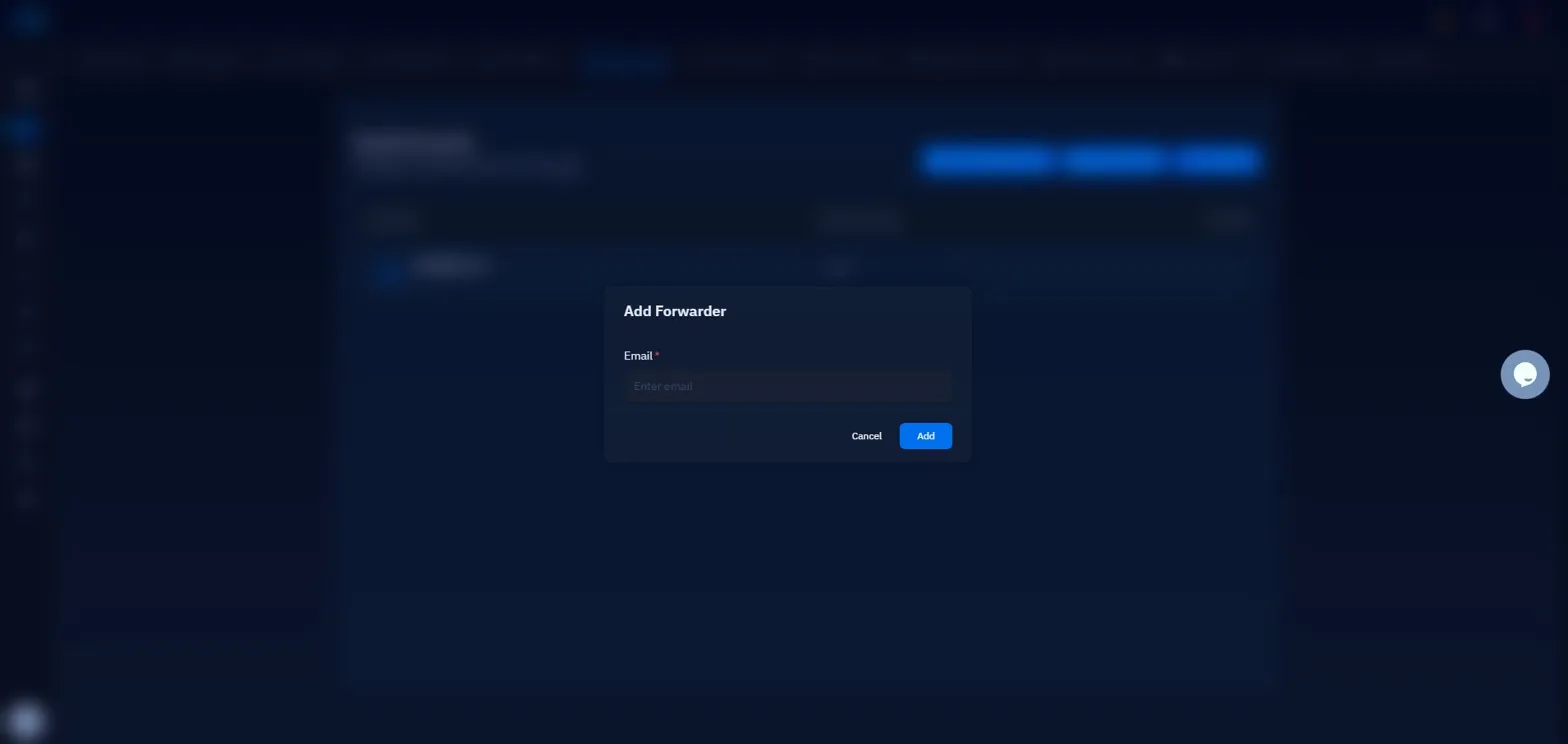
Fig. 03 — Add Forwarder popup with the destination email address field.
You can add multiple forwarders to a single email account by repeating this process and entering a different destination address each time.
Double-check the destination address before clicking Add. A typo will silently drop forwarded mail — CloudStick does not validate whether the destination inbox exists.