How to View Login Activity in CloudStick
Overview
CloudStick records every login attempt made to your account, giving you full visibility into who has accessed your dashboard and when. The Login Activity section shows login date and time, IP address, browser and device details, and whether each attempt was successful or failed — all from a single, easy-to-read table.
This guide walks you through accessing the Login Activity page from your profile so you can monitor your account and catch any unauthorized access early.
You must be logged in to your CloudStick account to view Login Activity. If you notice any unrecognized login attempts, update your password immediately.
Step 1: Open Your Profile
Your profile menu is the gateway to all account-level settings, including Login Activity. It lives at the bottom-left corner of the dashboard.
1. Log in to CloudStick: Sign in to your account at app.cloudstick.io and land on the main dashboard.
2. Locate your profile avatar: At the bottom-left corner of the dashboard, find your profile avatar or account name.
3. Click your avatar: Clicking it expands the profile menu, which displays your account name, current plan, and quick-action links.

Fig. 01 — CloudStick dashboard with the profile avatar expanded at the bottom-left corner.
Step 2: Open Login Activity
Once your profile is open, navigate to the Login Activity section. The Profile page groups all account settings — User Details, API Access, Subscription, Login Activity, User Git SSH, Two-Factor Auth, and Security & Privacy — in a right-hand sidebar for easy navigation.
1. Open the Profile page: From the profile menu, click on your name or the profile link to open the full Profile page.
2. Locate the Login Activity card: On the Profile page, scroll down to find the "Login activity" card, which shows the description "Check your account's login history."
3. Click the arrow: Click the → arrow on the Login activity card, or select "Login Activity" from the right-hand sidebar to navigate directly to the login records.
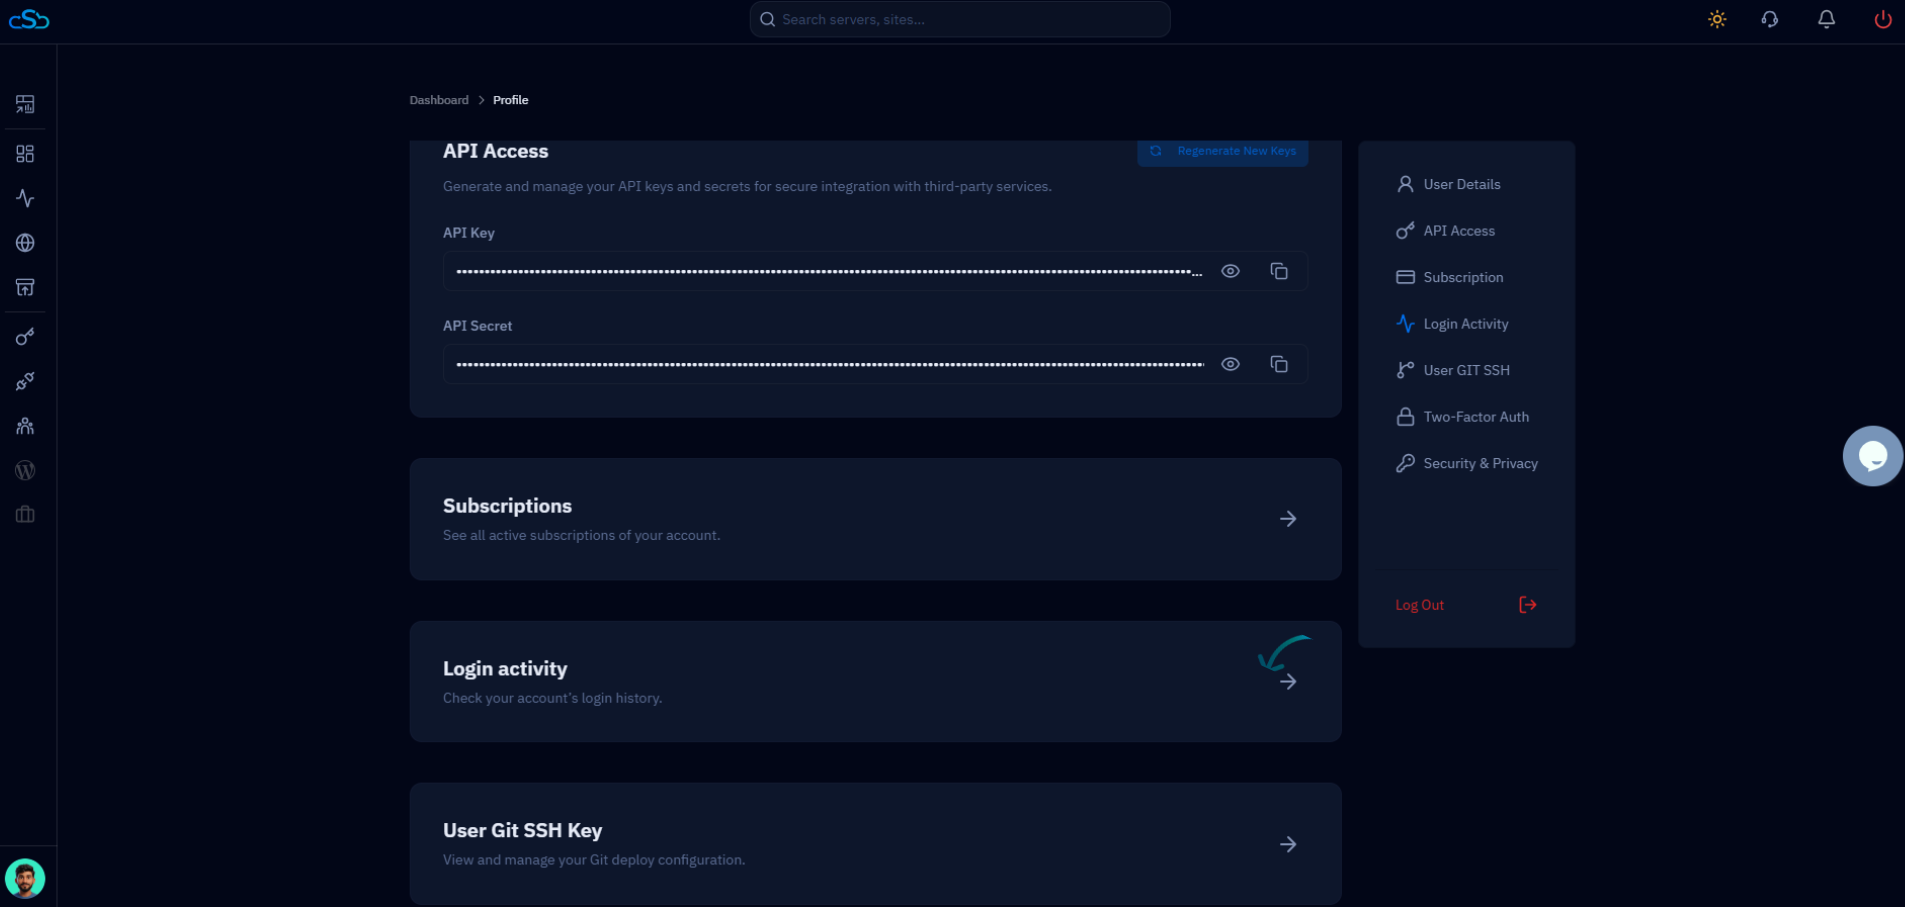
Fig. 02 — Profile page showing the Login activity card and the right-hand sidebar navigation.
Step 3: Review Login Records
The Login Activity page presents a detailed table of every login attempt on your account. Each row gives you the full context you need to verify whether access was authorized.
Status: Shows whether the login attempt was "Success" (displayed in green) or failed.
IP Address: The public IP address of the device that attempted to log in. Compare this against your known locations.
Detail: The browser user-agent string, which identifies the operating system, browser name, and version used during the login attempt.
Date: The calendar date of the login attempt.
Time: The exact time of the login attempt.
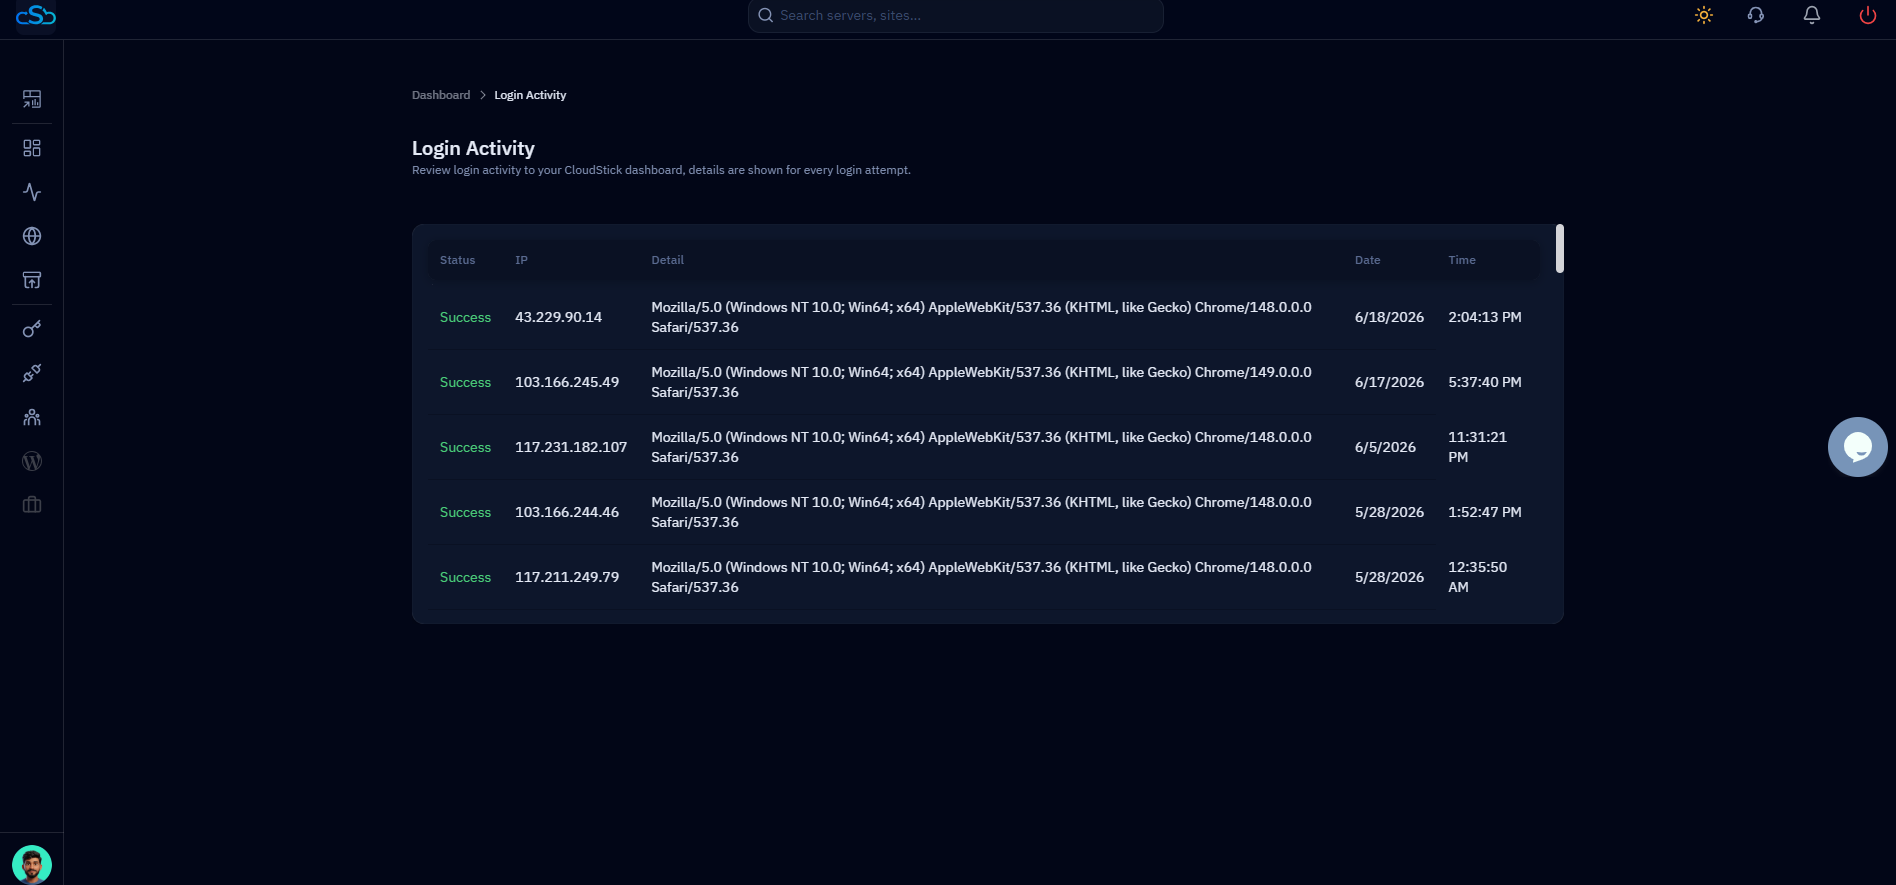
Fig. 03 — Login Activity page displaying the full table of login records with Status, IP, Detail, Date, and Time columns.
Review all records and confirm that each IP address and browser matches a device you recognize. Unfamiliar IPs or locations are a signal that your account may have been accessed without your knowledge.
Step 4: Monitor Account Security
Reviewing your Login Activity is only the first step — acting on what you find keeps your account secure. If you spot anything unusual, take immediate action.
Check for unfamiliar IPs: If an IP address does not match your usual location or network, treat it as suspicious.
Look for failed attempts: A pattern of failed logins from an unknown IP may indicate a brute-force attempt against your account.
Update your password: If you identify any unauthorized access, go to Security & Privacy in your profile and change your password immediately.
Enable Two-Factor Auth: For stronger protection, enable Two-Factor Authentication from the Two-Factor Auth section in your profile sidebar.
Regularly reviewing your login activity — even if nothing looks wrong — is a good security habit. CloudStick logs every attempt so you always have a complete audit trail.