How to Access SSH Configuration
Overview
How your server handles SSH access is one of the most important security decisions you can make. Whether passwords are allowed, whether the root user can log in directly, and whether key-based authentication is enforced all determine how exposed your server is to brute-force attempts and unauthorized access.
CloudStick lets you manage all of these options from the SSH Configuration panel in the dashboard, so you can harden SSH access with a few toggles instead of editing /etc/ssh/sshd_config over the terminal. This guide walks you through opening the SSH Configuration panel and the settings you can control there.
Before enabling Passwordless Login Only, make sure a working SSH key is already added to the server — otherwise you can lock yourself out. See the How to Add an SSH Key guide first if you haven't added one.
Step 1: Log In to Your CloudStick Account
Start from the CloudStick Dashboard and open the server you want to configure.
1. Log in: Sign in to your CloudStick dashboard at app.cloudstick.io.
2. Select your server: From the Dashboard, click the server you want to manage to open its server details page.
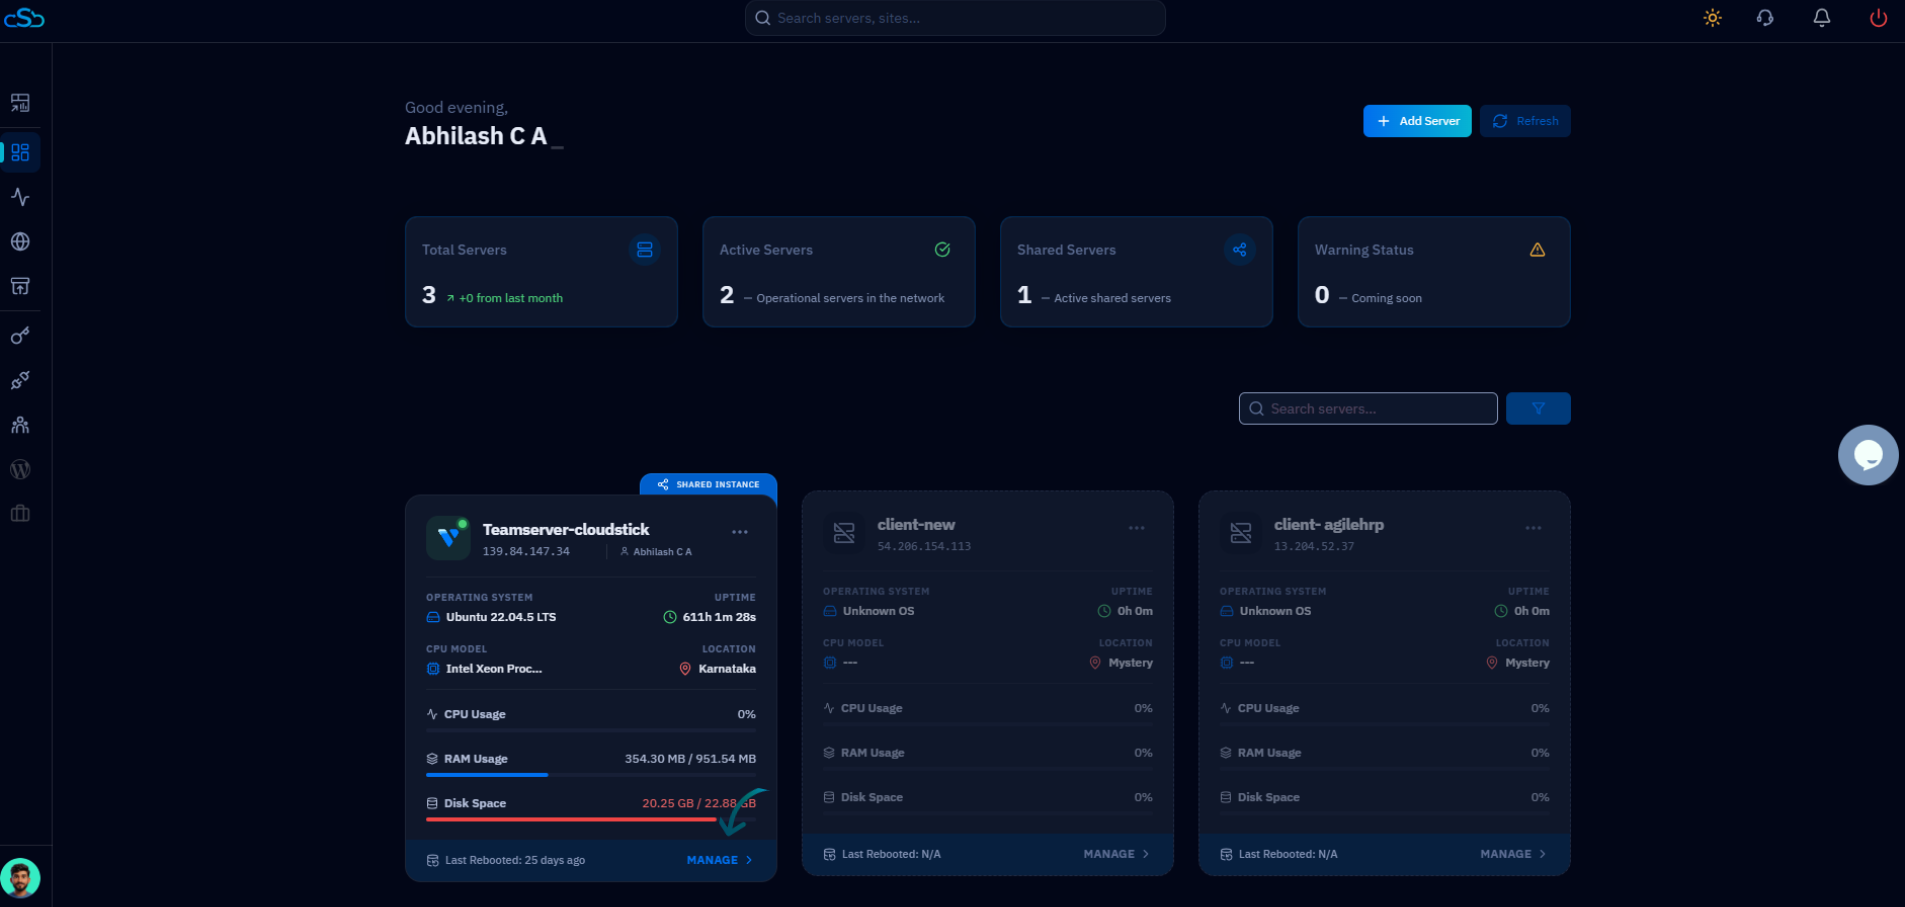
Fig. 01 — The CloudStick Dashboard showing your connected servers. Select the server you want to configure.
Step 2: Open SSH
The SSH tools live in the left-hand navigation of the server panel.
1. Open the menu: From the left-side menu of the server panel, locate the SSH key icon.
2. Click SSH: Click on SSH to open the page where SSH keys and configuration for this server are managed.
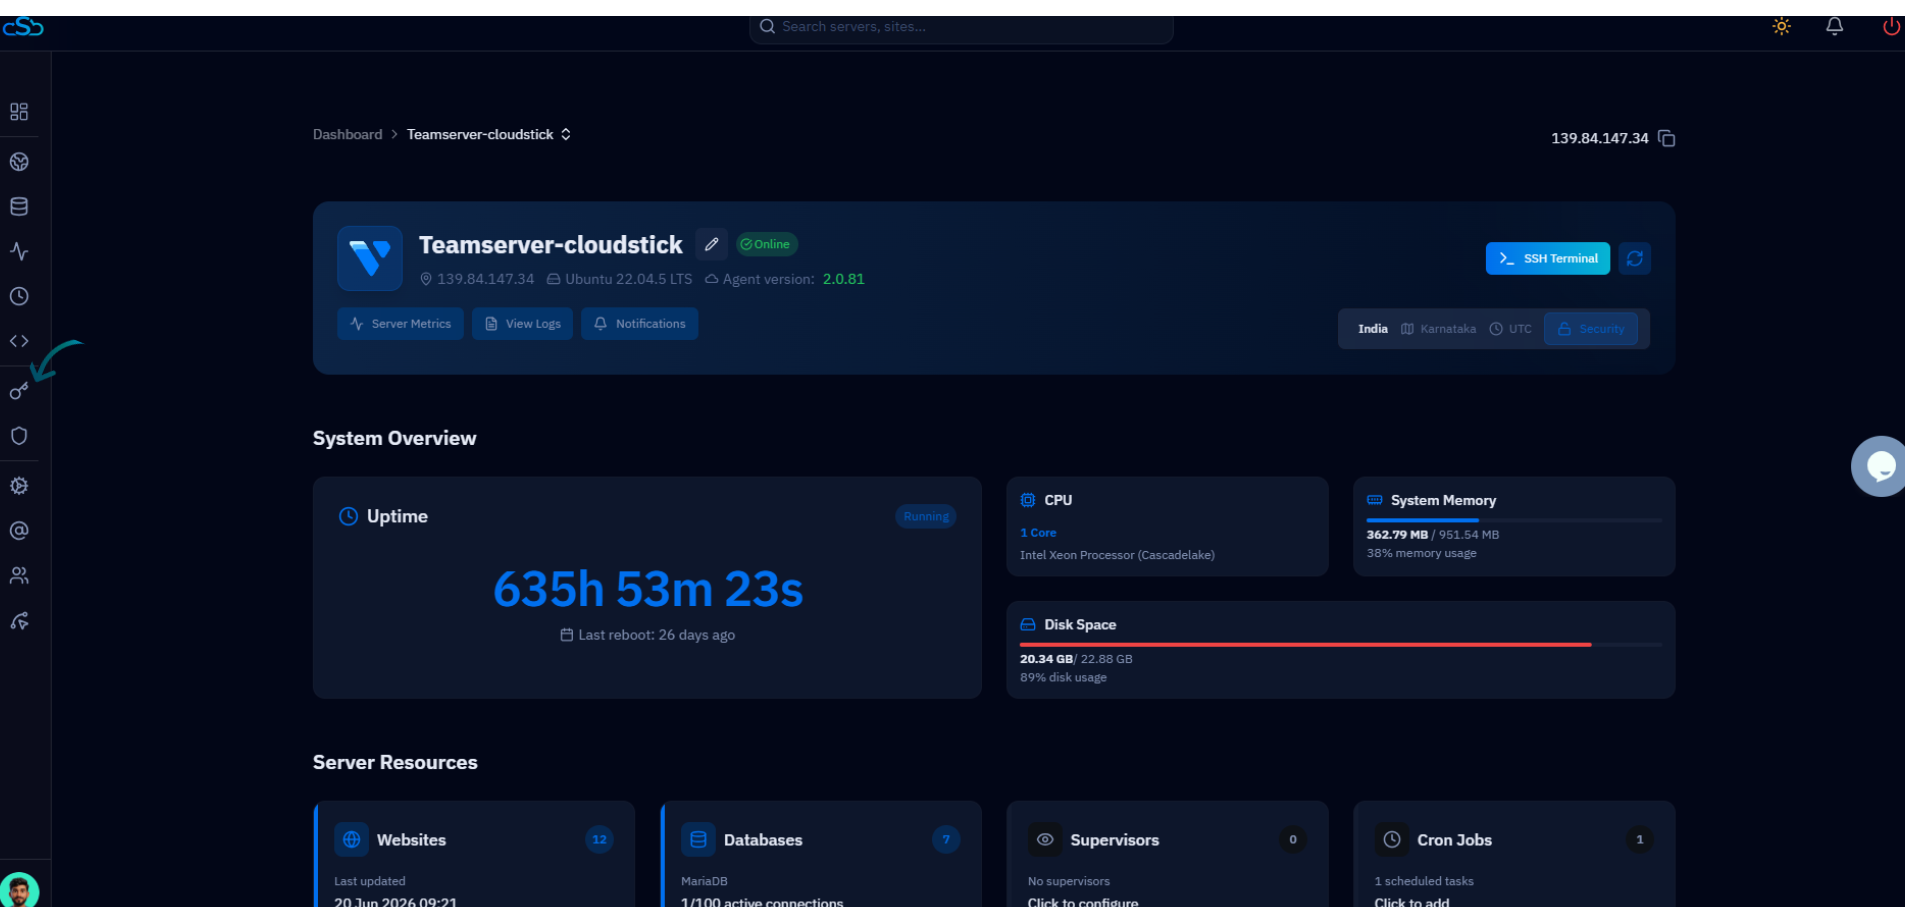
Fig. 02 — The server panel with the SSH option highlighted in the left-hand navigation.
Step 3: Open SSH Configuration
The SSH Keys page has a dedicated button for opening the configuration options.
1. Find the button: On the SSH Keys page, look to the top-right next to the Add SSH Key button.
2. Click SSH Configuration: Click the SSH Configuration button to open the panel where SSH security settings can be toggled.
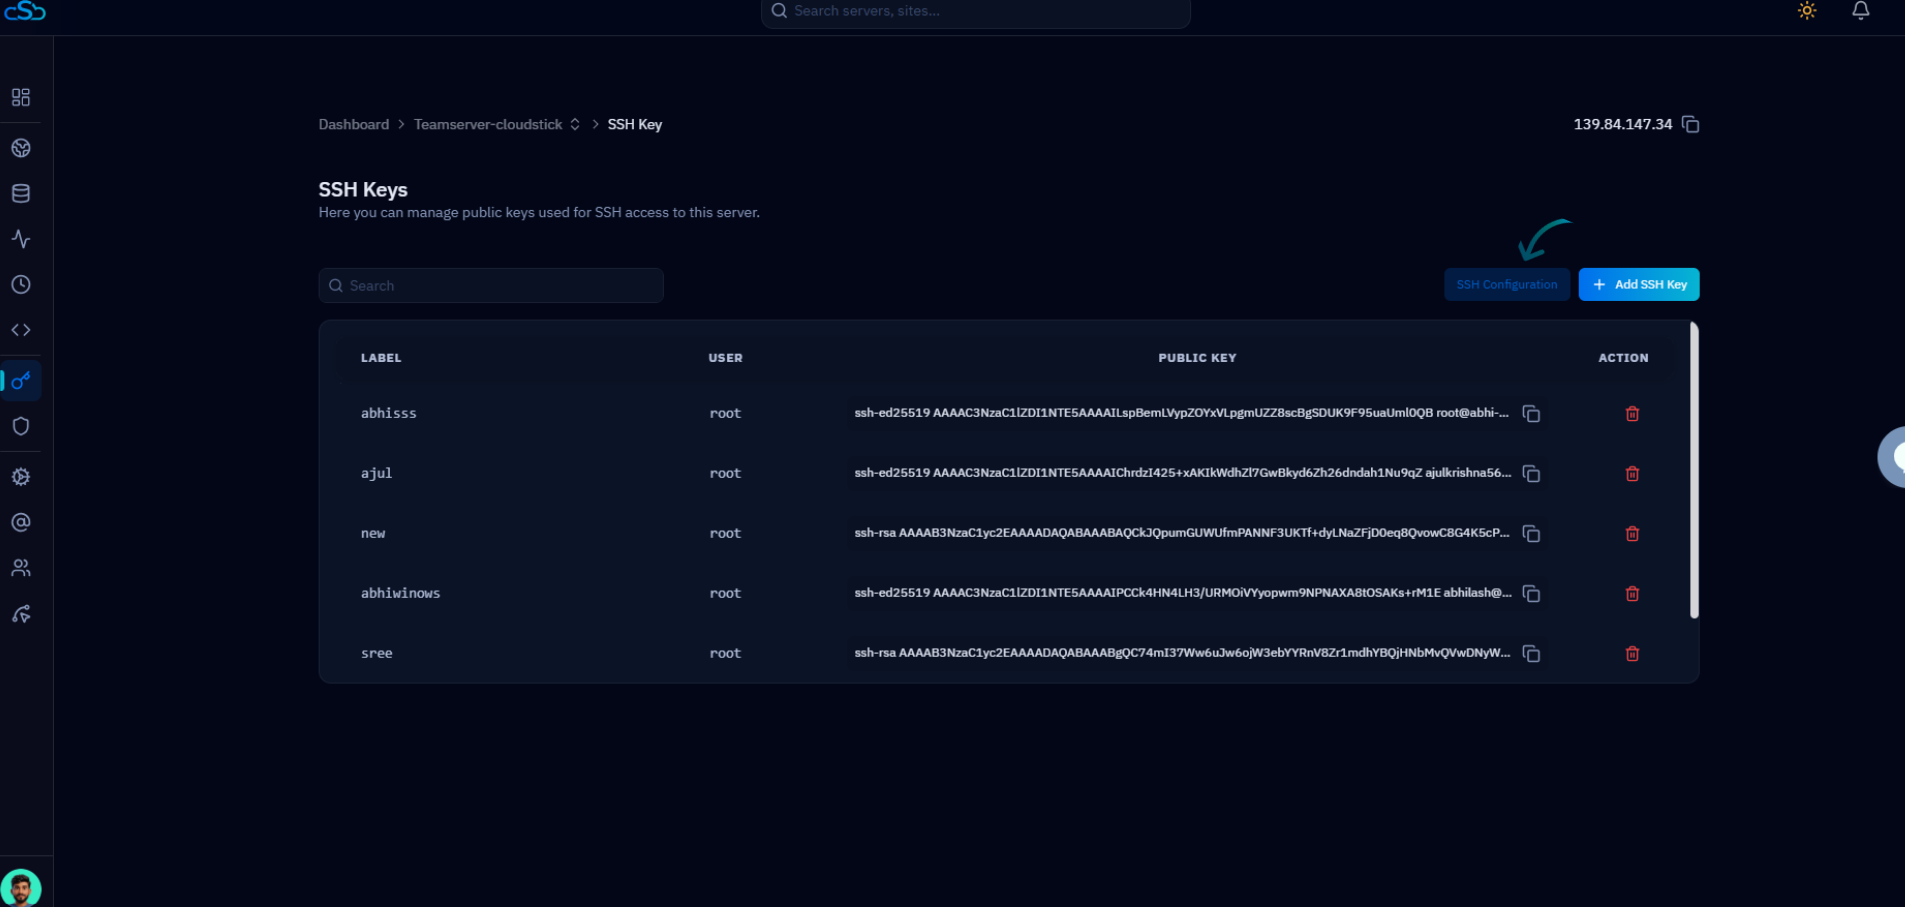
Fig. 03 — The SSH Keys page. Click the SSH Configuration button to open the settings panel.
Step 4: Manage SSH Settings
The SSH Configuration panel lets you enable or disable the following options directly from the dashboard.
Passwordless Login Only: Forces key-based authentication only — passwords are no longer accepted for SSH.
Password Authentication: Allows users to log in over SSH using a password.
Permit Root Login: Controls whether the root user is allowed to connect over SSH directly.
Use DNS: Enables reverse DNS lookups on connecting clients during the SSH handshake.
Pubkey Authentication: Enables authentication using SSH public keys.
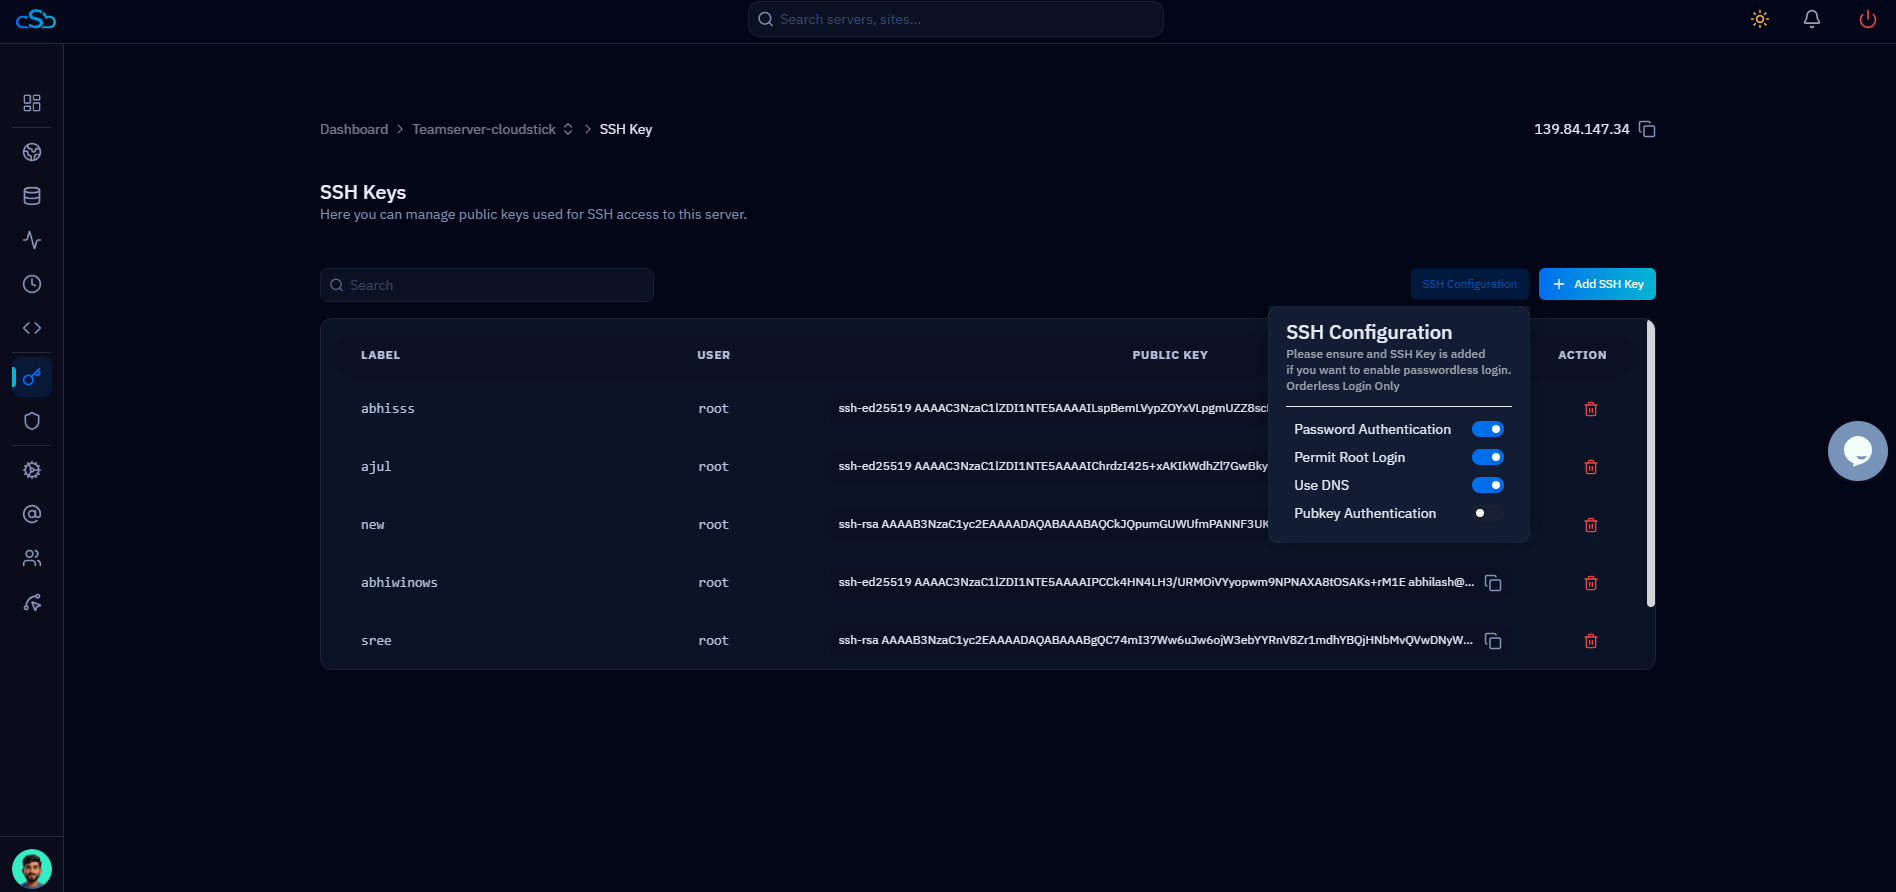
Fig. 04 — The SSH Configuration panel with toggles for password authentication, root login, DNS, and pubkey authentication.
Step 5: Configure Passwordless Login (Optional)
Passwordless Login Only is the most secure setting, but it requires a working key first.
1. Add a key first: If you want to enable Passwordless Login Only, make sure an SSH key has already been added to the server and that you can connect with it.
2. Enable the toggle: Turn on Passwordless Login Only to disable password-based SSH access entirely.
Ensure an SSH key is configured and tested before enabling this option; otherwise, you may lose access to the server.
Step 6: Save Changes
Apply your changes so they take effect on the server.
1. Save the configuration: After updating the desired settings, click Save or Update Configuration to apply the changes.
2. Confirm they applied: CloudStick writes the settings to the server's SSH configuration and reloads the SSH service so the new rules take effect.
Changes made in the SSH Configuration section are applied directly to the server, letting you manage SSH security settings without manually editing configuration files through the terminal.