How do I add firewall rules?
Overview
Firewall and security systems are essential to any production server. CloudStick ships every connected server with CSF (ConfigServer Security & Firewall) pre-configured — a powerful, rule-based firewall that monitors and controls all incoming and outgoing network traffic. It ensures that only trusted connections reach your server while blocking unauthorized access and brute-force attempts automatically.
This guide walks you through adding custom firewall rules in CloudStick — including how to allow a specific IP address on a particular port (for example, granting a remote host access to MySQL on port 3306) and how to create time-bound allow or deny rules using CSF's Temporary Rules feature.
You must have an active server connected to CloudStick before managing firewall rules. If you have not yet connected a server, see the How to Deploy Your Own Server guide first.
Step 1: Navigate to the Firewall Section
All firewall management happens inside the server panel. Start by opening the server you want to configure.
1. Open your CloudStick Dashboard: Log in to your CloudStick account and click on the server you want to manage.
2. Open the Firewall section: In the left-hand navigation of the server panel, click the shield icon labelled Firewall. This opens the Firewall & Security management screen, which includes the Active Temporary Rules List, Brute Force & Network Limits, and other CSF controls.
The Firewall section is only available on connected servers. If you do not see it in the left-hand navigation, ensure your server agent is installed and the server status shows as Active.
Step 2: Configure a Custom Firewall Rule
CloudStick lets you create targeted firewall rules that allow or deny a specific IP address on a specific port — with an optional time limit. This is ideal for granting temporary database access, permitting a remote tool during maintenance, or blocking a suspicious IP for a defined period.
Add a New Rule
In the Active Temporary Rules List, click the + Add New Rule button in the top right corner. The Add Temporary Rule dialog will appear.
IP Address: Enter the IP address you want to target (e.g., 127.65.37.21). This is the source IP that will be allowed or denied.
Rule Type: Select Allow to permit traffic from this IP, or Deny to block it. Choose based on your use case — for example, Allow for a trusted remote database client.
Time Period: Set how long the rule should remain active. Options include durations such as For 1 hour, For 1 day, or For 1 week. Once the period expires, CSF automatically removes the rule.
Port: Enter the port number the rule applies to (e.g., 3306 for MySQL, 5432 for PostgreSQL, 22 for SSH). Leaving this blank applies the rule to all ports for that IP.
To allow inbound MySQL connections from a specific host, set the IP to the client's public IP, Rule Type to Allow, and Port to 3306. This restricts the permission to only that IP and port combination — more secure than fully whitelisting the IP.
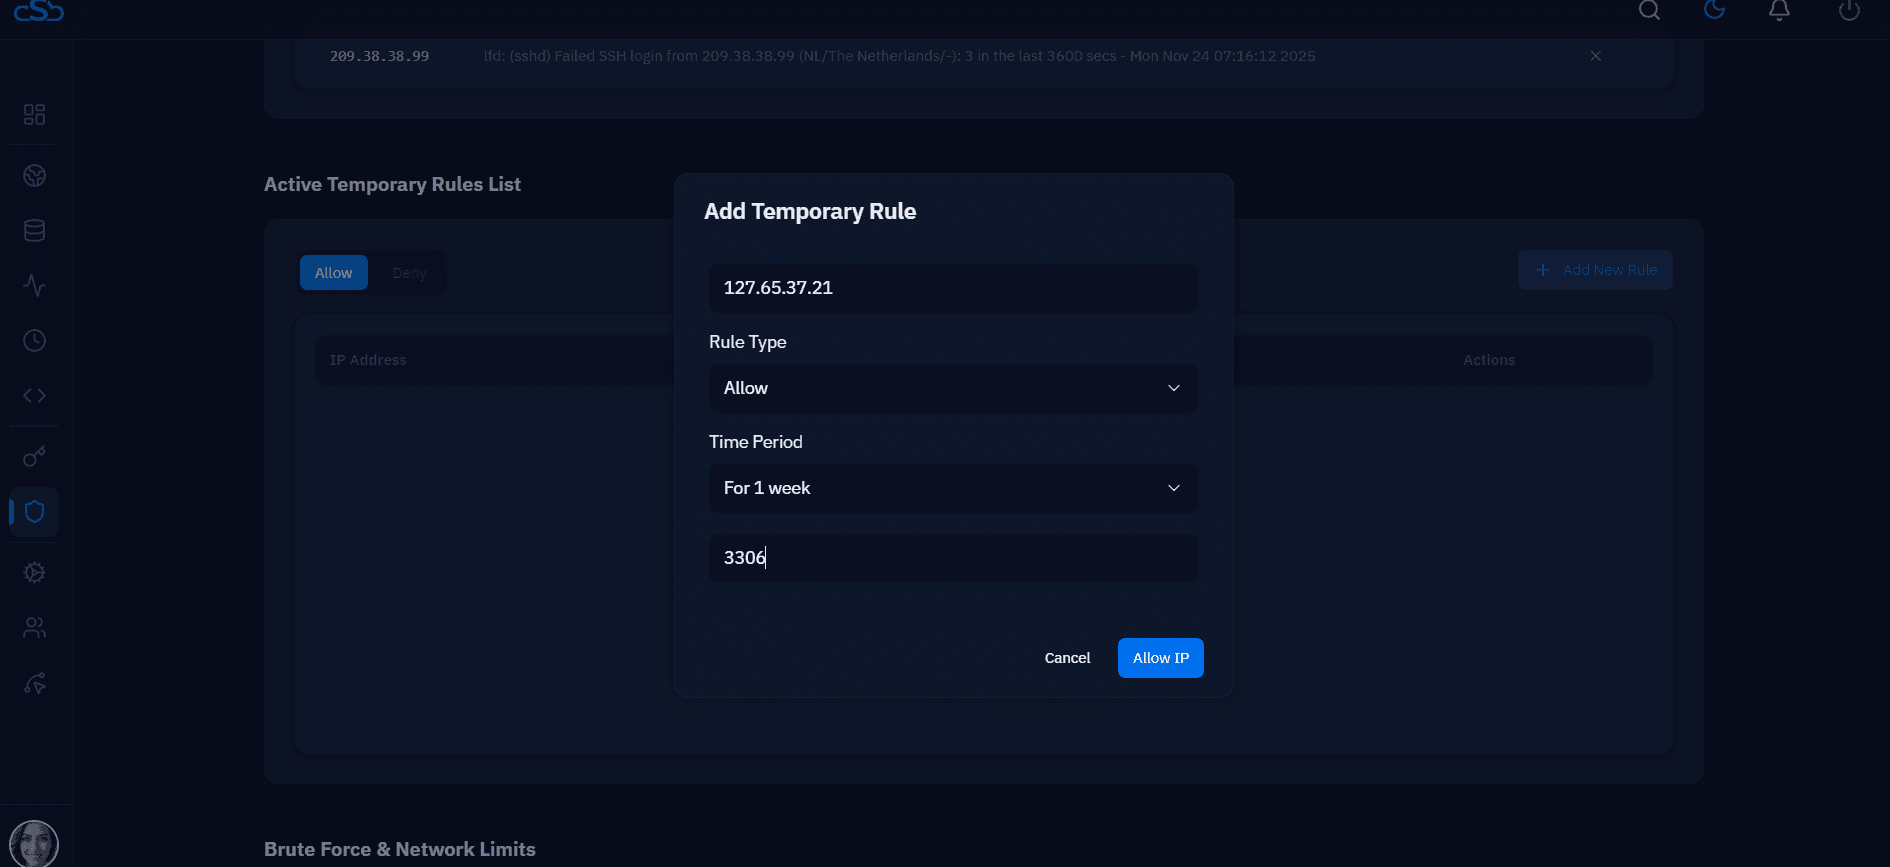
Fig. 01 — The Add Temporary Rule dialog with IP address, Rule Type (Allow), Time Period (For 1 week), and Port (3306) filled in.
Save the rule: Click the Allow IP (or Deny IP) button to confirm. CloudStick will apply the rule to CSF immediately — no server restart required.
Step 3: Review Active Temporary Rules
Once a rule is saved, it appears instantly in the Active Temporary Rules List. This list gives you a live view of all temporary rules currently enforced on your server, making it easy to audit access and clean up expired or unnecessary entries.
Understanding the Rules List
Allow / Deny tabs: Use these tabs to toggle between viewing permitted IPs and blocked IPs separately. This keeps the list readable when you have many rules.
IP Address column: Shows the targeted IP for each rule — you can verify the correct host was added at a glance.
Port column: Displays the port the rule applies to (e.g., 3306 for MySQL rules).
Protocol column: Shows whether the rule applies to TCP, UDP, or both.
Actions column: Click the red × icon to immediately remove a rule when it is no longer needed — useful for revoking temporary access ahead of its expiry.
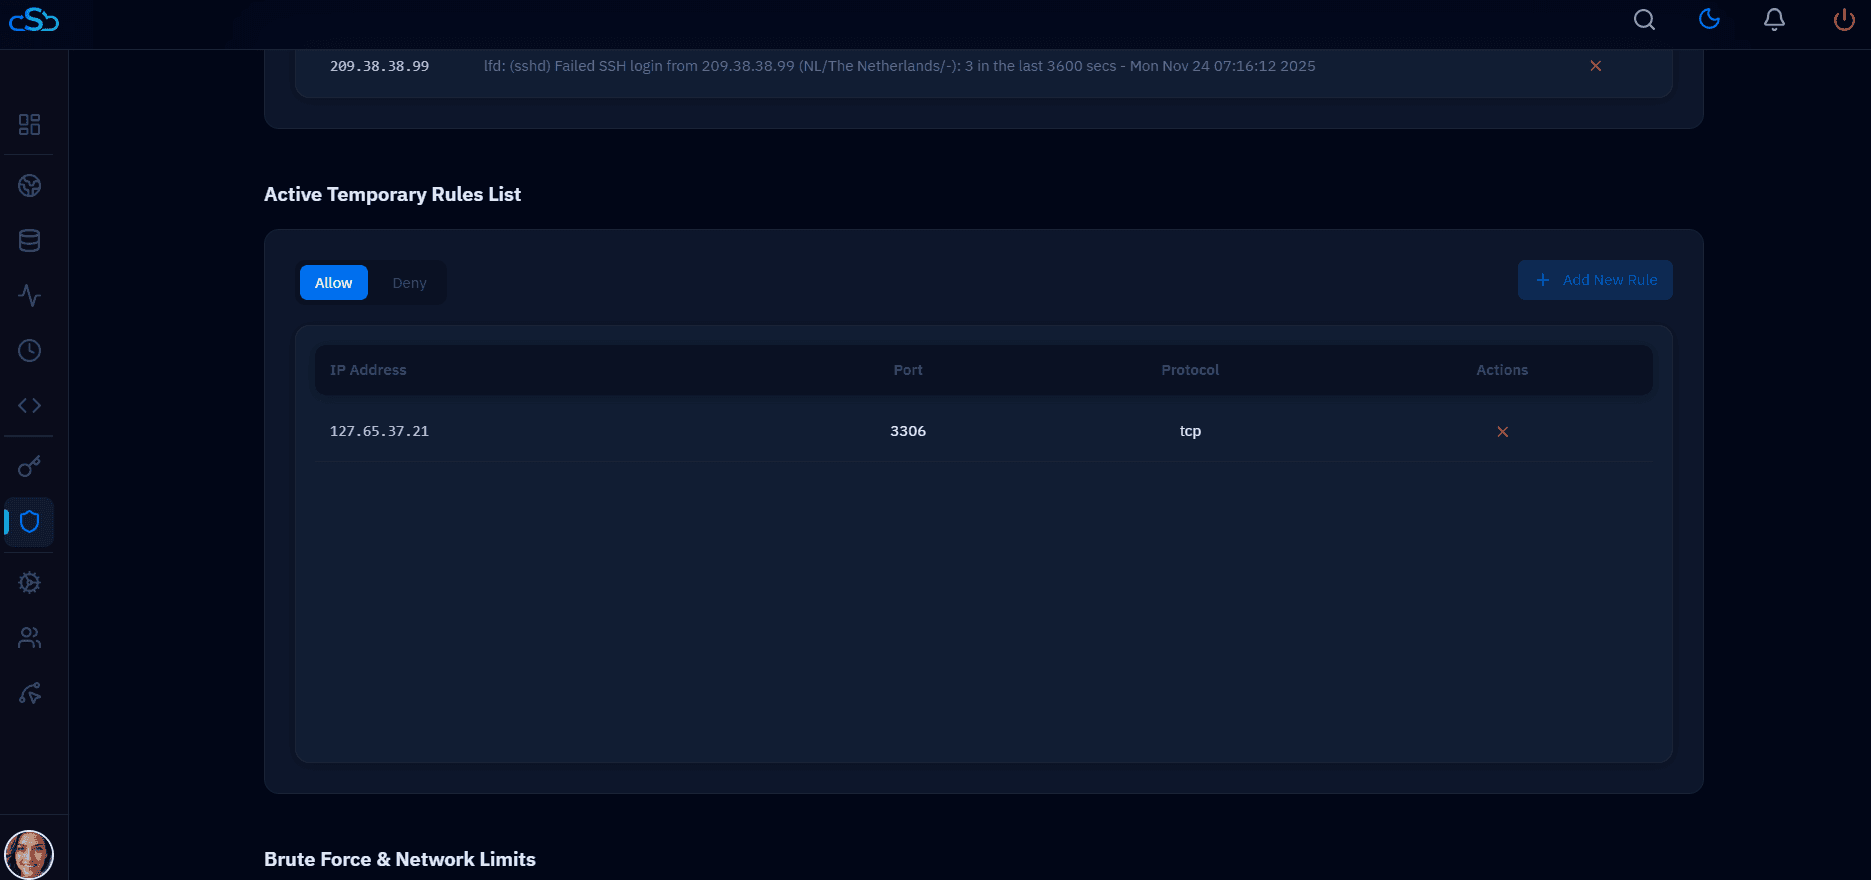
Fig. 02 — The Active Temporary Rules List showing an Allow rule for IP 127.65.37.21 on port 3306 (TCP) with a remove action.
Temporary rules are automatically removed by CSF when their time period expires. You do not need to manually clean them up unless you want to revoke access early.