How to Clone a Website
Overview
Cloning a website lets you create an exact, working copy of an existing site — files, databases, and configuration included — without rebuilding it from scratch. It's the fastest way to spin up a staging or testing environment where you can safely trial plugins, theme changes, or code updates, and it's ideal when you need to migrate a site to another server.
CloudStick handles the entire copy from a single dialog in the dashboard — no manual file transfers, database dumps, or SSH commands. This guide walks you through selecting the website, opening the Clone action, choosing a Complete or Custom clone, picking a destination server, and starting the process.
Cloning is available on all paid plans (Basic and above). Before you begin, make sure the destination server has enough free disk space and resources to host the copied website, especially when cloning to the same server.
Step 1: Log In to CloudStick
Start by signing in to your CloudStick account. The dashboard is your home base and lists every server connected to your account.
Sign in to CloudStick: Log in with your account credentials to open the main dashboard.
Step 2: Select Your Server
From the dashboard, open the server that hosts the website you want to clone. Each server card shows its operating system, uptime, and live resource usage.
Choose the server: Click the server card for the machine where your website is hosted, or click Manage to open its server panel.
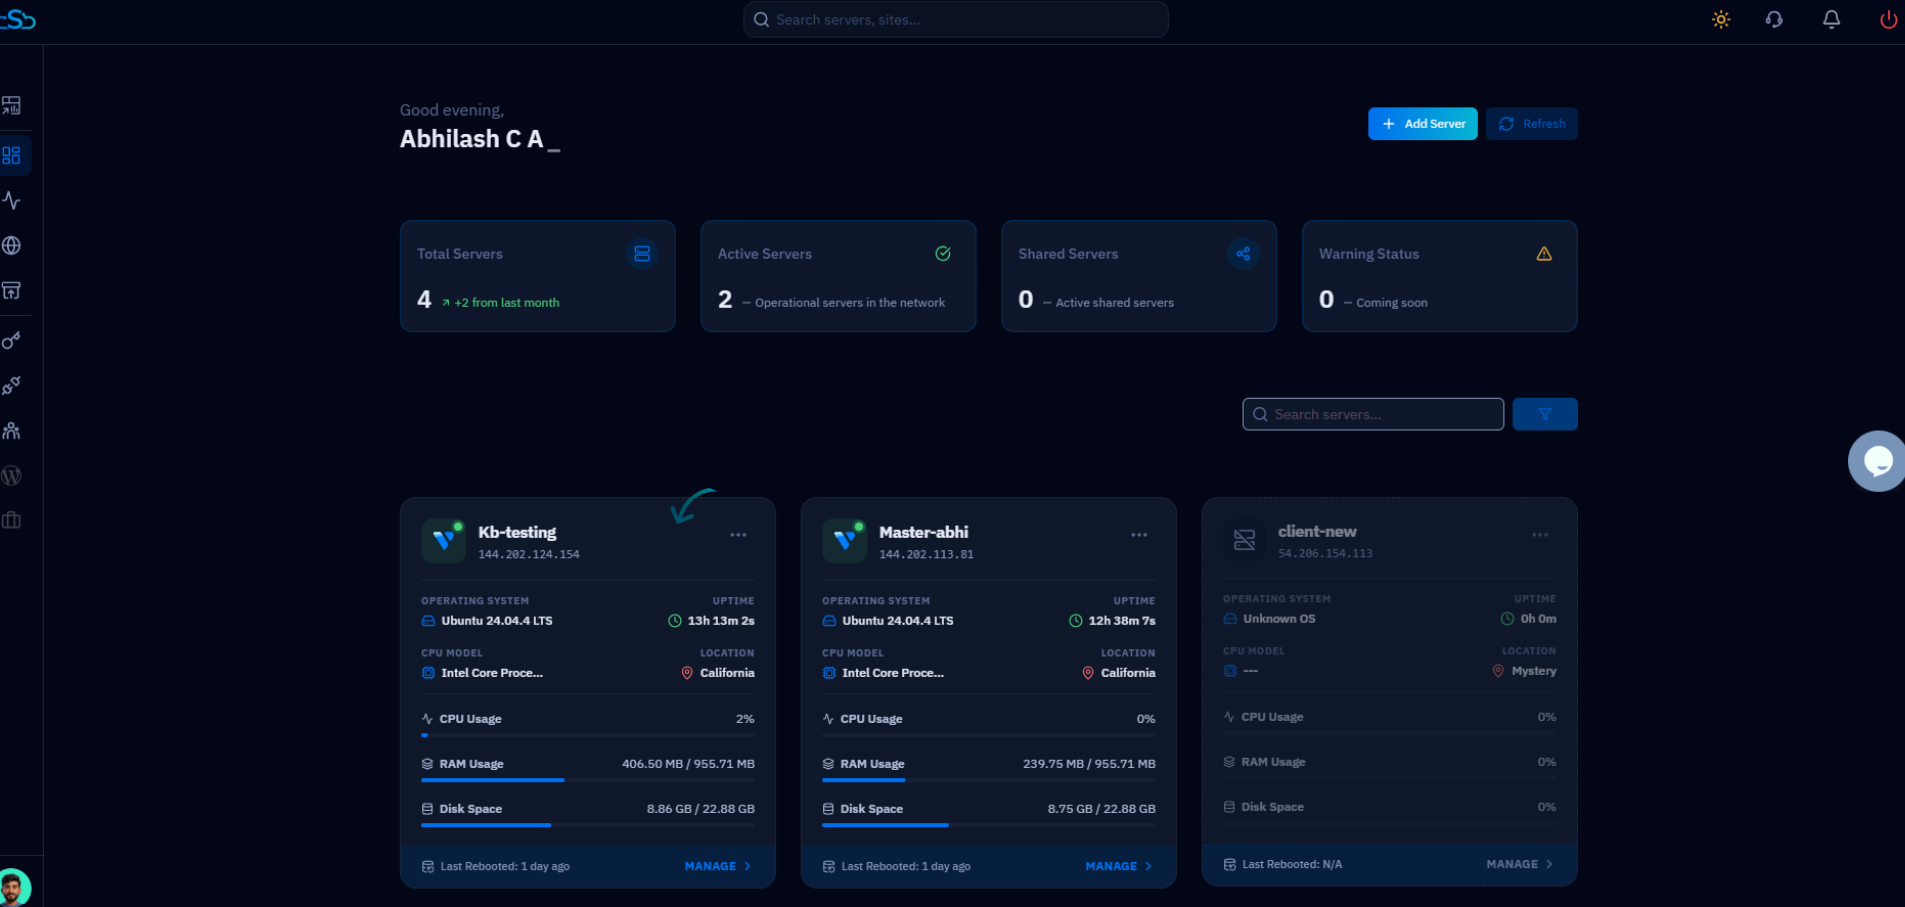
Fig. 01 — The CloudStick dashboard listing connected servers; select the server that hosts your website.
Step 3: Open the Websites Section
Inside the server panel, the System Overview shows your server resources. Open the Websites area to see every site hosted on this server.
Click Websites: From the left-side menu (or the Websites card under Server Resources), click Websites to open the web application list.
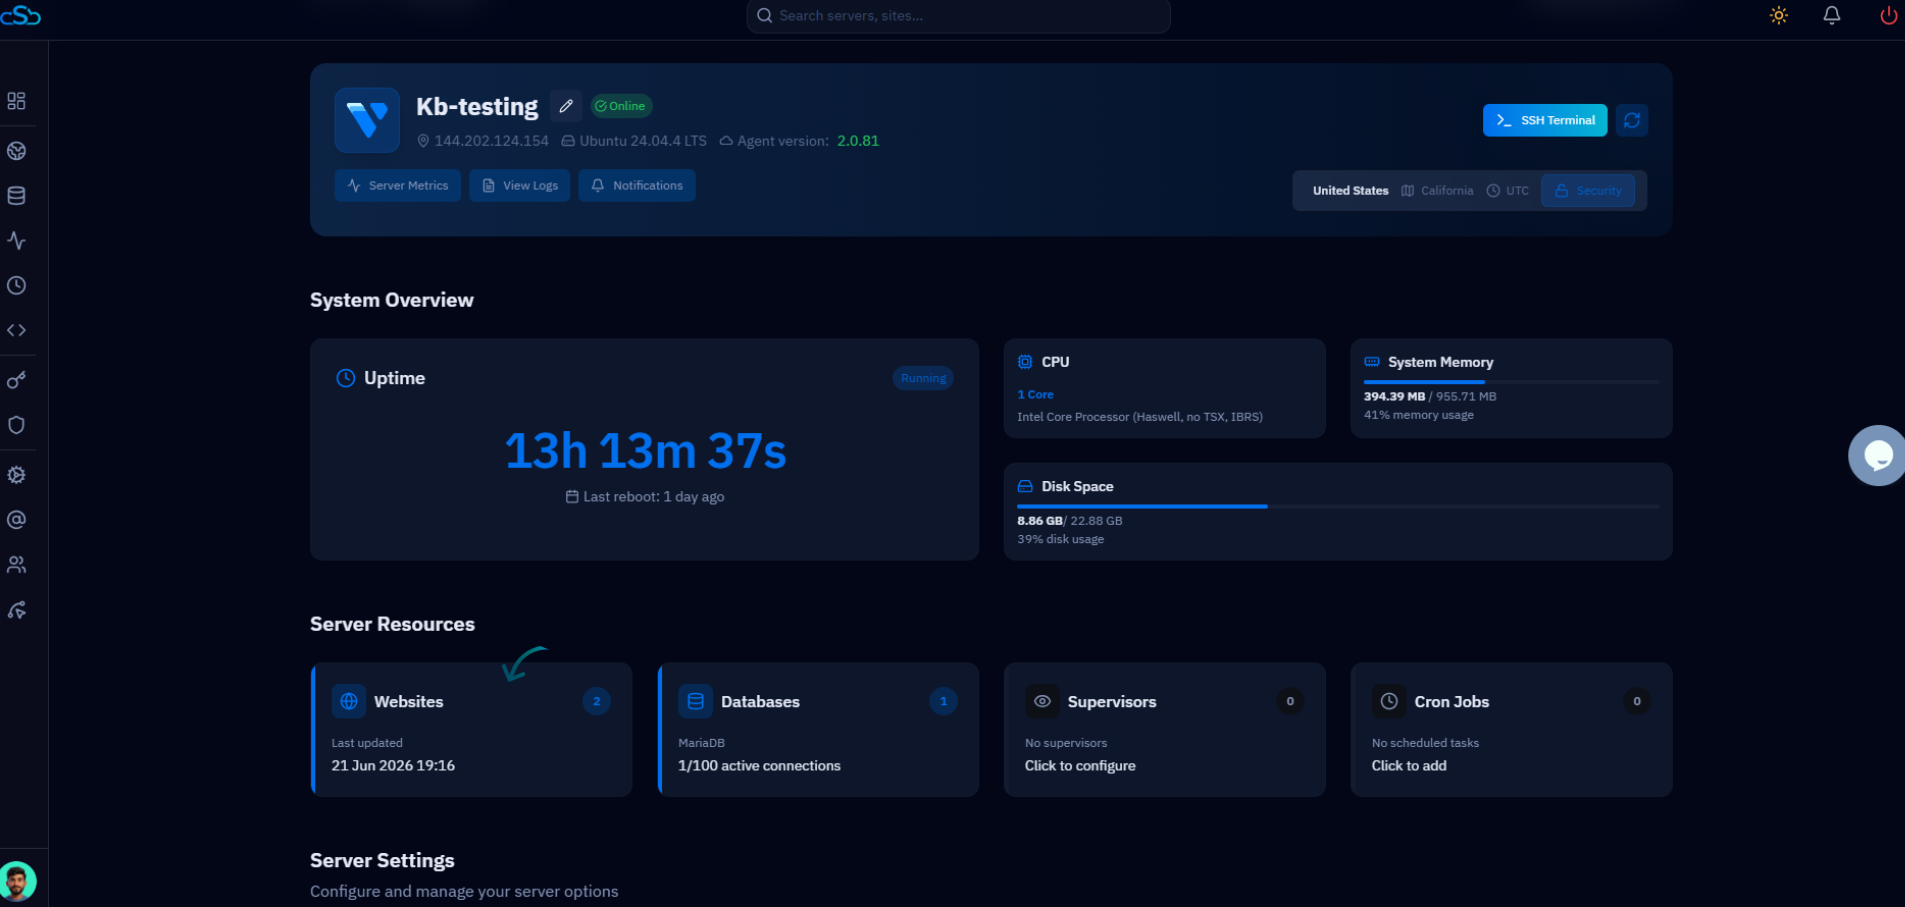
Fig. 02 — The server panel; click Websites in the left-side menu to view all hosted web applications.
Step 4: Select the Website to Clone
The WebApp List displays all websites on the server, along with their domain, stack, PHP version, and status. Identify the one you want to duplicate.
Find your website: Locate the website you want to clone in the list — use the Search button if you have many sites.
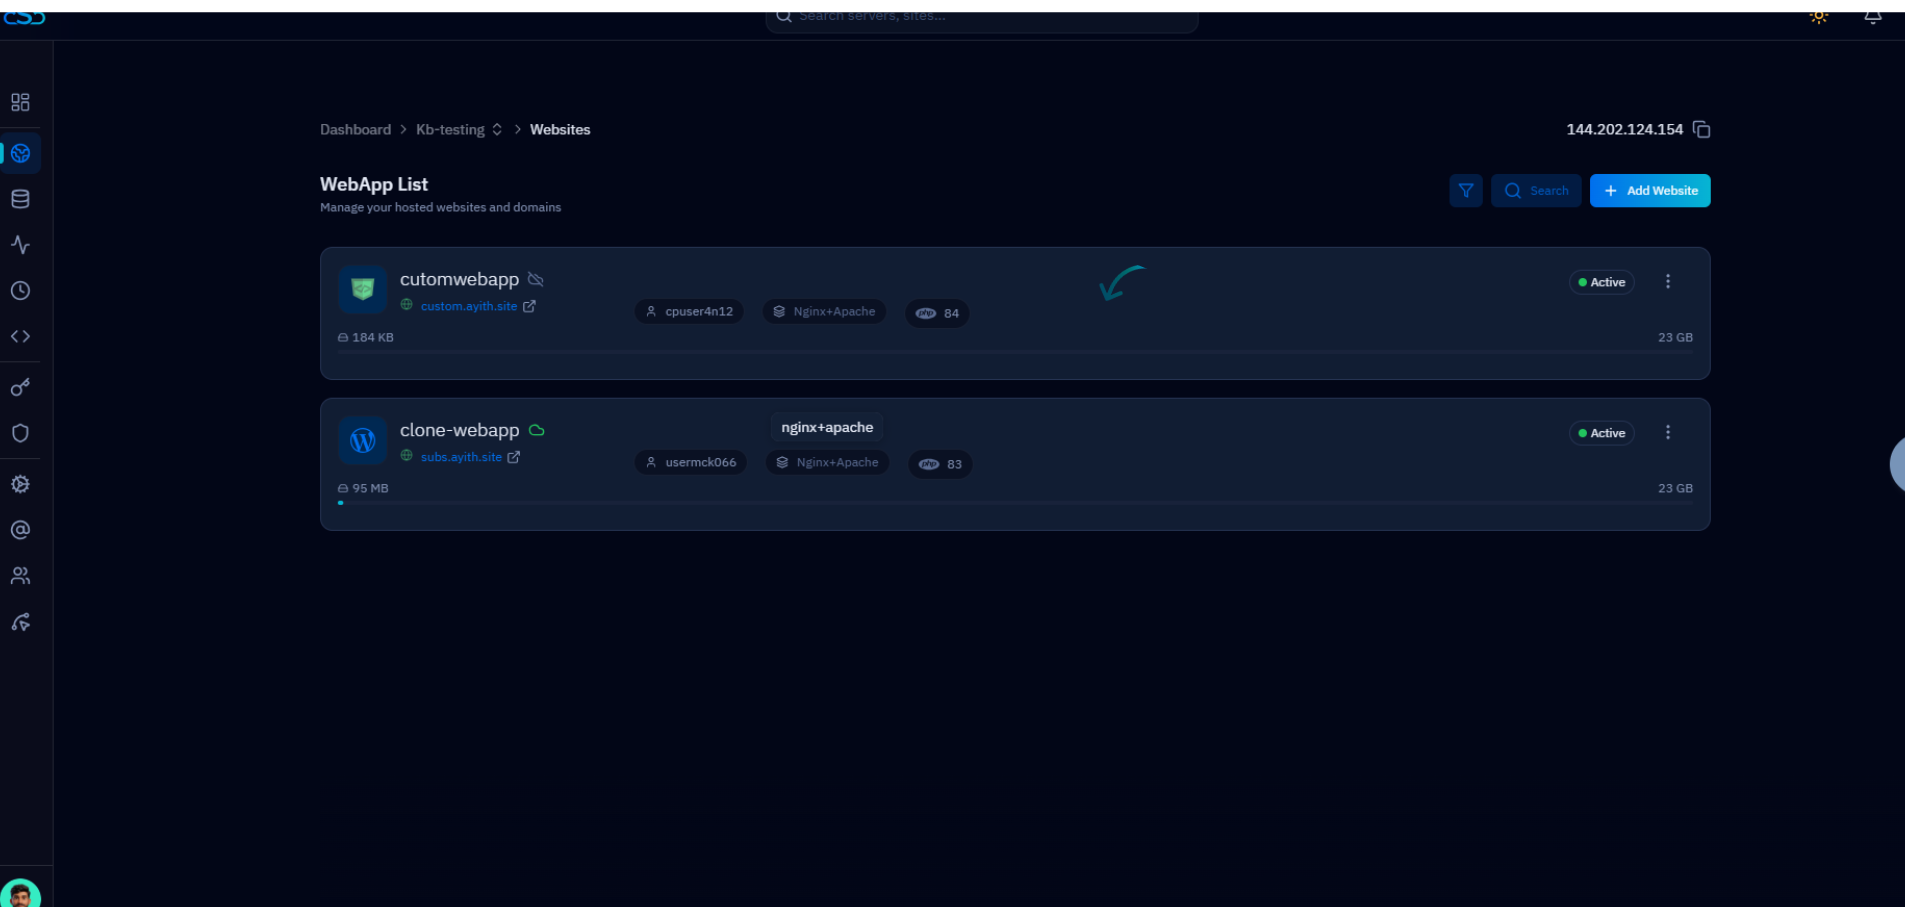
Fig. 03 — The WebApp List showing every website on the server with its domain, stack, and status.
Step 5: Open the Actions Menu and Click Clone
Every website exposes a set of quick actions behind a three-dot menu. This is where the clone operation lives.
Open the actions menu: Click the three dots (⋮) next to the website to reveal the available options.
Select Clone: Choose Clone Webapp from the menu to open the Create Clone dialog.
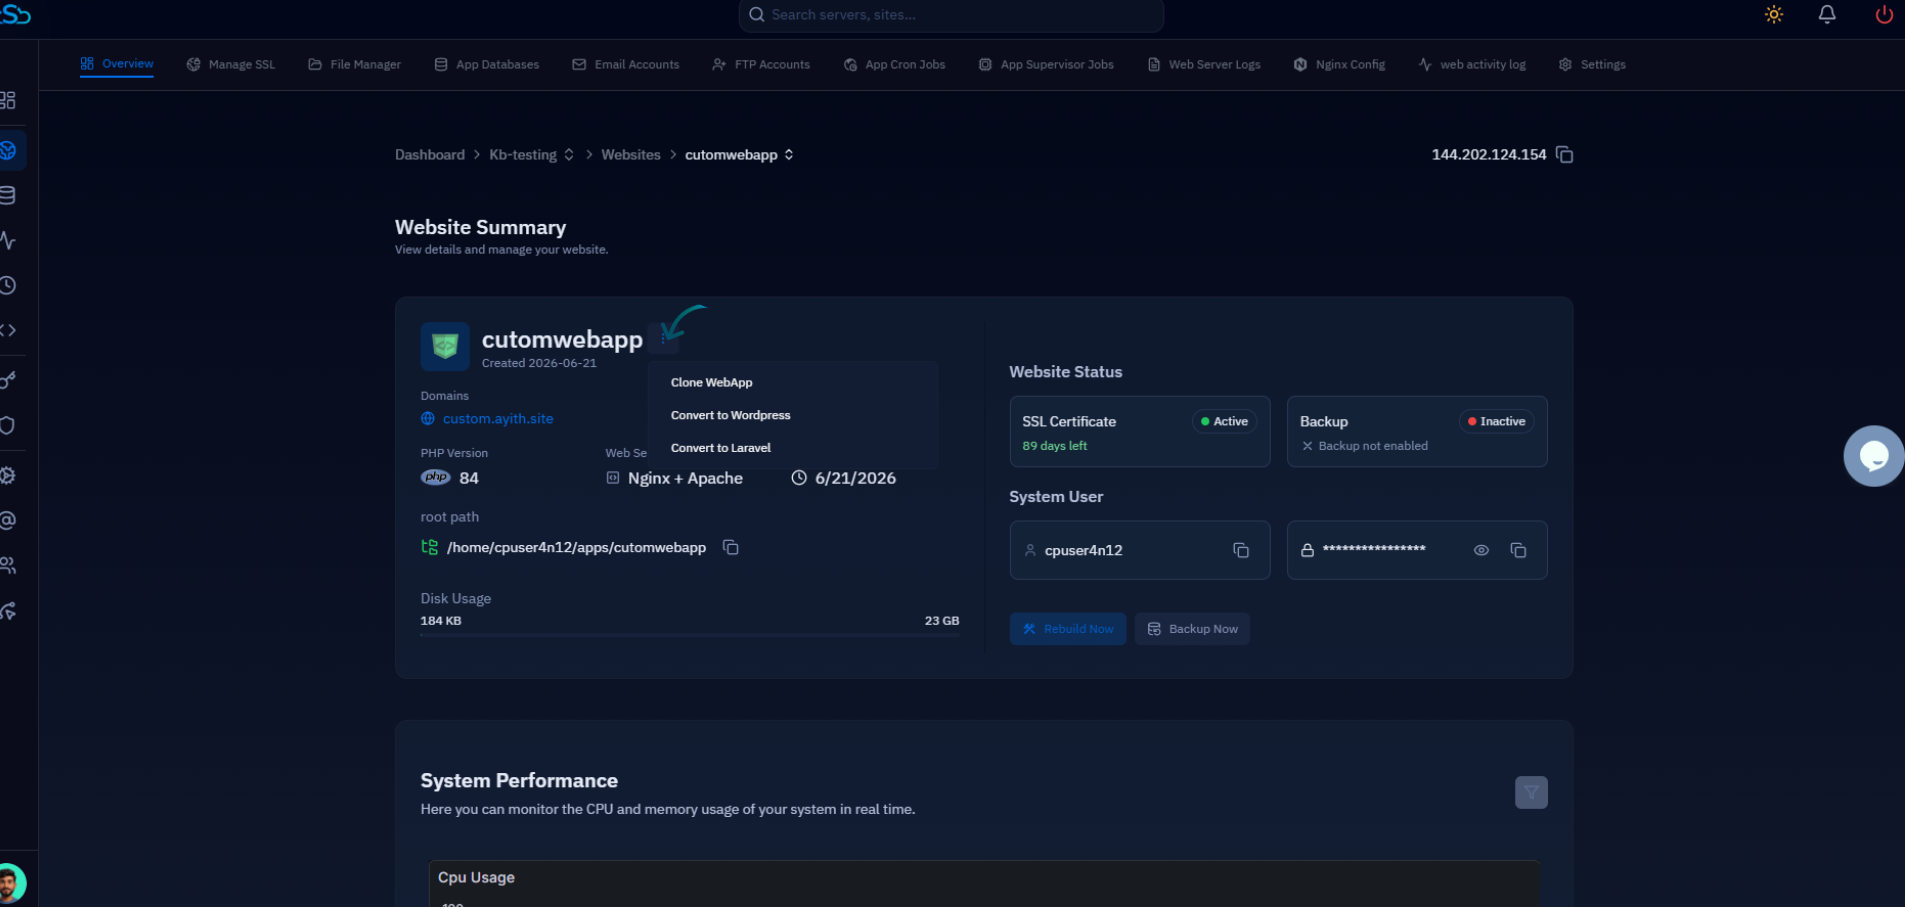
Fig. 04 — The website actions menu opened from the three-dot icon, with the Clone Webapp option.
Step 6: Choose the Clone Type
In the Create Clone dialog, you'll choose how much of the website to copy. CloudStick offers two clone types:
Complete: Copies the entire website exactly as it is — all files, databases, and configuration — with no further input required. Best for full backups, staging copies, and migrations.
Custom: Lets you fine-tune the clone by setting a new website name, system user, and domain for the copy. Best when the duplicate needs its own identity on the destination.
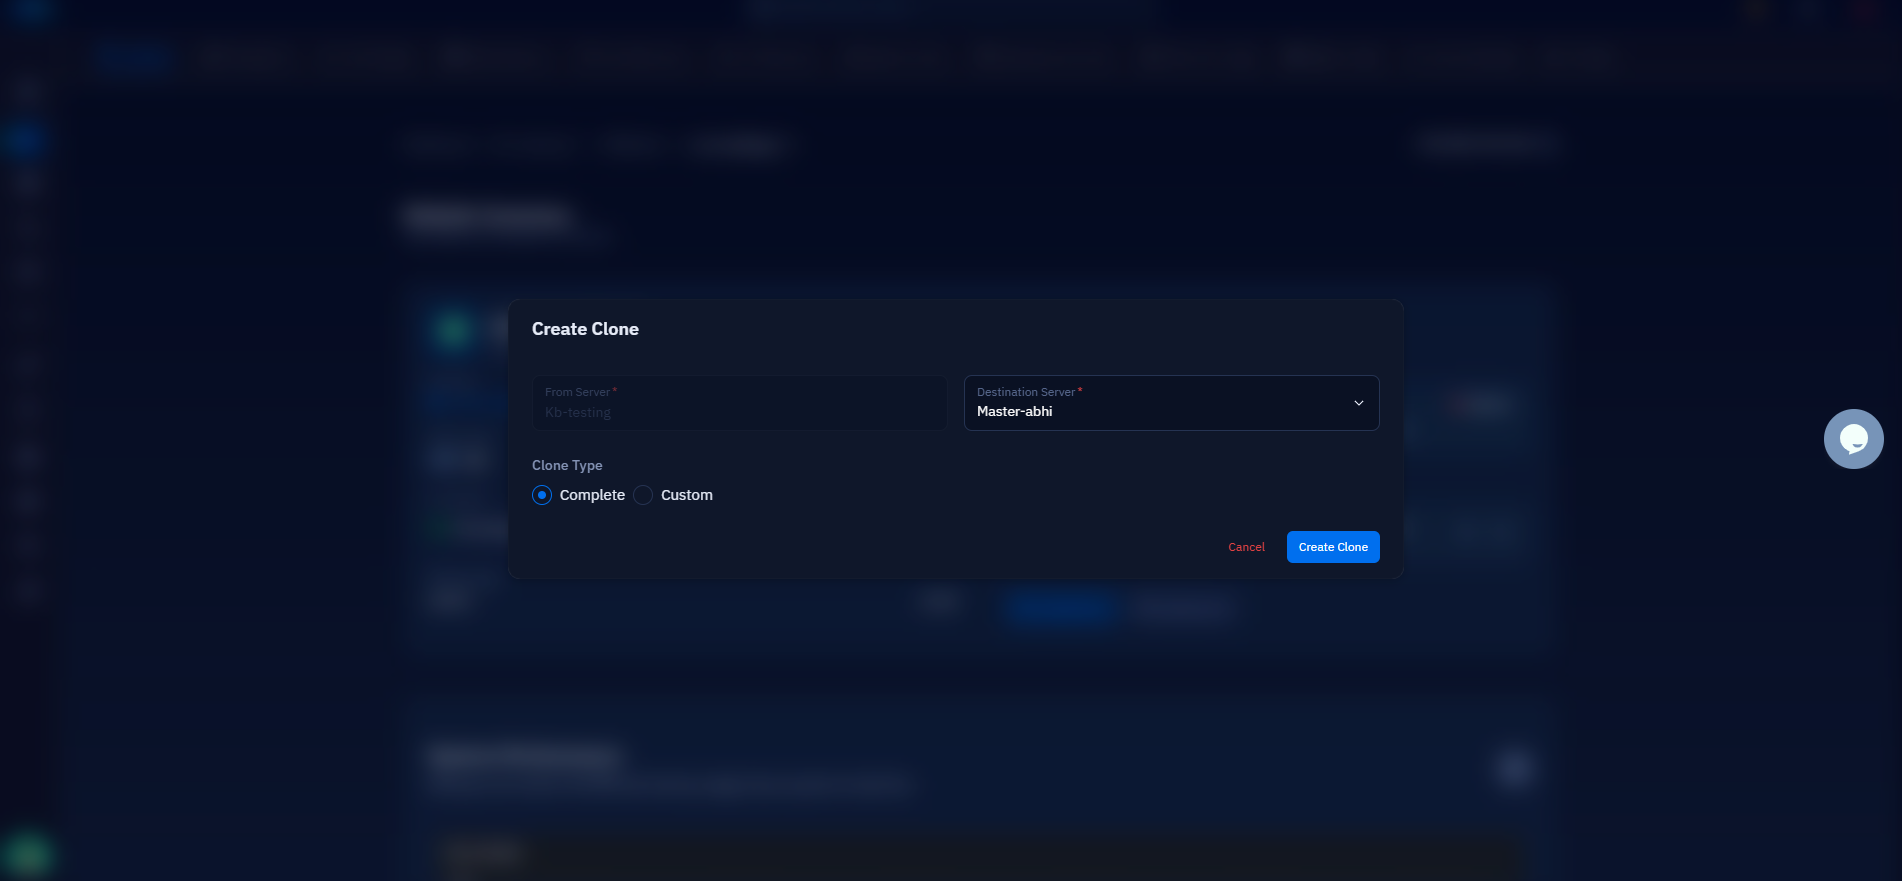
Fig. 05 — The Create Clone dialog with the Complete and Custom clone type options.
Step 7: Set the Destination and Start Cloning
Next, tell CloudStick where the copy should live. You can clone onto the same server or to a different server already connected to your account.
From Server: Confirm the source server that hosts the original website.
Destination Server: Choose where to place the clone — the same server or another connected server.
Custom fields (Custom clone only): If you chose Custom, enter the new Website Name, pick or generate a System User, and set the Domain for the cloned site.
Once the details are set, click Create Clone to begin the process.
To clone to a different server, that server must already be connected to your CloudStick account and have enough free resources to host the copied site.
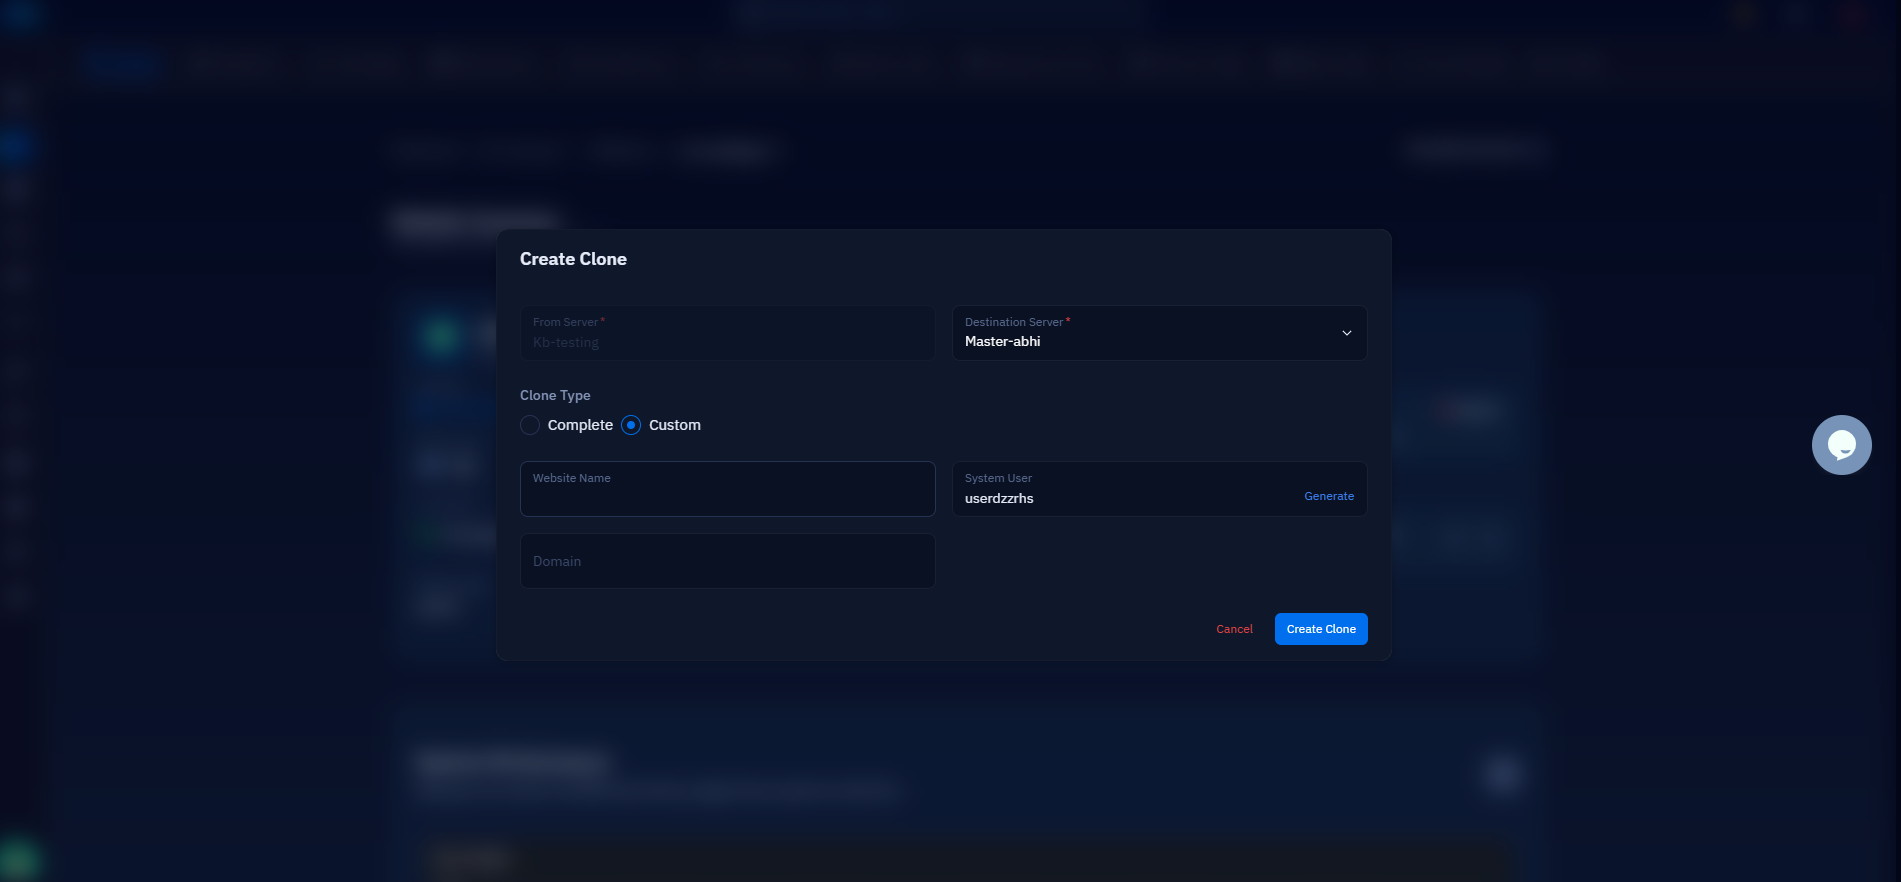
Fig. 06 — The Create Clone dialog with the destination server selected and the Create Clone button.
Step 8: Wait for Completion
CloudStick now copies everything in the background — no further action is needed from you.
CloudStick automatically copies all files, databases, and configurations to the chosen destination.
When the process finishes, the cloned website appears in the destination server's WebApp List with an Active status, ready to use.
Cloning a website creates an exact copy of your existing site. Make sure the destination has enough resources before starting the process.