How to Configure SMTP Relay Using Exim4 in CloudStick
Overview
By default, your CloudStick server sends outgoing email directly — which can lead to messages landing in spam folders or getting rejected outright by recipient mail servers. Configuring an SMTP relay solves this by routing all outgoing mail through a trusted third-party provider such as Postmark, Mailjet, or SendGrid, dramatically improving deliverability and protecting your server's sending reputation.
This guide walks you through configuring Exim4 — the default mail transfer agent installed by CloudStick — to relay outgoing mail via your chosen provider's SMTP endpoint.
Prerequisites: You will need root or sudo SSH access to your server, Exim4 installed (included by default on CloudStick servers), and valid SMTP credentials (API token or username/password) from your mail provider.
Step 1: Access Your Server and Back Up the Configuration
Before making any changes, create a safety backup of the Exim4 configuration file. This allows you to restore the original settings instantly if anything goes wrong.
Open the SSH Terminal: In your CloudStick dashboard, navigate to your server and click the SSH Terminal button in the top right corner. This opens a browser-based terminal session.
Create a backup copy: Run the following command to duplicate the current configuration template:
cp /etc/exim4/exim4.conf.template /etc/exim4/exim4.conf.template-bakKeep this backup file intact until you have confirmed that mail is routing correctly through your relay provider.
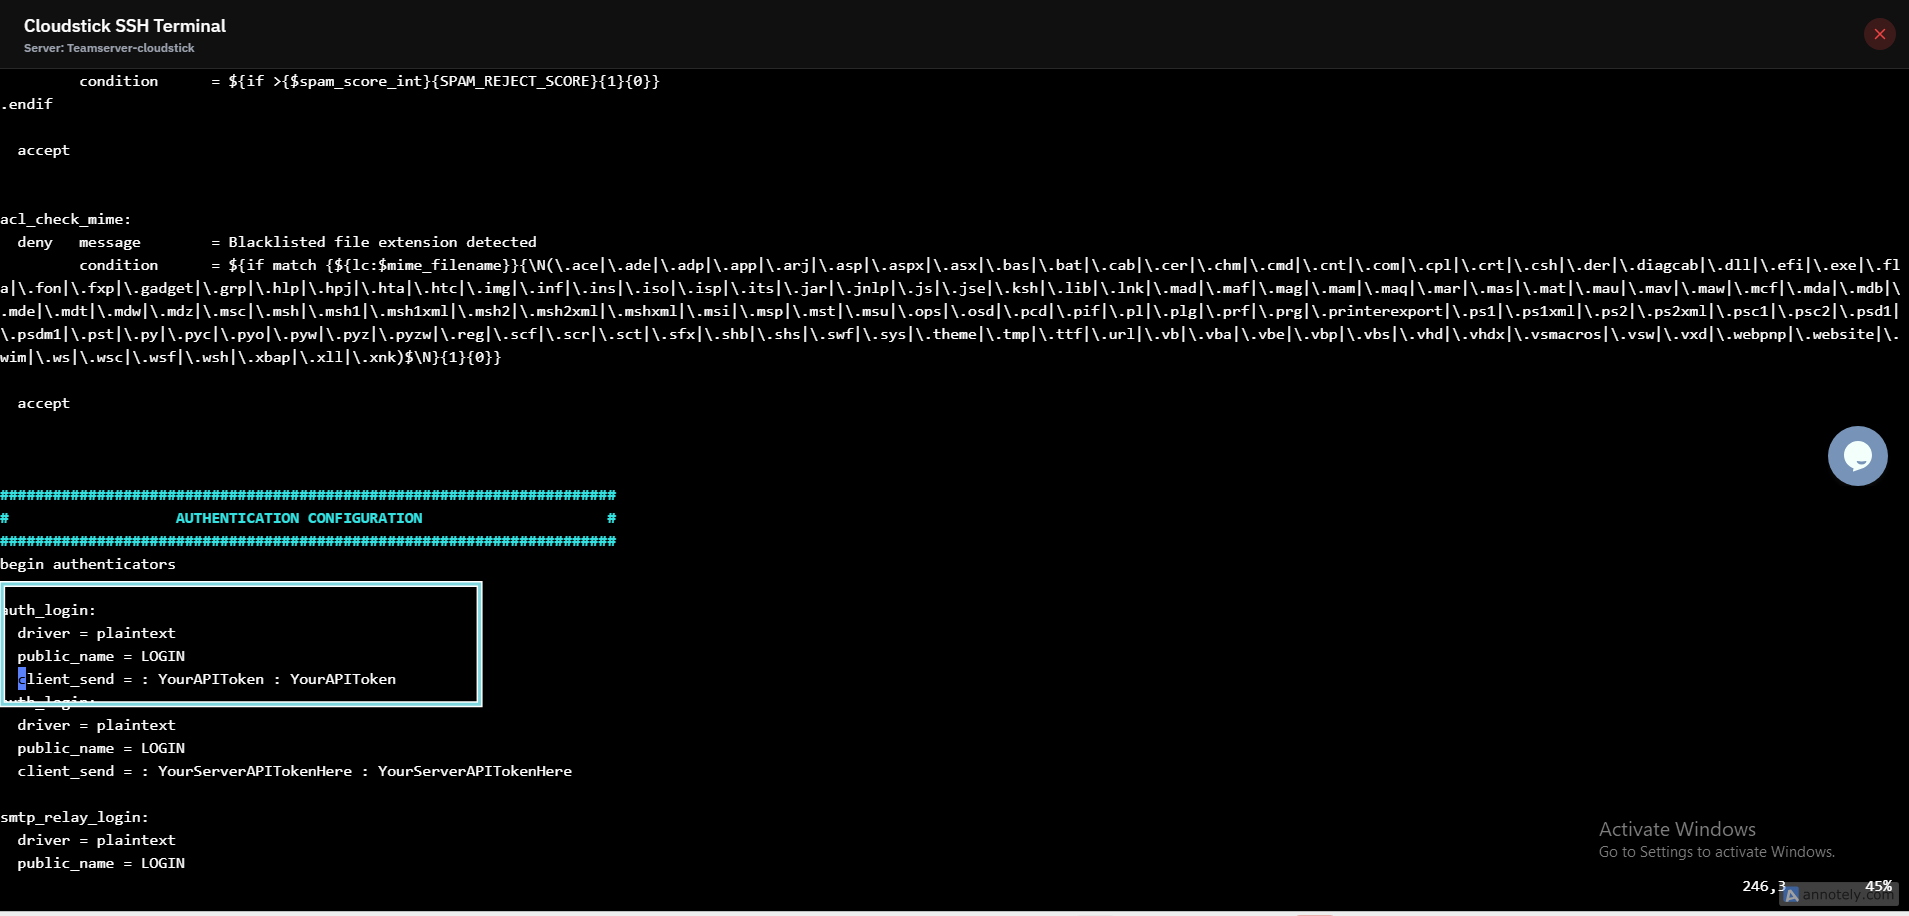
Fig. 01 — CloudStick SSH Terminal open with the backup command ready to run.
Step 2: Add the Authenticator Block
The authenticator block tells Exim4 how to prove your identity to the relay provider's SMTP server. You will add a plaintext LOGIN authenticator that sends your API token as the credential.
Open the configuration file: In your terminal, run:
vi /etc/exim4/exim4.conf.templateLocate the authenticators section: Scroll down until you find the line that reads begin authenticators.
Add the following block immediately below that line:
auth_login:
  driver = plaintext
  public_name = LOGIN
  client_send = : YourAPIToken : YourAPIToken
Replace both instances of YourAPIToken with the actual API token or password provided by your mail provider. These are separate from your CloudStick account password.
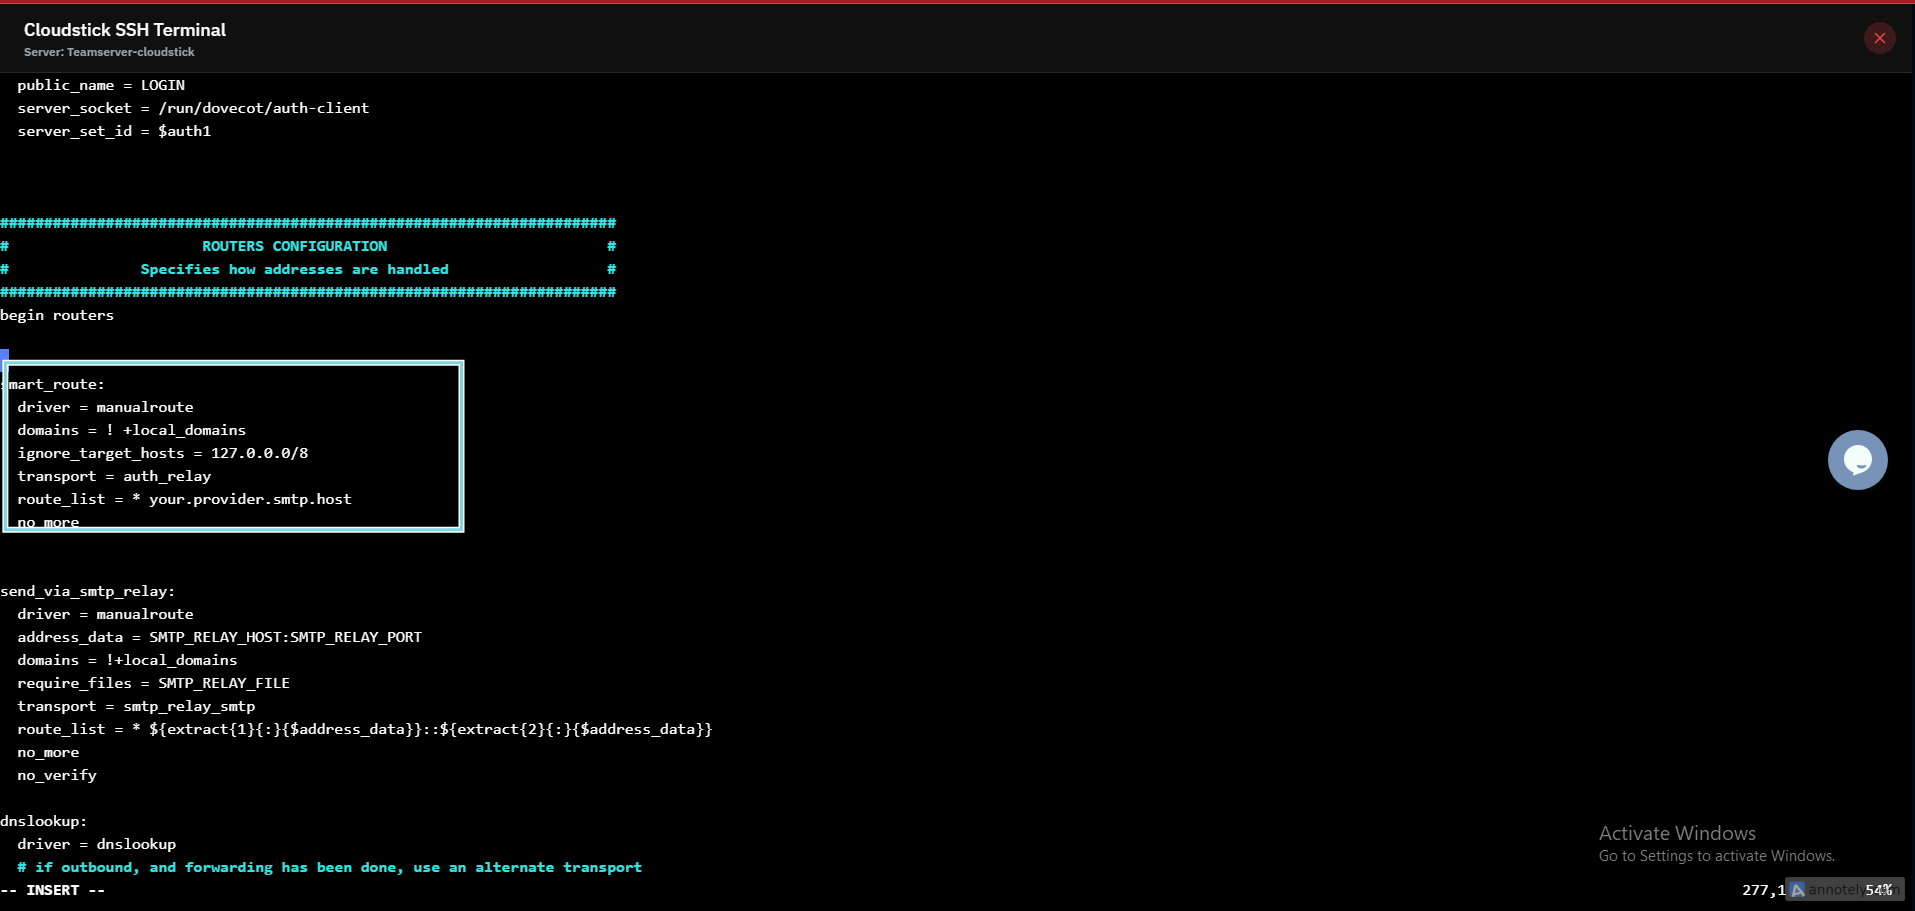
Fig. 02 — Exim4 config file with the auth_login authenticator block added under begin authenticators.
Step 3: Add the Router Block
The router block instructs Exim4 to direct all outgoing mail for non-local domains through your relay provider, rather than attempting direct delivery.
Locate the routers section: Still in the same configuration file, scroll up to find the line that reads begin routers.
Add the following router block immediately below that line:
smart_route:
  driver = manualroute
  domains = ! +local_domains
  ignore_target_hosts = 127.0.0.0/8
  transport = auth_relay
  route_list = * your.provider.smtp.host
no_moreReplace the route_list hostname with the correct SMTP host for your provider:
| Provider | route_list value |
|---|---|
| Postmark | * smtp.postmarkapp.com |
| Mailjet | * in.mailjet.com:587 |
| SendGrid | * smtp.sendgrid.net::587 byname |
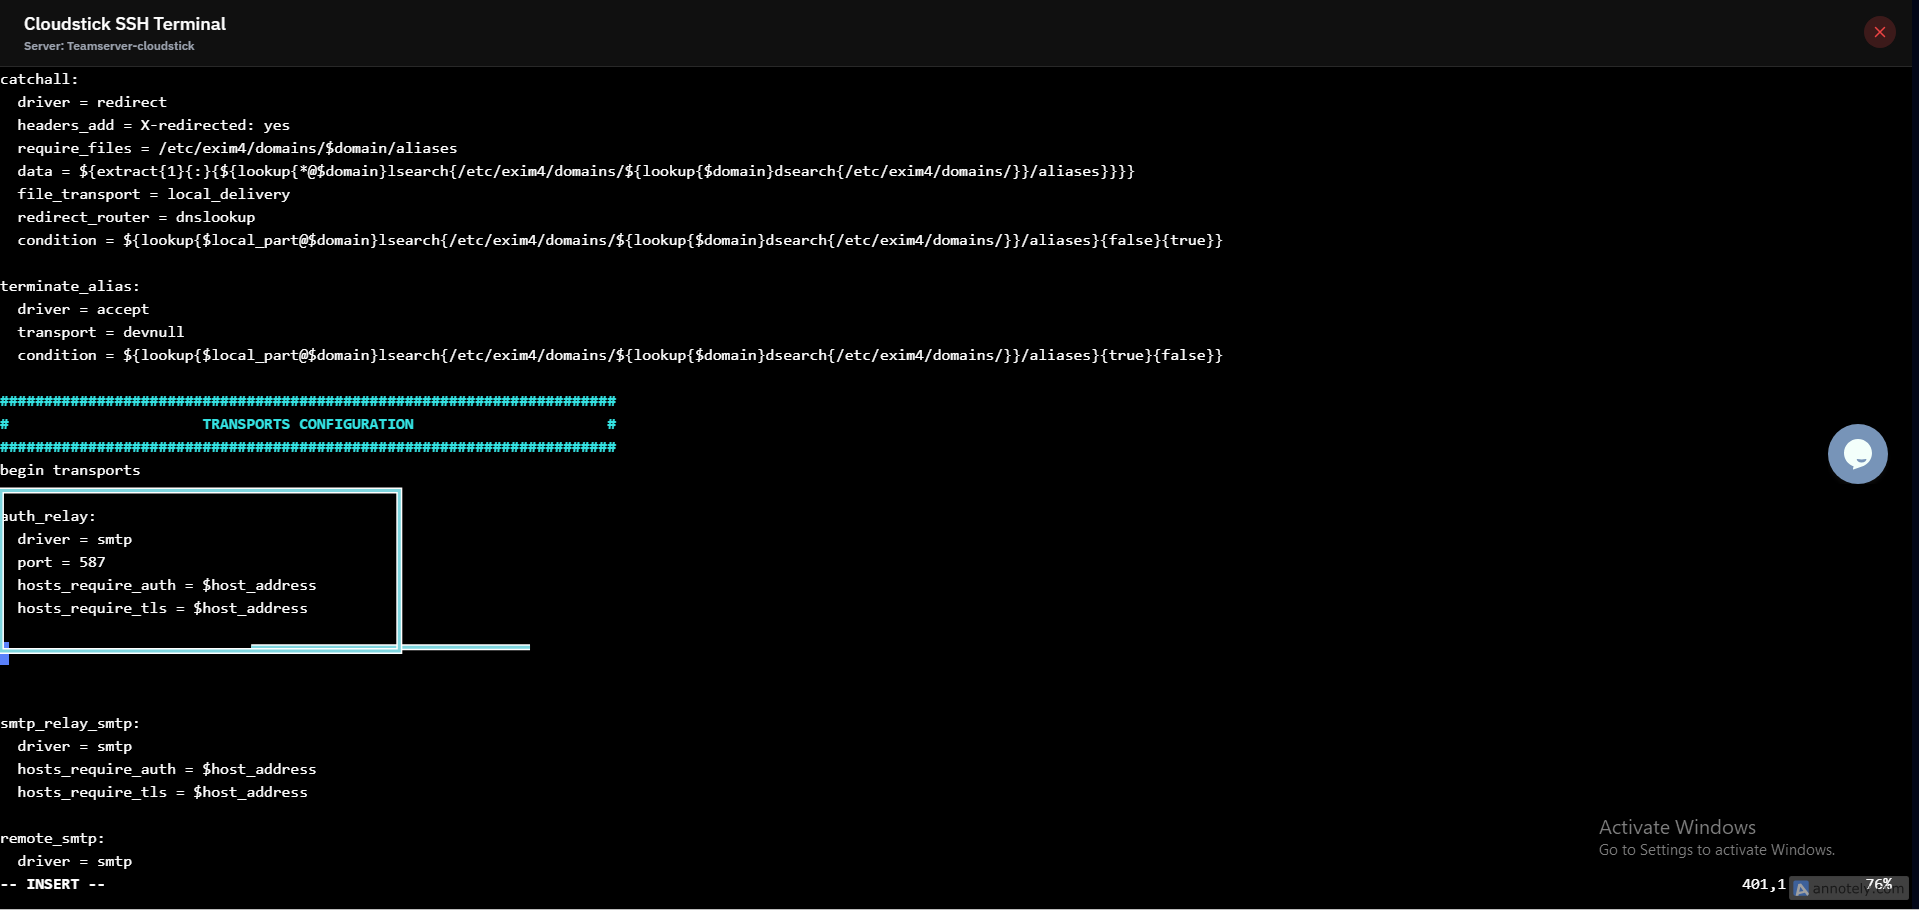
Fig. 03 — Exim4 config file with the smart_route router block added under begin routers.
Step 4: Add the Transport Block
The transport block defines the connection parameters used when actually sending the message to the relay — including the port, TLS requirement, and authentication enforcement.
Locate the transports section: Scroll to the line that reads begin transports.
Add the following transport block immediately below that line:
auth_relay:
  driver = smtp
  port = 587
  hosts_require_auth = $host_address
hosts_require_tls = $host_addressPort 587 is the standard SMTP submission port used by all major providers.
hosts_require_tls ensures the connection is always encrypted before credentials are transmitted.
Step 5: Apply the Changes and Test
Save the configuration file and restart Exim4 to apply all three blocks you added. Then send a test message to confirm mail is routing correctly through the relay.
Save and exit: In vi, press Esc, then type :wq and press Enter to save the file.
Restart Exim4: Apply the new configuration by running:
systemctl restart exim4Send a test email: Run the following command to dispatch a quick test message:
mail -s "Relay Test" user@example.com < /dev/nullCheck the mail log: Monitor the Exim4 log file for delivery confirmation or error messages:
tail -f /var/log/exim4/mainlogCommon failure reasons: Authentication failed — the API token in Step 2 is incorrect or missing. Connection refused — port 587 may be blocked by your server's firewall (check CSF rules in the CloudStick Firewall section). Syntax error / Exim fails to restart — restore your backup with cp /etc/exim4/exim4.conf.template-bak /etc/exim4/exim4.conf.template and re-check for typos.