How to Create a Database in CloudStick
Overview
CloudStick includes a built-in visual database manager that lets you create and manage MySQL databases directly from the dashboard — no command line or phpMyAdmin required. Every website you host typically needs its own database, and CloudStick makes the process straightforward with a guided form that handles the database, user, privileges, and host settings all in one place.
This guide walks you through navigating to the Databases section, filling in the database details, setting up a database user with the appropriate privileges, and completing the creation in a few clicks.
Your server must already be connected and active in CloudStick before you can create a database. If you have not yet connected a server, see How to Deploy Your Own Server first.
Step 1: Navigate to the Databases Section
Start from the main CloudStick dashboard and open the server you want to create a database on. The Databases section is accessible from the server panel's left-hand navigation.
Log in to your CloudStick dashboard.
Locate your server in the server list and click Manage to open its server panel.
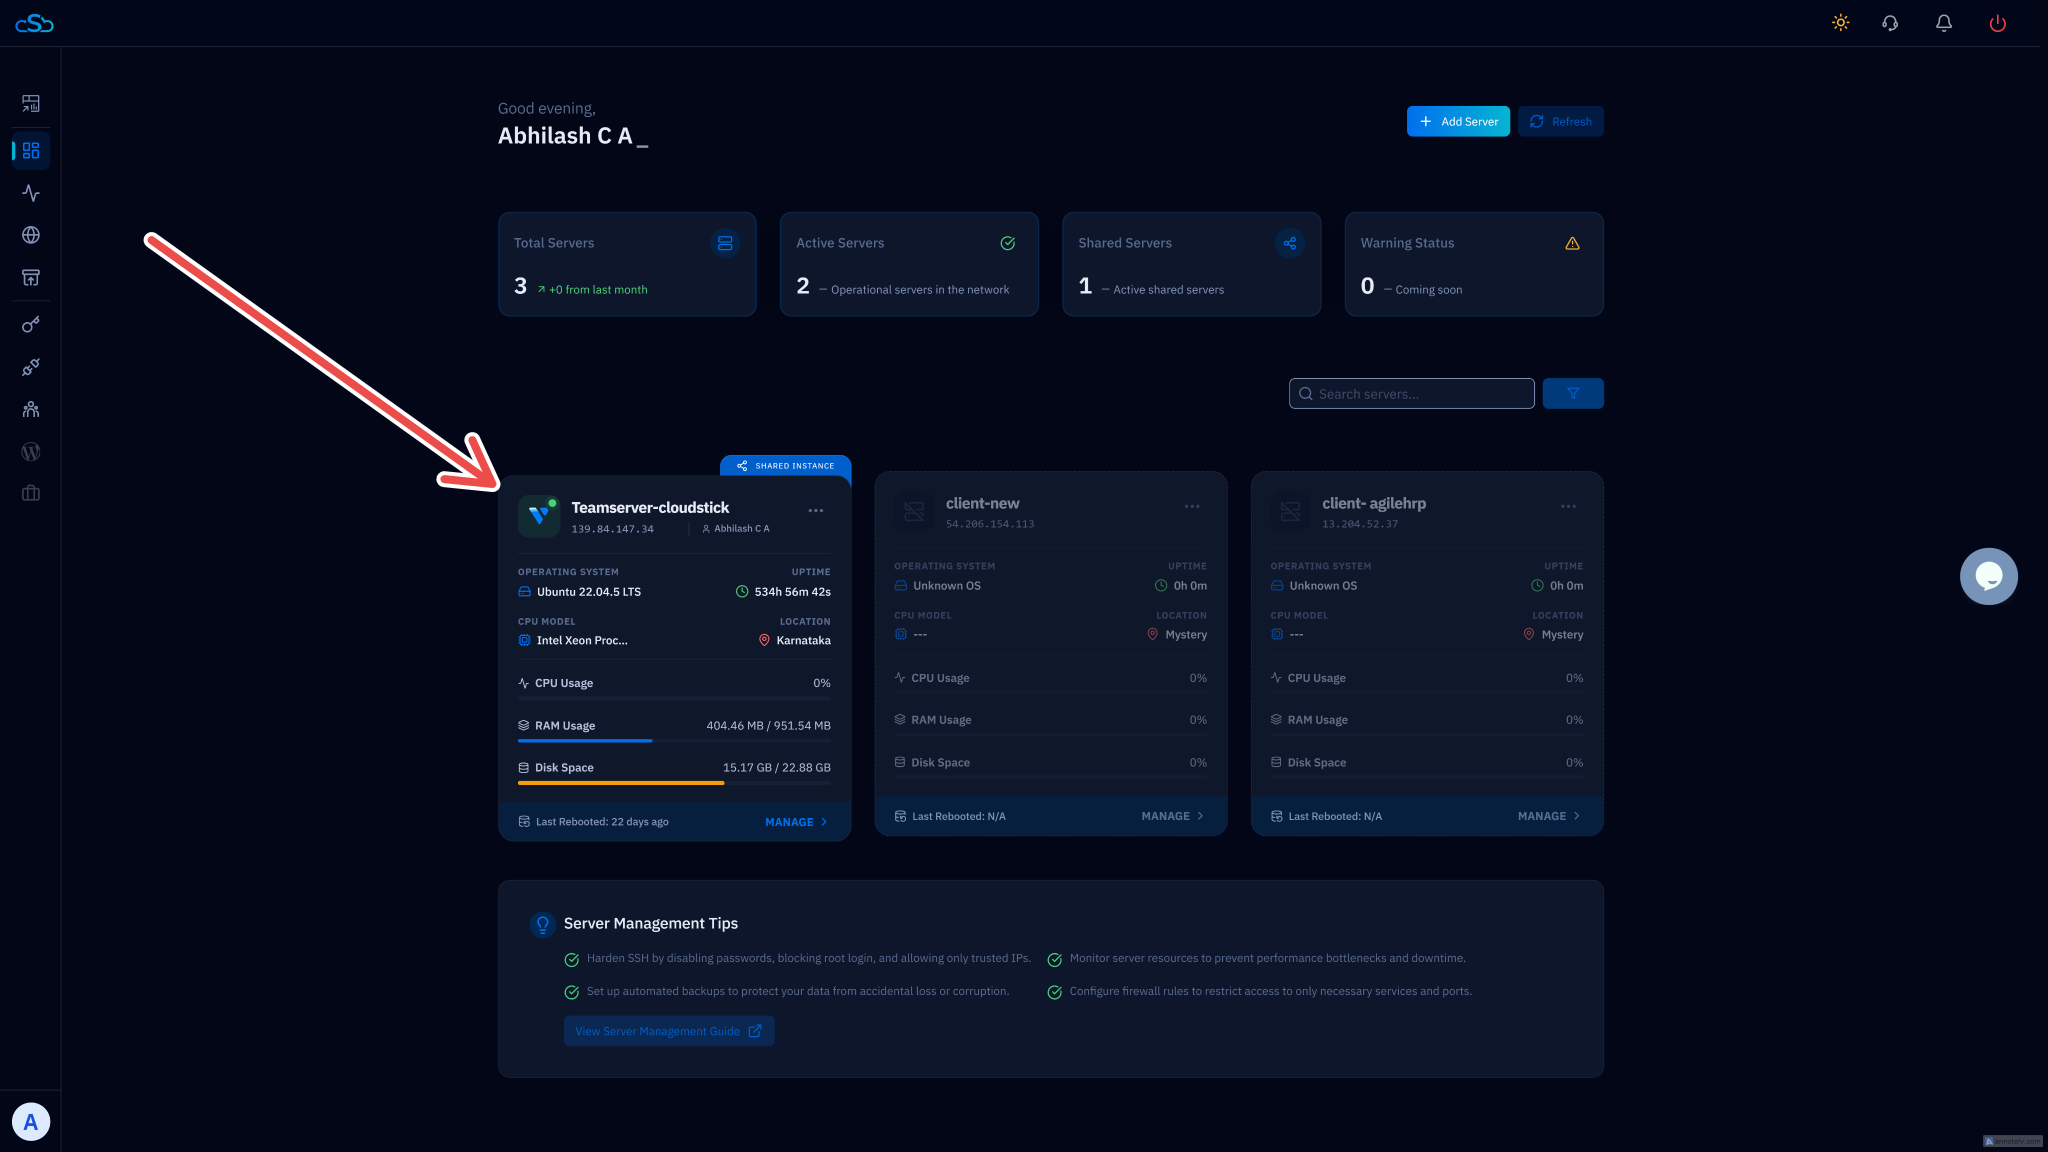
Fig. 01 — CloudStick dashboard showing connected servers. Click Manage on the server you want to work with.
Step 2: Open the Create Database Form
Inside the server panel, navigate to the Databases section using the left-hand sidebar. This section lists all existing databases on your server and provides the option to create a new one.
In the left-hand navigation of the server panel, click the Databases icon.
Click the Create Database button to open the creation form.
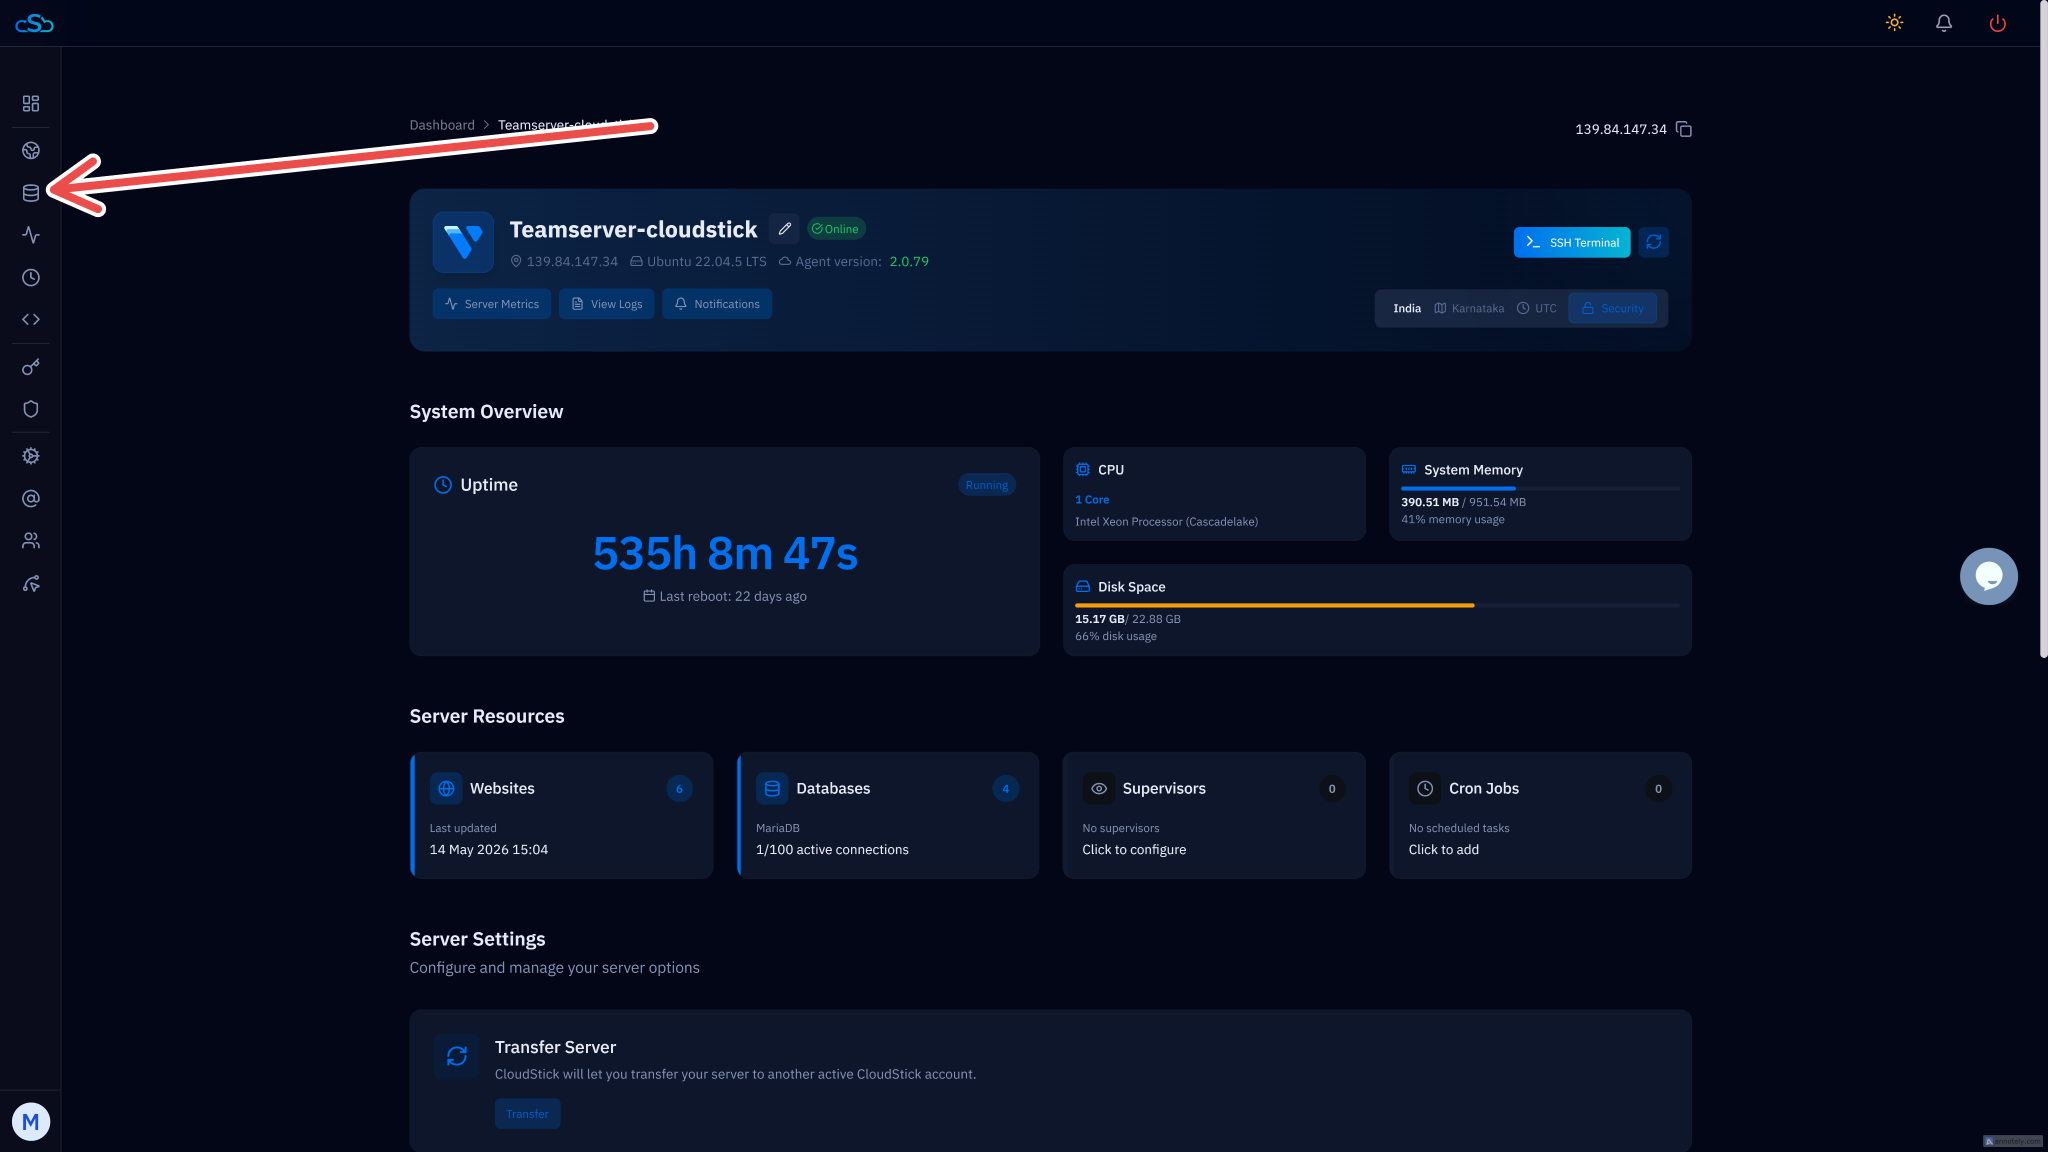
Fig. 02 — Server panel with the Databases section highlighted in the left-hand navigation.
Step 3: Fill in Database & User Details
The creation form is split into three parts: database details, an optional database user, and host configuration. Filling these in together saves you from having to create the user separately afterwards.
Database Details
Database Name: Enter a descriptive name for your database, e.g. my_app_db. Use lowercase letters and underscores — no spaces.
Collation: Leave this as the default unless your application requires a specific character set (e.g. utf8mb4_unicode_ci for full Unicode support).
Database User Details (Optional)
Creating a dedicated user for each database is best practice — it limits the blast radius if credentials are ever compromised.
Database User: Enter a username for the new database user, e.g. app_user.
Password: Enter a strong password. CloudStick does not enforce a minimum length, but use at least 16 characters.
Privileges: Select ALL PRIVILEGES for full access, which is recommended for application database users.
If you skip the user details here, you can always create a database user separately from the Databases section later.
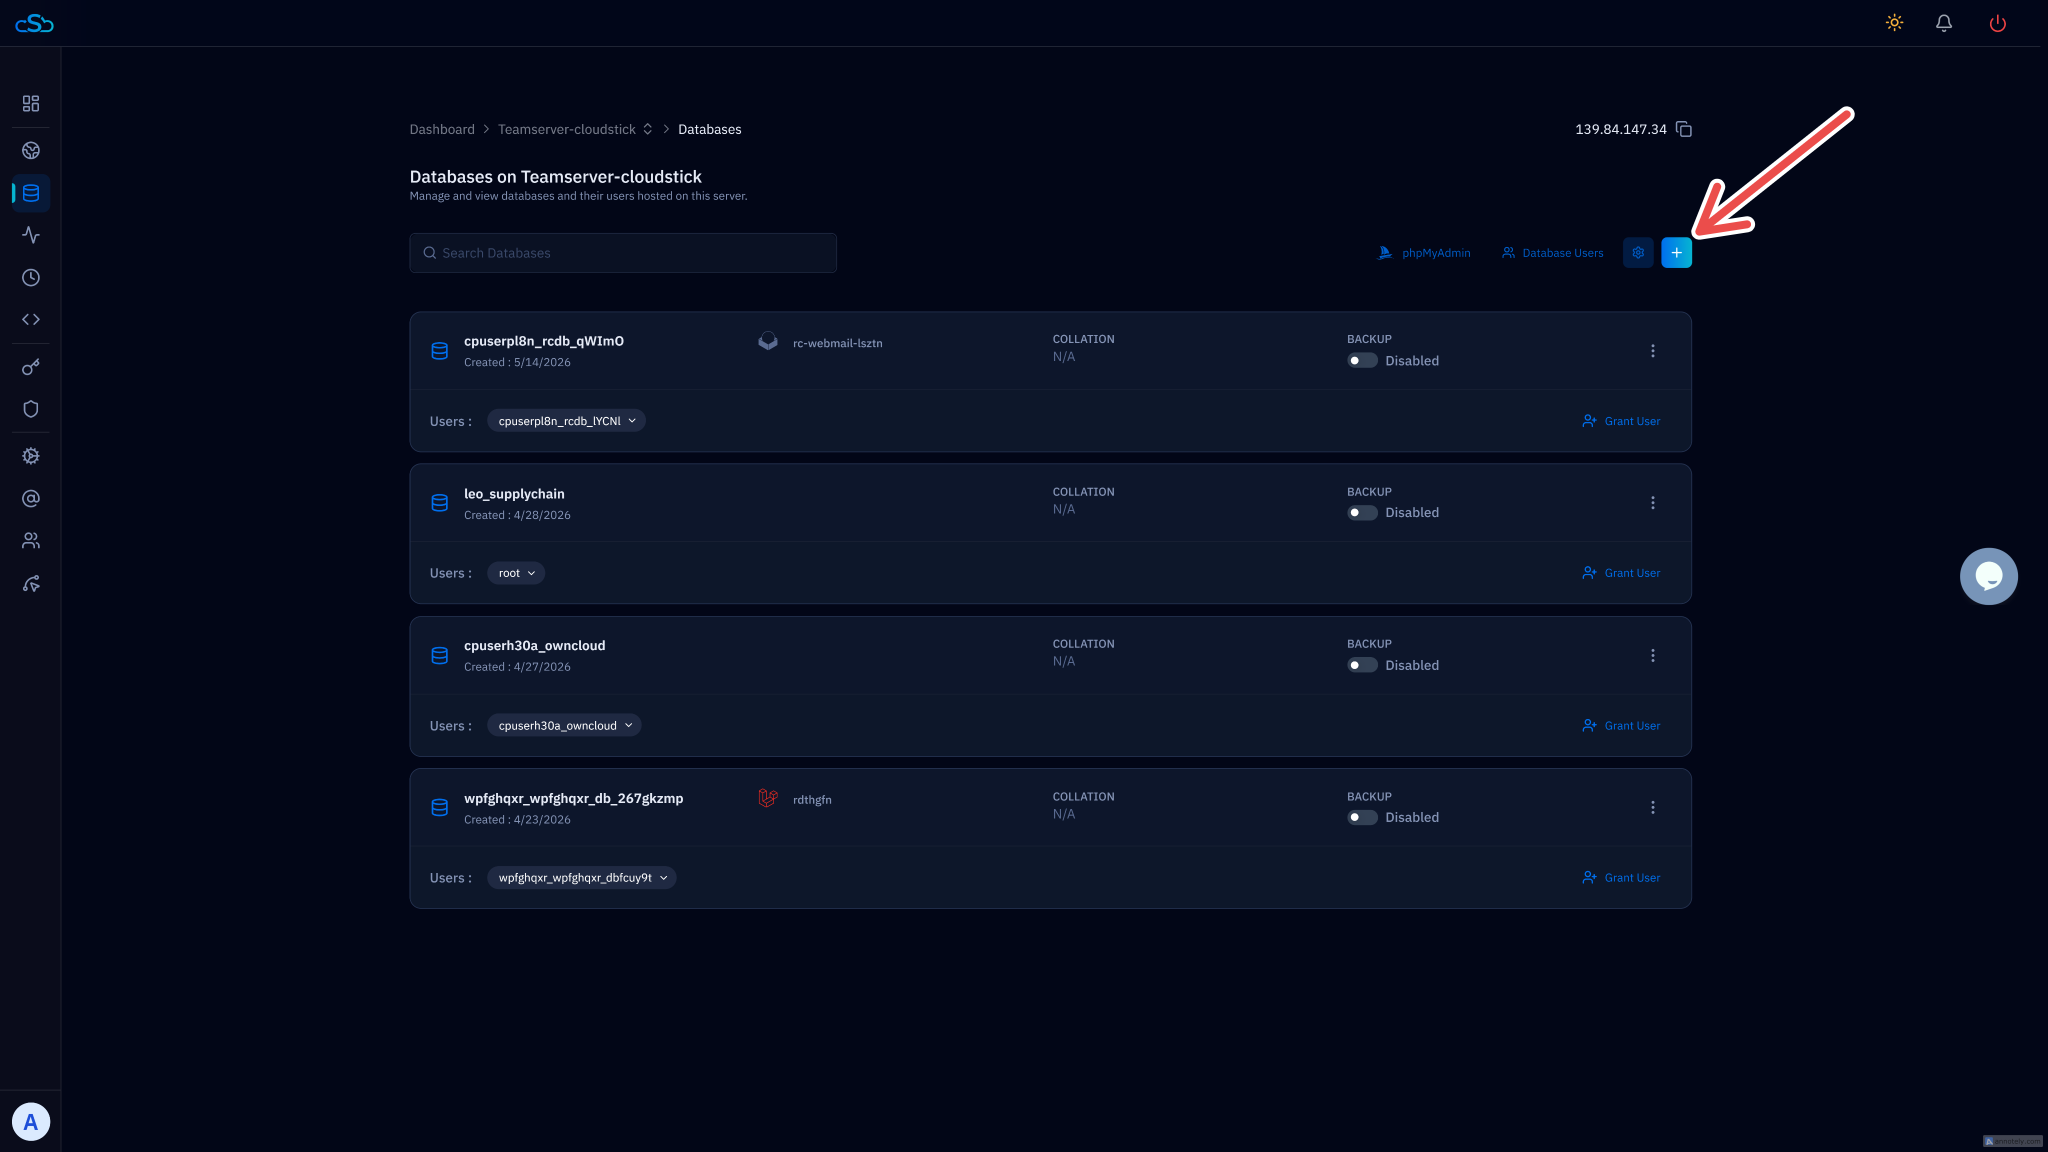
Fig. 03 — Create Database form showing the Database Details and Database User Details fields.
Step 4: Configure Host & Complete the Setup
The final part of the form lets you set the host from which the database user is allowed to connect. For most applications running on the same server, localhost is the correct and most secure choice.
Host (Optional)
Host: Select localhost to allow connections from the same server only. This is the recommended default for web applications.
Create the database
Once all fields are filled in, click the Create Database button at the bottom of the form.
CloudStick will provision the database and user immediately. The new database will appear in your Databases list.
Your new database is now ready to use. Add the database name, username, password, and host (127.0.0.1 or localhost) to your application's environment configuration to connect it.
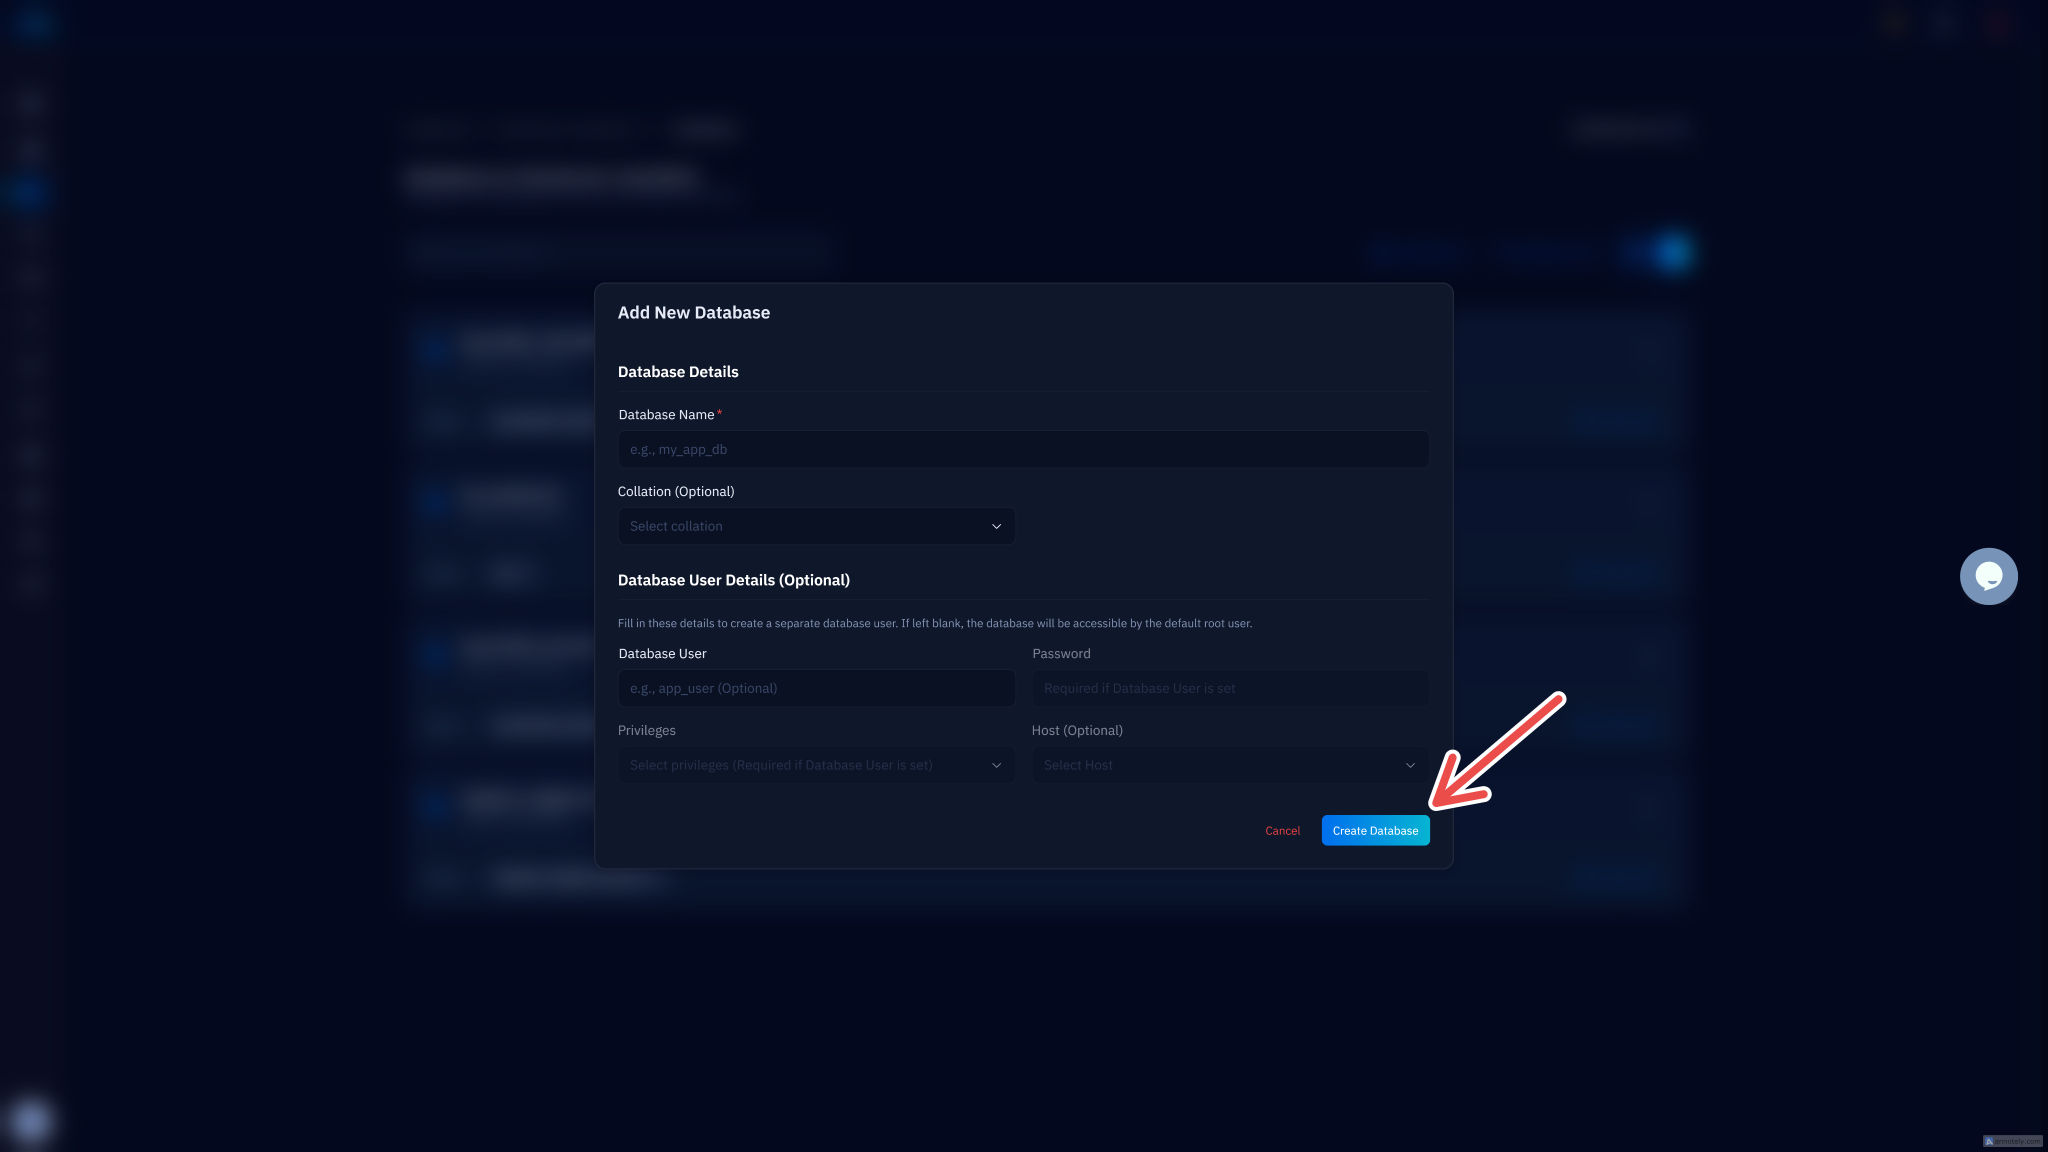
Fig. 04 — Completed Create Database form with Host set to localhost, ready to submit.