How to Delete a System User
Overview
System users are the Linux accounts that own your websites, files, and processes on a server. Over time you may accumulate accounts that are no longer needed — for example, when a website is decommissioned, a developer leaves the project, or an account was created for testing. Removing an unused system user is good hygiene: it cuts down the number of accounts that can log in, reclaims disk space, and keeps your server's access list tidy.
CloudStick lets you manage every Linux account from the dashboard through the System Users section, so you can remove an account with a few clicks instead of running userdel over SSH. This guide walks you through deleting a system user from a server.
Deleting a system user is immediate and cannot be undone. It also removes the user's access to server files and services, so make sure the account is no longer required — and that any websites or processes it owns have been moved or removed — before you proceed. If you need to set up a new account afterward, see the How to Add System Users guide.
Step 1: Log In to Your CloudStick Account
Start from the CloudStick Dashboard and open the server that hosts the account you want to remove.
1. Log in: Sign in to your CloudStick dashboard.
2. Select your server: From the Dashboard, click Manage on the server you want to work with to open its server panel.
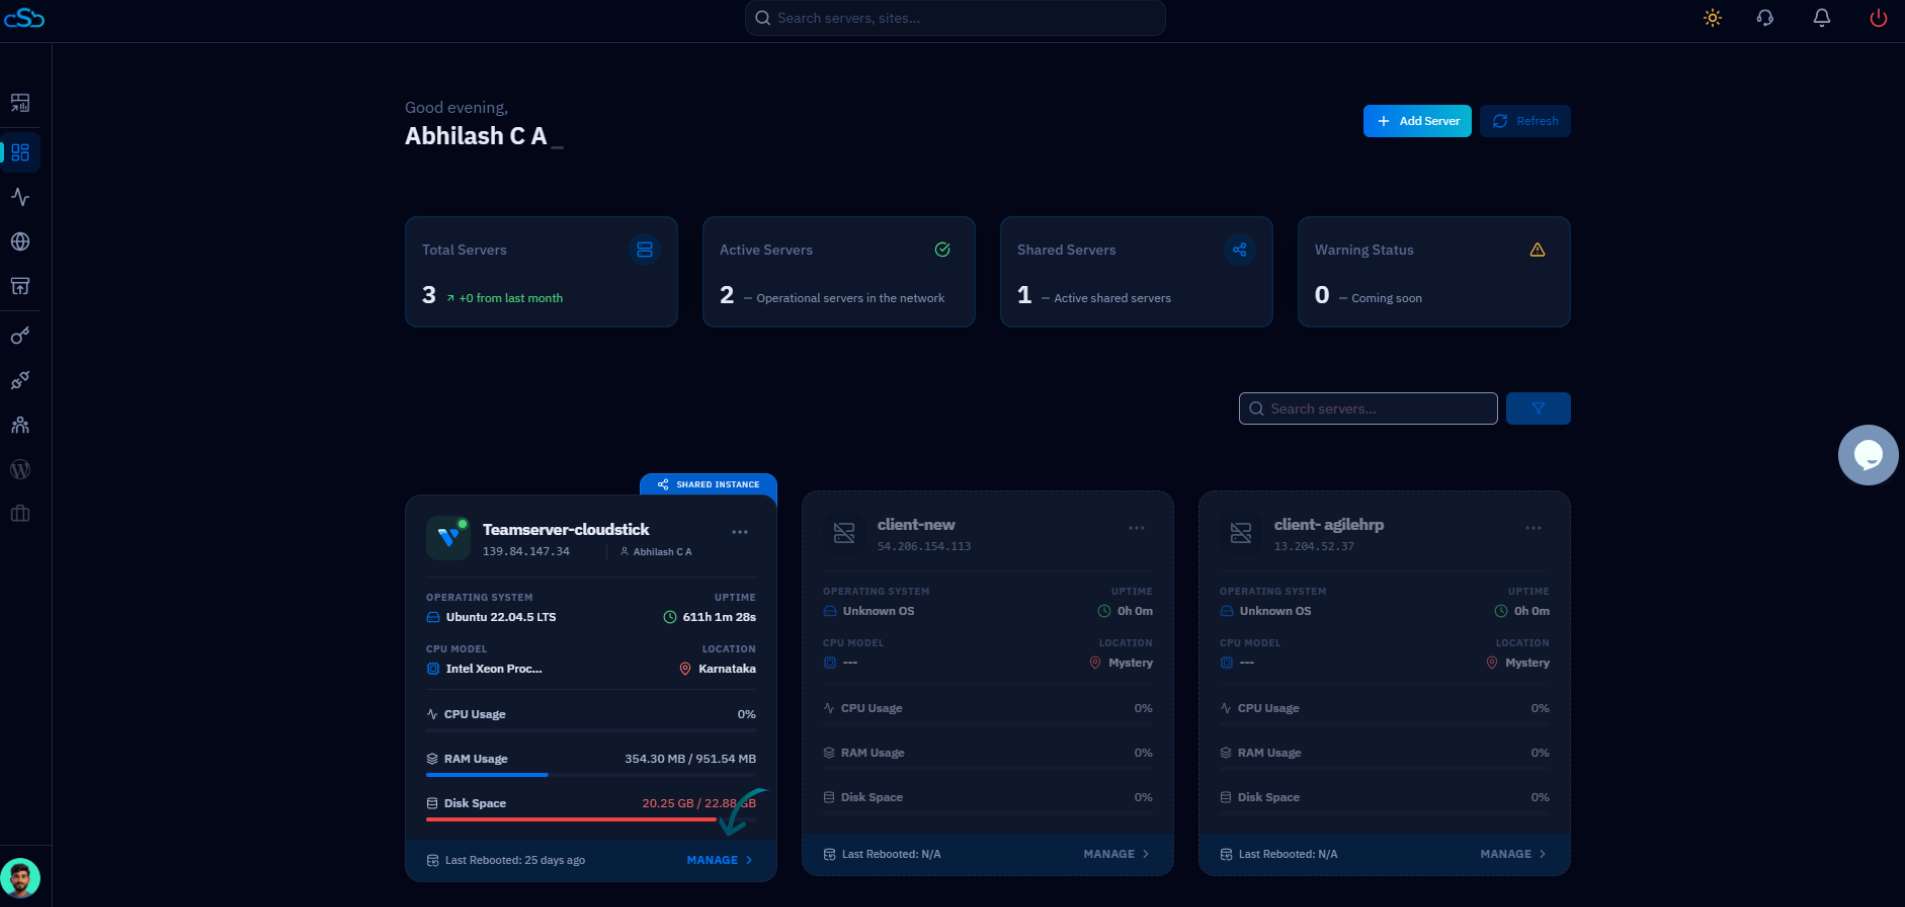
Fig. 01 — The CloudStick Dashboard showing your connected servers. Select the server you want to manage.
Step 2: Open System Users
The system user manager lives in the left-hand navigation of the server panel.
1. Open the menu: From the left-side menu of the server panel, locate the System Users icon.
2. Click System Users: Click on System Users to open the page where Linux accounts for this server are managed.
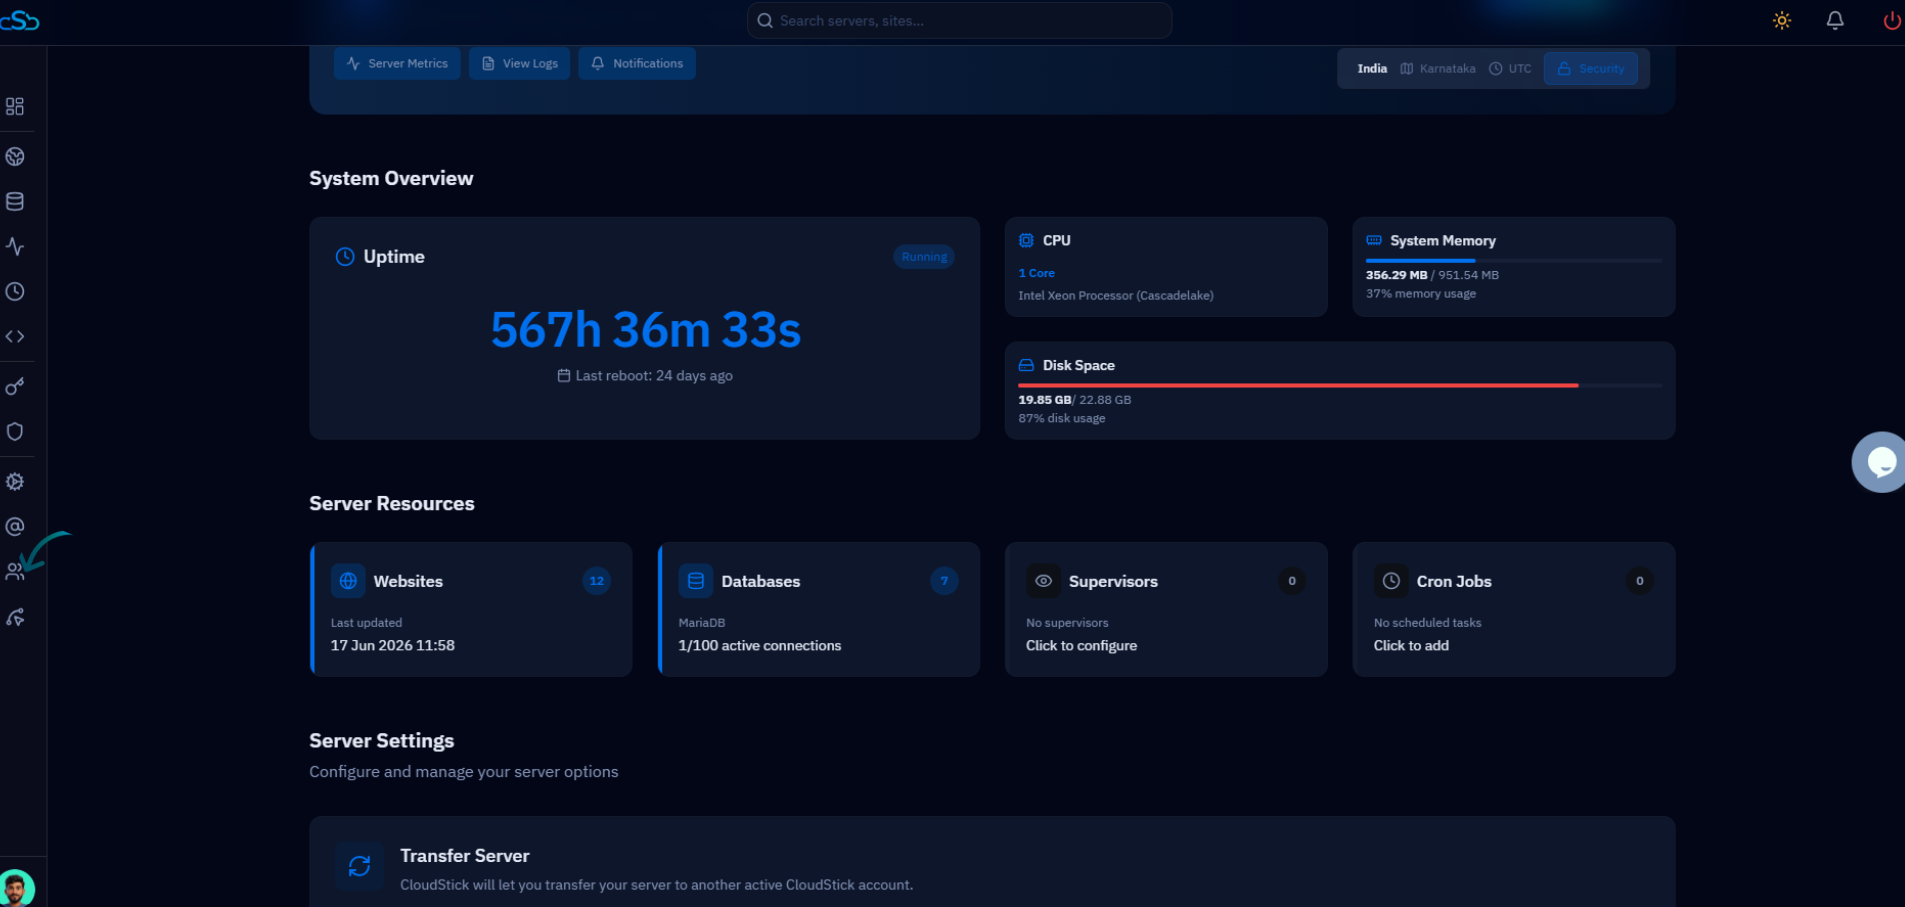
Fig. 02 — The server panel with the System Users option highlighted in the left-hand navigation.
Step 3: View User List
The System Users page lists every account currently configured on this server.
1. Review the list: You will see a list of all system users created on the server, showing each user's name, disk usage, sudo permission, and an Actions menu.
2. Use search if needed: If the server has many accounts, use the Search box to quickly filter the list by username.
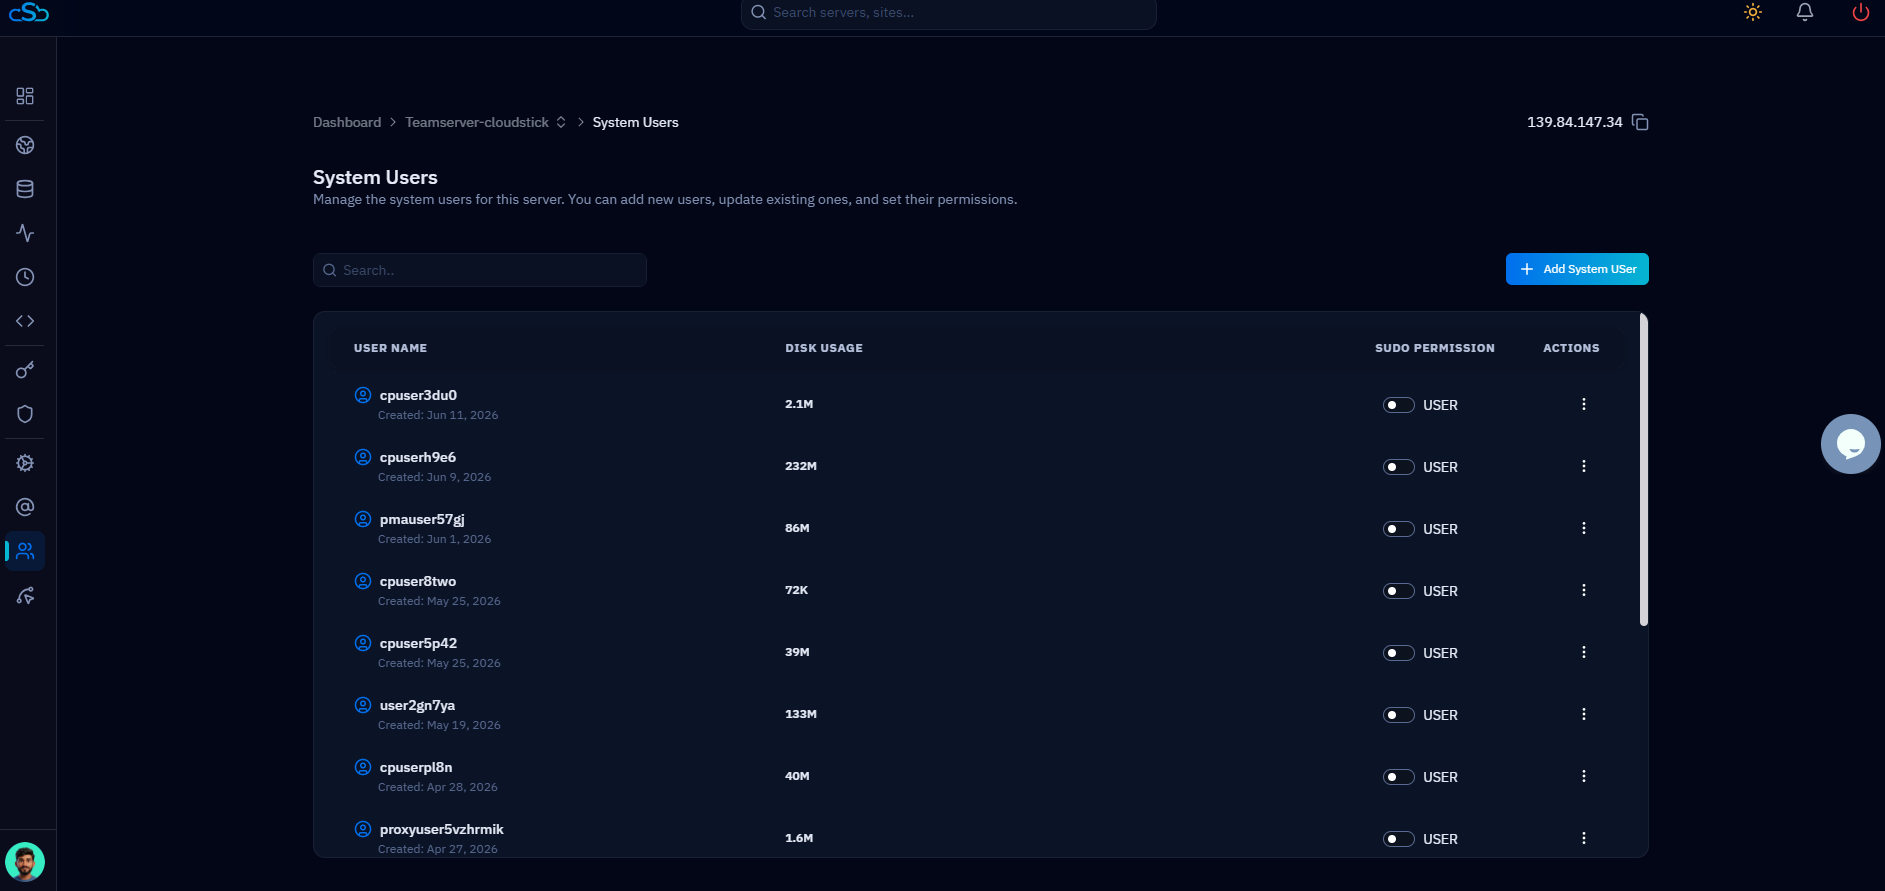
Fig. 03 — The System Users list showing every Linux account on the server, each with an Actions menu.
Step 4: Select the User
Identify the exact account you want to remove before taking any action.
1. Find the user: Look through the list and find the system user you want to delete, using the username and disk usage to confirm it is the correct account.
2. Double-check before continuing: Make sure the account does not still own any websites or running processes you need, so you don't remove a user that is still in use.
Step 5: Open Actions Menu
Each user has an Actions menu at the end of its row.
1. Open the menu: In the row for the user you want to remove, click the Actions menu (the three-dot icon) under the Actions column.
2. Choose Delete User: From the menu that appears, select the Delete User option to begin removing the account.
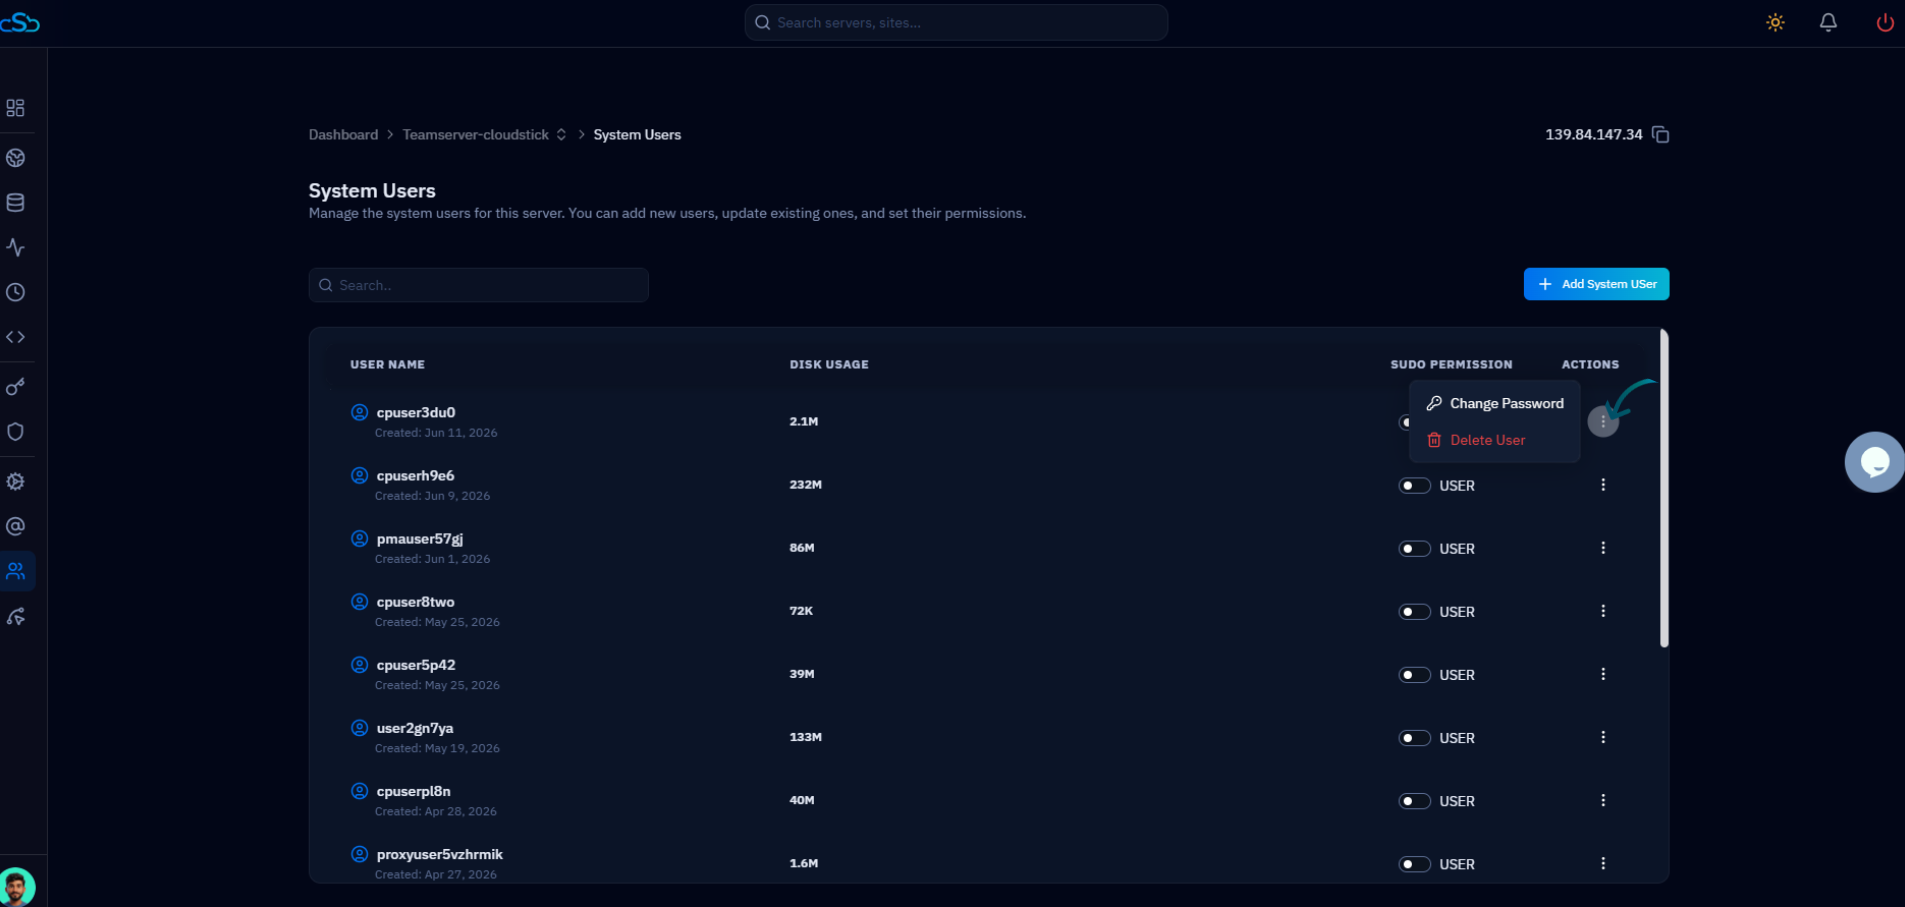
Fig. 04 — Open the Actions menu for the chosen user and select Delete User.
Step 6: Delete the User
Selecting Delete User starts the removal process for the selected account.
1. Trigger the deletion: Click the Remove or Delete User option to tell CloudStick you want to remove this account from the server.
Step 7: Confirm Deletion
CloudStick asks you to confirm before permanently removing the account.
1. Confirm the prompt: When prompted, confirm the action to permanently delete the system user. This is your last chance to cancel if you selected the wrong account.
Once confirmed, the user is removed immediately. If you are unsure, cancel and re-check the username before deleting.
Step 8: User Removed
The account is deleted and disappears from the System Users list.
1. Verify removal: The system user is removed from the server immediately and no longer appears in the list.
2. Access is revoked: The account can no longer log in, and its access to server files and services is removed along with it.
Deleting a system user will also remove their access to server files and services. Make sure the user is no longer required before deleting, and move any data you need to keep to another account beforehand.