How to Deploy MediaWiki in CloudStick
Overview
MediaWiki is the open-source wiki platform that powers Wikipedia — ideal for teams, communities, and organizations that need a structured, collaborative knowledge base. CloudStick makes deploying MediaWiki on your own server straightforward: select the application, fill in your site details, and CloudStick handles the server configuration, database setup, and installation automatically.
This guide walks you through every step — from selecting the server to accessing your live MediaWiki site — so you can have a fully configured wiki running in minutes without any manual server commands.
Make sure your server is connected to CloudStick and has sufficient disk space before beginning. MediaWiki requires PHP compatibility — CloudStick automatically configures the correct stack for you.
Step 1: Log In and Select Your Server
MediaWiki will be deployed onto a specific server, so start by identifying which server you want to use and navigating to its management panel.
Log in to your CloudStick account: Visit app.cloudstick.io and sign in with your credentials.
Select your server: From the main dashboard, locate the server card where you want to deploy MediaWiki, then click Manage to open its server panel.
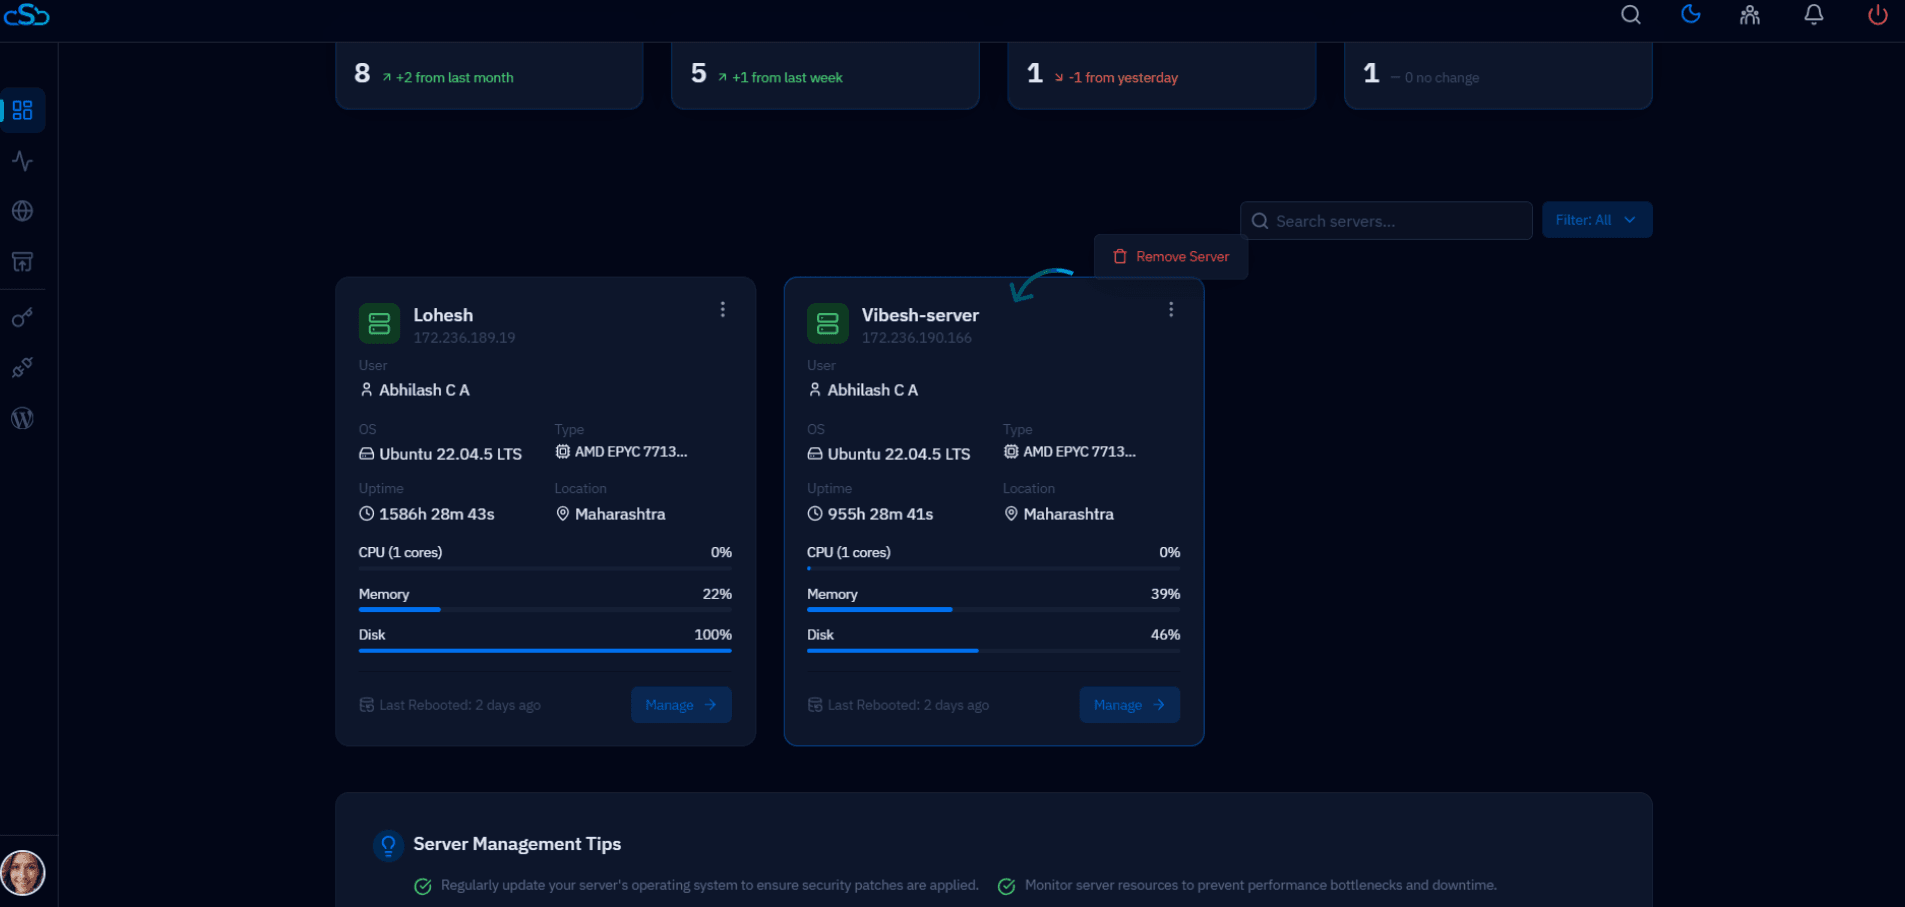
Fig. 01 — CloudStick dashboard showing connected servers. Click Manage on the server where you want to deploy MediaWiki.
Step 2: Navigate to the Websites Section
All web applications — including MediaWiki — are created and managed from the Websites section of the server panel.
Click on Websites: In the Server Resources area of the server panel, click the Websites card. This opens the WebApp List showing all web applications currently hosted on this server.
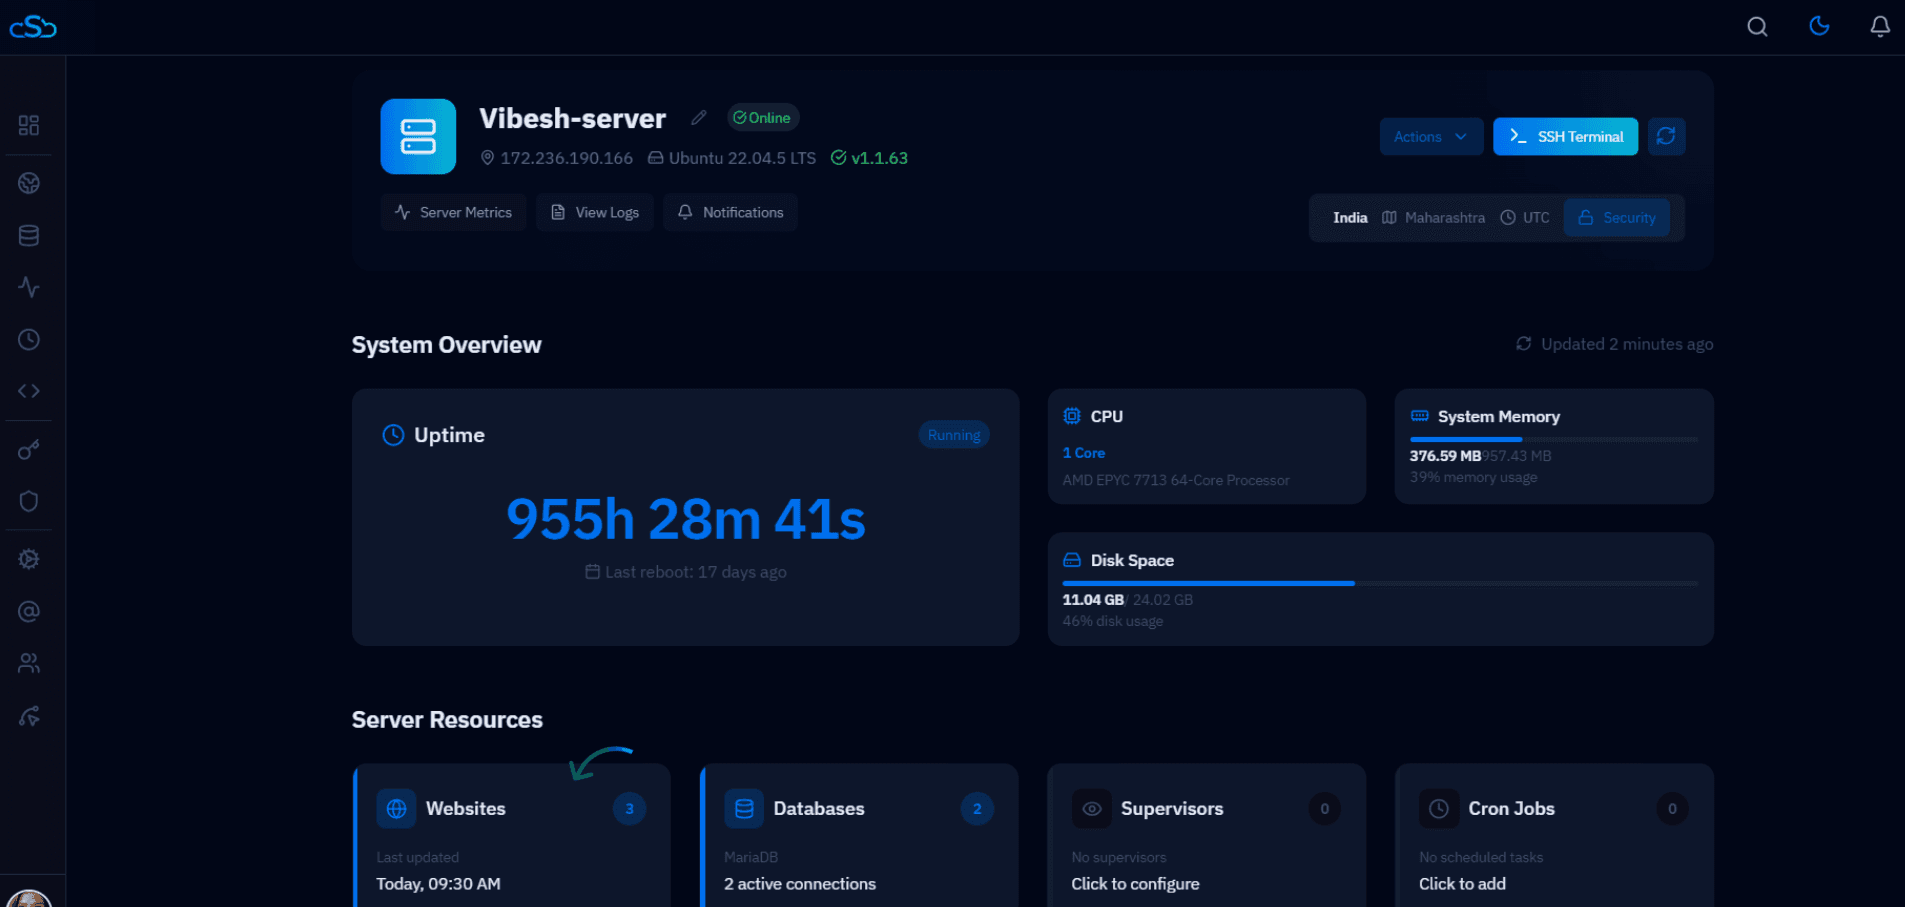
Fig. 02 — Server panel showing the Websites card under Server Resources. Click it to open the WebApp List.
Step 3: Click Add Website
To deploy a new application, you initiate the process from the WebApp List using the Add Website button.
Click + Add Website: In the top-right corner of the WebApp List page, click the blue + Add Website button. This opens the Create New Website panel where you can choose from available application stacks.
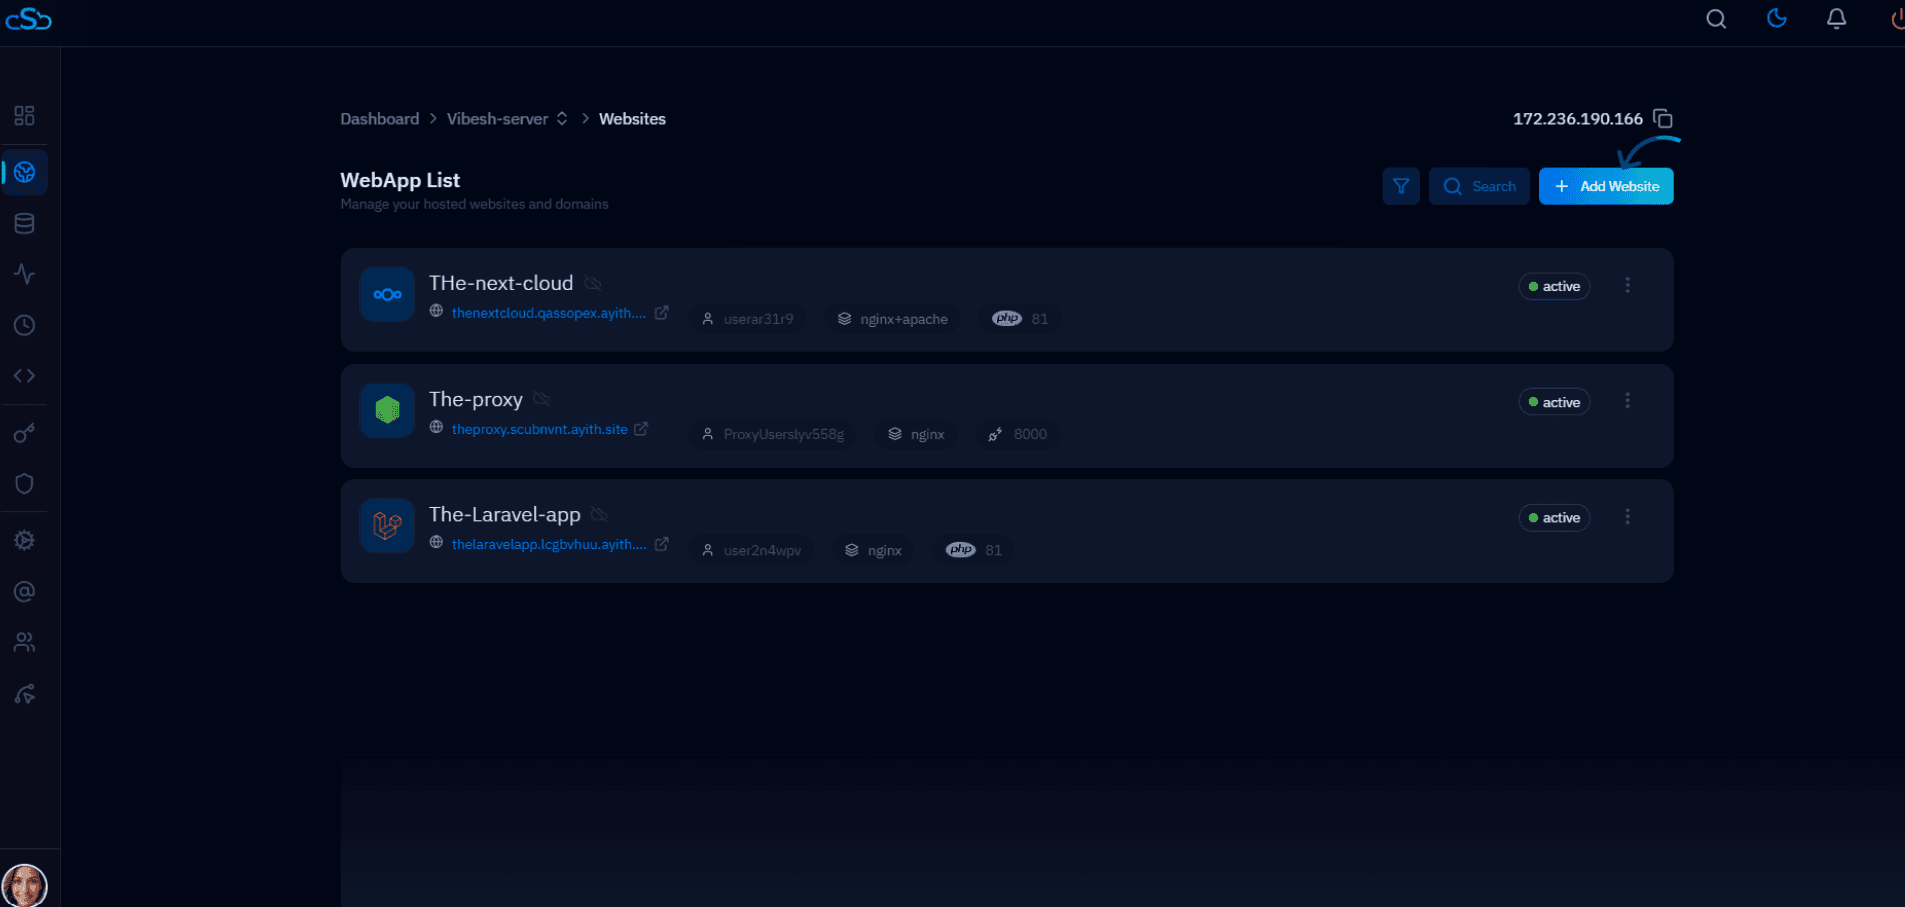
Fig. 03 — WebApp List page with the + Add Website button highlighted in the top-right corner.
Step 4: Select MediaWiki
CloudStick supports one-click deployment of several popular PHP applications. Select MediaWiki from the application grid to proceed.
Find MediaWiki in the grid: The Create New Website panel displays available stacks including phpMyAdmin, NextCloud, Laravel, MediaWiki, WooCommerce, PrestaShop, Ghost, and Joomla.
Click Select next to MediaWiki: Locate the MediaWiki card (labelled Open-source wiki platform) and click its Select → button to load the MediaWiki configuration form.
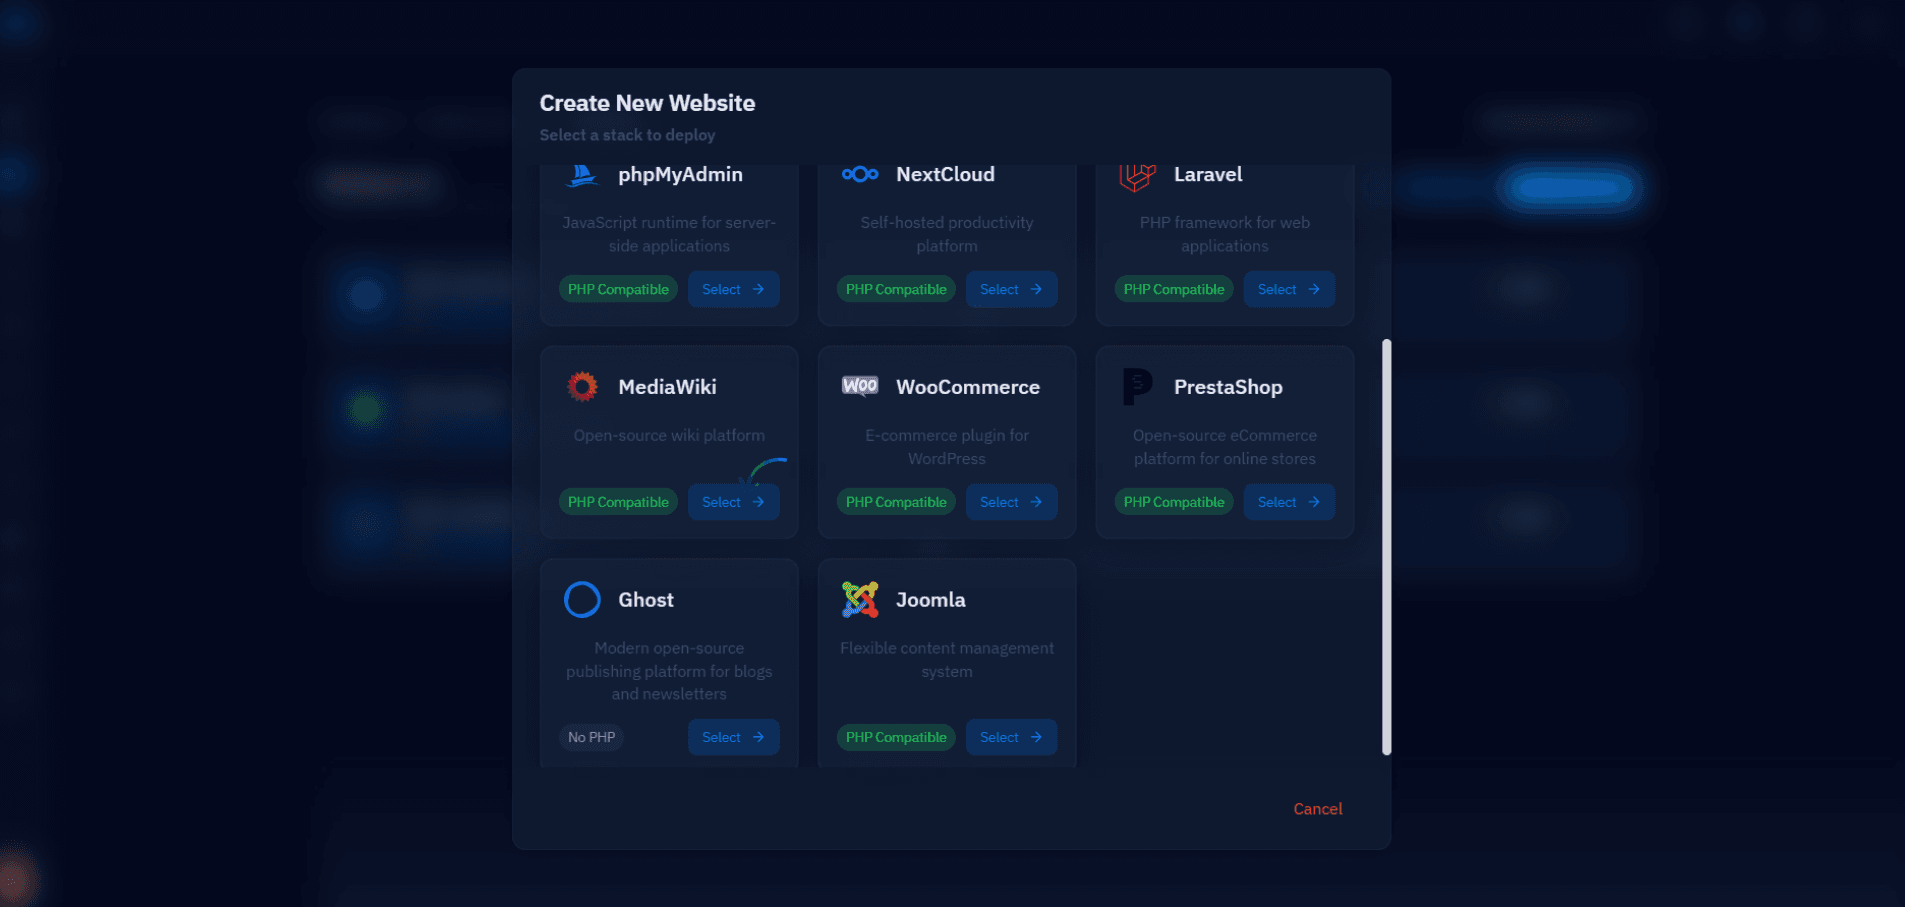
Fig. 04 — Create New Website panel showing the available application stacks. Click Select on the MediaWiki card.
Step 5: Enter Site Configuration
The MediaWiki configuration form collects all the details needed to set up your wiki — from domain information to admin credentials. Fill in each field carefully as these values configure your live site.
Email Address: Enter the email address associated with this deployment (used for admin notifications).
Website Name: Enter a short identifier for this web application (e.g. media-app). This is used internally in CloudStick.
Domain Type: Choose Use My Own Domain to point a real domain at the site, or Use Temporary Domain for a quick test deployment.
Domain Name: Enter the domain or subdomain where your MediaWiki site will be accessible (e.g. media.yourdomain.com). Comma-separate multiple domains if needed.
Cloudflare: Optionally select a connected Cloudflare account to automatically configure DNS for this domain.
Site Title: Enter the name that will appear at the top of your MediaWiki site (e.g. Welcome to My Wiki).
Admin Username: Set the username for the MediaWiki administrator account.
Admin Password: Set a strong password for the admin account, or click Generate to create one automatically.
Admin Email: Enter the email address for the MediaWiki admin account.
PHP Version: Select the PHP version to use. PHP 8.4 is recommended for best compatibility with the latest MediaWiki release.
Web Application Server: Choose your preferred web server stack. Nginx + Apache is the default and works well for MediaWiki.
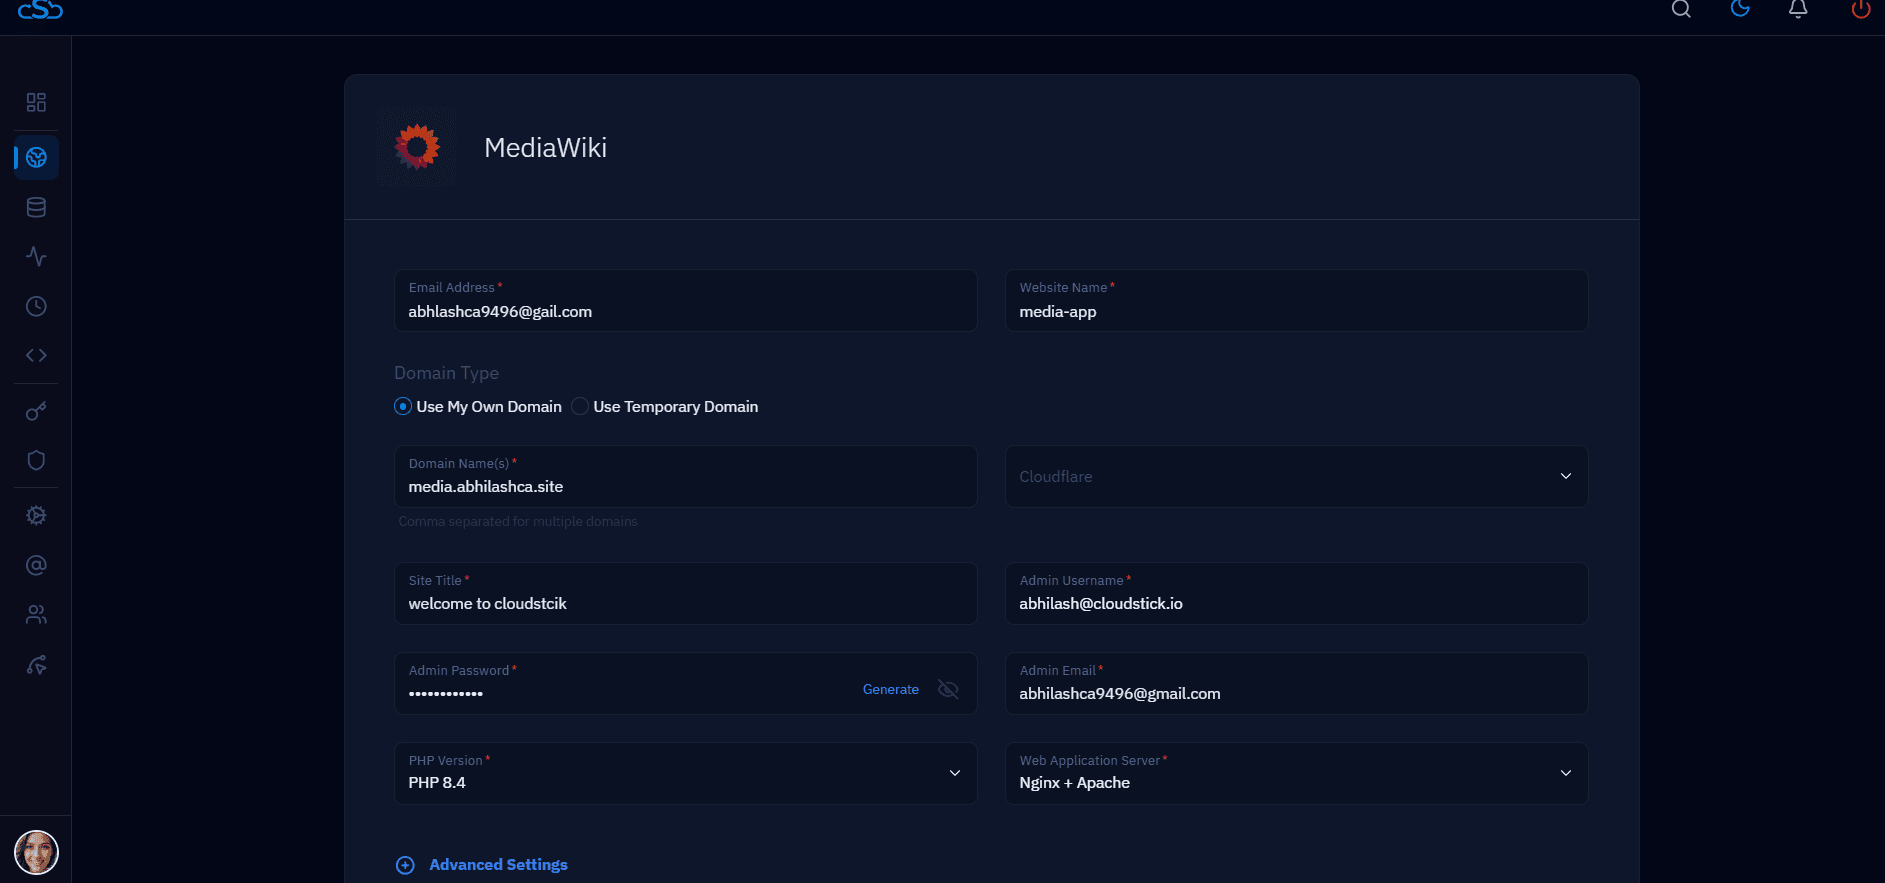
Fig. 05 — MediaWiki configuration form showing Email Address, Website Name, Domain Type, Domain Name, Cloudflare, Site Title, Admin credentials, PHP Version, and Web Application Server fields.
Step 6: Configure Advanced Settings and Install
Expand the Advanced Settings section to review and optionally customise the database and system user configuration, then launch the installation.
Database Name: A database name is auto-generated (e.g. db_i4m1oomv). You can leave this as-is or enter a custom name.
DB User: The database user is also auto-generated. Click Generate to create a new one if needed.
DB Password: A secure database password is generated automatically. You can regenerate it or enter a custom value.
System User: The server system user that owns the application files. Auto-generated, or enter a custom username.
System User Password: The password for the system user. Auto-generated by default.
Click Install MediaWiki: Once all fields are filled, click the blue Install MediaWiki button in the bottom-right corner to begin deployment.
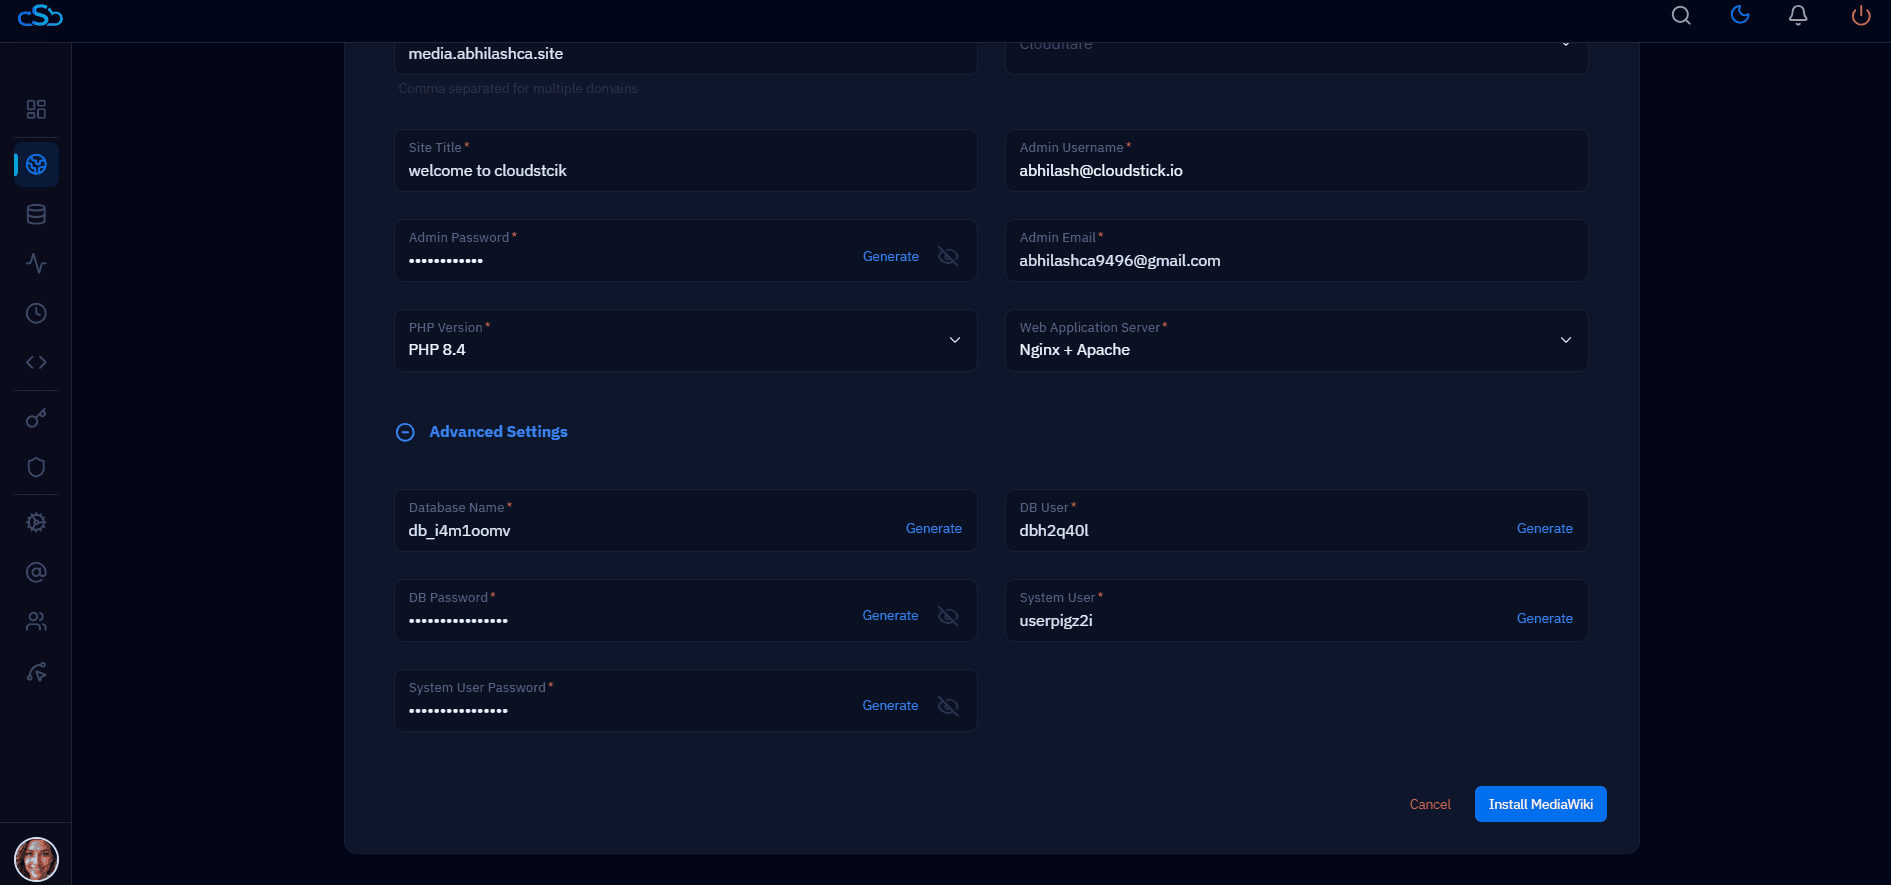
Fig. 06 — Advanced Settings section showing Database Name, DB User, DB Password, System User, and System User Password fields, with the Install MediaWiki button at the bottom right.
All database and system user credentials are auto-generated with secure values. You only need to change them if you have specific requirements.
Step 7: Monitor the Installation
After clicking Install MediaWiki, CloudStick begins the automated deployment process. You can watch the progress in real time from the installation screen.
Watch the live log output: The installation screen shows a live terminal log as CloudStick configures the web server, creates the database, installs MediaWiki, and sets up email handling. Each completed step is listed in the log.
Installation Complete status: When the top status bar shows Installation Complete and the log confirms MediaWiki created successfully and Website created successfully, the deployment is done.
Review the summary: A success dialog appears showing your website name, domain, system user, PHP version, and public path. Review these details for your records.
Click See Website Details: Click the green See Website Details button to proceed to your website summary, or click Back to List to return to the WebApp List.
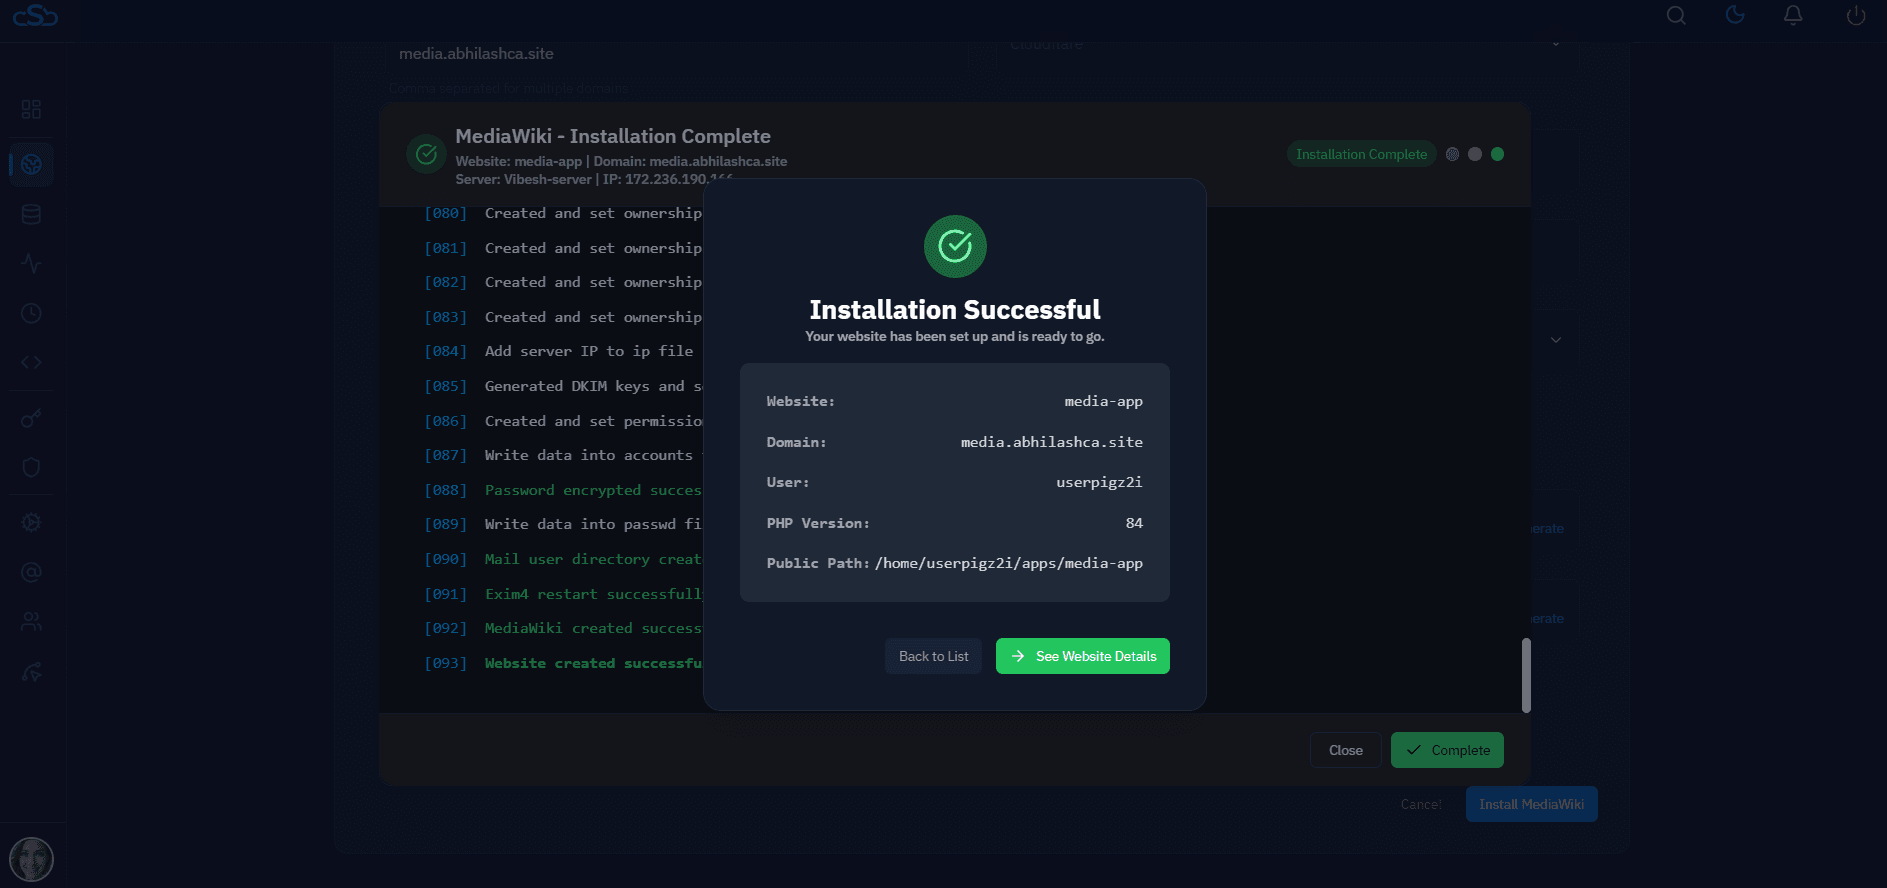
Fig. 07 — Installation Complete screen showing the live log output and the Installation Successful dialog with website name, domain, user, PHP version, and public path.
Step 8: Access Your MediaWiki Site
Once the installation completes, your MediaWiki application is live and fully configured. The Website Summary gives you a central view of everything about your new site.
Review the Website Summary: The summary page shows your domain, PHP version, web server configuration (Nginx + Apache), root path, disk usage, SSL certificate status, and backup status.
Check SSL status: CloudStick automatically provisions a Let's Encrypt SSL certificate for your domain. Verify it shows Active in the Website Status panel.
Visit your wiki: Click your domain link from the summary page to open your MediaWiki site in a browser and begin setting up your wiki content.

Fig. 08 — Website Summary page for the newly deployed MediaWiki site showing domain, PHP version, web server, root path, SSL status, and system user details.
MediaWiki is automatically configured and ready to use. Log in to your wiki admin panel at yourdomain.com/Special:UserLogin using the admin credentials you set in Step 5.