How to Enable PHP Extensions in EasyPHP
Overview
PHP extensions are compiled libraries that unlock specific capabilities in your PHP applications — from IMAP and LDAP connectivity to image processing and database drivers. CloudStick includes EasyPHP, a built-in PHP extension manager that lets you install and toggle extensions for each PHP version on your server without touching the command line. Extensions are managed per PHP version, so you can keep each version's configuration exactly as your applications need it.
This guide walks you through navigating to the EasyPHP section in your server panel, selecting the PHP version you want to configure, and enabling or disabling extensions using the toggle interface.
EasyPHP extensions are version-specific. Make sure you select the correct PHP version before enabling or disabling extensions — changes apply only to the version you have selected.
Step 1: Log In and Select Your Server
EasyPHP is a server-level feature, so the first step is to open the server panel for the server whose PHP extensions you want to manage.
Log in to your CloudStick Dashboard: Go to app.cloudstick.io and sign in to your account. You will land on the main dashboard showing all your connected servers.
Select your server: Find the server you want to manage in the server list and click Manage to open the server panel.
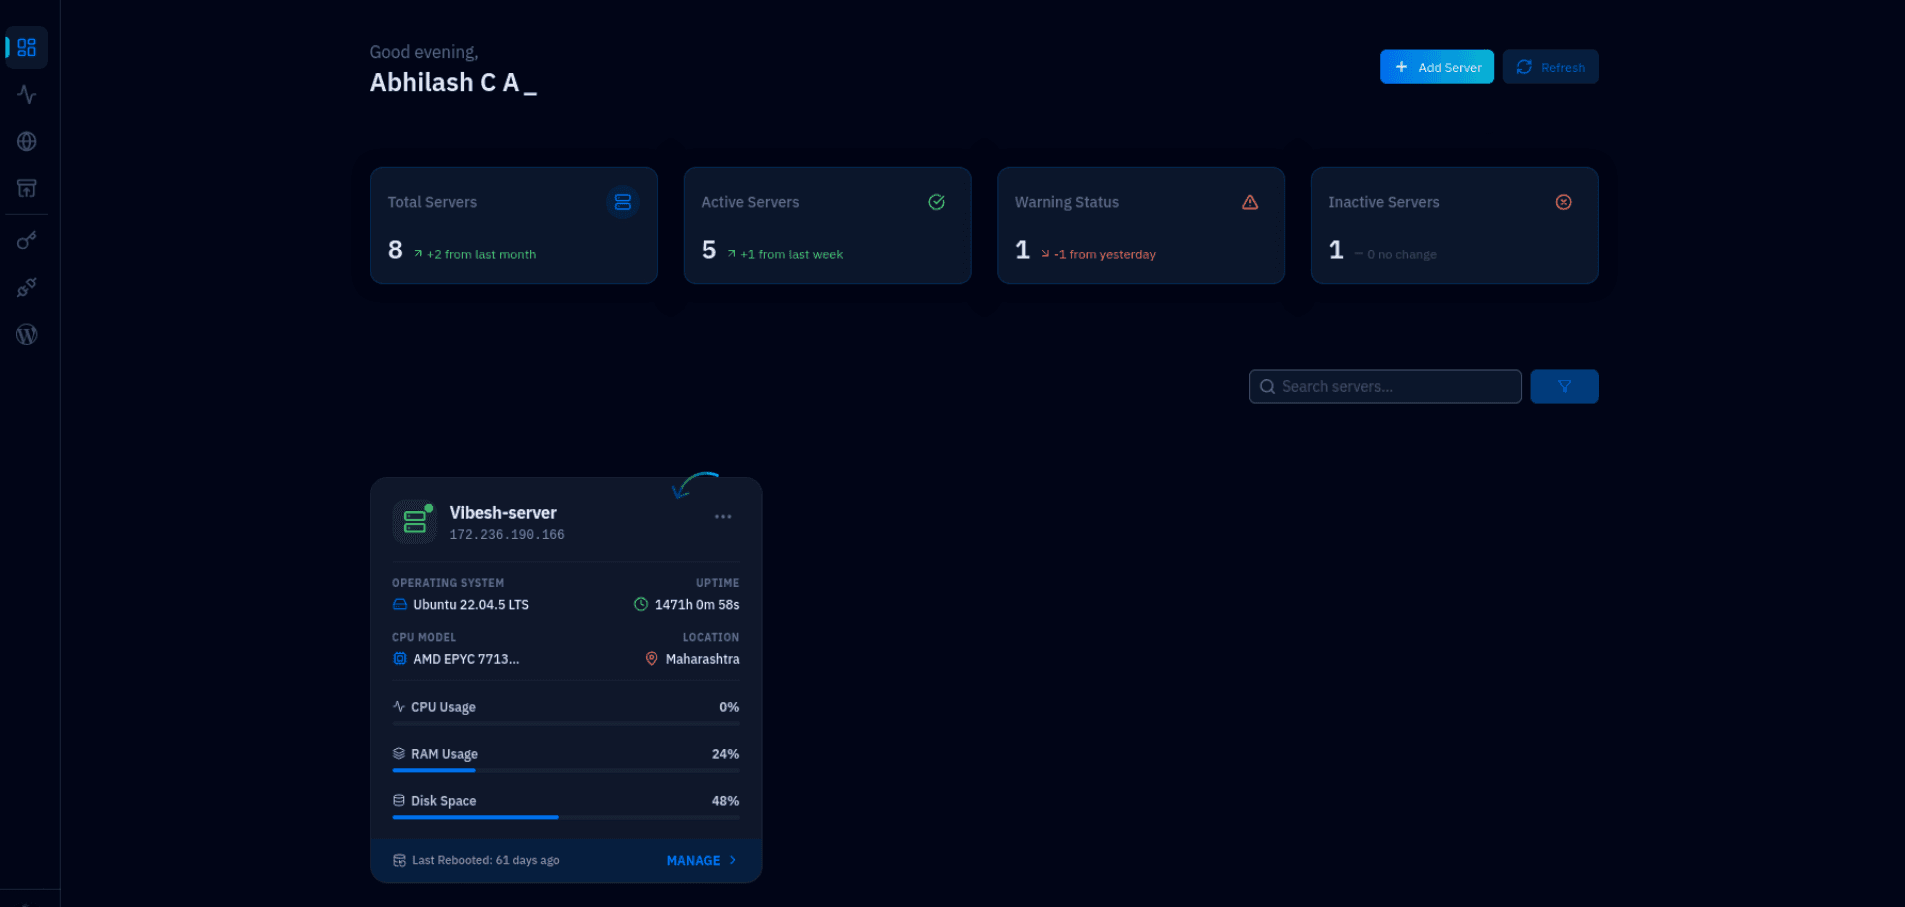
Fig. 01 — CloudStick Dashboard showing all connected servers with status and resource usage.
Step 2: Navigate to EasyPHP
Once inside the server panel, EasyPHP is accessible from the left-hand navigation menu. It gives you a complete view of your server's PHP versions and the extensions available for each.
Open the server panel: After clicking Manage, you will see the server overview with system metrics such as CPU, RAM, disk space, and uptime.
Click EasyPHP in the left-hand menu: In the left-hand navigation of the server panel, click the EasyPHP icon (represented by the code brackets icon) to open the EasyPHP manager.
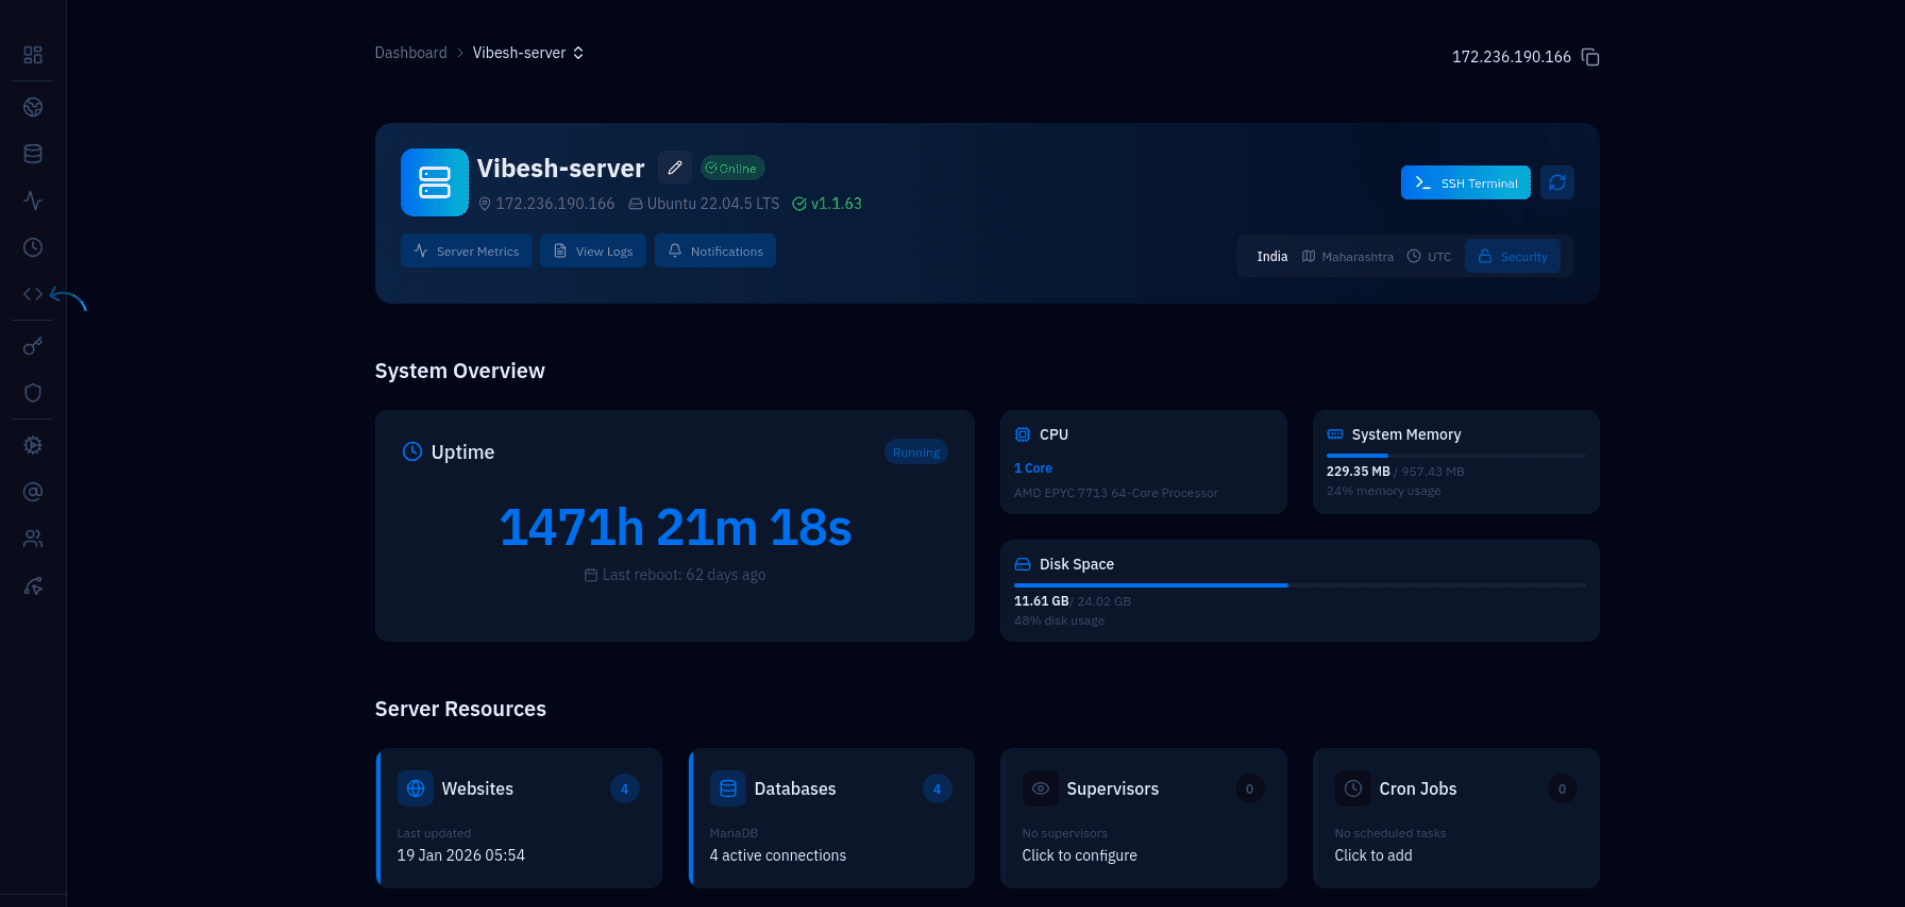
Fig. 02 — Server panel overview showing system metrics and the left-hand navigation menu.
Step 3: Manage PHP Extensions
The EasyPHP page displays all PHP versions installed on the server and a full list of available extensions for whichever version you select. Use the toggle switches to enable or disable any extension instantly.
Select the PHP version: At the top of the EasyPHP page, click the PHP version card you want to manage — for example PHP 8.1, 8.2, 8.3, 8.4, or 8.5. The extensions list below will update to show that version's configuration.
Browse the PHP Extensions list: Scroll through the PHP Extensions section to find the extension you need. Each extension shows its current status — Enabled or Disabled.
Toggle the extension: Click the toggle switch on the right side of the extension row to enable or disable it. The change takes effect immediately — no server restart is required.
Save the changes: If a Save button is present, click it to confirm and apply the updated PHP extension configuration.
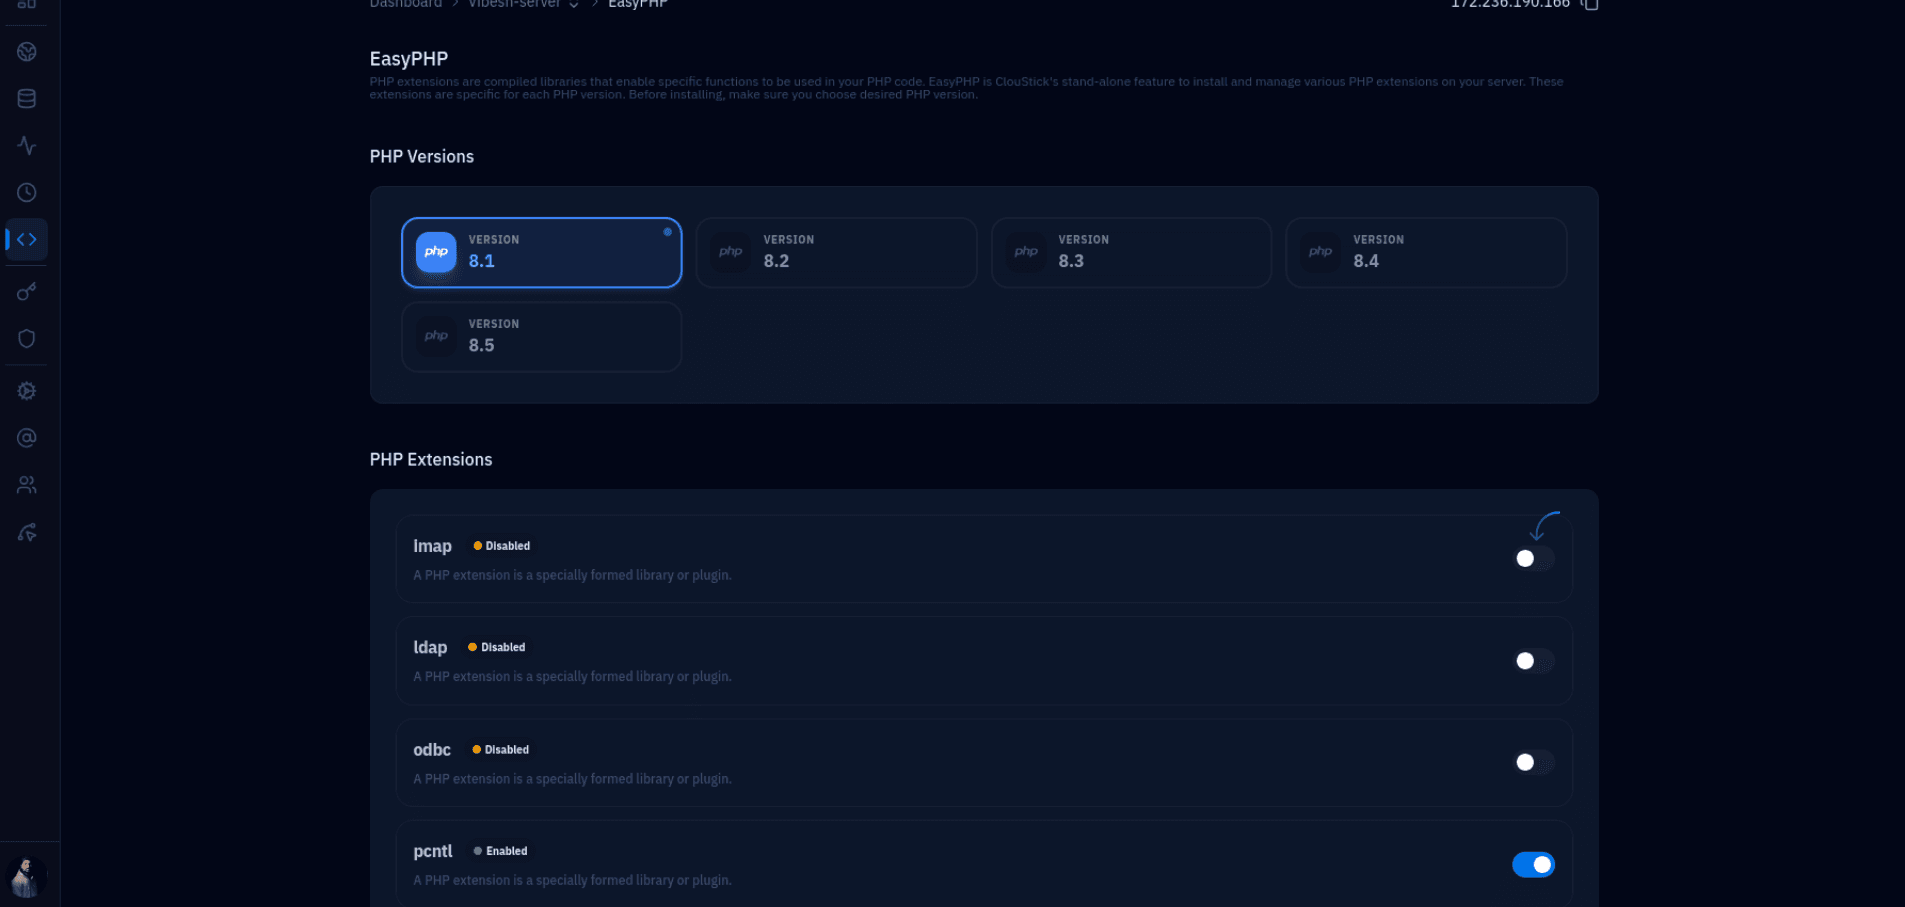
Fig. 03 — EasyPHP page showing PHP version selection and the PHP Extensions list with toggle switches.
EasyPHP manages extensions for all PHP versions on the server. Changes to one version do not affect other versions — each version's extension set is fully independent.