How to Manage Domains (Web Application)
Overview
Each web application in CloudStick can be connected to one or more custom domain names. The Domains section in App Settings lets you add new domains, assign them to your application, and remove domains that are no longer needed — all from the dashboard without any Nginx or server config changes required. You can also optionally install a free Let's Encrypt SSL certificate at the same time as adding a domain.
This guide walks you through navigating to the correct application, opening the Domains section in App Settings, and adding a custom domain name to your web application.
After adding a domain in CloudStick, you must also update your DNS records to point the domain to your server's IP address. CloudStick configures the server side — DNS propagation must be done at your domain registrar or DNS provider.
Step 1: Log In and Navigate to Your Server
Domain management is configured at the web application level, so the first step is to open the server panel that hosts the application you want to configure.
Log in to your CloudStick Dashboard: Go to app.cloudstick.io and sign in to your account.
Select your server: From the dashboard, find the server that hosts your web application and click Manage to open the server panel.
Locate the Websites resource card: In the Server Resources section of the server panel, you will see a Websites card showing the total number of web applications on this server. Click on it to navigate to the WebApp List.
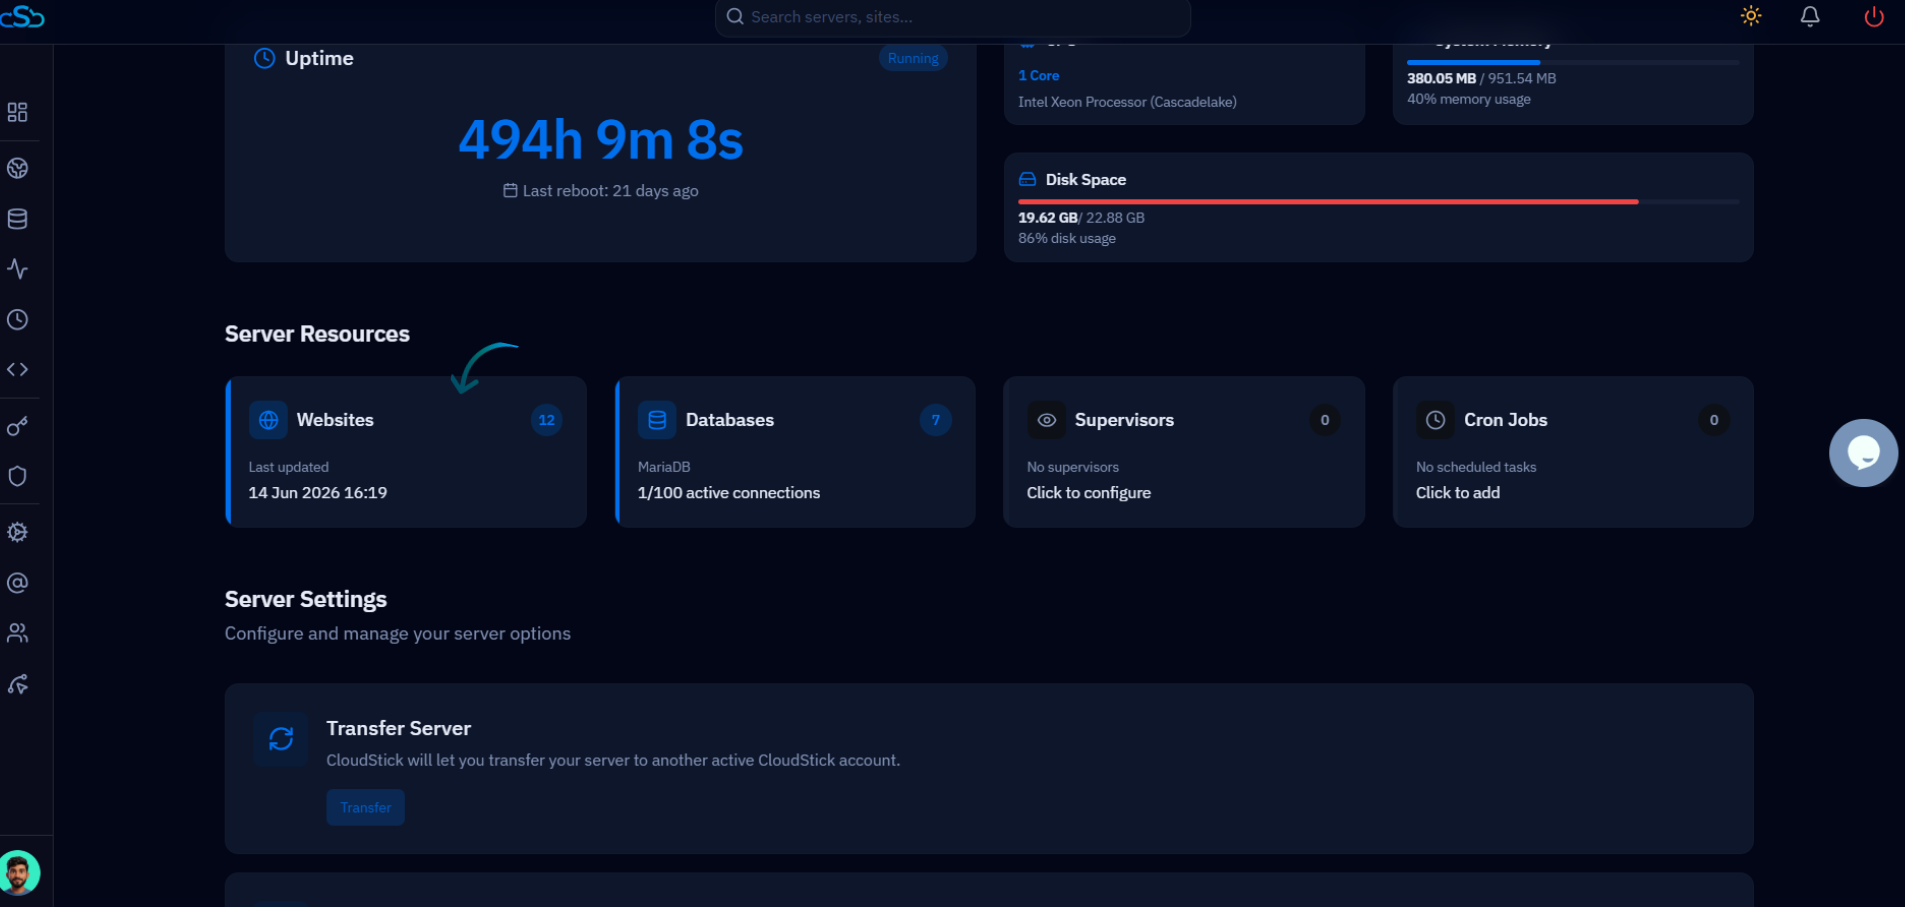
Fig. 01 — Server panel showing the Websites resource card alongside Databases, Supervisors, and Cron Jobs.
Step 2: Select Your Web Application
The WebApp List shows all websites hosted on the selected server. Find the specific application whose domain configuration you want to update.
Browse the WebApp List: The list displays each application's name, domain, system user, web stack, and PHP version.
Click your web application: Find the application you want to manage and click on its name to open the application management view.
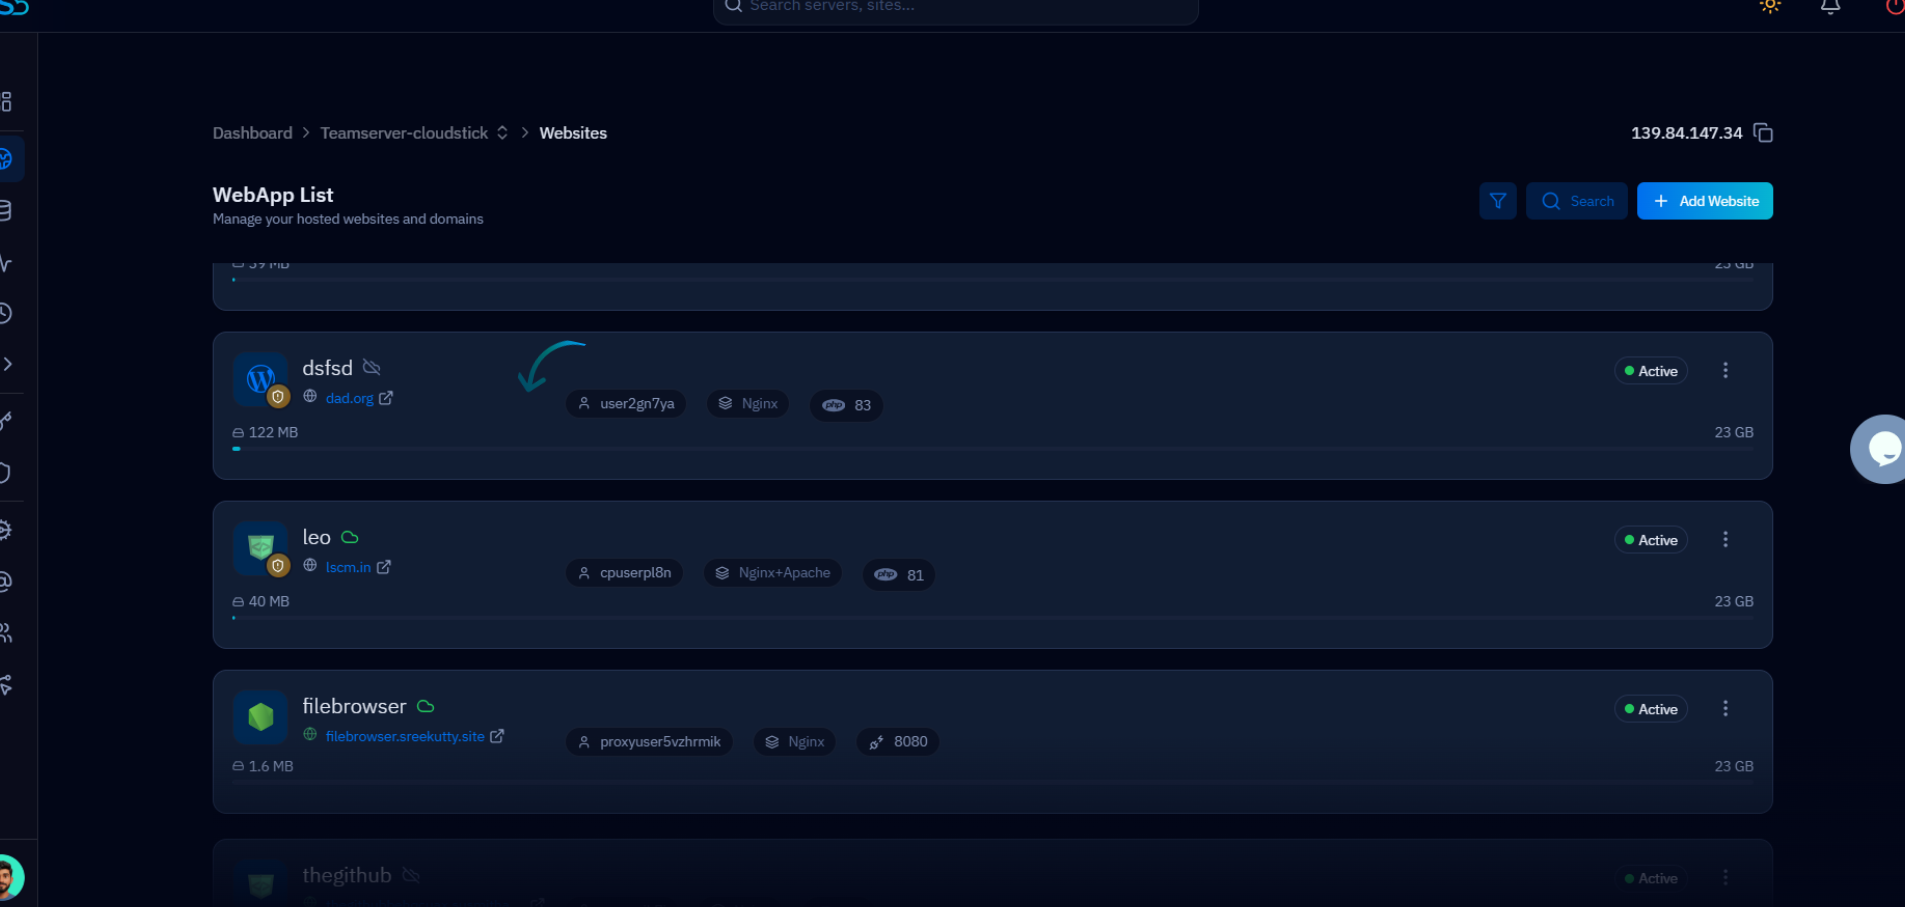
Fig. 02 — WebApp List showing all hosted websites with their active status and configuration details.
Step 3: Open Settings and Find the Domains Section
The App Settings panel is where all per-application configuration is managed. The Domains card is listed alongside other settings such as PHP Version, Web Stack, and NGINX Settings.
Click the Settings tab: In the top navigation bar of your web application, click Settings to open the App Settings page.
Locate the Domains card: Scroll to the Domains card on the App Settings page. It displays the description "Manage your connected domain names." Click on it to expand the domain management interface.
To remove an existing domain, expand the Domains section and click the delete / remove option next to the domain you want to unlink. The application will continue running on its remaining domains.
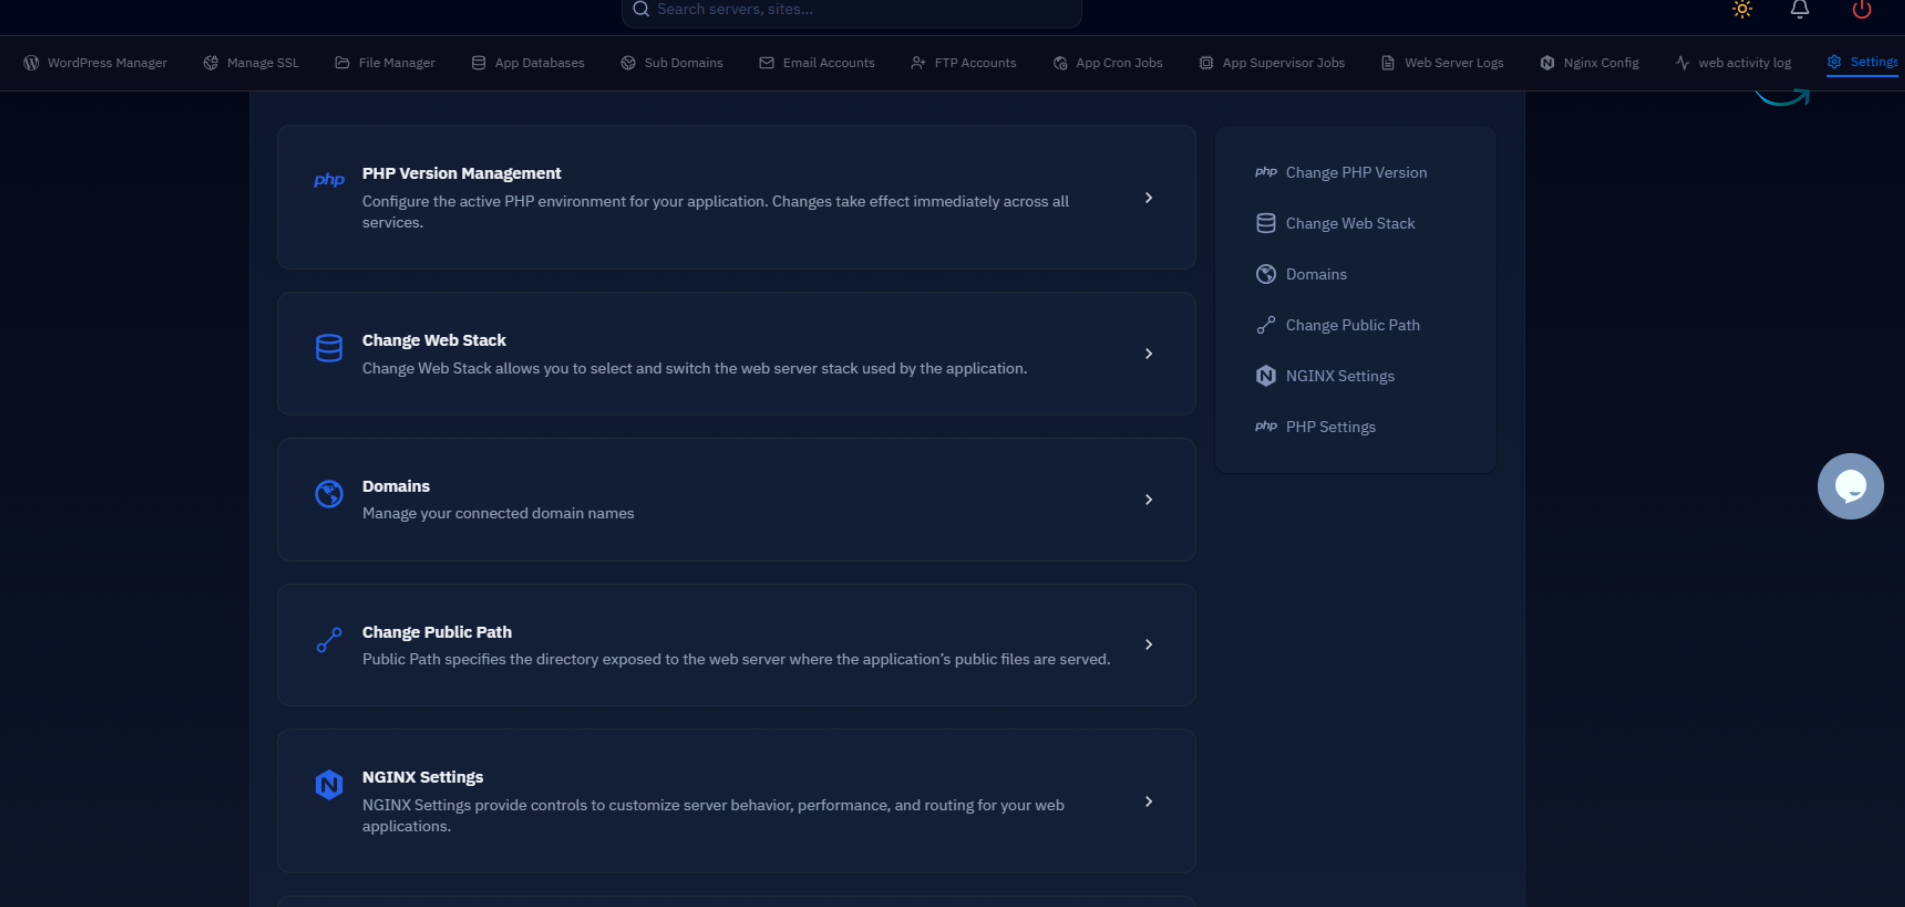
Fig. 03 — App Settings page showing the Domains card alongside PHP Version Management, Change Web Stack, and other settings.
Step 4: Add or Edit a Domain
Clicking Add Domain opens a modal where you enter the domain name and optionally install SSL in the same step.
Click Add Domain: In the Domains section, click the Add Domain button to open the Add Domain dialog.
Enter the domain name: In the Domain name field, type your custom domain — for example, example.com.
Choose whether to install SSL: The dialog includes an "Install SSL for this domain?" option. Select Yes to automatically provision a free Let's Encrypt SSL certificate for this domain, or No to skip SSL installation for now.
Click Add to save: Click the blue Add button to assign the domain to your web application and apply the configuration.
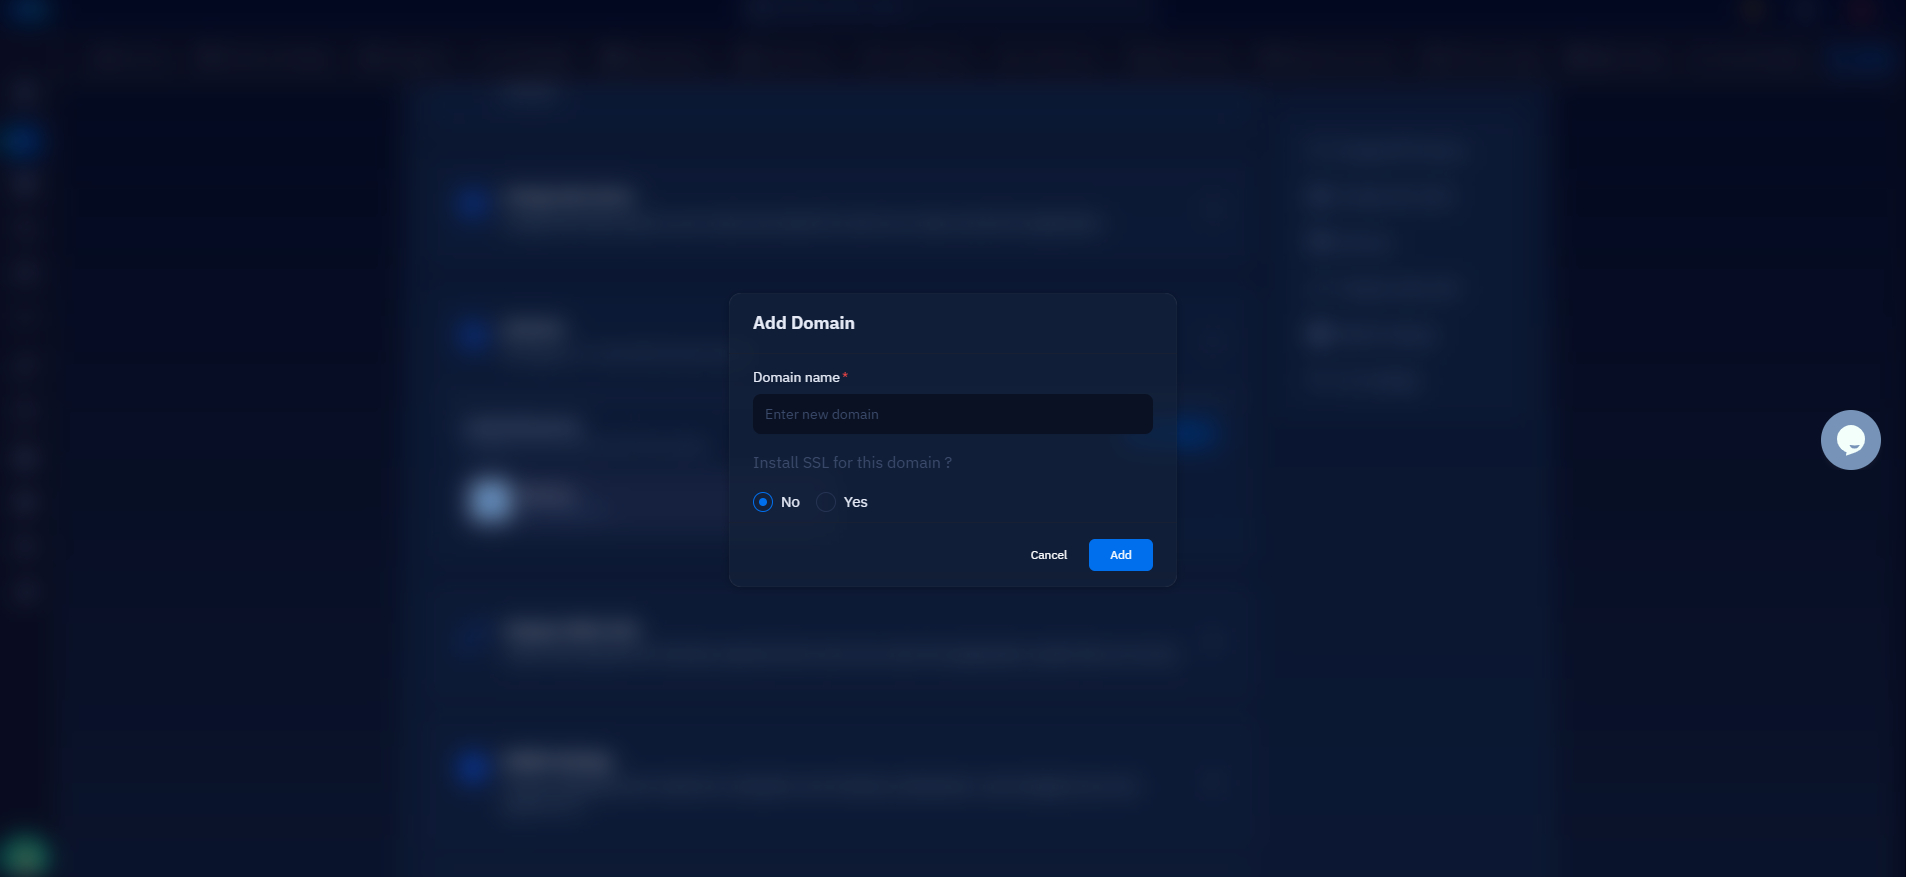
Fig. 04 — Add Domain modal showing the domain name field and the SSL installation option.
After saving, update your DNS records at your domain registrar to point the domain's A record to your server's IP address. Once DNS propagates, your application will be accessible at the new domain.