How to Rebuild a Website
Overview
CloudStick's Website Rebuild feature lets you reset and redeploy a web application directly from your dashboard. Rebuilding regenerates the website's server configuration — its web server (Nginx, Apache, or OpenLiteSpeed) and PHP setup — without deleting the site or recreating it from scratch. It is the quickest way to recover from a broken or misconfigured setup and bring the site back to a clean, working state.
This guide walks you through the complete process of rebuilding a website from the CloudStick dashboard, starting from selecting your server and ending with the rebuild completion. The whole flow is handled in the web UI — no SSH or command line is required.
Rebuilding a website may overwrite existing configurations depending on your setup. Always take a backup before proceeding — you can enable one from the Backups section of your server panel.
Step 1: Select Your Server
Websites are managed at the server level in CloudStick, so the first step is to open the server that hosts the site you want to rebuild.
1. Log in to your CloudStick dashboard: Sign in to your account. You will land on the main Dashboard, which lists all of your connected servers along with their status and resource usage.
2. Select your server: Click MANAGE on the server that hosts the website you want to rebuild. This opens the server panel for that server.
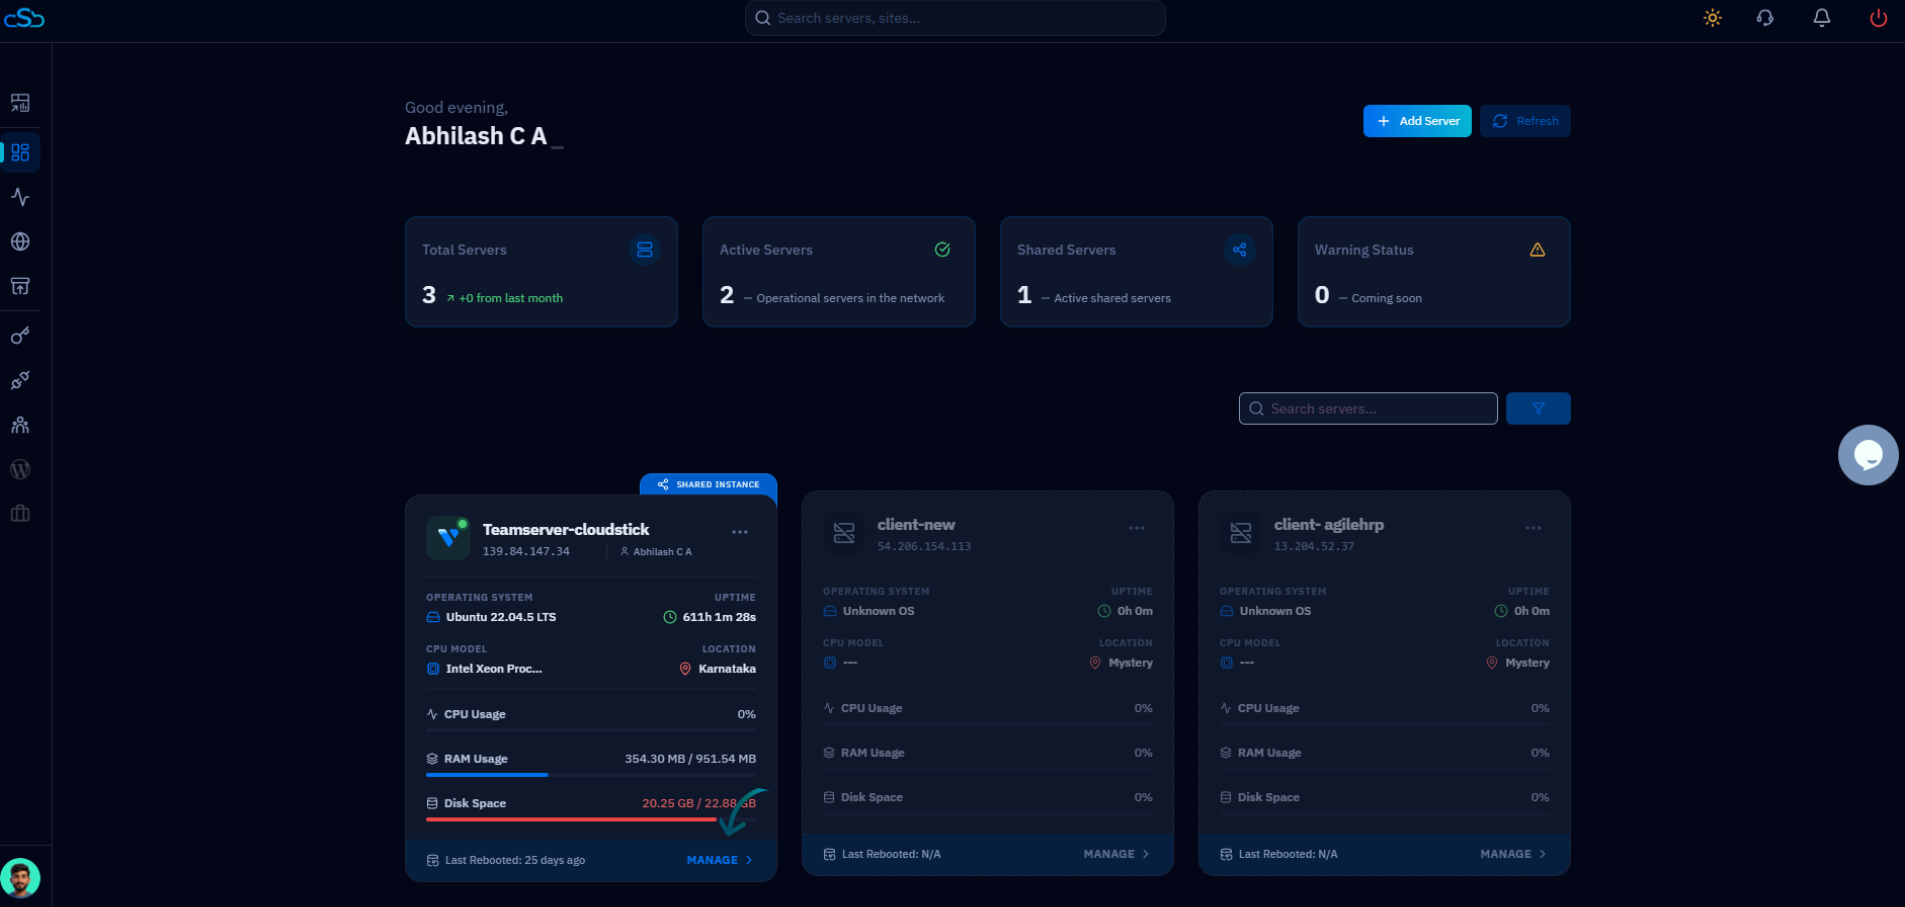
Fig. 01 — CloudStick Dashboard showing the connected servers available to manage.
Step 2: Open the Websites Section
Once inside the server panel, navigate to the list of websites hosted on that server.
3. Open Websites: From the left-hand navigation, click on Websites, or click the Websites card under Server Resources on the System Overview page. This opens the WebApp List of all sites hosted on the server.
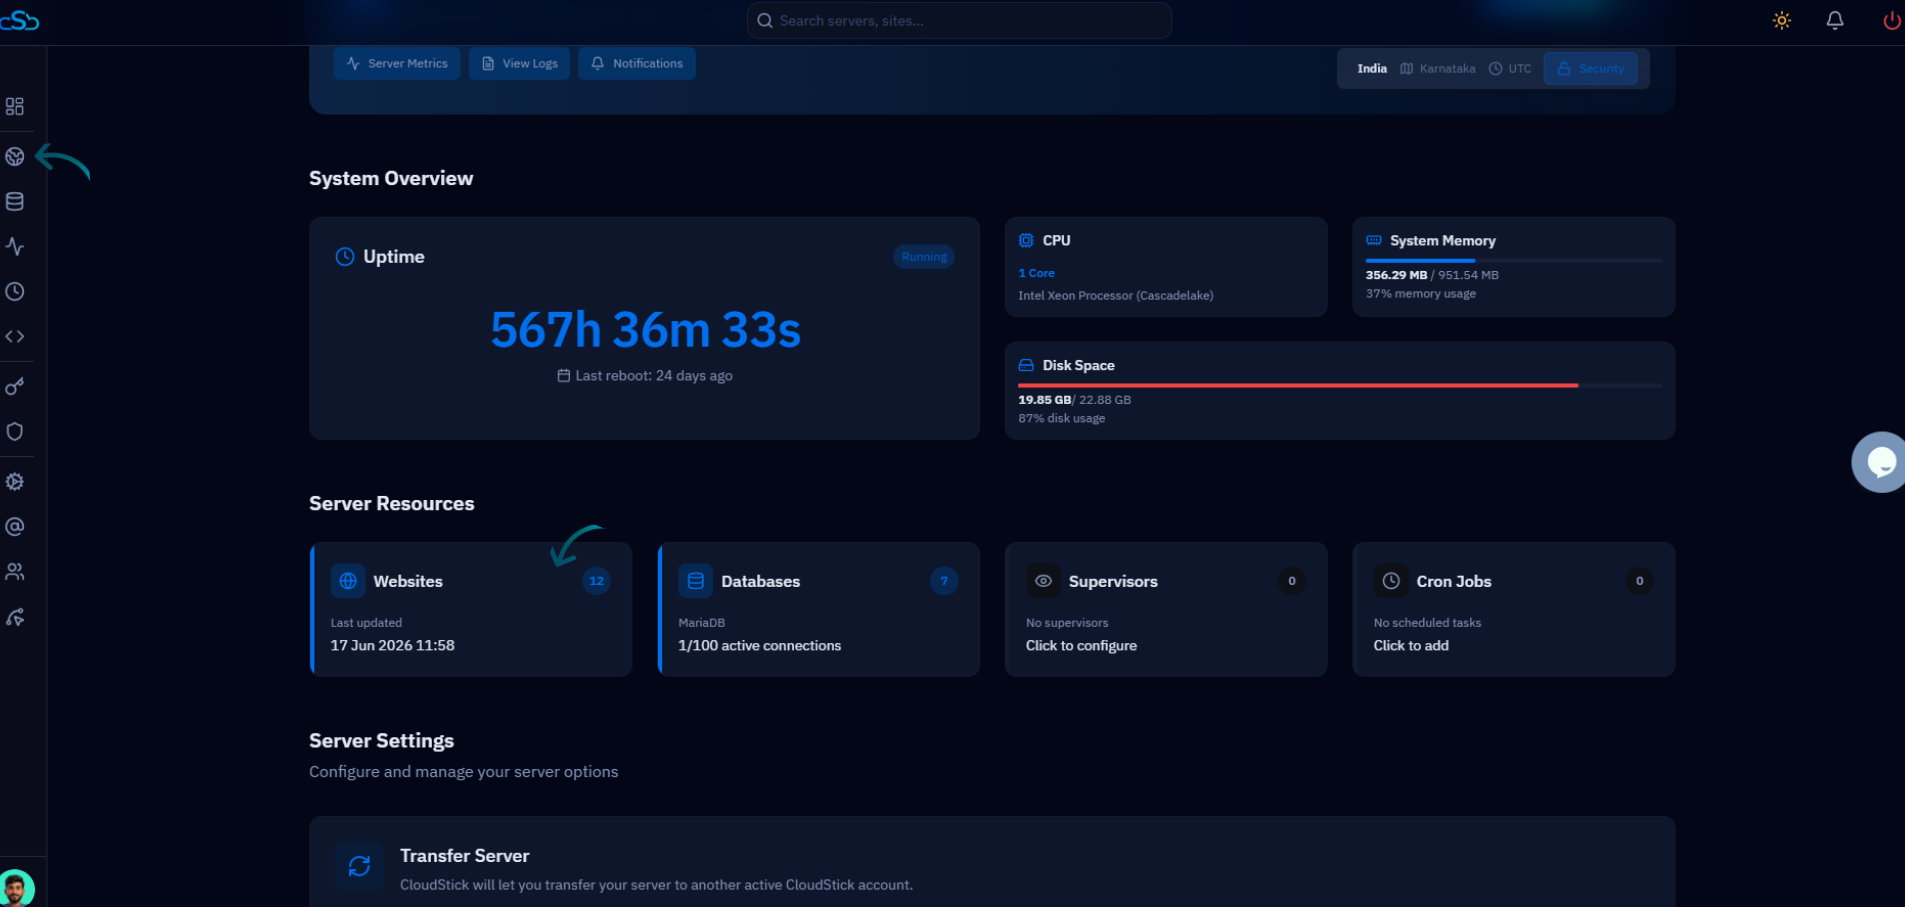
Fig. 02 — Server panel System Overview with the Websites section highlighted in Server Resources.
Step 3: Select the Website
From the WebApp List, choose the specific website you intend to rebuild.
4. Choose the website: Locate the website you want to rebuild in the WebApp List and click on it to open its details.
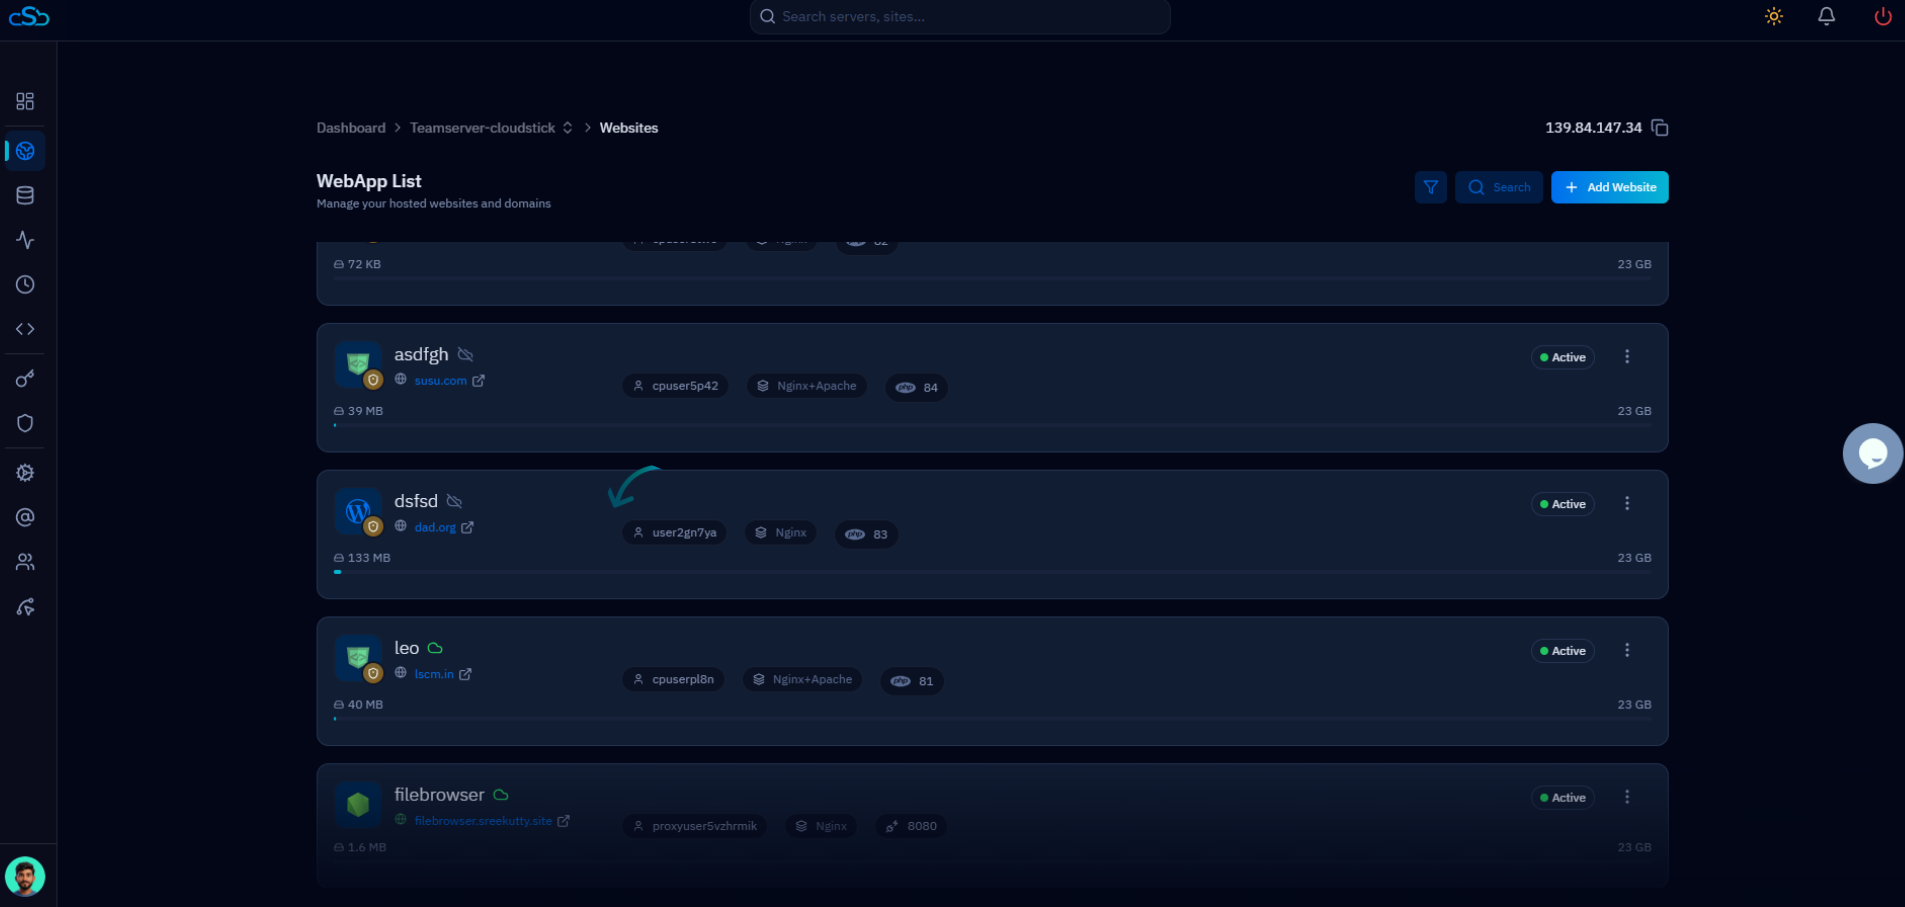
Fig. 03 — WebApp List with the website selected for rebuilding.
The WebApp List shows each site's status, system user, web server type, and disk usage — use it to confirm you are selecting the correct website.
Step 4: Open the Website Summary
The Website Summary page is the central place to view a site's details and perform management actions, including the rebuild.
5. Go to the Website Summary page: Open the Website Summary view for the selected site. It displays the site's configuration, SSL certificate status, backup status, and system user details.
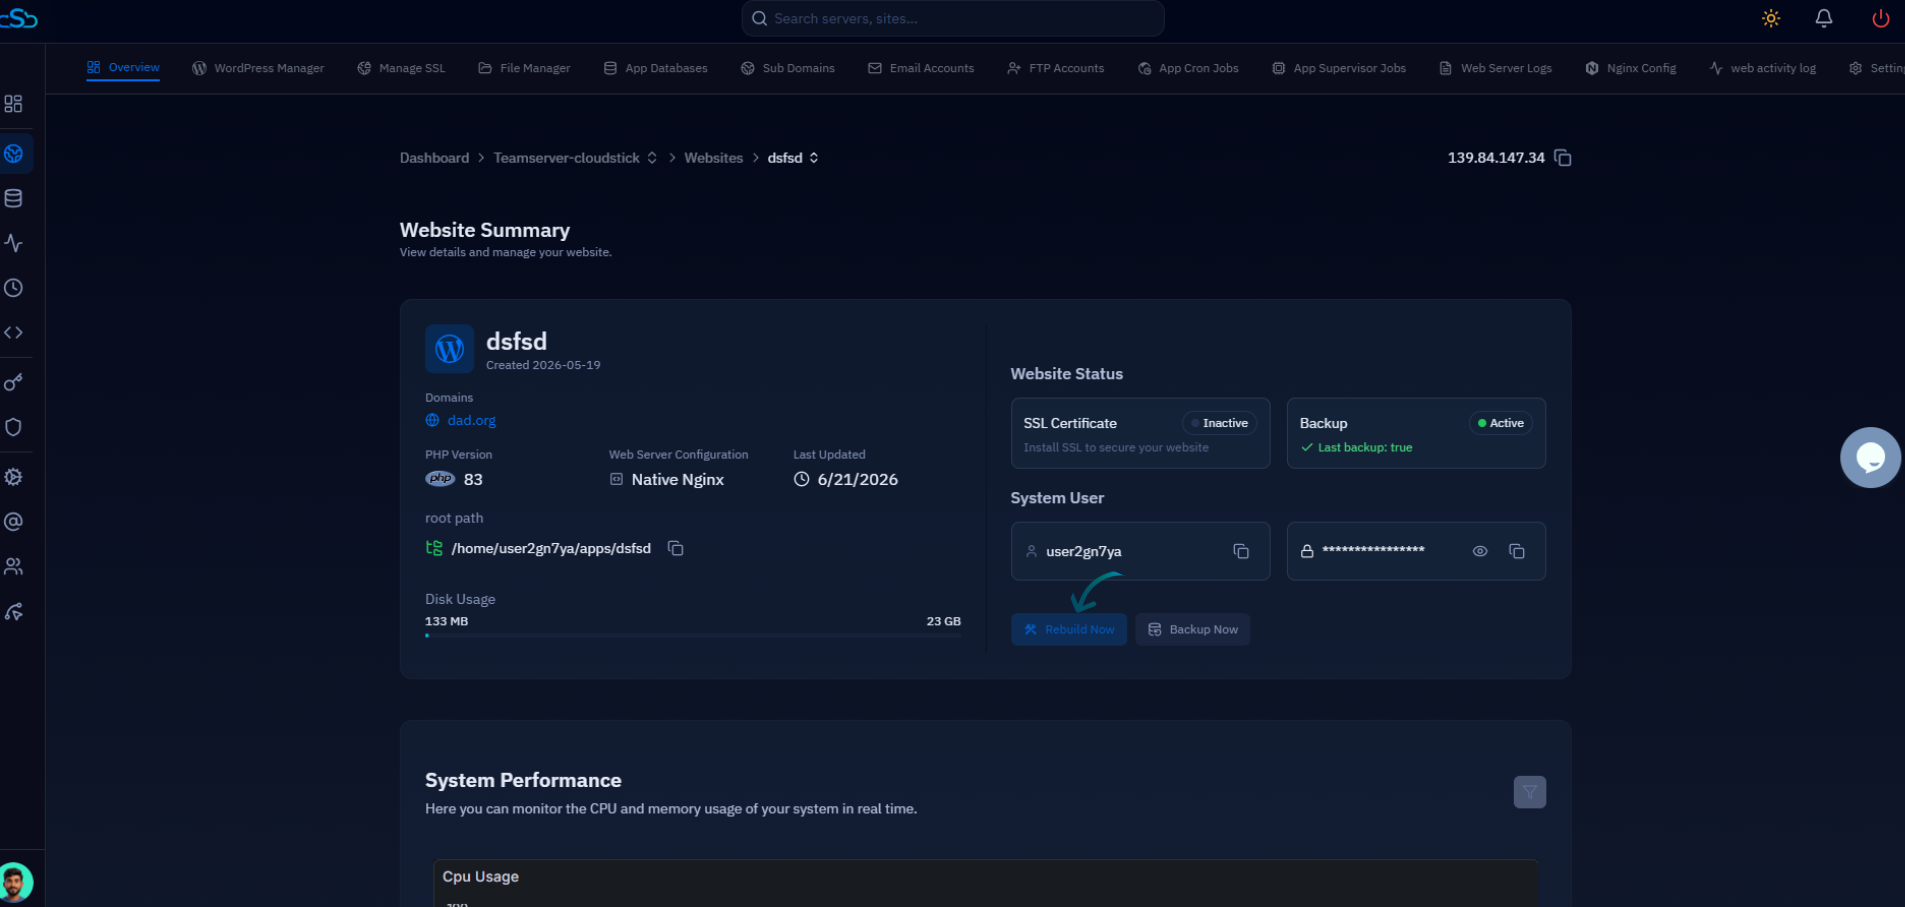
Fig. 04 — Website Summary page showing the site's details and management options.
Step 5: Rebuild the Website
With the summary open, you can trigger the rebuild and confirm the action in just a couple of clicks.
6. Click the Rebuild option: On the Website Summary page, locate the Rebuild option and click on it to begin.
7. Confirm the rebuild: A confirmation prompt will appear. Review it and confirm the action to proceed.
8. Wait for completion: CloudStick will rebuild the website, reconfiguring its files and settings. Once finished, the site is restored to a clean, working configuration.
The rebuild may take a moment to complete. Once it finishes, verify the site loads correctly in your browser. If you took a backup beforehand, you can restore it should anything need to be recovered.