How to Create a Custom Web App
Overview
A Custom Web App (Custom PHP) lets you deploy your own PHP-based application — a framework, a hand-written codebase, or any app that doesn't fit a one-click installer like WordPress or Laravel. CloudStick provisions the web server, PHP runtime, system user, and directory structure for you, so you can focus on your code instead of server configuration. It is the most flexible stack option when you need full control over how your application is hosted.
This guide walks you through logging in, selecting your server, opening the Websites section, choosing the Custom Web App stack, entering your domain and application details, and deploying the site from the CloudStick dashboard.
Before pointing a domain to your application, make sure the DNS records are configured correctly and the domain resolves to your server's IP address. CloudStick sets up the server side — DNS propagation is handled at your domain registrar or DNS provider and may take some time.
Step 1: Log In and Select Your Server
A custom web app is deployed onto a specific server, so the first step is to choose which connected server will host it.
Log in to your CloudStick account: Sign in to the CloudStick dashboard to see all of your connected servers.
Select your server: From the Dashboard, find the server where you want to create the custom web app and click Manage to open the server panel.
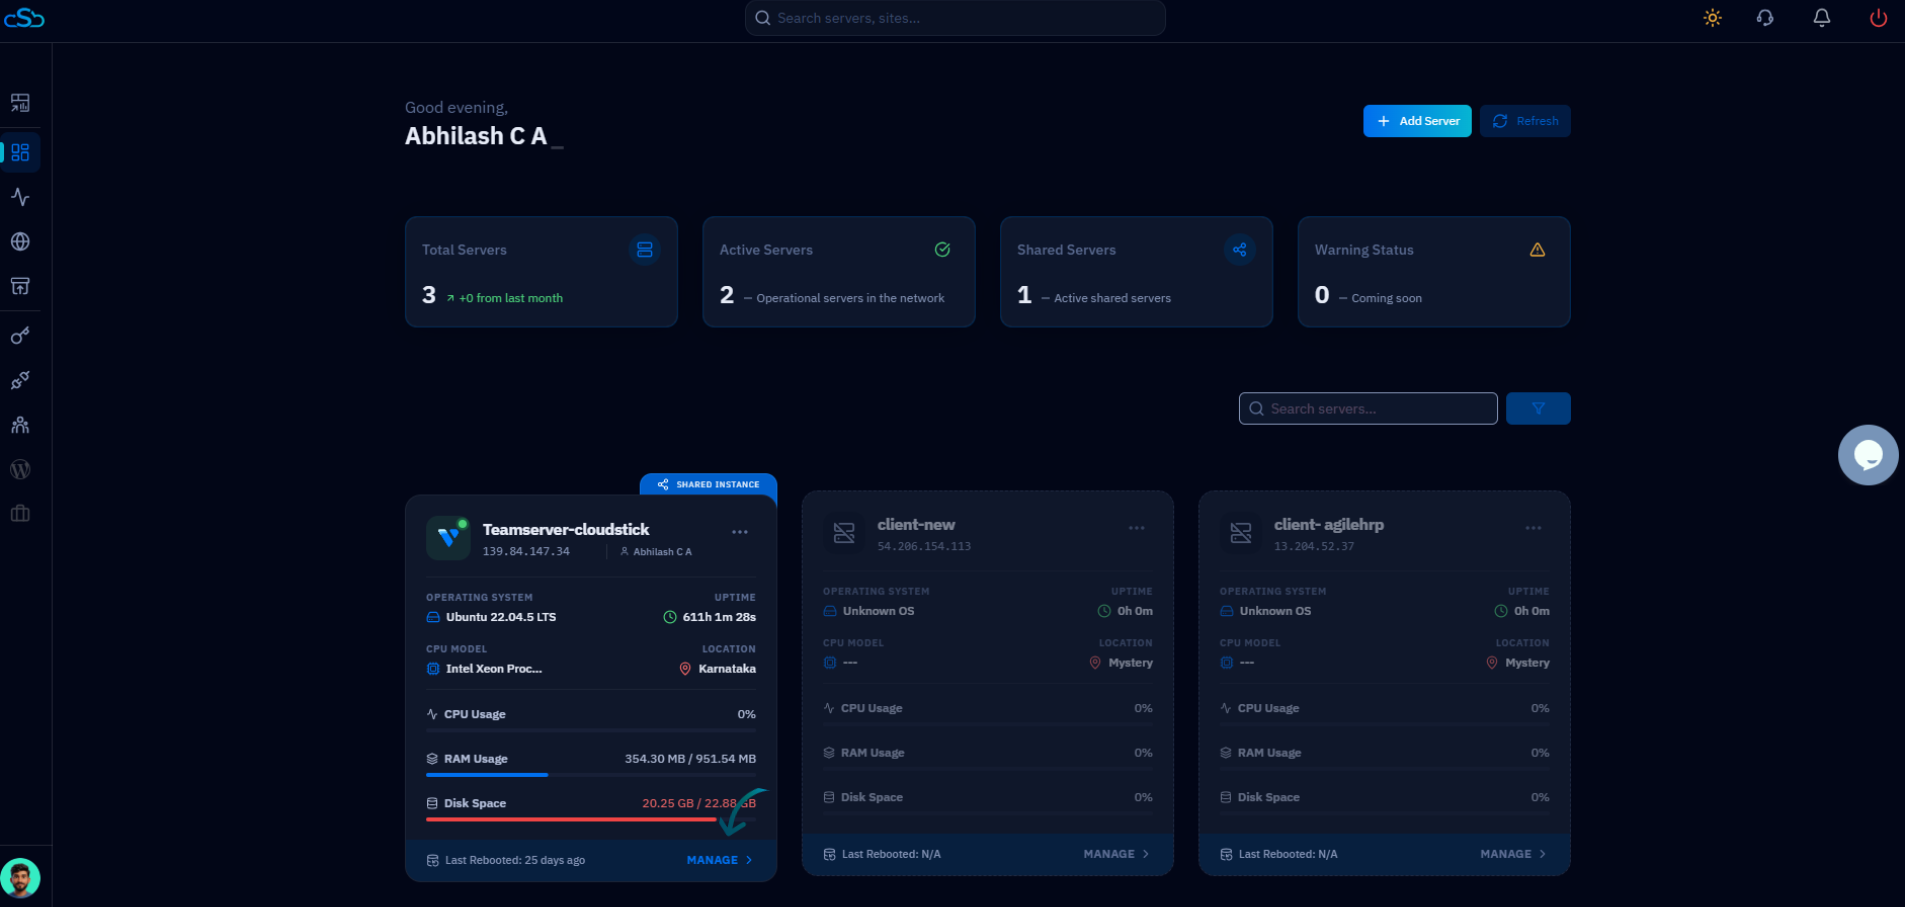
Fig. 01 — CloudStick Dashboard listing all connected servers; click Manage on the one that will host your app.
Step 2: Open the Websites Section
Web applications are managed from the Websites area of the server panel, where every site hosted on the server is listed.
Open Websites: From the left-hand navigation, click Websites — or click the Websites resource card in the Server Resources section of the server overview.
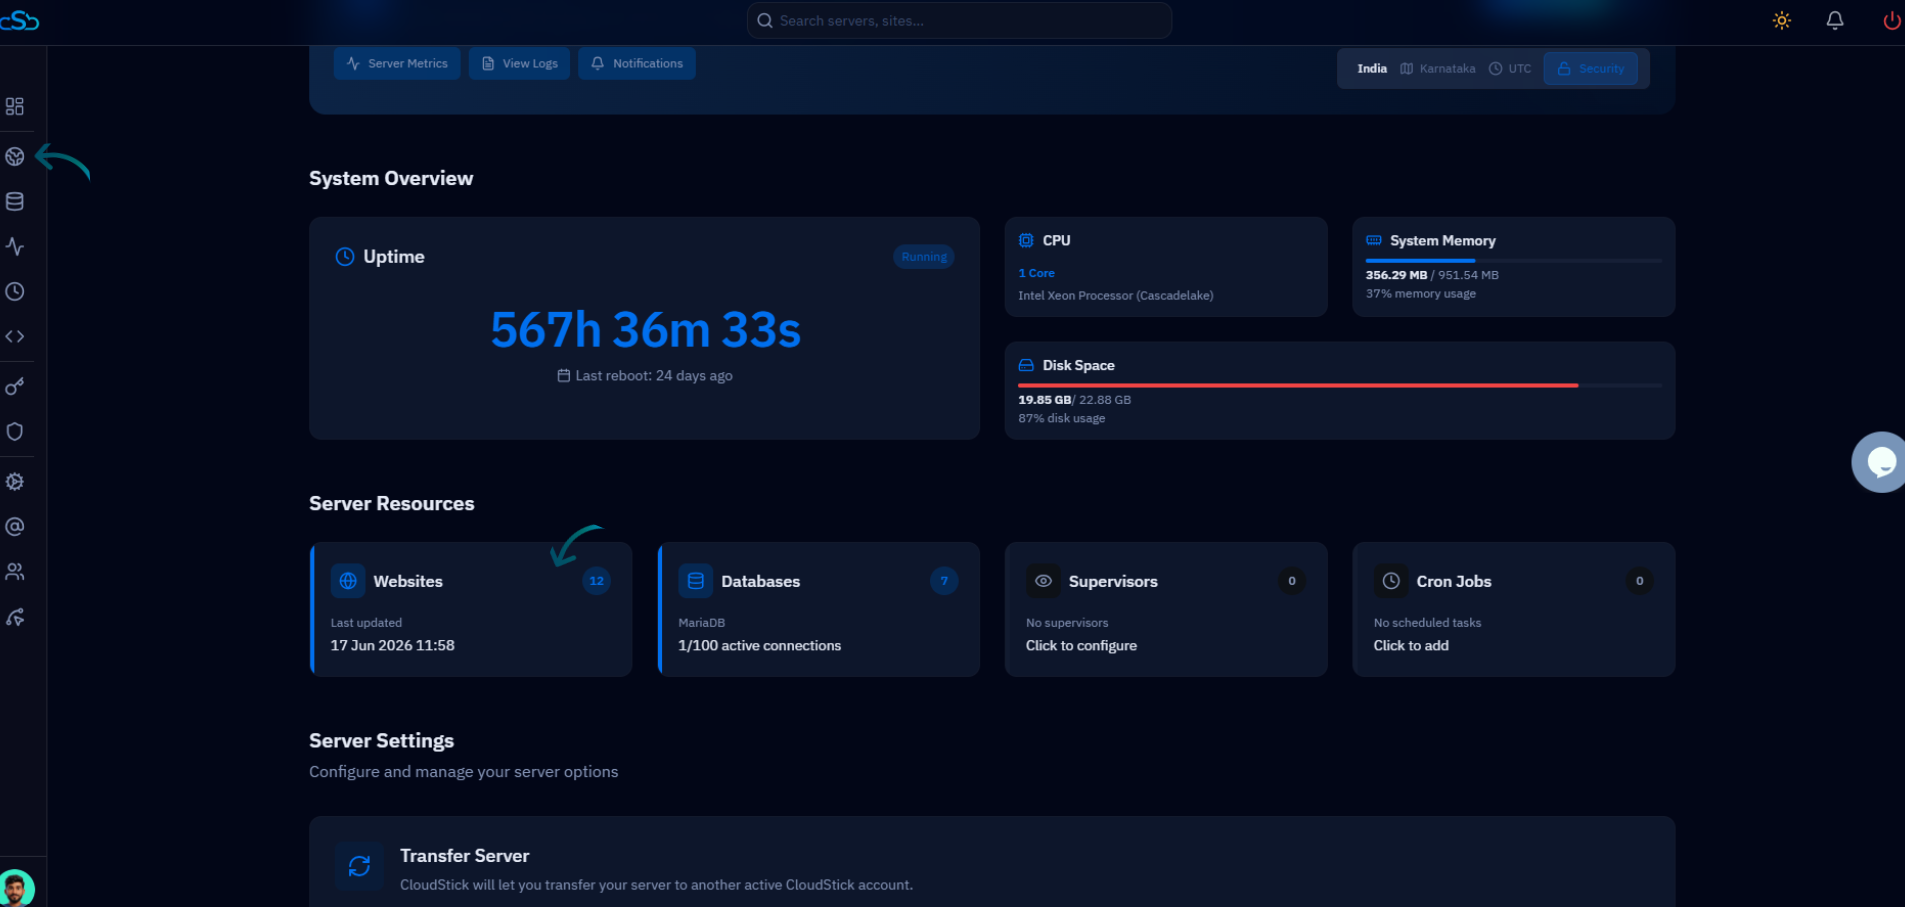
Fig. 02 — Server overview showing the Websites resource card in the Server Resources section.
Step 3: Create a New Website
The WebApp List shows all websites already hosted on the server. Start a new deployment from here.
Click Add Website: In the top-right of the WebApp List, click the Add Website button to open the stack selection dialog.
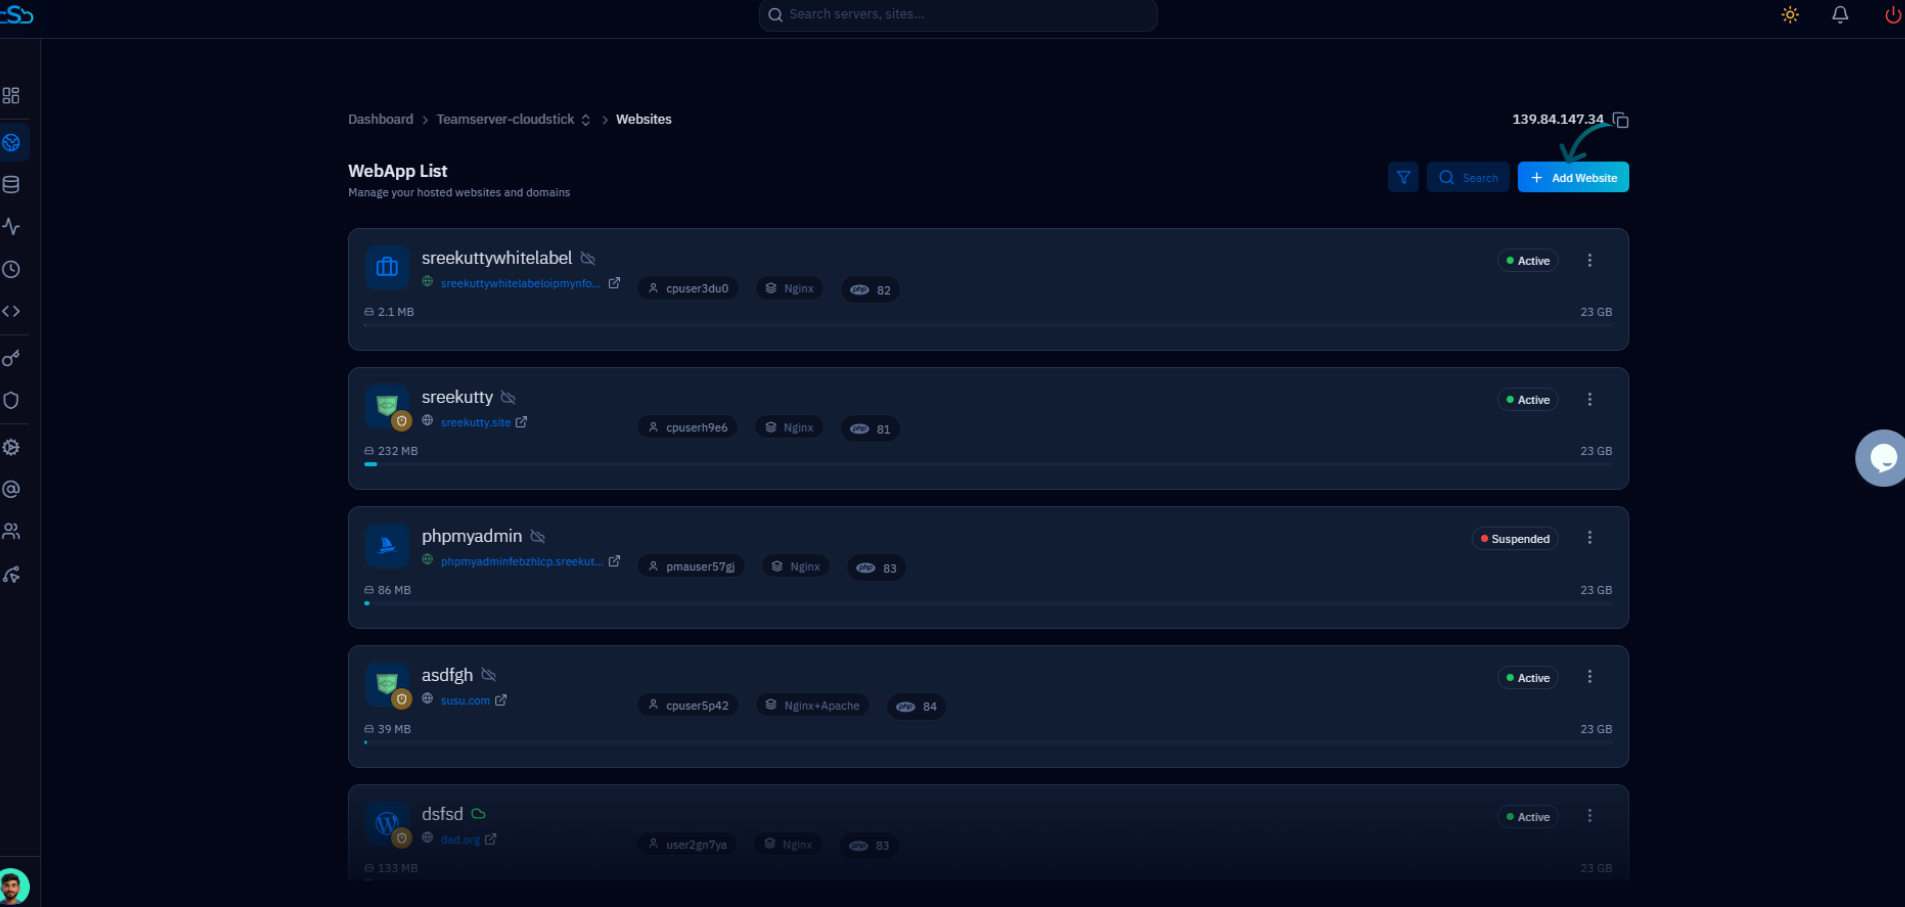
Fig. 03 — WebApp List with the Add Website button in the top-right corner.
Step 4: Select Custom Web App
The Create New Website dialog lets you pick the application type to deploy. For a custom PHP application, choose the Custom Web App stack.
Choose Custom Web App: From the available application types — WordPress, Custom PHP, Proxy App, Laravel, and more — click Select on the Custom PHP (Custom Web App) card.

Fig. 04 — Create New Website dialog; select the Custom PHP stack to deploy a custom web app.
Step 5: Enter Website Details and Create
The Custom PHP form is where you configure how the application is hosted. Fill in the required fields, review the settings, and deploy.
Enter the basic details: Provide an Email Address and a Website Name for the application.
Set the domain: Under Domain Type, choose Use My Own Domain and enter your domain name (comma-separated for multiple domains), or select Use Temporary Domain to test first.
Choose the runtime: Select the PHP Version and the Web Application Server (for example, Nginx + Apache). The Public Path is generated automatically from the system user and app name.
Review security options: Confirm the protection toggles — Clickjacking Protection, XSS Protection, and MIME Sniffing Protection — and open Advanced Settings for any additional configuration your application needs.
Click Install Custom PHP: Click the Install Custom PHP button to deploy the custom web app to your server.
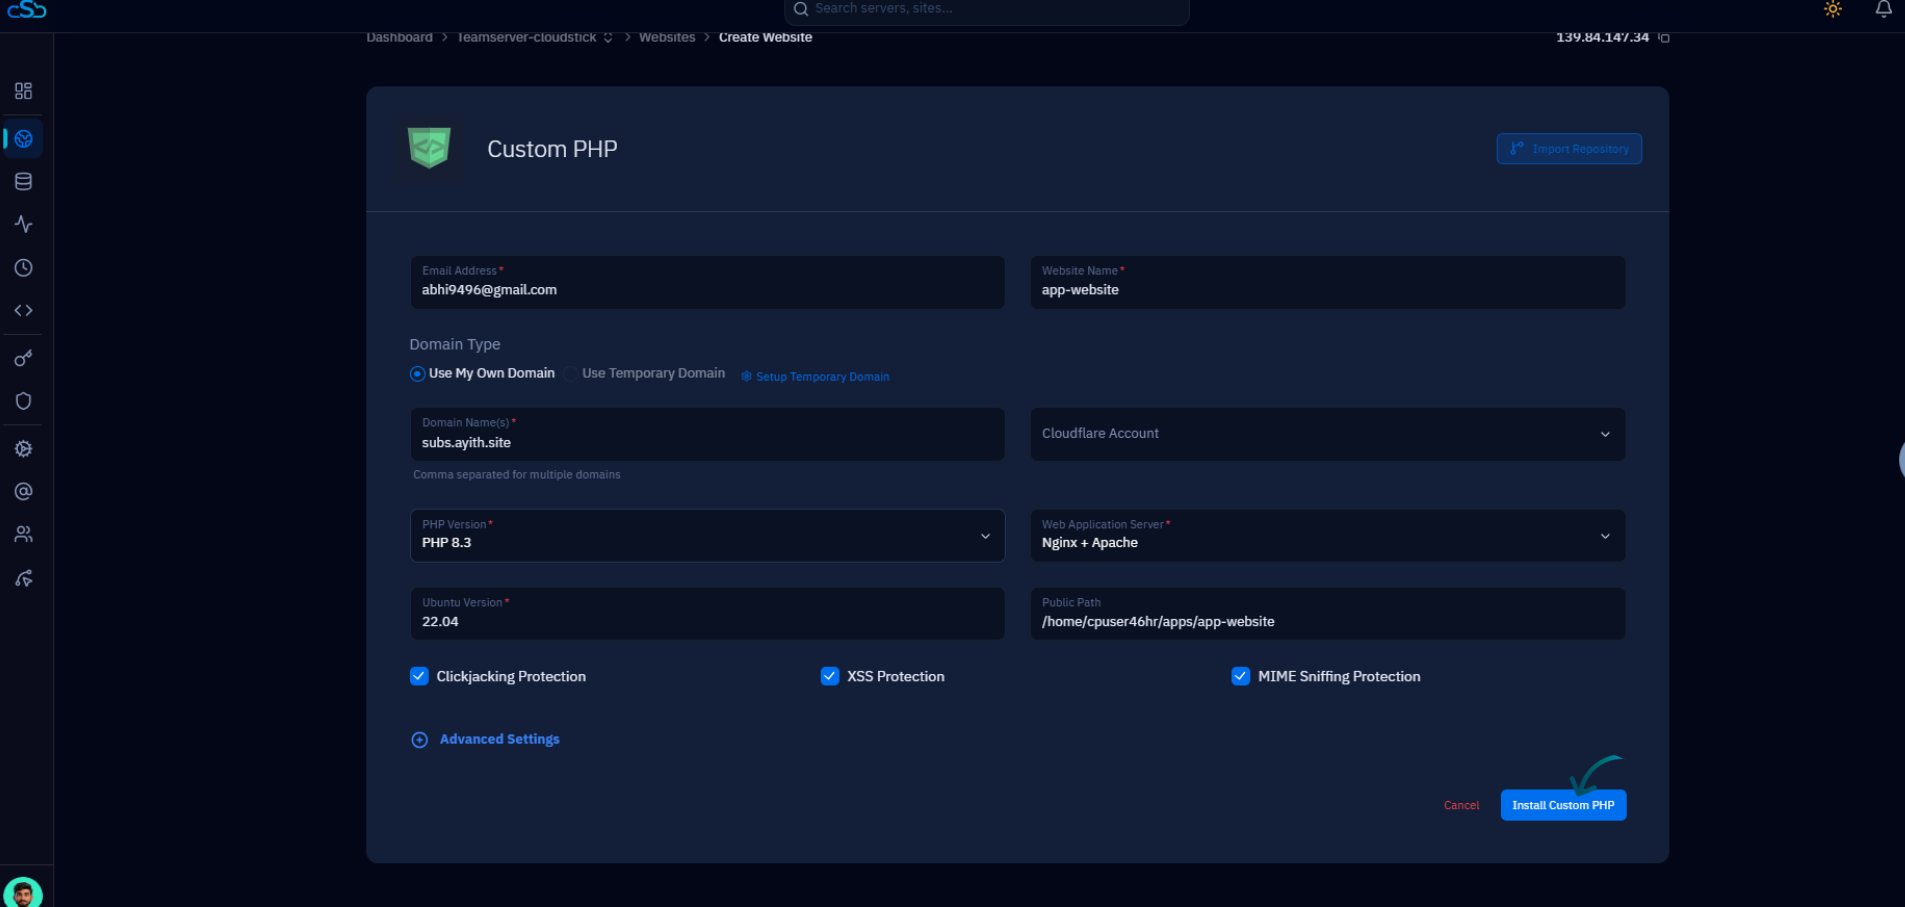
Fig. 05 — Custom PHP creation form showing domain, PHP version, web server, public path, and security options.
Once created, the custom web app appears in the Websites list, where you can manage its files, SSL certificates, domains, FTP accounts, and application settings at any time.