How to Delete an SSH Key
Overview
SSH keys grant passwordless access to a system user on your server, so it's good practice to remove any key that is no longer needed — for example, when a team member leaves, a laptop is decommissioned, or a key has been compromised. Removing an unused key reduces the number of credentials that can authenticate to your server and keeps your access list tidy.
CloudStick lets you manage every authorized public key from the dashboard through the SSH Keys section, so you can revoke a key with a couple of clicks instead of editing ~/.ssh/authorized_keys by hand. This guide walks you through deleting an SSH key from a server.
Deleting an SSH key is immediate and cannot be undone — the key stops working for SSH authentication right away. If you remove the wrong key, you will need to add it again from scratch. See the How to Add an SSH Key guide if you need to re-add one.
Step 1: Log In to Your CloudStick Account
Start from the CloudStick Dashboard and open the server whose key you want to remove.
1. Log in: Sign in to your CloudStick dashboard at app.cloudstick.io.
2. Select your server: From the Dashboard, click the server you want to manage to open its server details page.
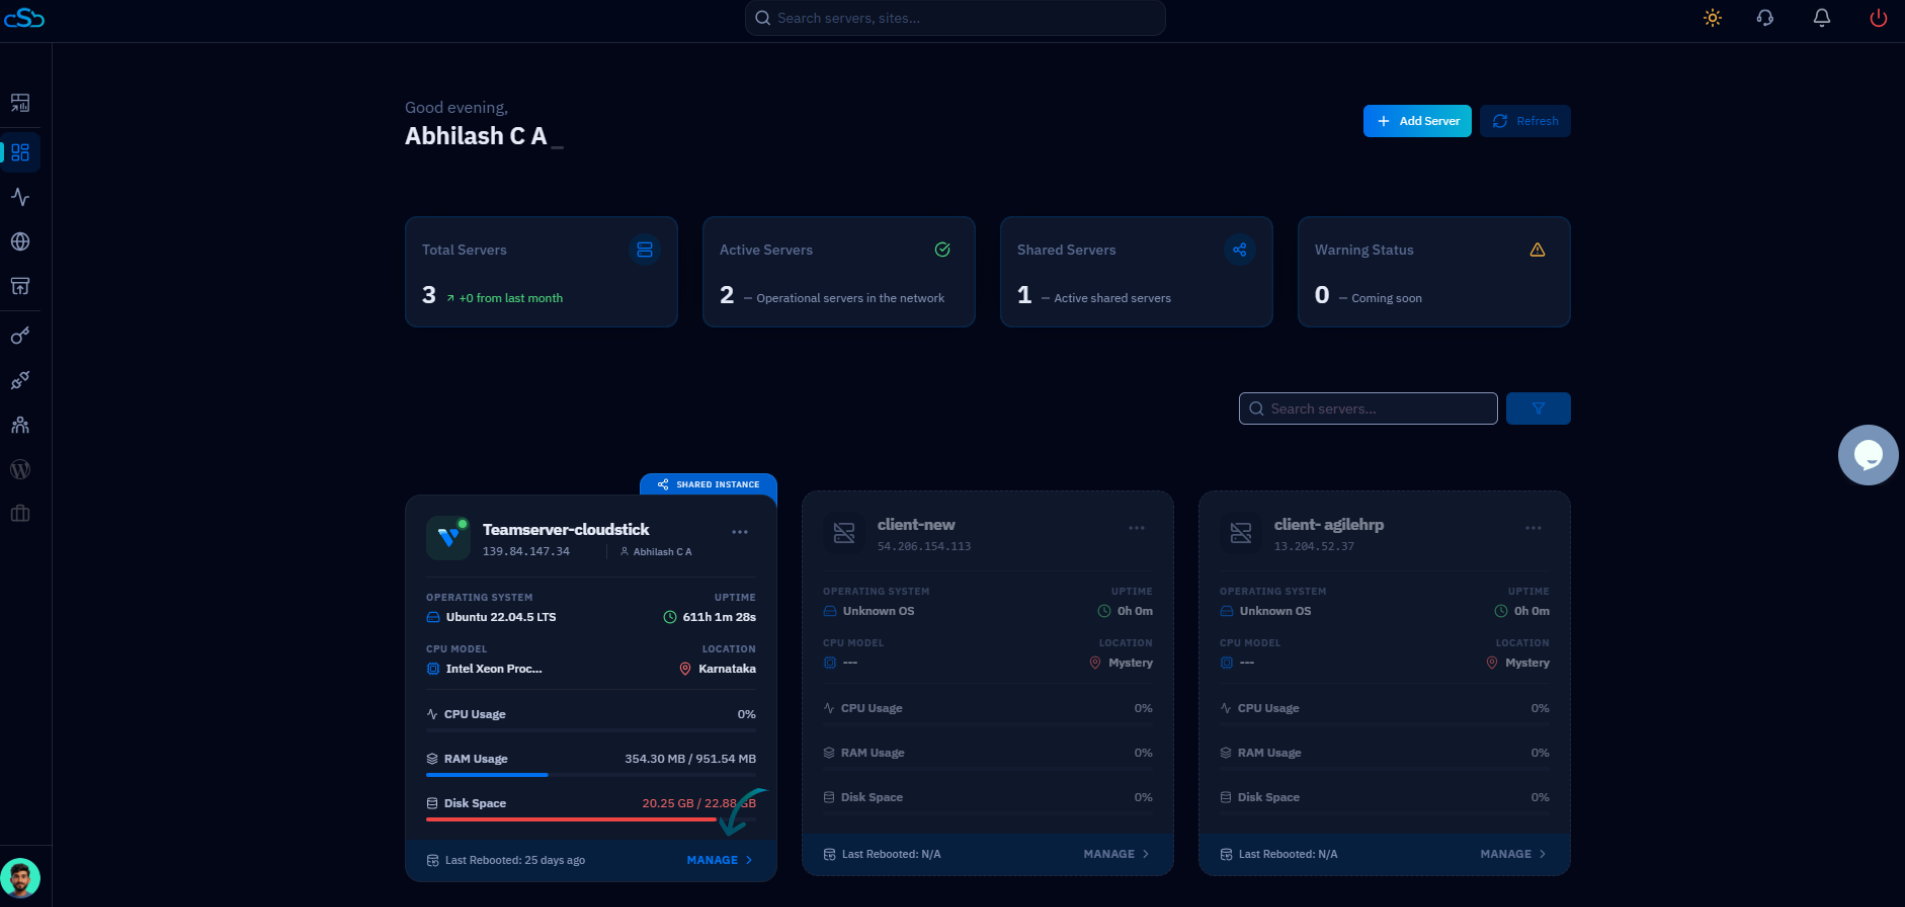
Fig. 01 — The CloudStick Dashboard showing your connected servers. Select the server you want to manage.
Step 2: Open SSH Keys
The SSH key manager lives in the left-hand navigation of the server panel.
1. Open the menu: From the left-side menu of the server panel, locate the SSH key icon.
2. Click SSH Keys: Click on SSH Keys to open the page where public keys for this server are managed.
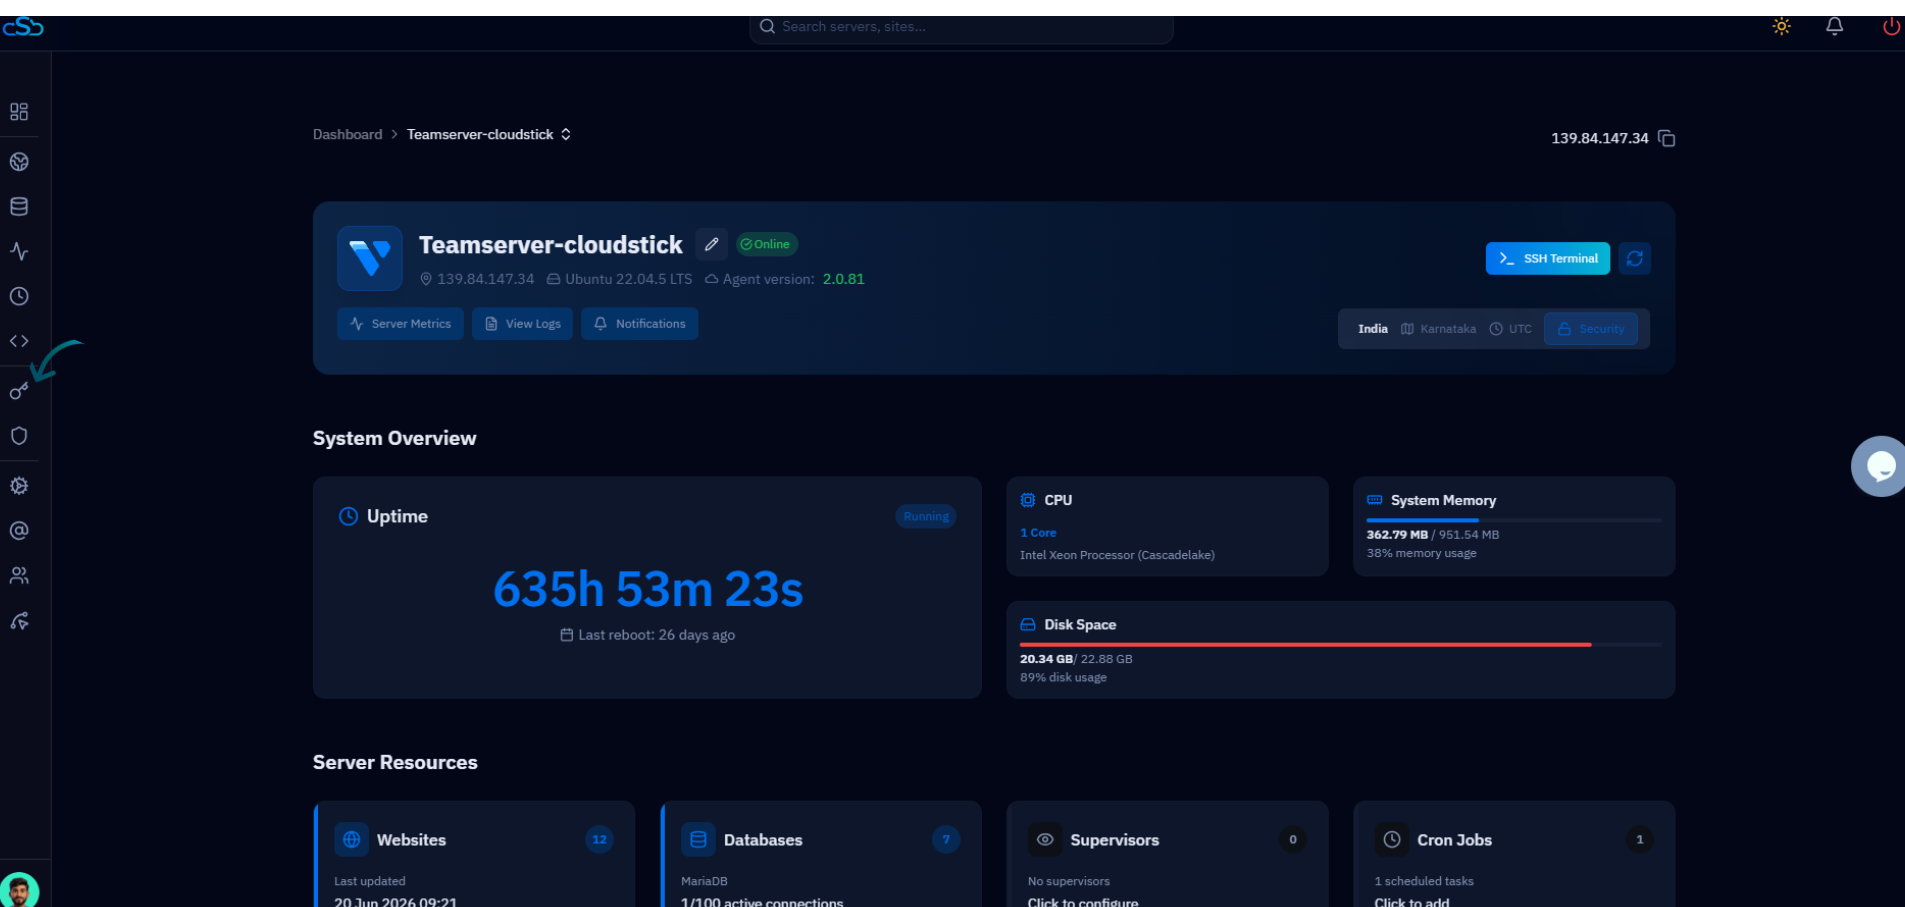
Fig. 02 — The server panel with the SSH Keys option highlighted in the left-hand navigation.
Step 3: View SSH Keys
The SSH Keys page lists every public key currently authorized for this server.
1. Review the list: You will see a list of all SSH keys configured on the server, showing the label, user, and public key for each one.
2. Use search if needed: If the server has many keys, use the Search box to quickly filter the list by label.
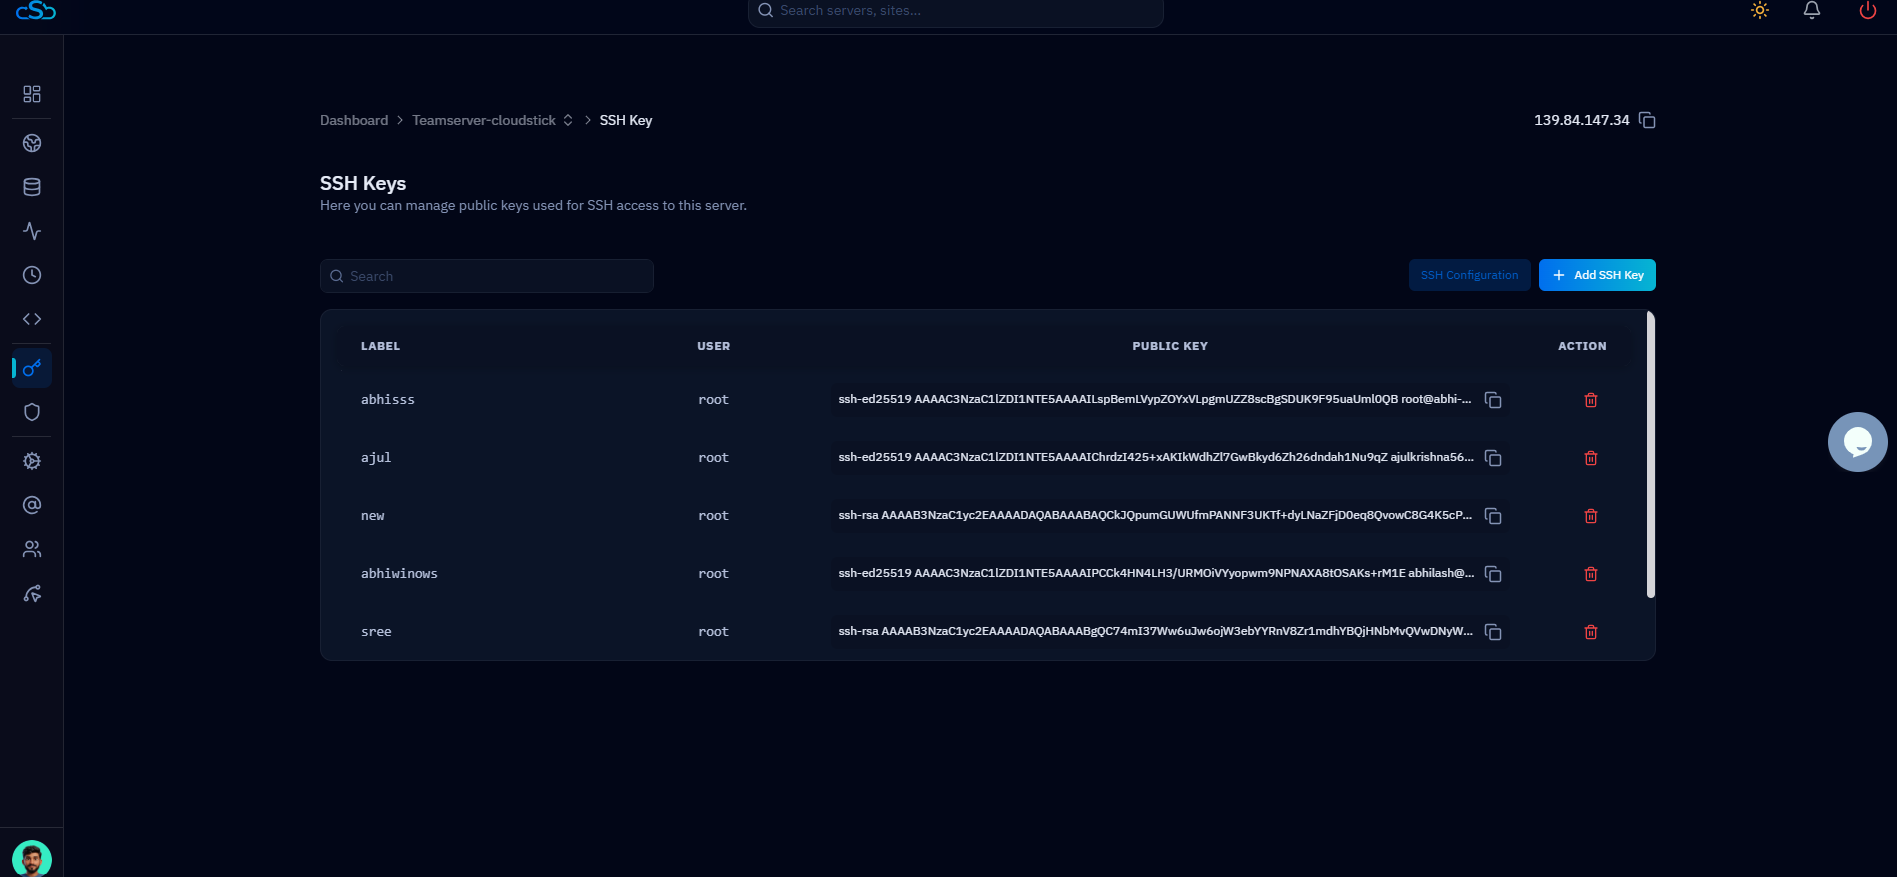
Fig. 03 — The SSH Keys list showing every public key authorized on the server, each with a delete action.
Step 4: Locate the SSH Key
Identify the exact key you want to remove before taking any action.
1. Find the key: Look through the list and find the SSH key you want to remove, using its label and associated system user to confirm it is the right one.
2. Double-check the user: Make sure the key's user matches the access you intend to revoke, so you don't remove a key that is still in use.
Step 5: Delete the SSH Key
Each key has a delete action in the Action column on the right of its row.
1. Open the action: In the row for the key you want to remove, click the delete (trash) icon under the Action column.
2. Choose Delete SSH Key: Select the Delete SSH Key option to begin removing the key.
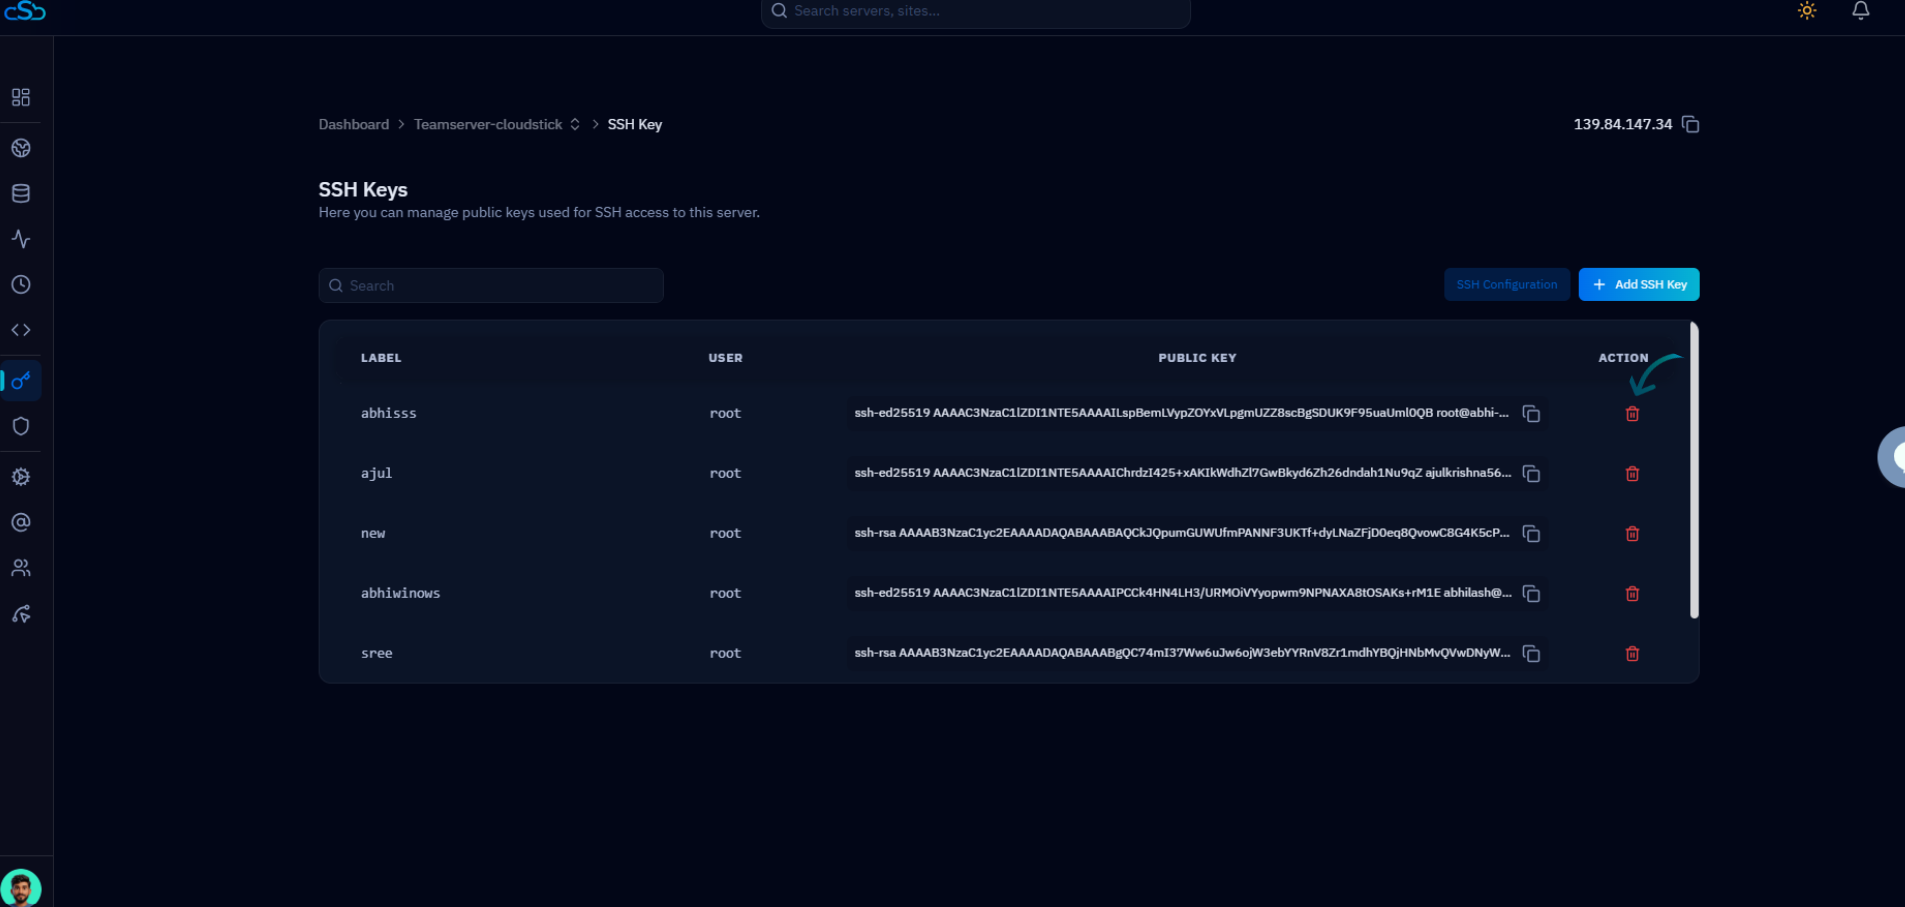
Fig. 04 — Click the delete (trash) icon in the Action column for the SSH key you want to remove.
Step 6: Confirm Deletion
CloudStick asks you to confirm before permanently removing the key.
1. Confirm the prompt: When prompted, confirm the deletion to proceed. This is your last chance to cancel if you selected the wrong key.
Once confirmed, the key is removed immediately. If you are unsure, cancel and re-check the key's label and user before deleting.
Step 7: SSH Key Removed
The key is revoked and disappears from the SSH Keys list.
1. Verify removal: The SSH key is removed immediately and no longer appears in the list. It can no longer authenticate SSH connections for the associated user.
2. Re-test access: Any client relying on that key will now be refused key-based access to the server.
Deleting an SSH key only removes key-based access. If password authentication is enabled on the server, users may still be able to log in using their password. Review your SSH settings if you want to disable password login entirely.