How to Edit Website Files in File Manager in CloudStick
Overview
CloudStick includes a built-in File Editor that lets you open, modify, and save website files directly from the dashboard — no FTP client, SSH terminal, or external code editor required. Whether you need to tweak a PHP configuration file, update an .htaccess rule, or edit a script, the File Editor handles it in a clean code-editing interface with syntax highlighting.
This guide walks you through navigating to the File Manager for your website and using the Open In File Editor action to edit any file in place. The editor supports both Auto Save and manual save with Ctrl+S.
The Advanced File Manager (and File Editor) is available on the Basic plan and above. Make sure your server is connected and the website is active before following these steps. Always make a backup of critical files before editing them.
Step 1: Log In and Select Your Server
Start from the CloudStick main dashboard where all your connected servers are listed.
1. Log in to your CloudStick account at app.cloudstick.io.
2. On the main dashboard, locate the server card for the server that hosts your website. Each card displays the server name, IP, OS, uptime, and resource usage.
3. Click "Manage" on the server card to open the server panel.
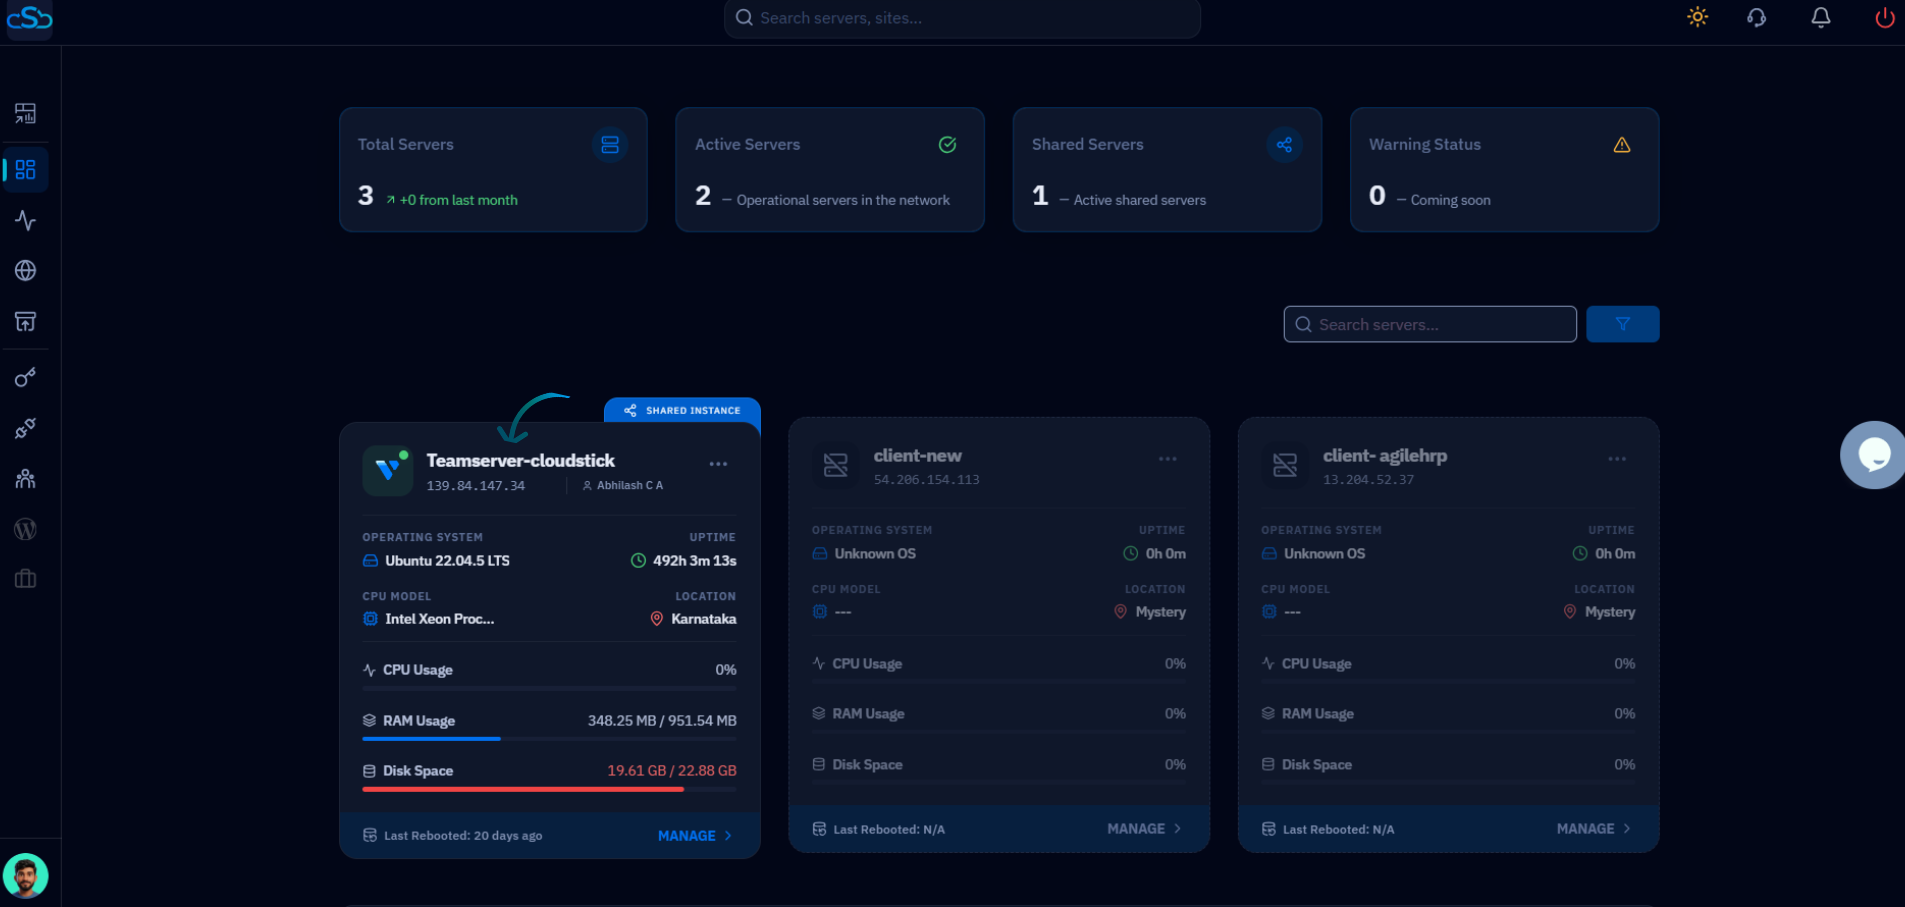
Fig. 01 — CloudStick main dashboard showing connected server cards with the Manage button.
Step 2: Navigate to the Websites Section
Inside the server panel, open the Websites section to see all sites hosted on this server.
1. In the server panel, locate the "Server Resources" section. It shows resource cards for Websites, Databases, Supervisors, and Cron Jobs.
2. Click the "Websites" card — or use the left-hand navigation — to open the WebApp List.
The Websites card shows the total count of hosted sites and when they were last updated.
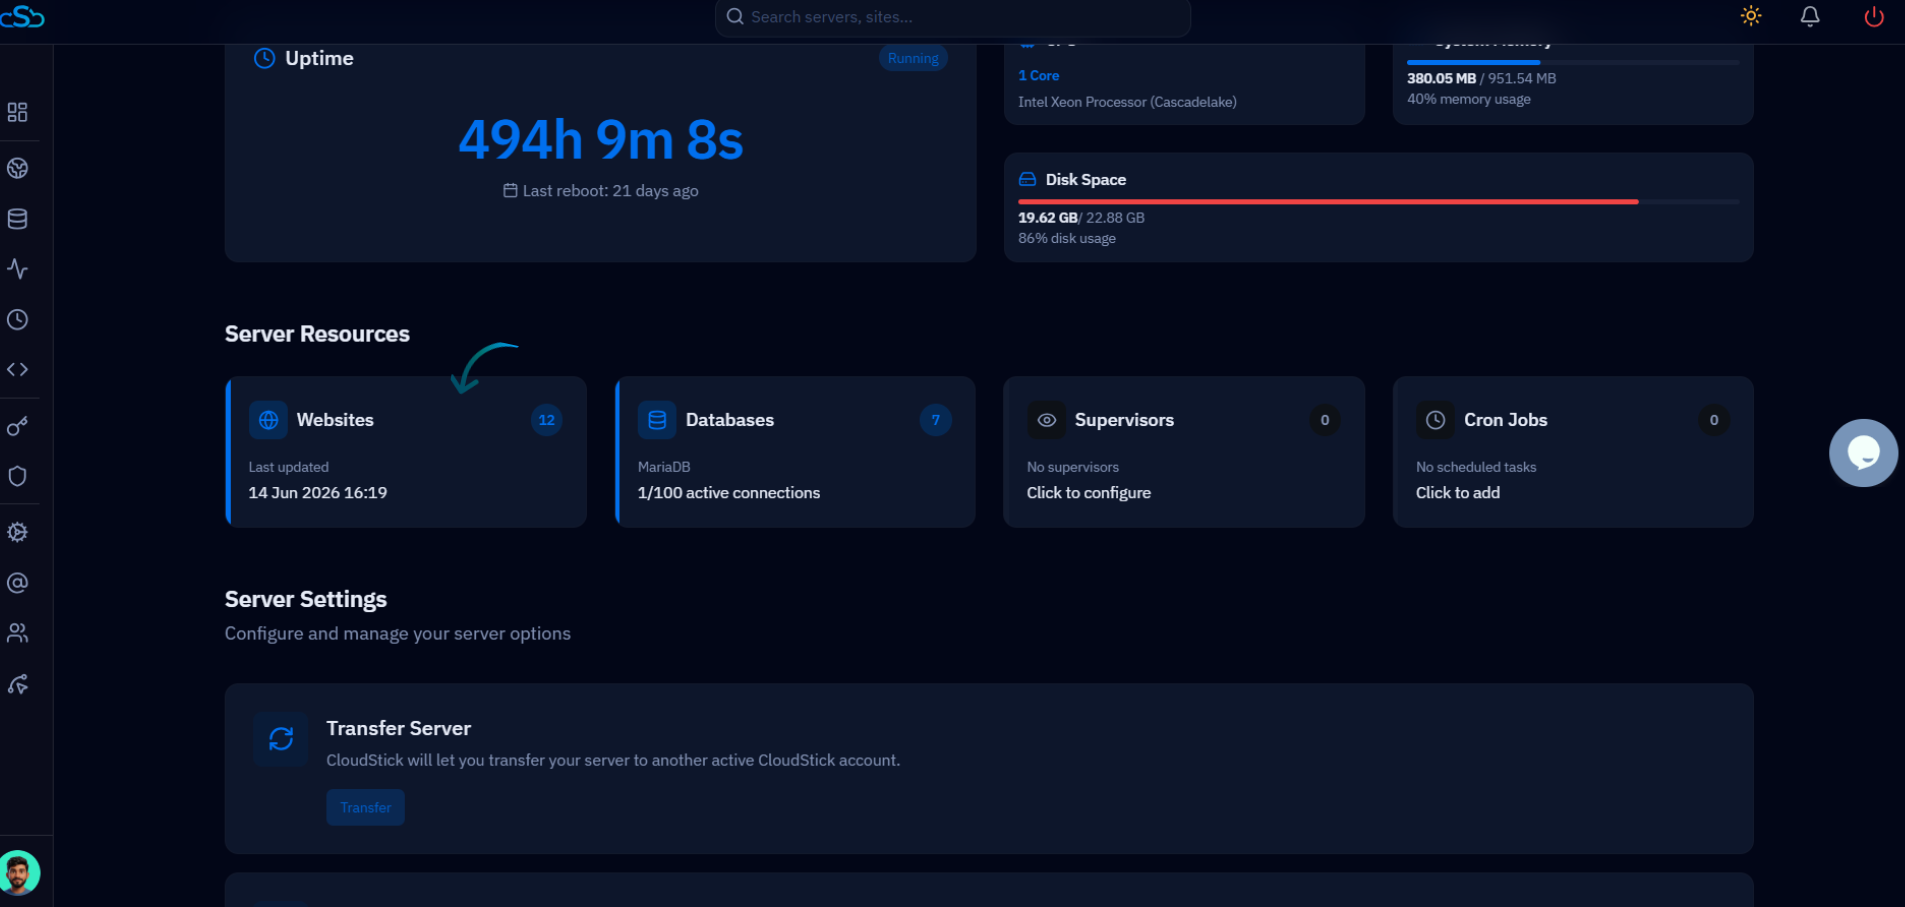
Fig. 02 — Server panel showing the Websites resource card under Server Resources.
Step 3: Select Your Website
The WebApp List shows every site hosted on the server. Open the specific website whose files you want to edit.
1. Browse the WebApp List to find your website. Each entry shows the site name, domain, system user, web server type, and disk usage.
2. Click on the website name to open its management page.
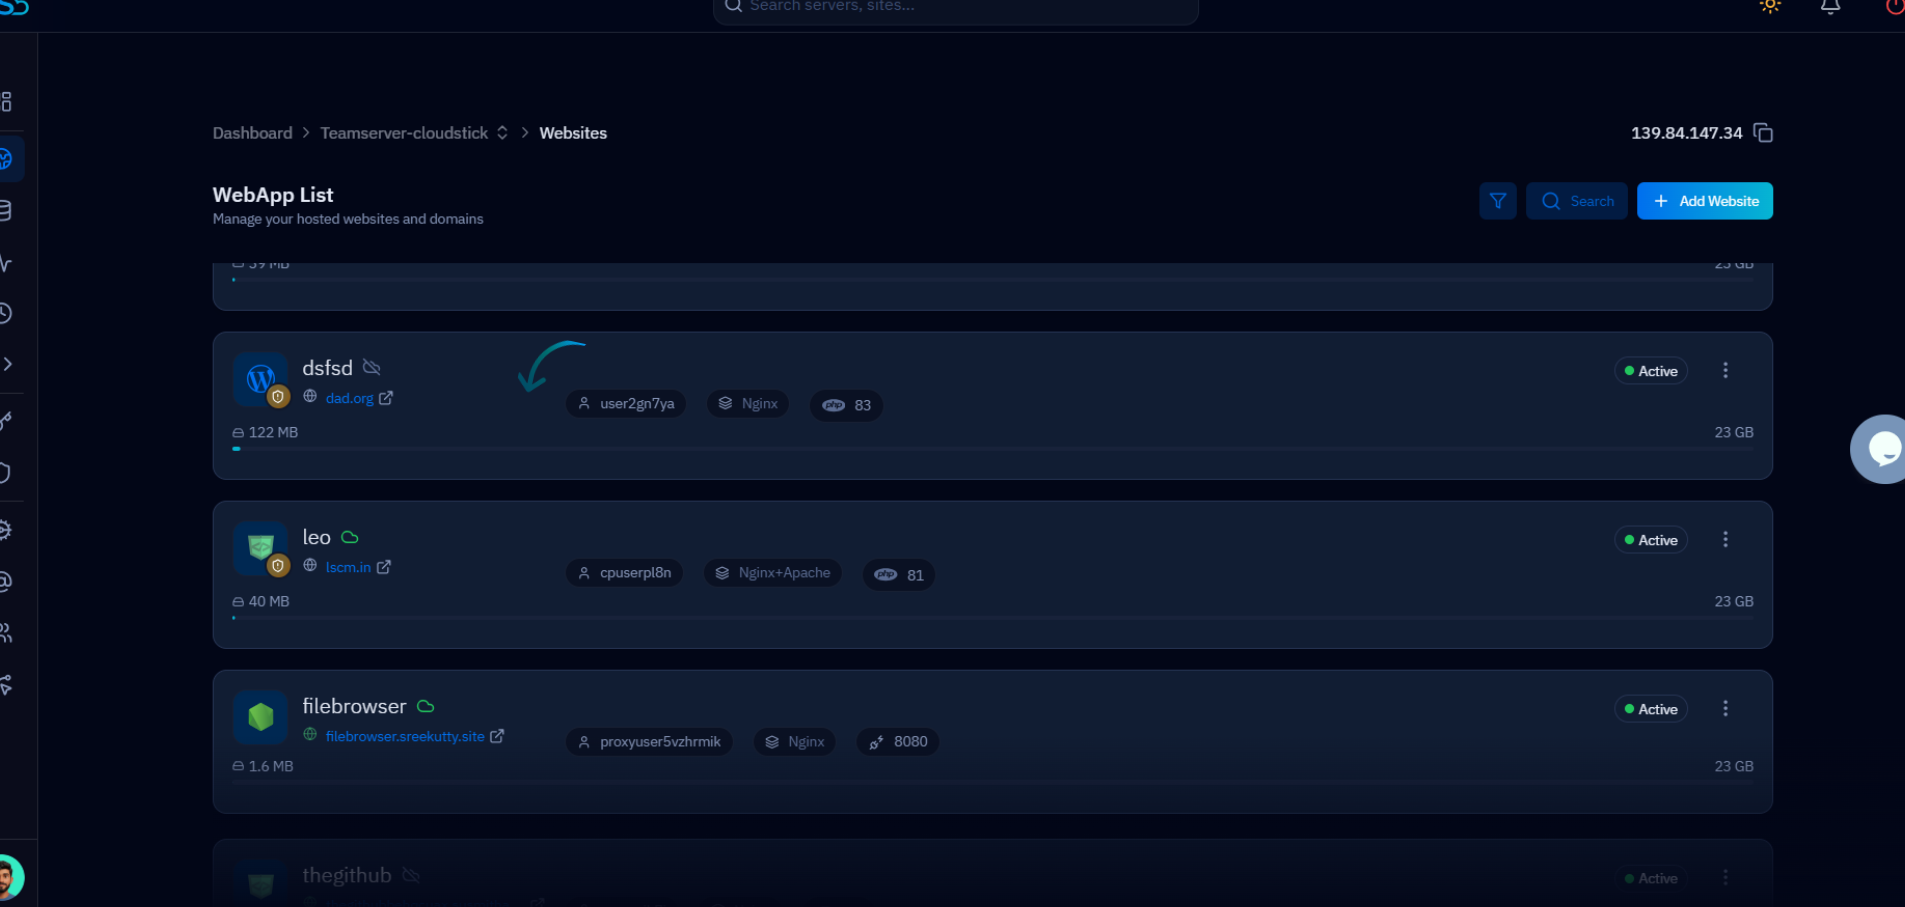
Fig. 03 — WebApp List displaying all hosted websites with their domain, system user, and web server details.
Step 4: Open the File Manager Tab
Switch to the File Manager tab within the website management page to browse the site's directory.
1. In the top navigation bar of the website management page, click the "File Manager" tab.
2. The File Manager loads showing your website's root directory. Files are listed with their name, size, permissions, and last modified date.
3. Navigate into subfolders by clicking any folder name to browse the directory tree.

Fig. 04 — File Manager tab open, showing website files with size, permissions, and modification timestamps.
Step 5: Open and Edit a File
Each file in the File Manager has a three-dot actions menu that provides access to the built-in File Editor.
Opening the File Editor
1. Locate the file you want to edit in the directory listing.
2. Click the three-dot menu (⋮) in the Actions column on the right side of the file row.
3. Select "Open In File Editor" from the dropdown. The file will open in the built-in code editor with syntax highlighting.
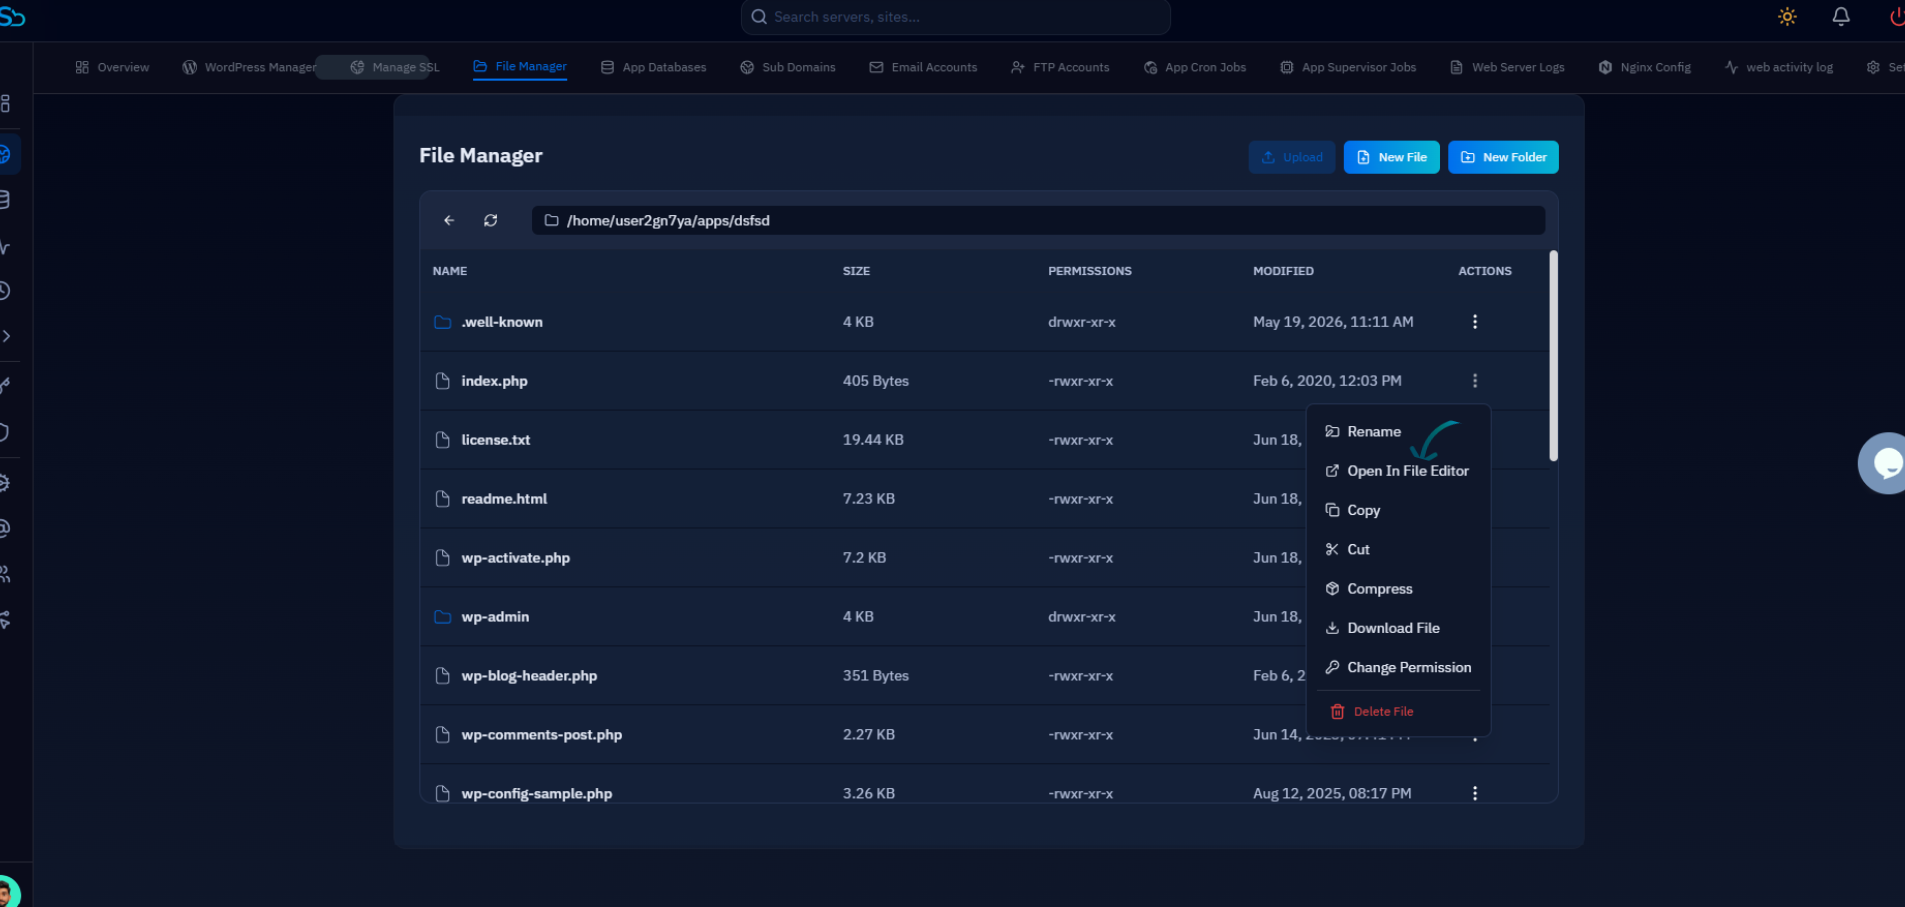
Fig. 05 — File Manager three-dot actions menu with the Open In File Editor option highlighted.
Editing and Saving
The File Editor opens with the full file content displayed in a code editor view. Make your changes directly in the editor.
Auto Save: Click the menu icon in the top-left of the editor and select "Enable Autosave" to turn on automatic saving. When Auto Save is active, your changes are written to disk as you type — no manual save needed.
Manual Save: Press Ctrl+S at any time to save your changes manually. This works regardless of whether Auto Save is enabled.
If Auto Save is enabled, you do not need to press Ctrl+S — changes are saved automatically. Disable Auto Save if you want full control over when edits are committed to the file.
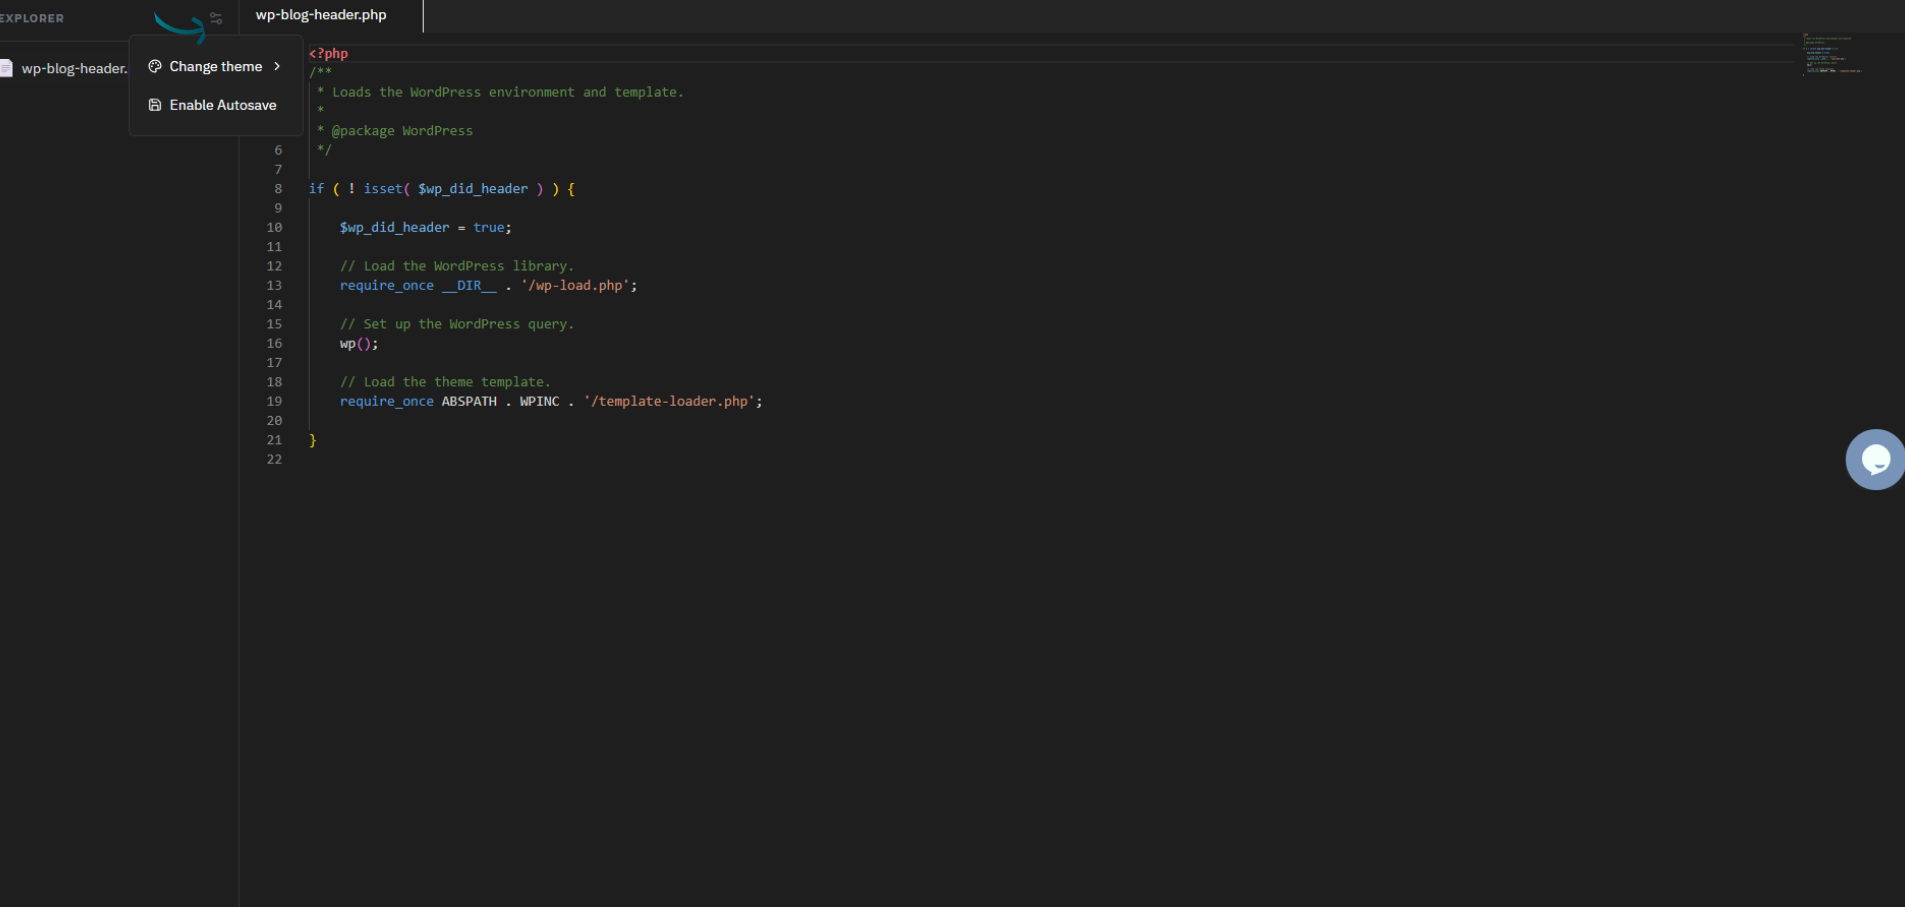
Fig. 06 — File Editor open with PHP file content and the Enable Autosave option visible in the top-left menu.