How to Enable HTTP to HTTPS Redirection
Overview
Installing an SSL certificate secures your website, but visitors who type http:// — or follow an old unencrypted link — can still land on the insecure version of your site. Forcing HTTPS closes that gap: every HTTP request is automatically redirected to the encrypted HTTPS version, which protects your visitors' data, avoids browser "Not Secure" warnings, and consolidates your SEO signals onto a single secure URL.
CloudStick makes this a one-toggle change. This guide shows you how to open your website's Manage SSL tab, edit the SSL configuration, and switch the Access Method to HTTPS Only — no web-server configuration files, no manual rewrite rules.
An SSL certificate must already be installed and active on your website before enabling HTTPS Only. If you haven't deployed one yet, follow How to Install Let's Encrypt SSL first, then return here.
Step 1: Log In and Open Your Server
HTTPS redirection is configured per website, so start by opening the server panel for the server that hosts the site you want to secure.
Log in to your CloudStick account: Sign in at the CloudStick dashboard to see all of your connected servers.
Select your server: From the Dashboard, find the server that hosts your website and click Manage to open the server panel.
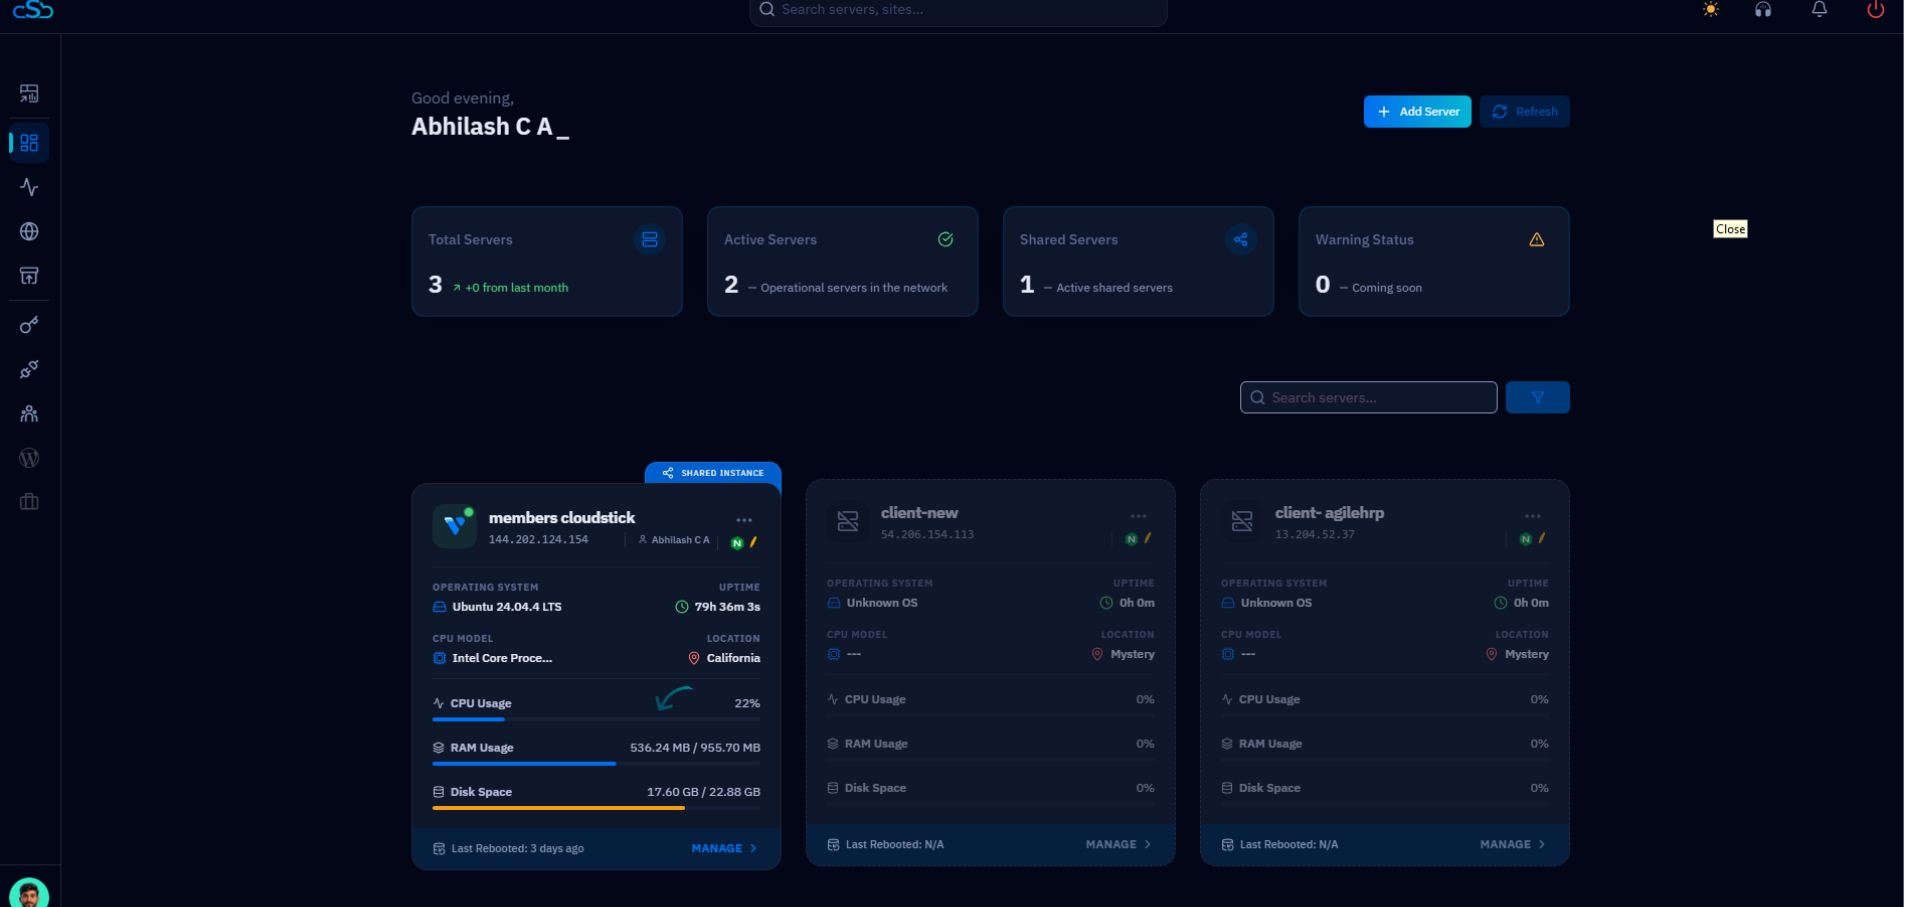
Fig. 01 — CloudStick Dashboard showing all connected servers; click Manage on the server that hosts your website.
Step 2: Select the Website
Inside the server panel, open the Websites area and choose the website for which you want to enable HTTPS redirection.
Open Websites: From the left-hand navigation, click Websites — or click the Websites resource card in the Server Resources section of the server overview.
Click the website: Select the website you want to redirect to HTTPS; this opens its management view.
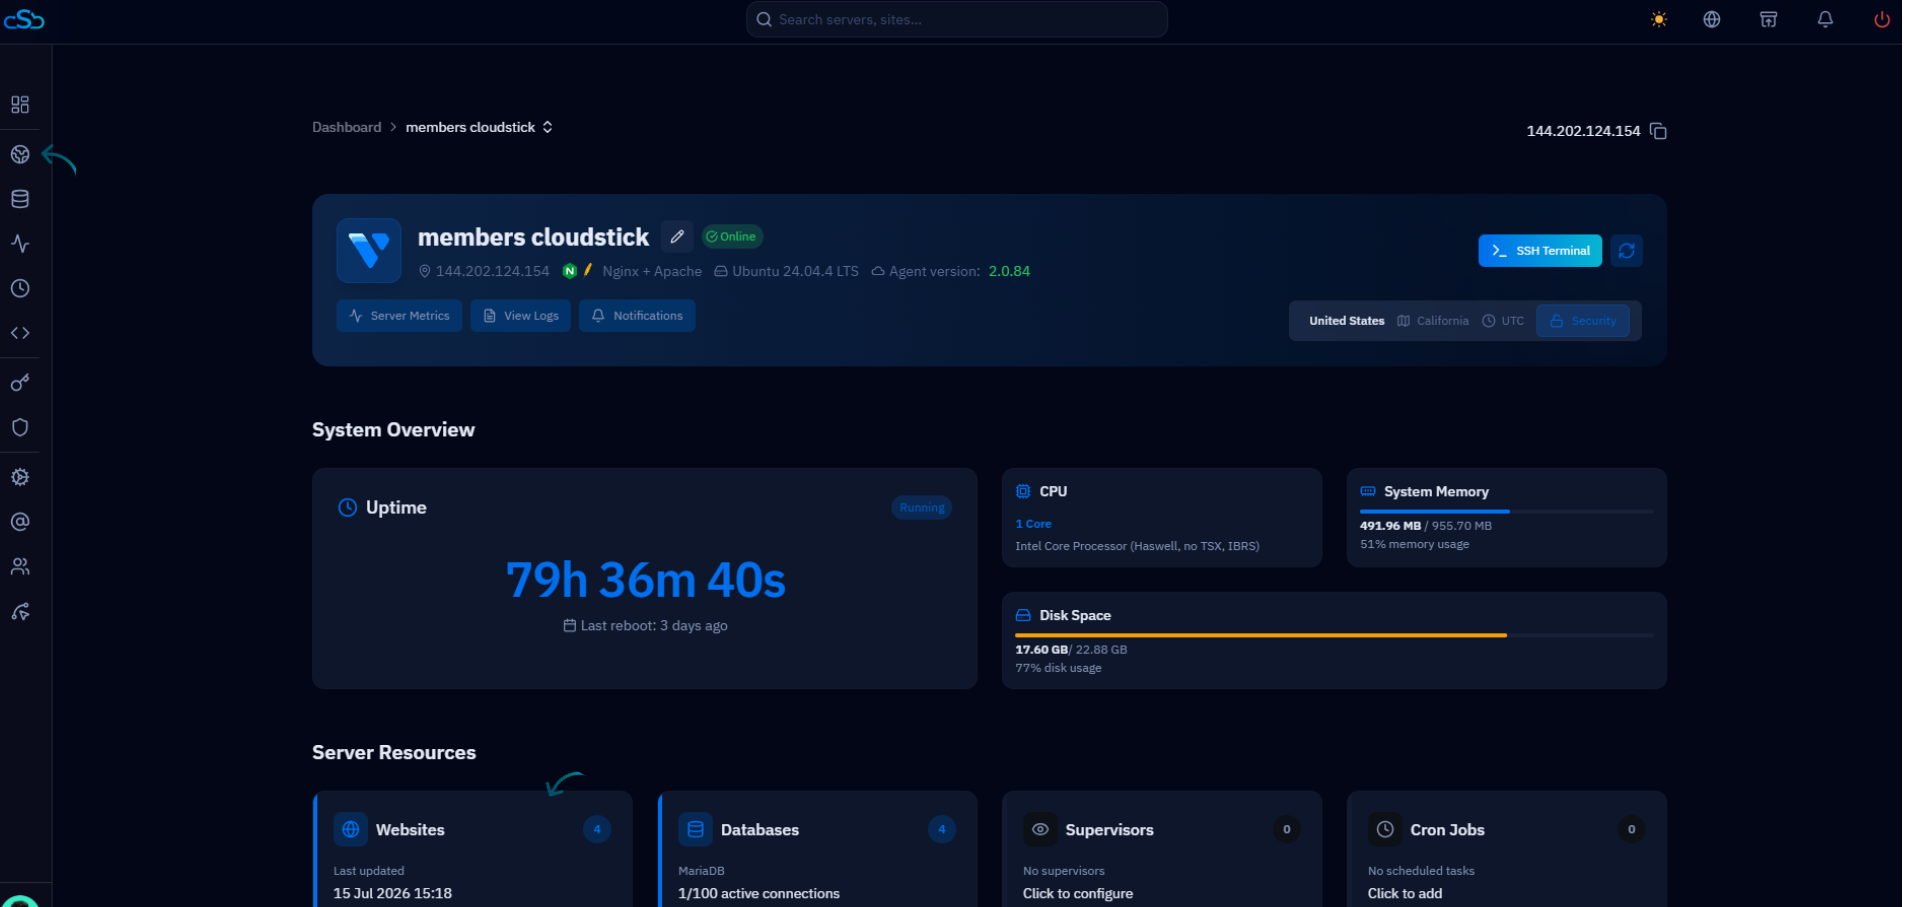
Fig. 02 — Server overview with the Websites resource card in the Server Resources section.
Step 3: Open Manage SSL
The website management page opens on the Website Summary view, with a row of tabs across the top. The SSL settings live under the Manage SSL tab.
Click Manage SSL: In the top tab bar, select the Manage SSL tab. The SSL Management section shows your certificate with the status SSL Active and Secured.
Confirm the certificate is active: The SSL Certificate card on the Website Summary should read Active — HTTPS Only cannot work without a valid certificate in place.
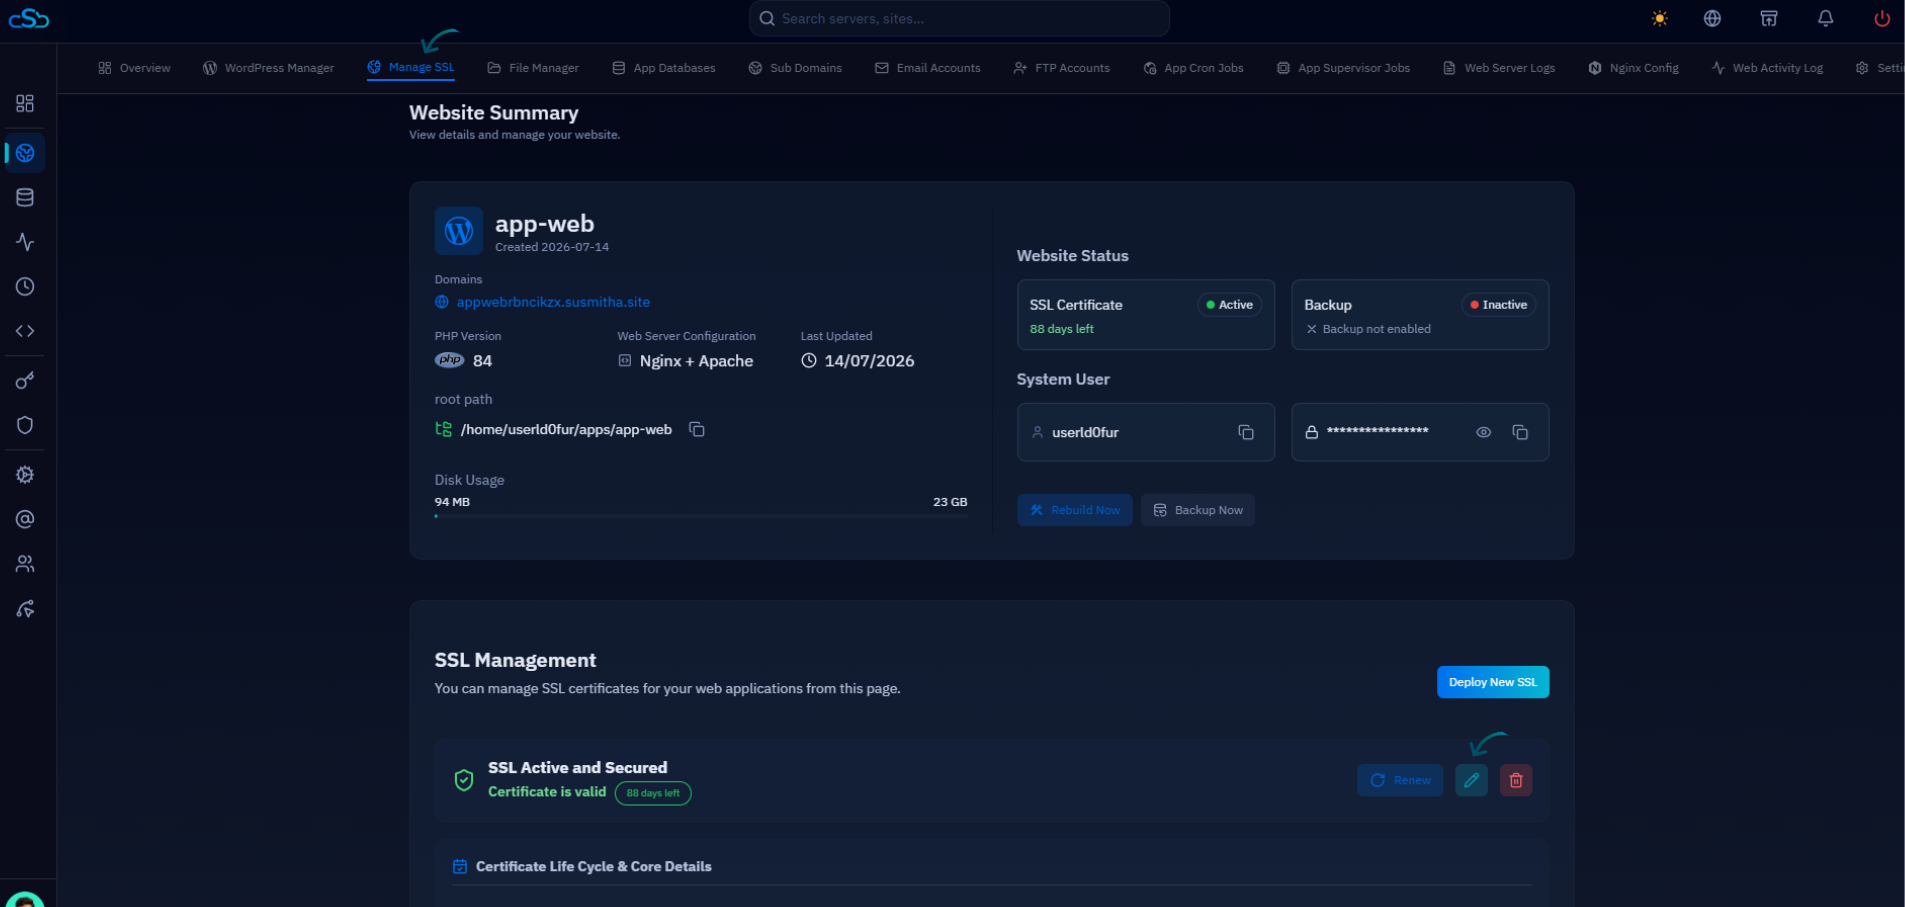
Fig. 03 — Manage SSL tab showing the SSL Management section with an active certificate and the edit (pencil) icon.
Step 4: Update the SSL Configuration
The redirection behaviour is part of the certificate's SSL configuration, so open it for editing.
Click the edit (pencil) icon: Next to the Renew button on your active certificate, click the edit (pencil) icon to open the SSL Configuration page.
Review the settings: This page also controls Brotli Compression, the TLS Protocol Version, and the cipher suite — leave these at their recommended values unless you have a specific reason to change them.
Step 5: Select HTTPS Only and Save
The Access Method section decides how visitors can reach your site. Switching it to HTTPS Only forces every HTTP request to be redirected to HTTPS.
Locate the Access Method section: You will see two options — HTTPS + HTTP, which allows both protocols, and HTTPS Only, which forcefully redirects all traffic from HTTP to the HTTPS version.
Select HTTPS Only: Click the HTTPS Only option; it is the recommended setting for secure setups.
Click Update SSL Configuration: Save the change with the Update SSL Configuration button. The redirection takes effect immediately.
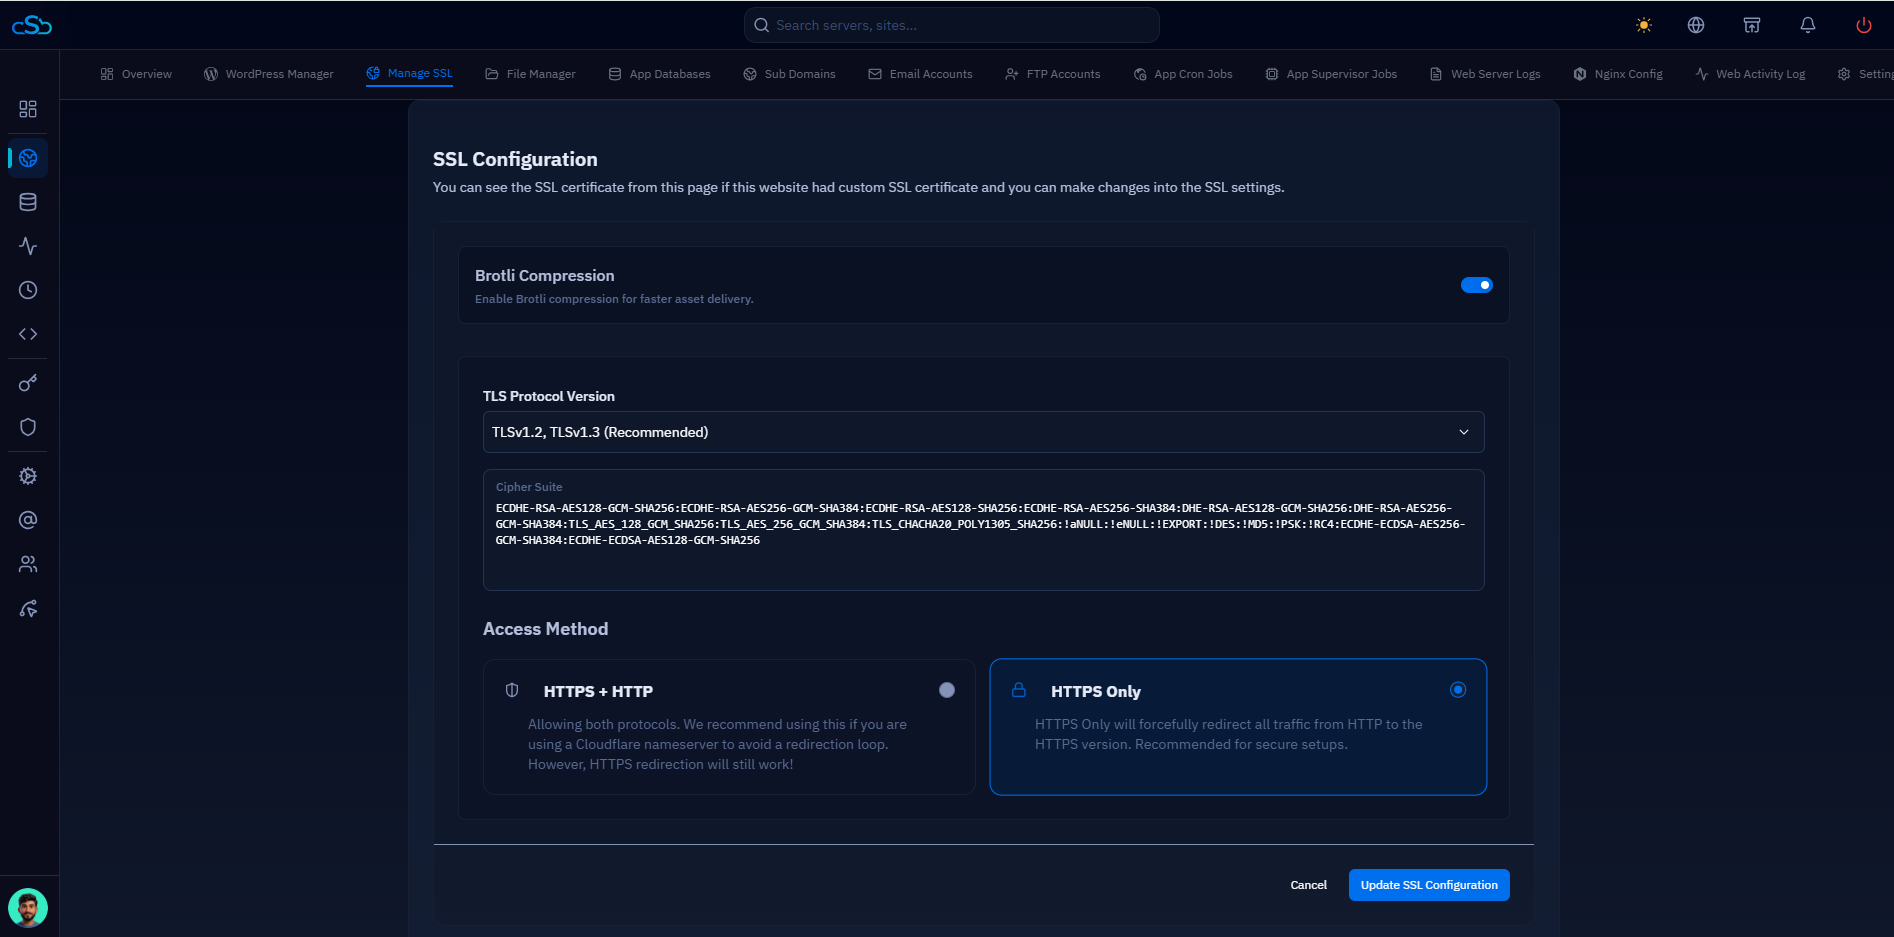
Fig. 04 — SSL Configuration page with HTTPS Only selected under Access Method; click Update SSL Configuration to apply.
Once enabled, all visitors accessing your site over HTTP are automatically redirected to the secure HTTPS version. If your domain uses a Cloudflare nameserver with the proxy enabled, prefer HTTPS + HTTP to avoid a redirection loop — HTTPS redirection will still work. If you do hit a loop, see How to Fix a Redirect Loop After Deploying SSL.