How to Install Mautic on Ubuntu 18.04 | 20.04

Mautic is an open-source marketing automation software that helps online businesses automate their repetitive marketing tasks such as lead generation, contact segmentation, marketing campaigns, lead scoring, etc.
In this tutorial, we are going to discuss how to install Mautic on Ubuntu with CloudStick.
Here is the step-by-step procedure.
Step 1: Log in to your CloudStick account and select the server.
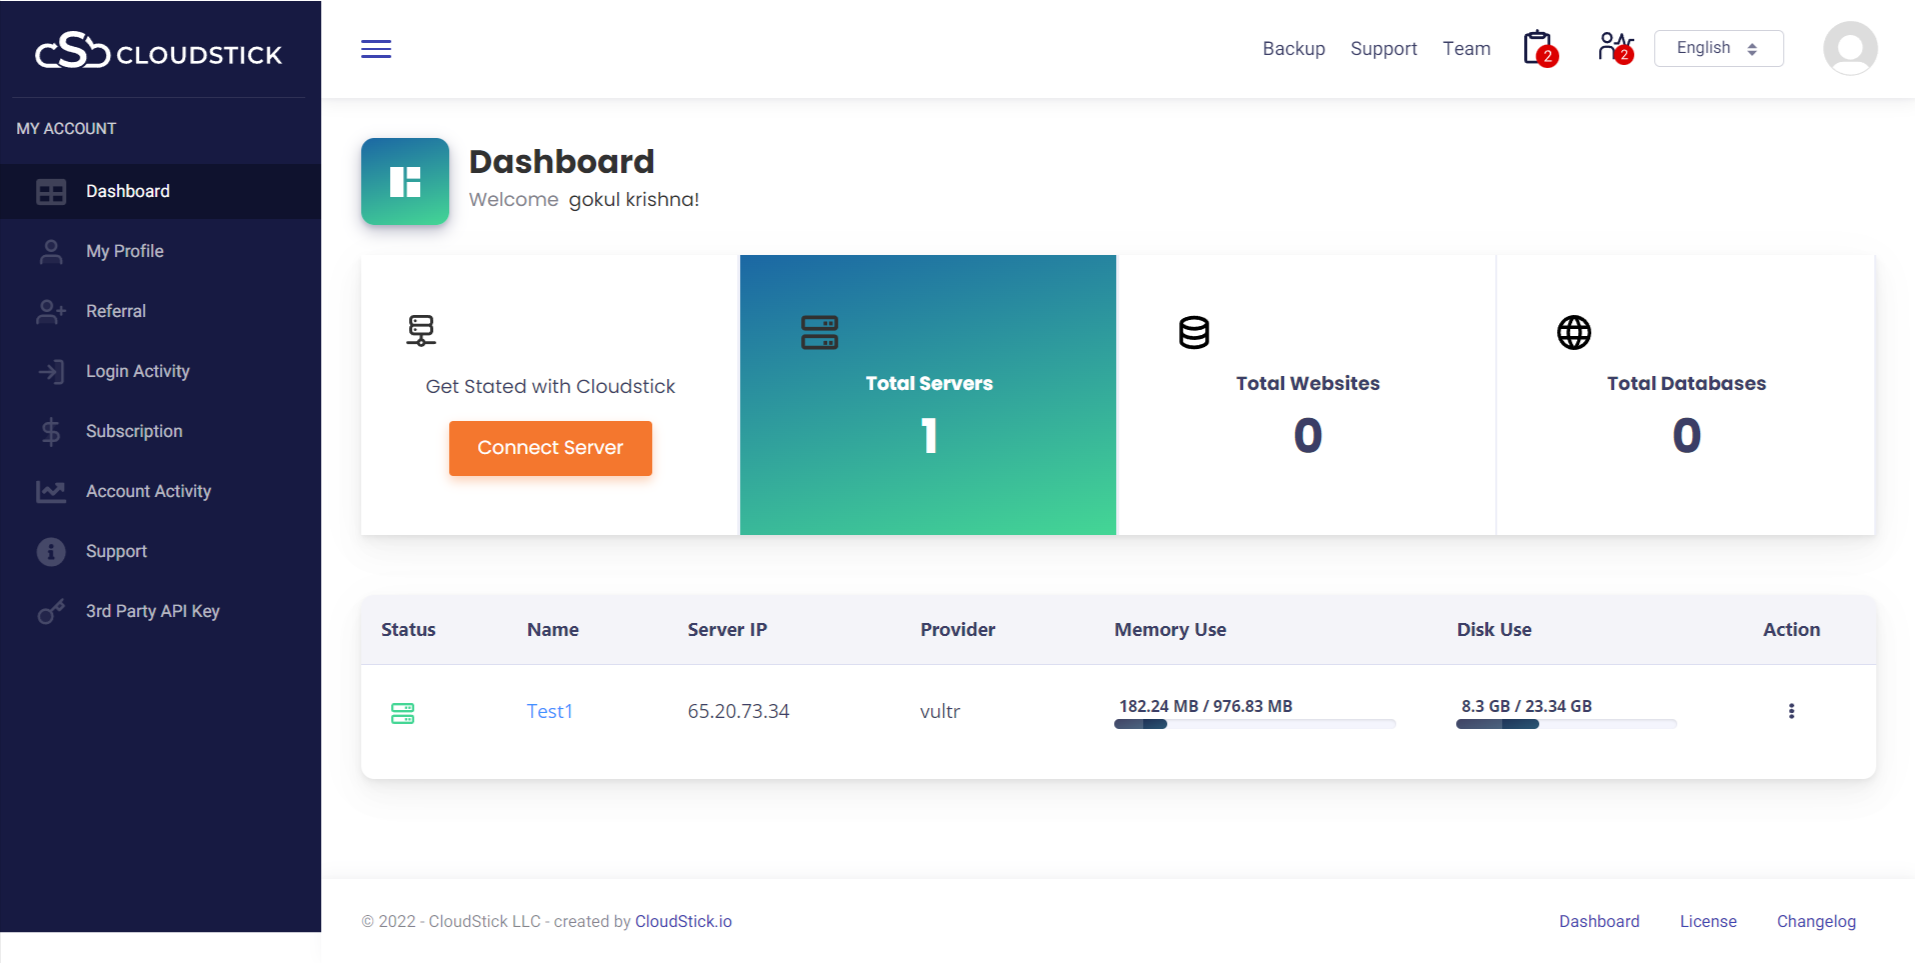
Step 2: Create a custom PHP web application to install Mautic
After selecting the server, scroll down to the web application menu. Click on ‘Manage’.
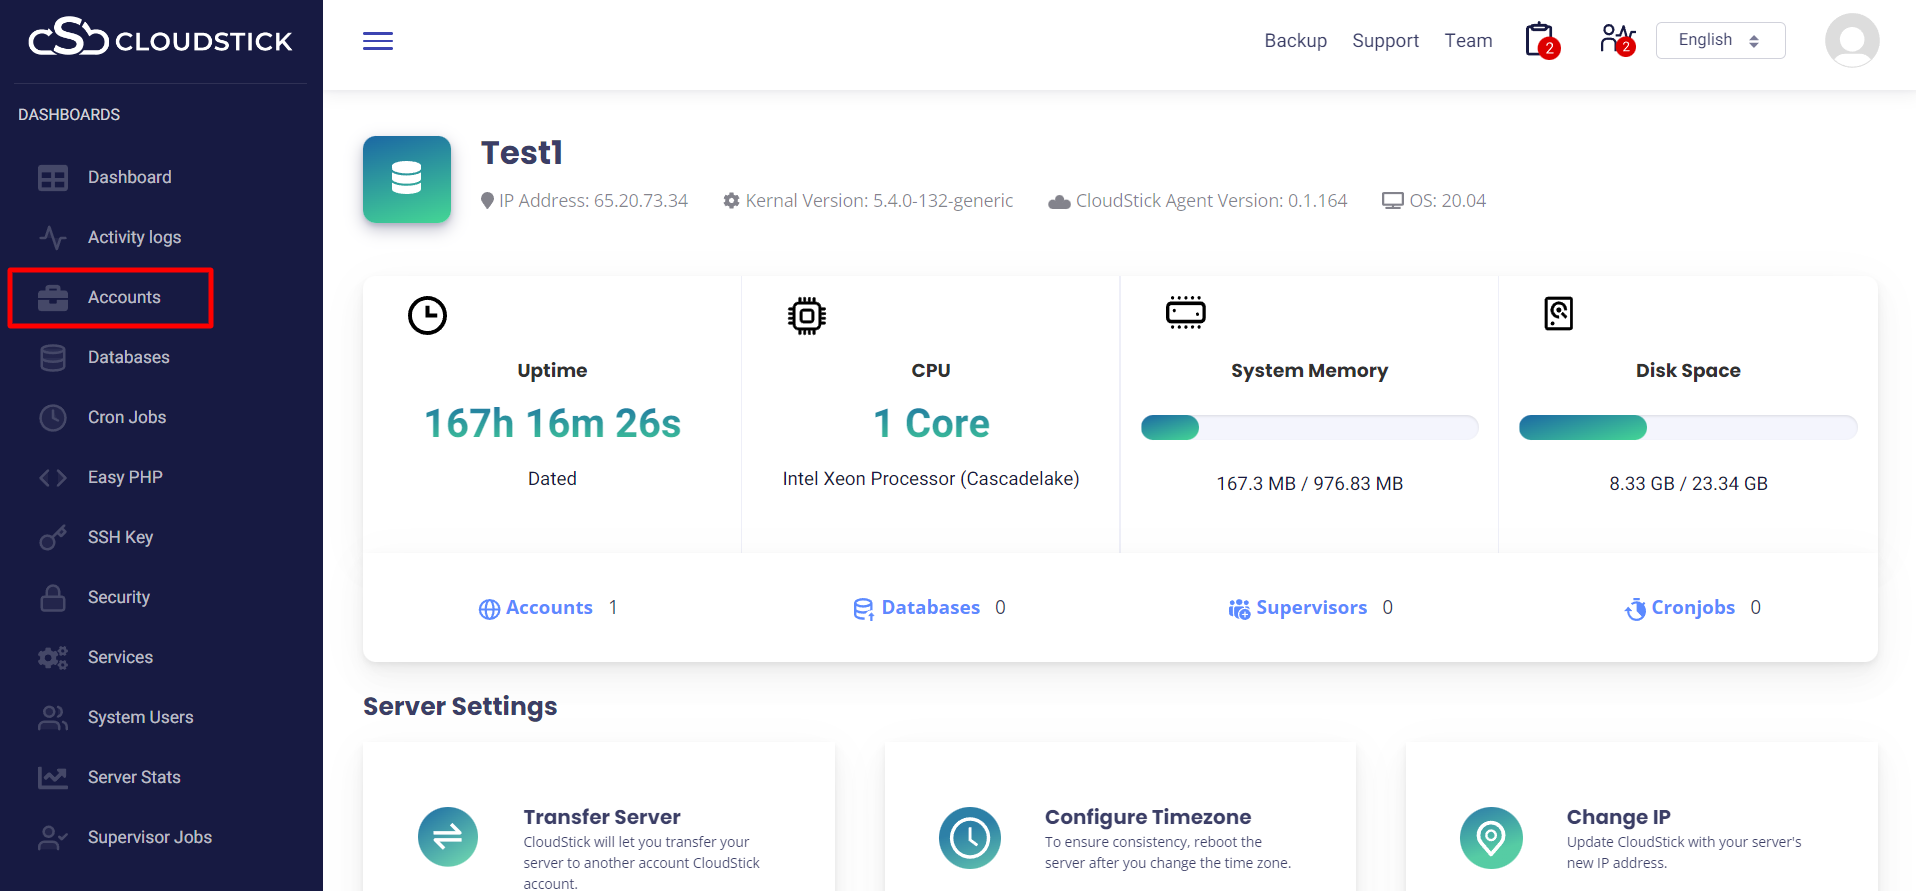
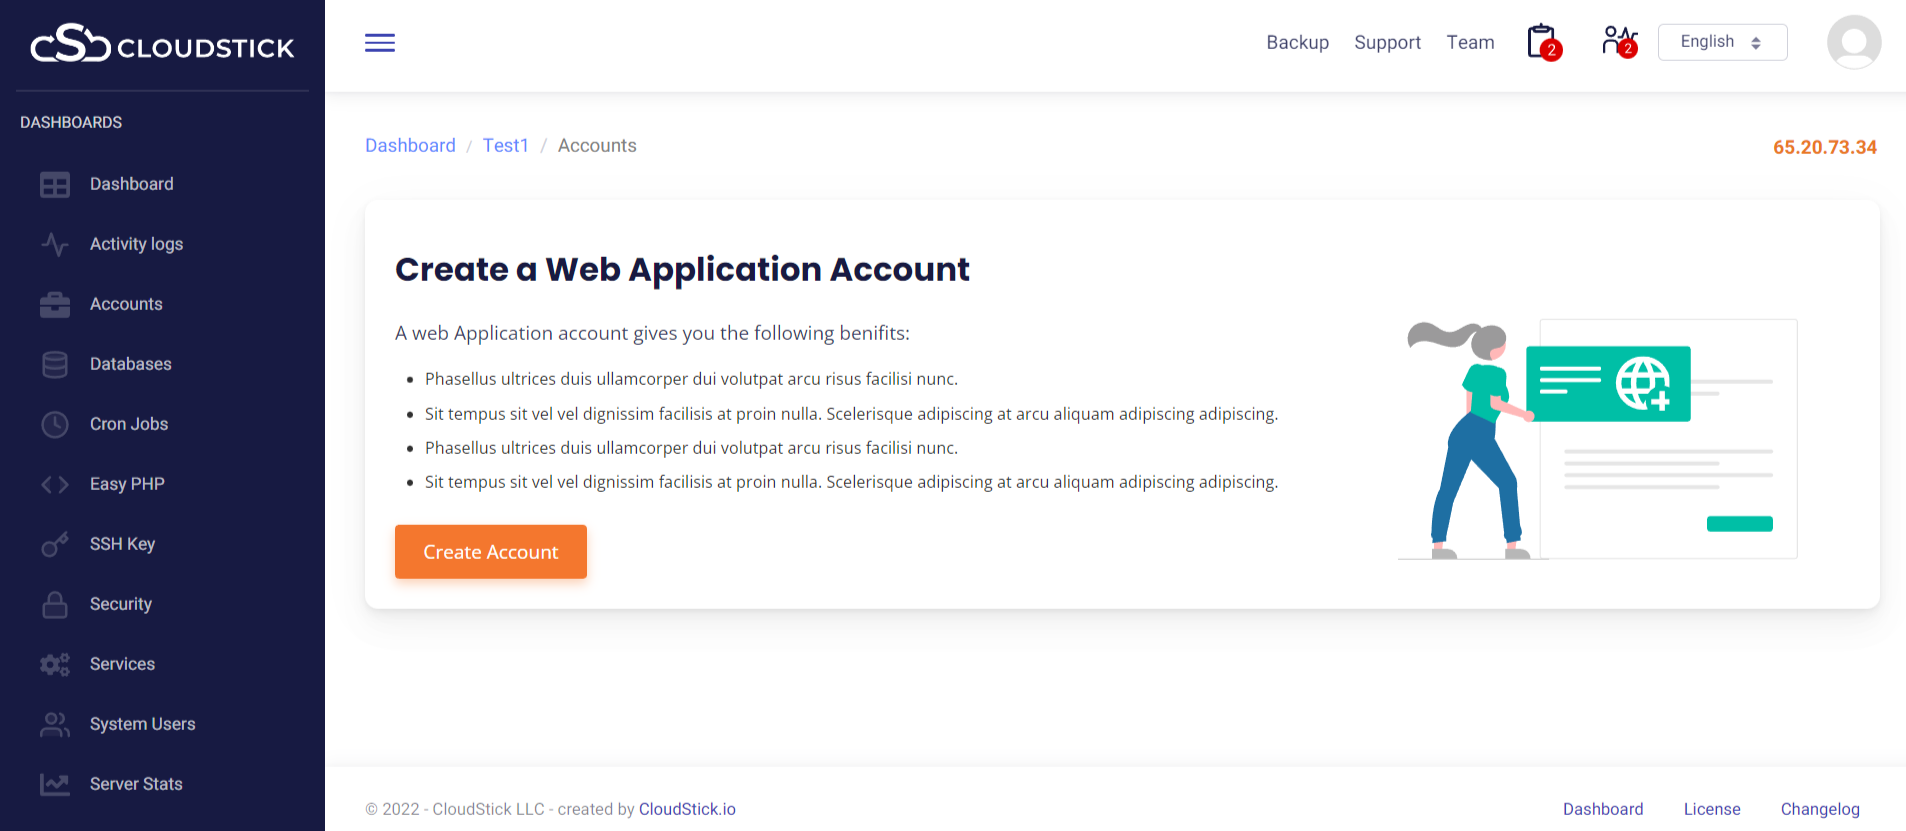
Then, click on the ‘Create account’ option.
NOTE: Please ensure that the File system quota is enabled prior to performing this procedure.
Select the Custom PHP web application from the list.
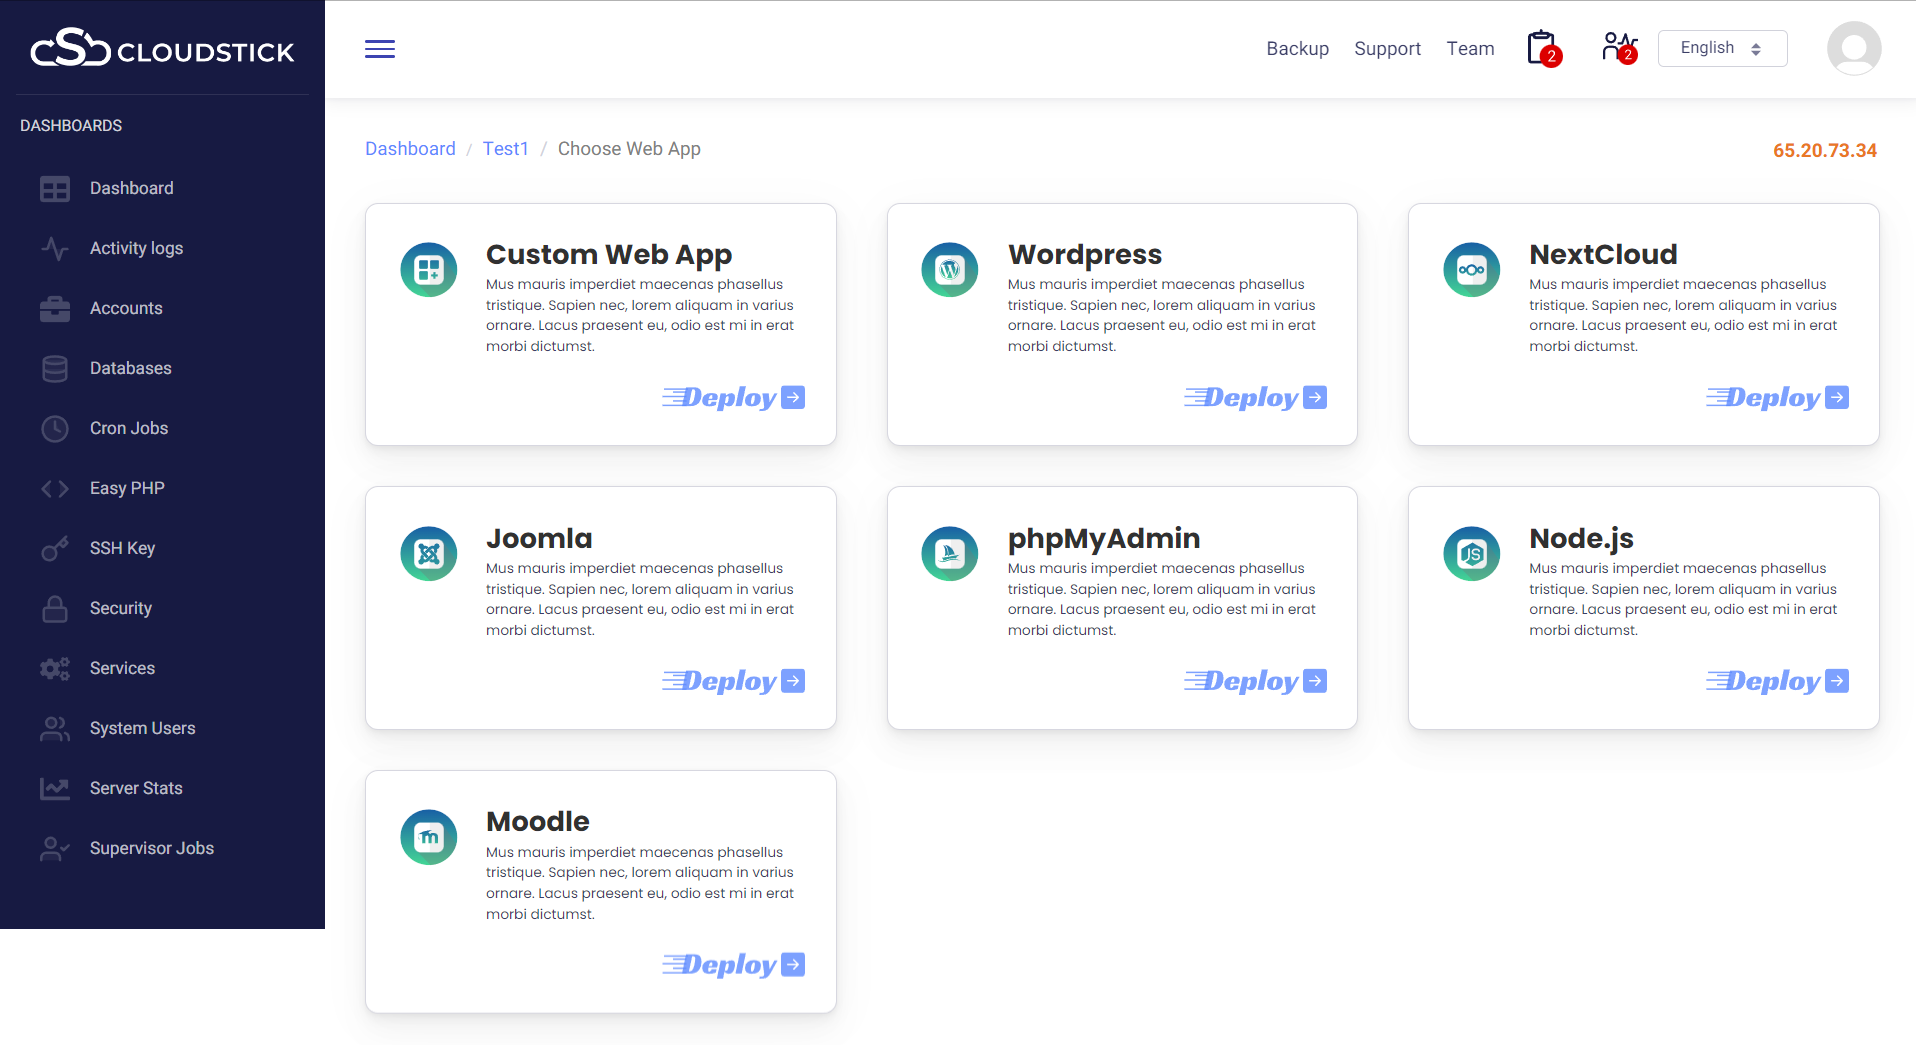
Follow the steps to create your PHP web application for Mautic.
Start with your email address. Provide a valid email address in the specified area.
For the ‘Web application name’, here we are using ‘mautic’. You can use any name you want.
For ‘Domain name’, you can use either your own domain or a CloudStick free domain. If you are using your own domain, make sure you configure the DNS record for the same.
Note: If you use your own domain, you can install an SSL Certificate for your website.
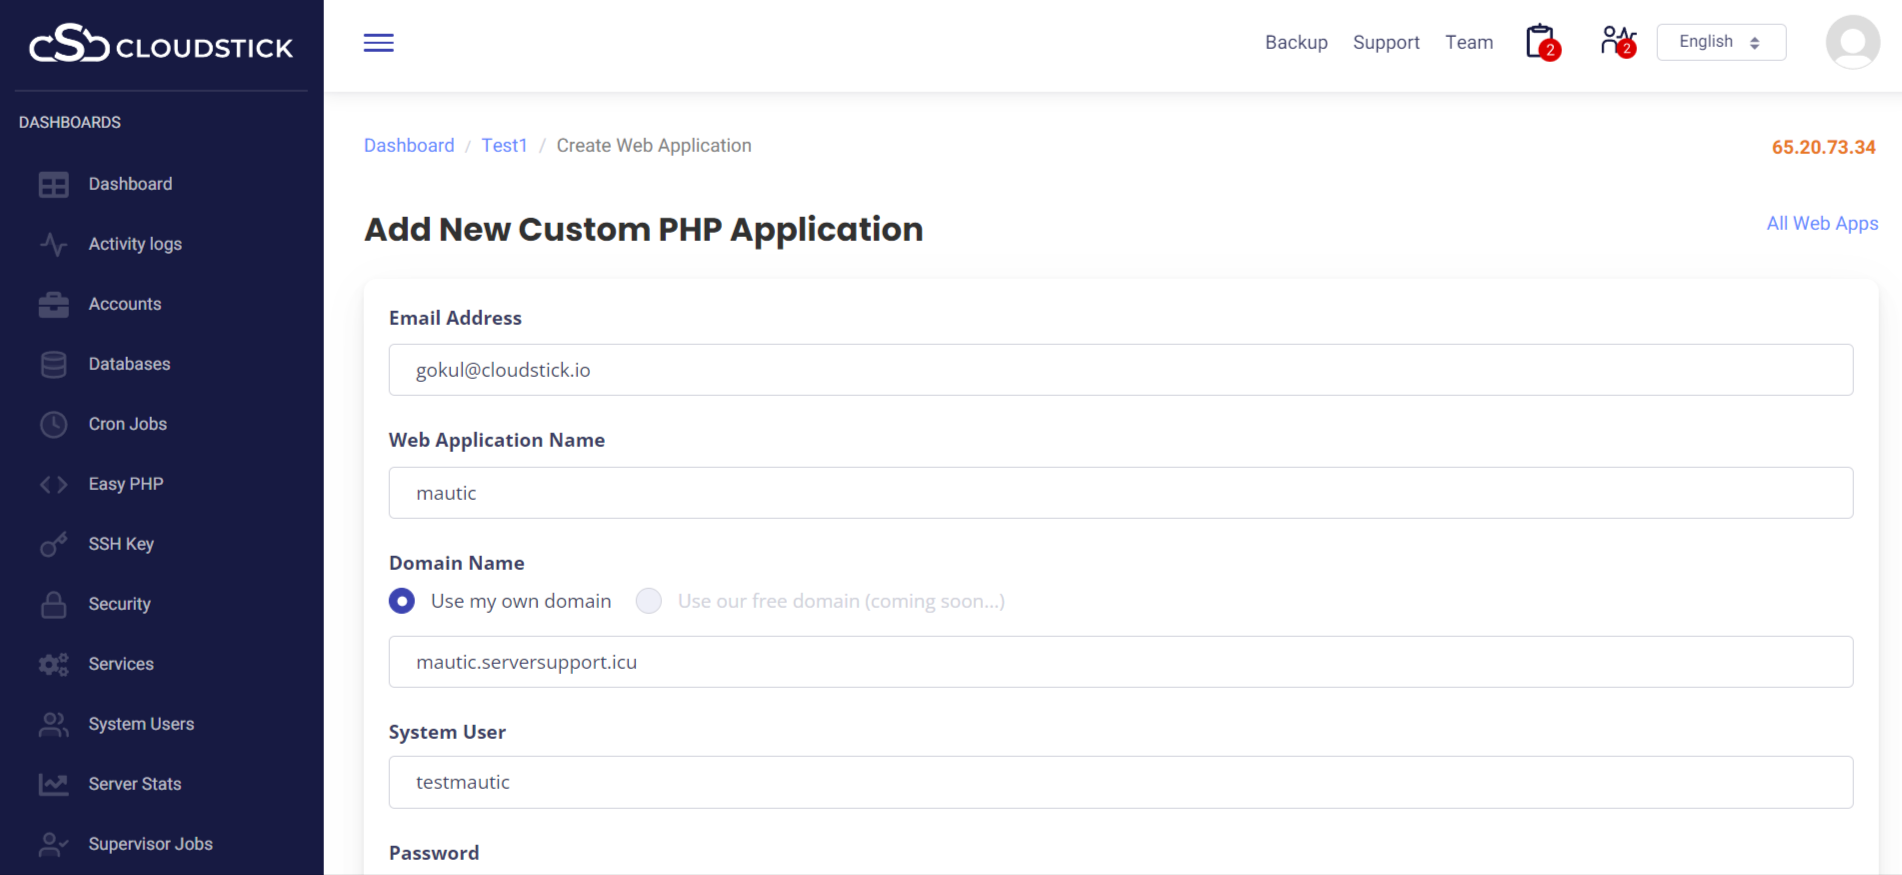
Here we are using ‘testmautic’ as the username.
Next is to set a password for the web application, then enter the quota size you want. Here, we are setting it as 1024M (1GB).
We suggest using PHP7.3 for Mautic since it still does not officially support PHP 7.4. Therefore, select PHP7.3 as ‘PHP Version’.
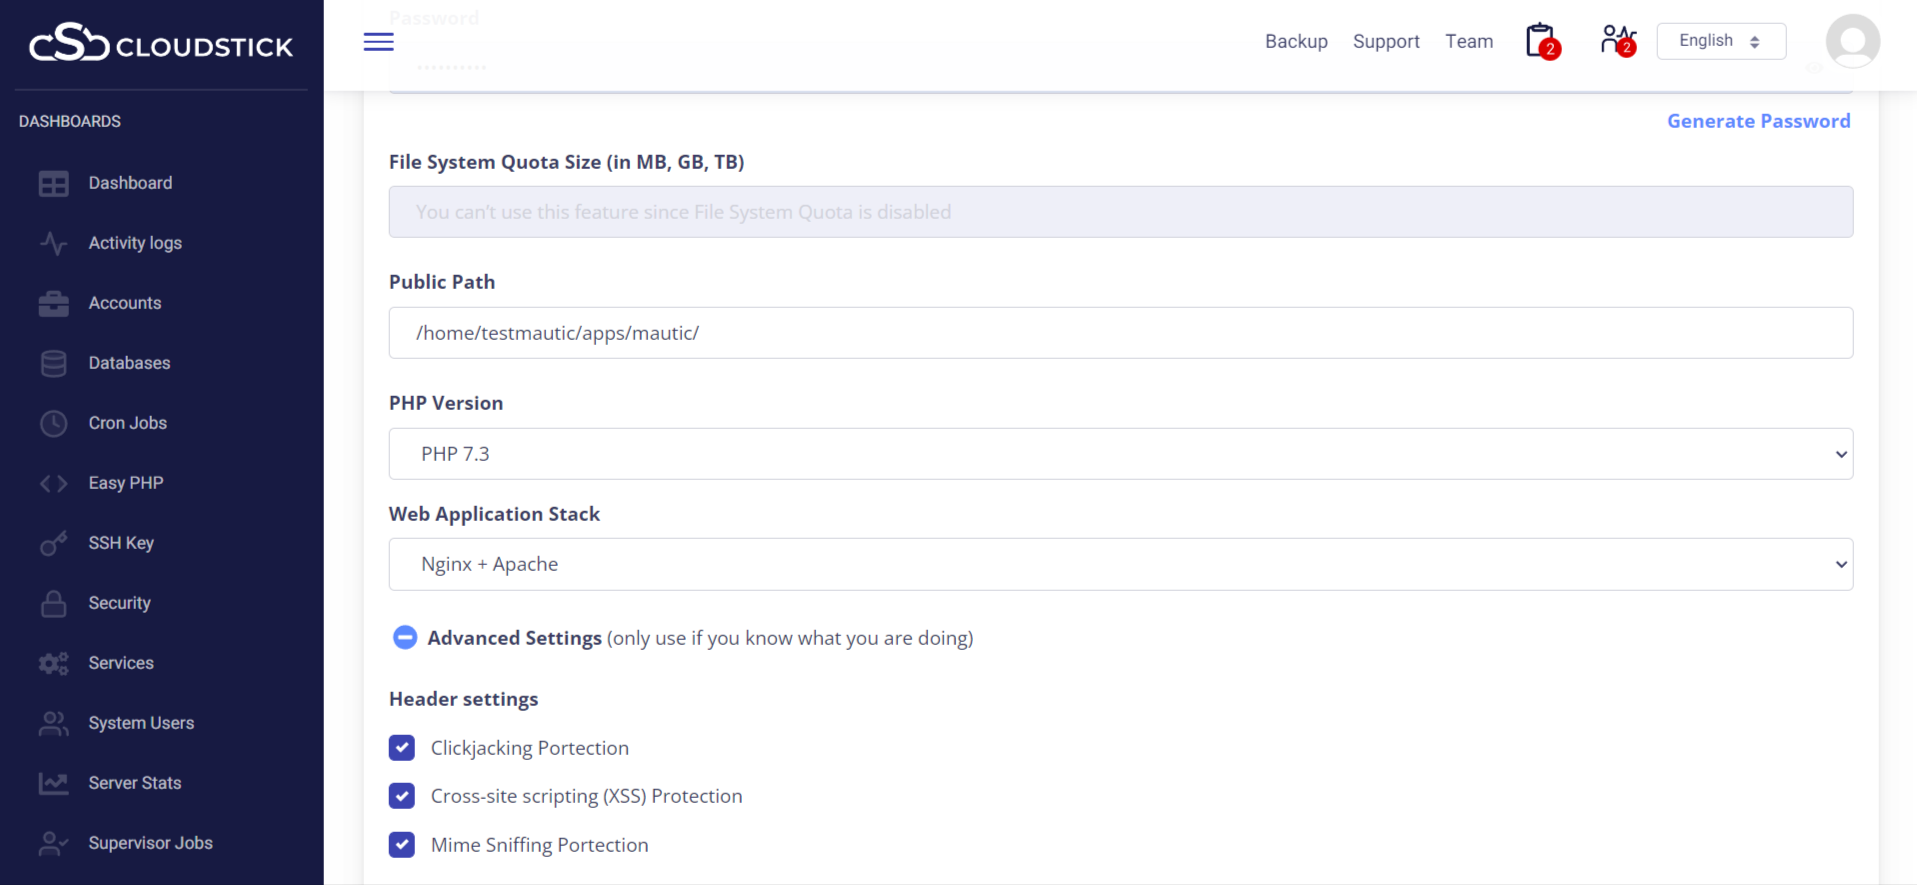
For ‘Web Application Stack’, choose ‘Nginx + Apache’ which will allow you to use the .htaccess file.
Click the ‘Advanced Settings’ checkbox to configure some extra settings like Clickjacking Protection and FPM settings for the web application.
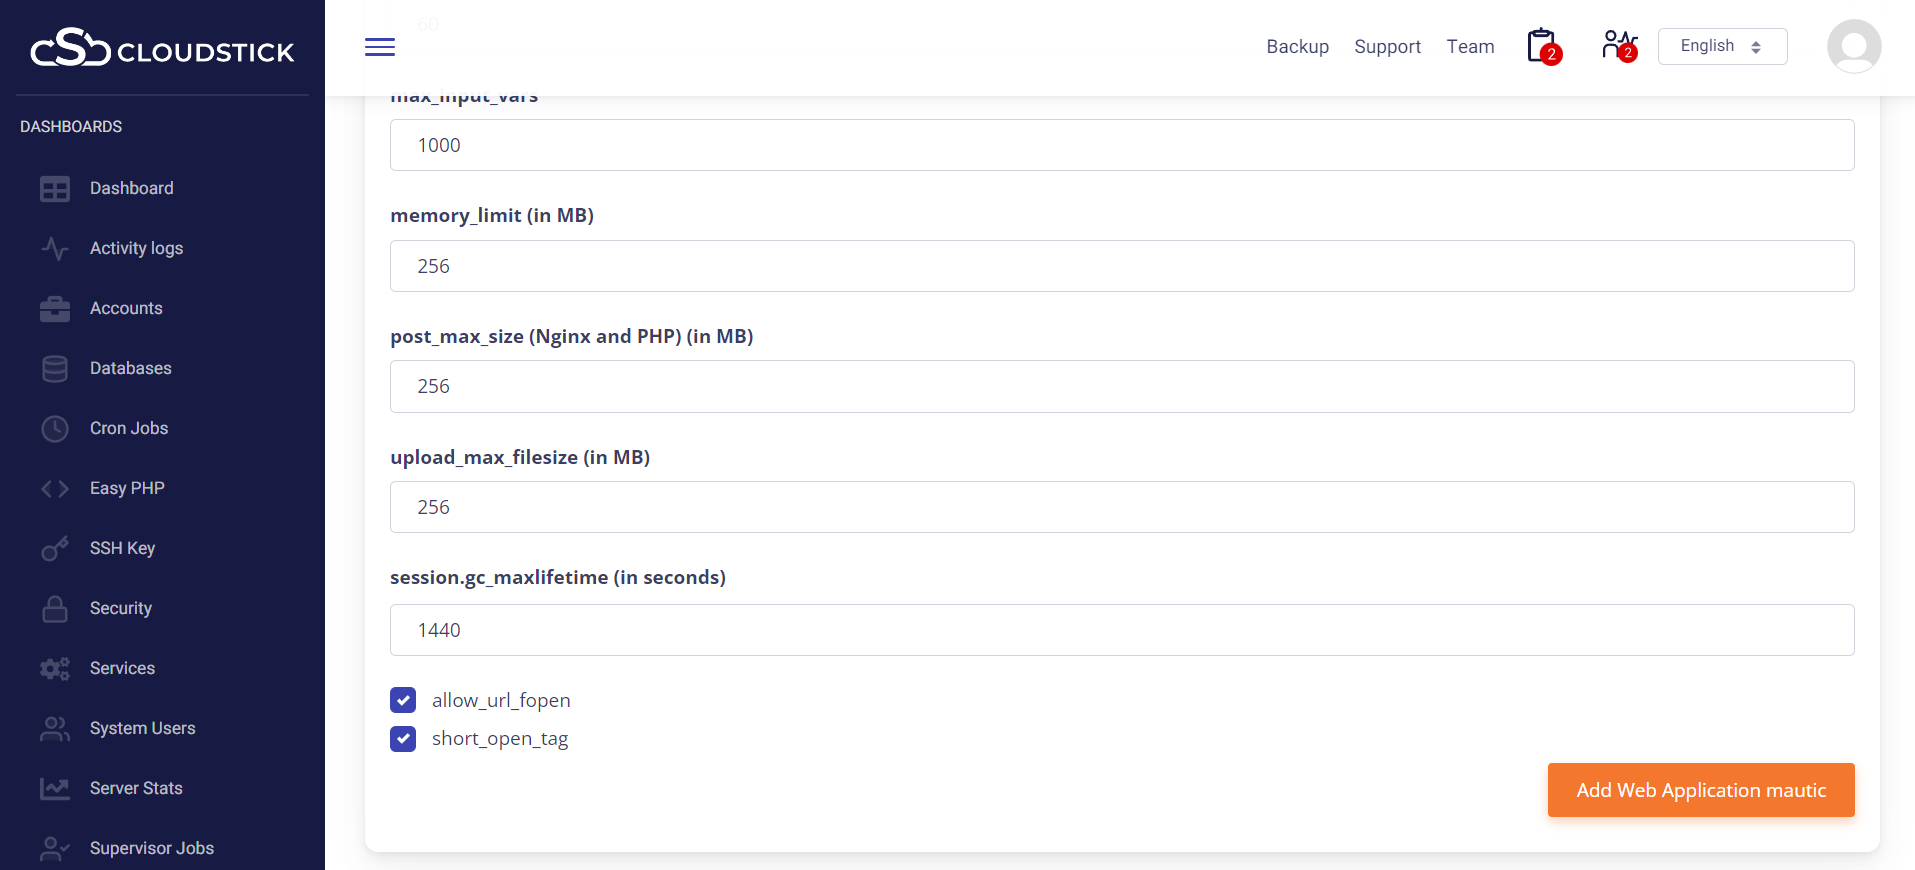
For ‘max_execution_time’, we suggest increasing the value to 120 to avoid any timeout issue during the installation process. Also, the ‘memory_limit’ shall be increased to 512MB for a smooth performance.
Then click on “Add web application”.
Perfect, now we have created a PHP web application for Mautic.
Step 3: Create a Database
For Mautic installation, we need to create a database. You can easily do this from the CloudStick dashboard.
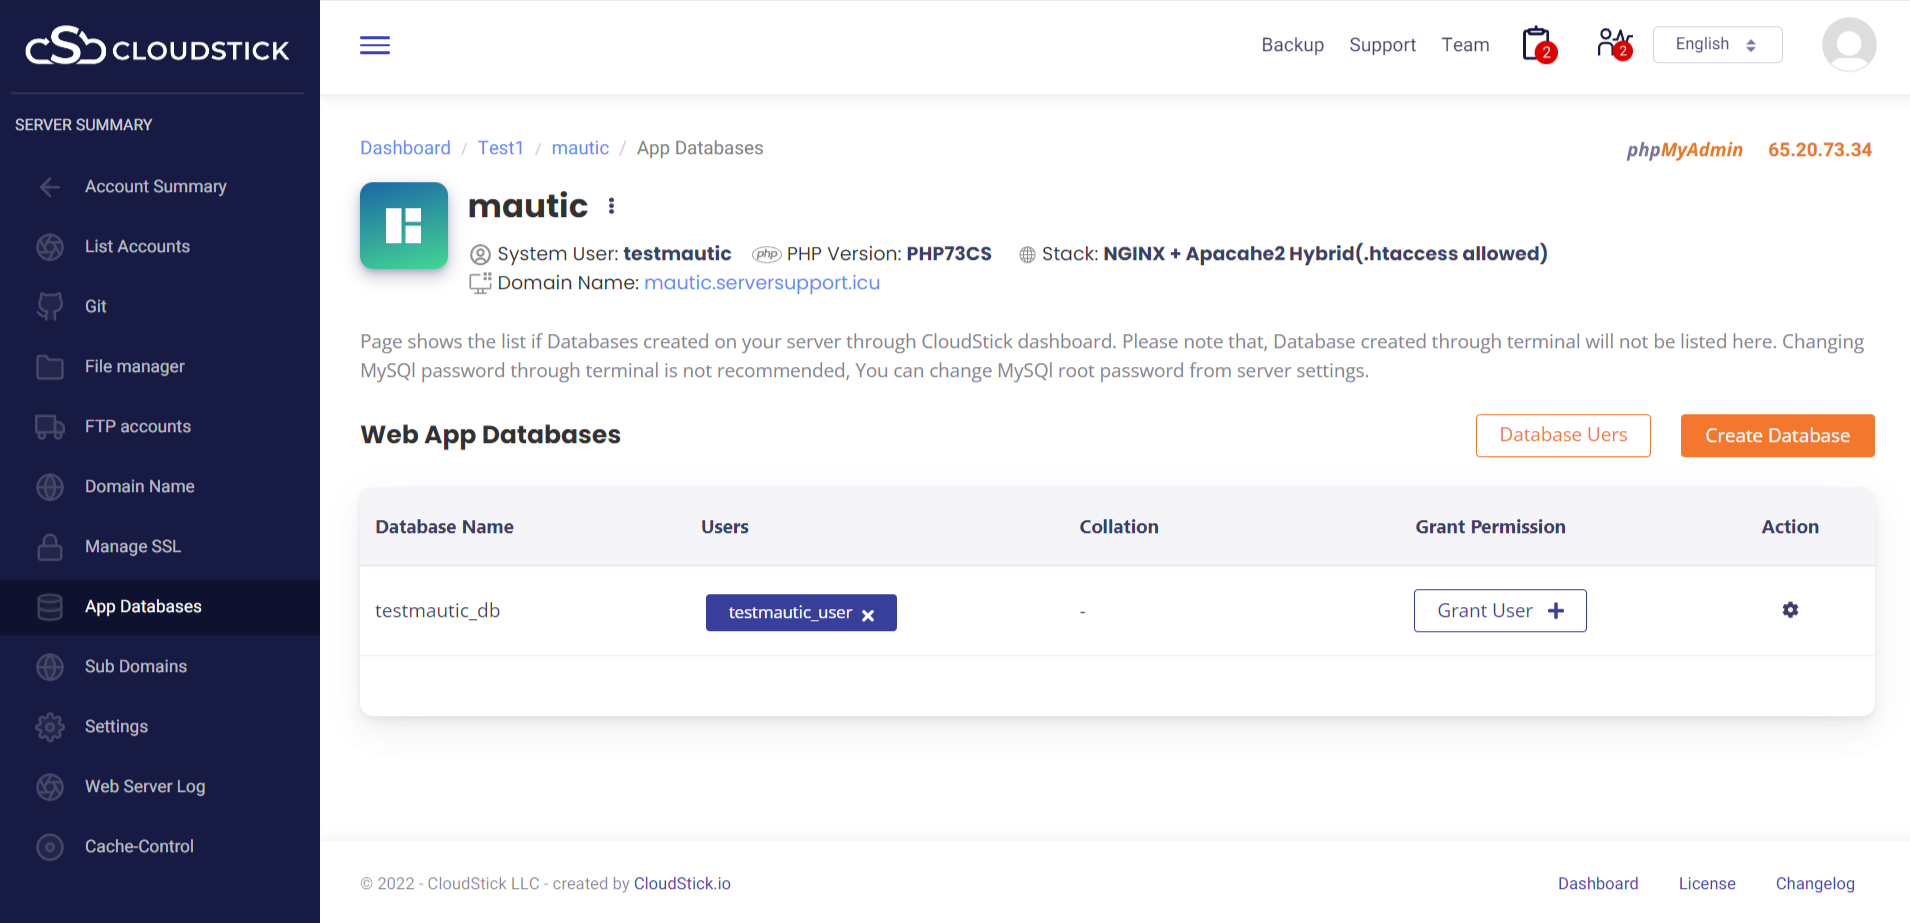
Click on the ‘App Databases’ tab from the side menu. Create a database and a database user.
Then click on the ‘Grant User’ option to connect the user with the database. You can also set a password for the database user from the dashboard.
Here, we have created the database ‘testmautic_db’ and database user ‘testmautic_user’.
Step 4: Install Mautic
Here, we are installing Mautic via SSH. For this, you need to log in to your server using SSH from either Terminal / Putty (for a Windows PC).
Log in as the system user with which you created the Web application. In this case, it is ‘testmautic’. If you need the password for the system user to log in, you can simply reset it from the ‘System Users’ tab.
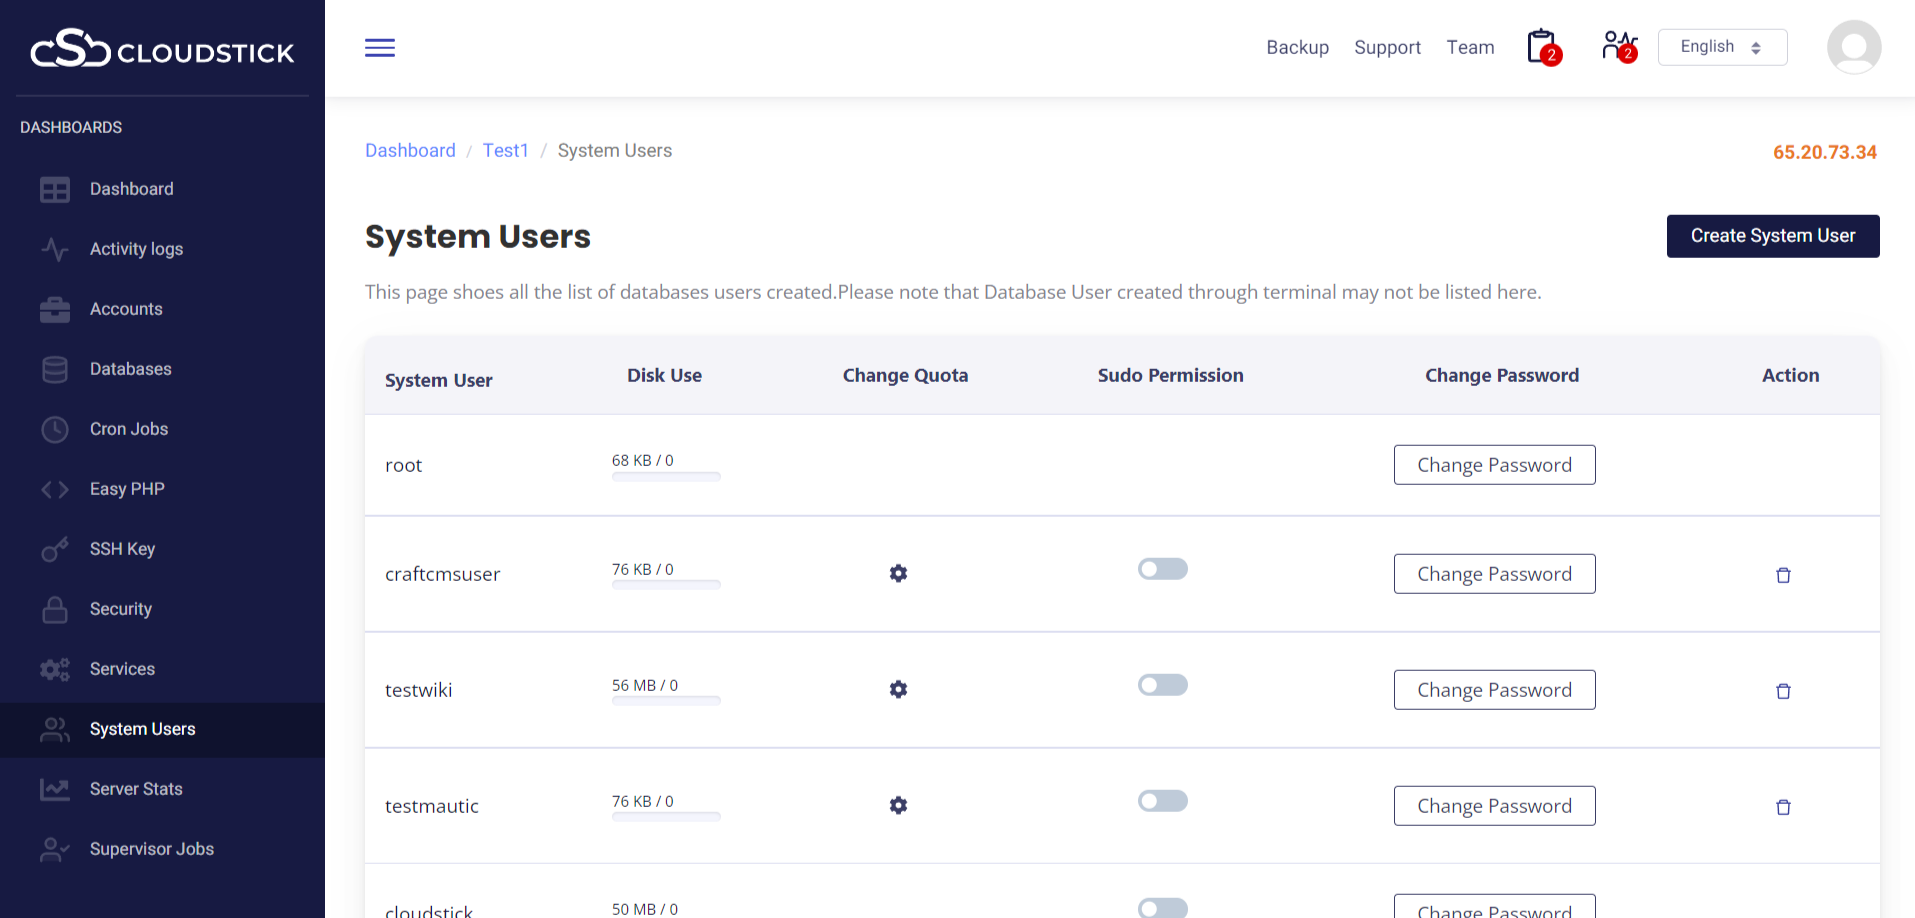
If you are using Terminal, you can run the following command to log in to your server. Please do not log in as “root”, to avoid any file/folder permission issue.
ssh <username>@<ipaddress>
Here the <username> is ‘testmautic’, remember to replace <ipaddress> with your server IP.
Change the working directory to the mautic web application root directory.
cd /home/testmautic/apps/mautic
Now, we can download Mautic.
wget https://github.com/mautic/mautic/releases/download/3.2.2/3.2.2.zip
Unzip the downloaded file
unzip 3.2.2.zip
If the Unzip package is not available, you can manually install it. Use the below command to install the Unzip package manually on the server.
sudo apt install unzip
Step 5: Complete the Mautic Setup Wizard
After downloading and extracting the files, visit your domain where you installed Mautic to proceed further with the installation.
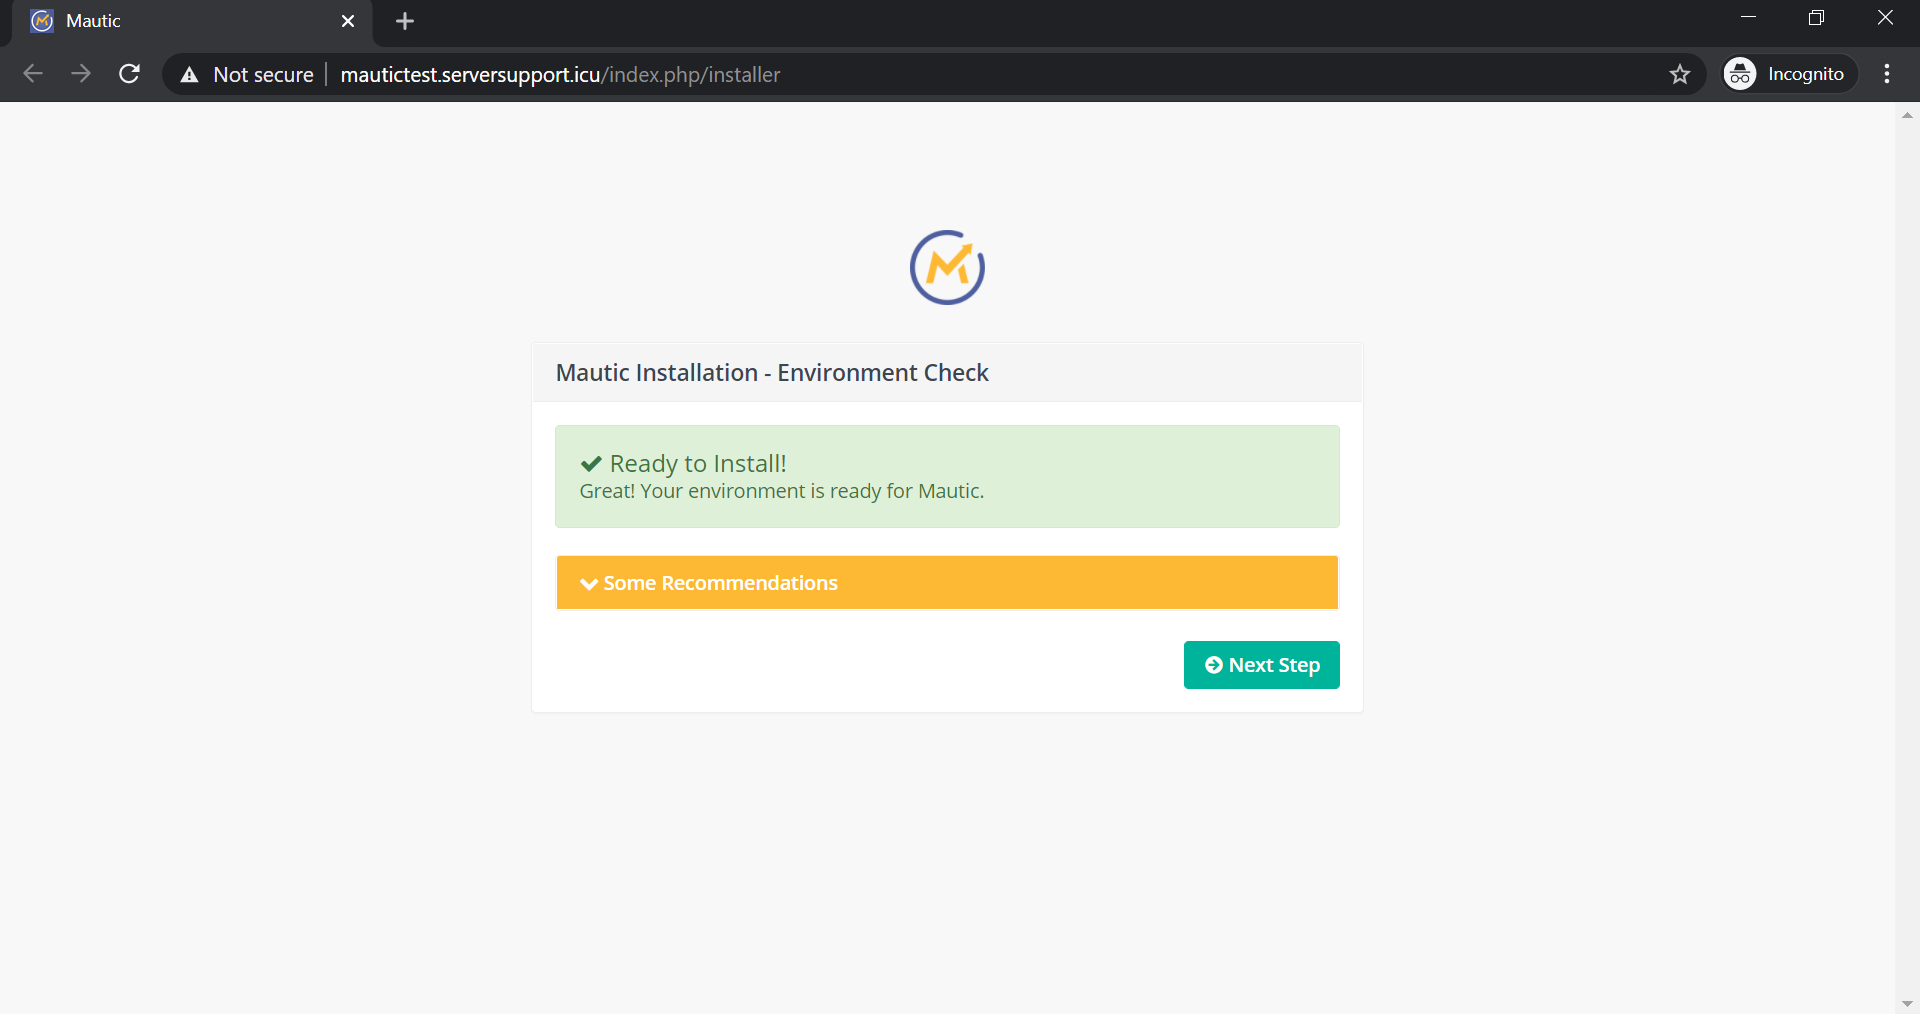
Click the “Next Step” button to complete the installation.
NOTE: If you get an error message on the page saying ‘Please install PDO drivers’, go to the ‘Easy PHP’ option under your server from the CloudStick dashboard and install the required PDO extensions.
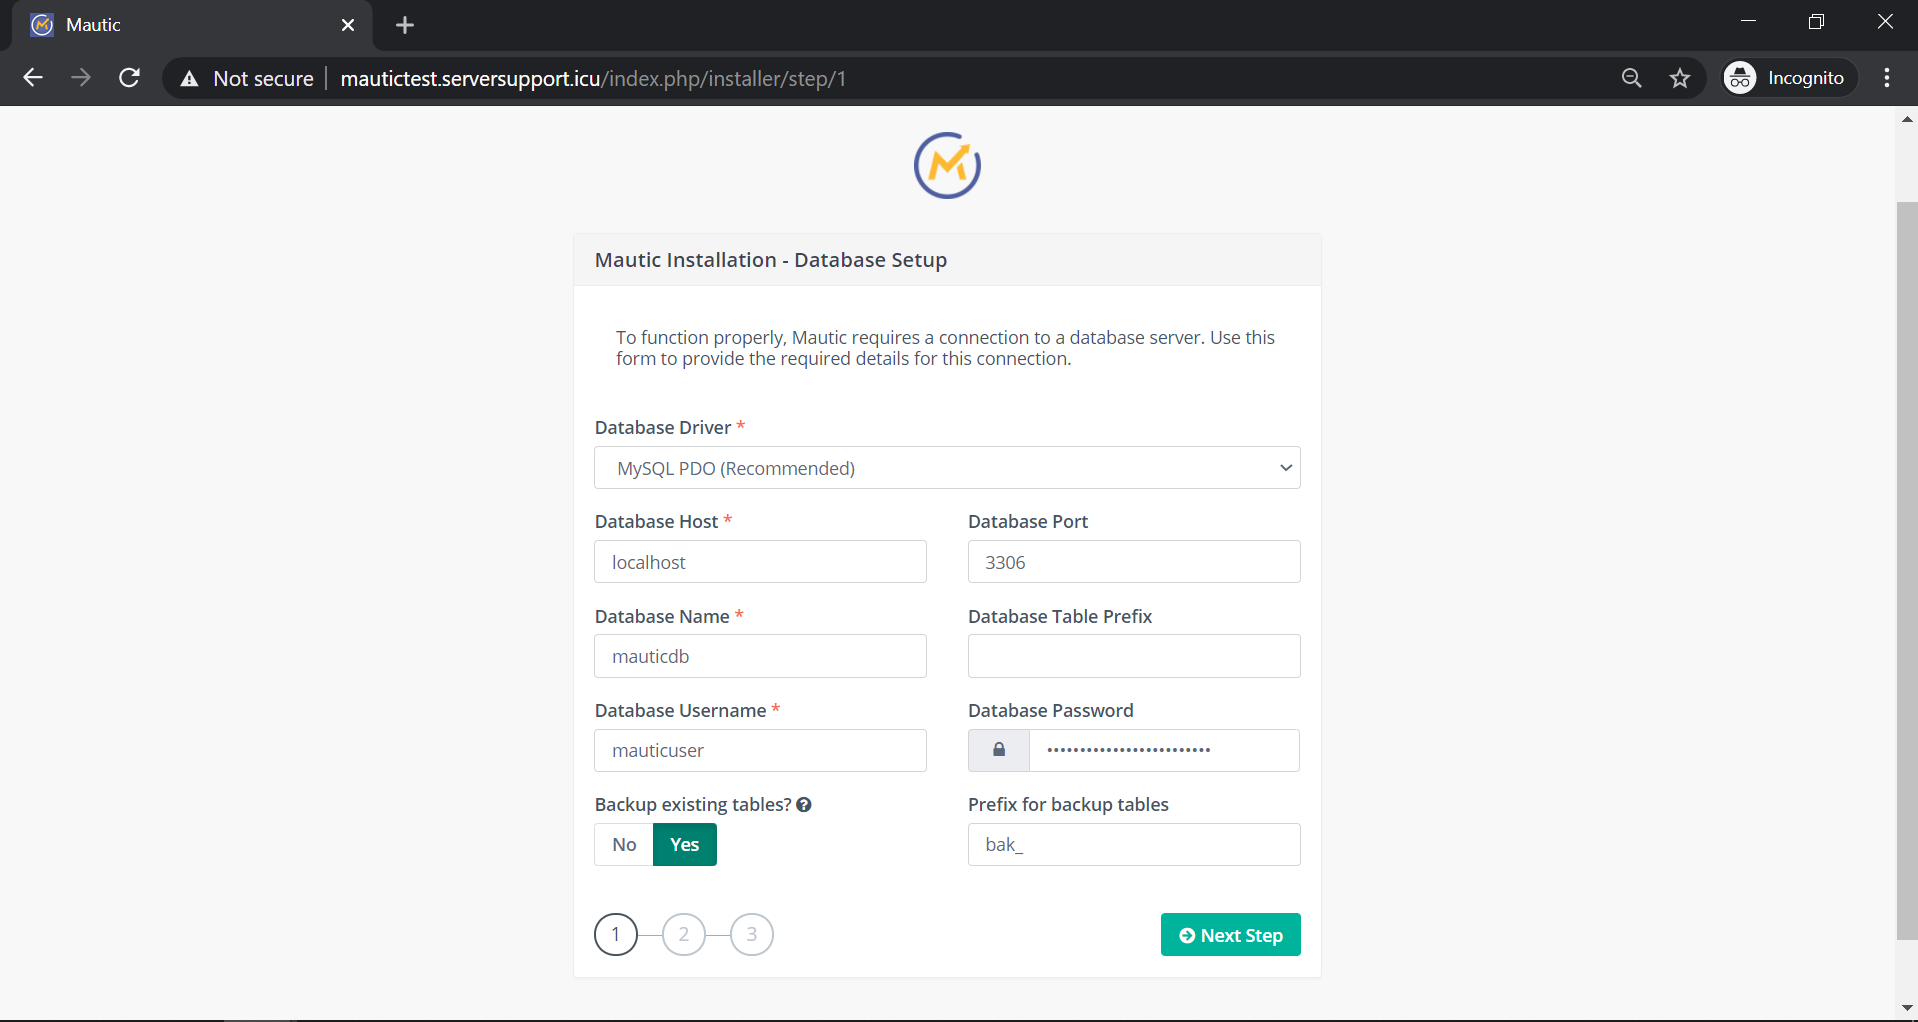
Enter the Database Name, Username, and password. Provide the required database details and click ‘Next Step’ to continue.
Then, create the admin user for your Mautic installation.
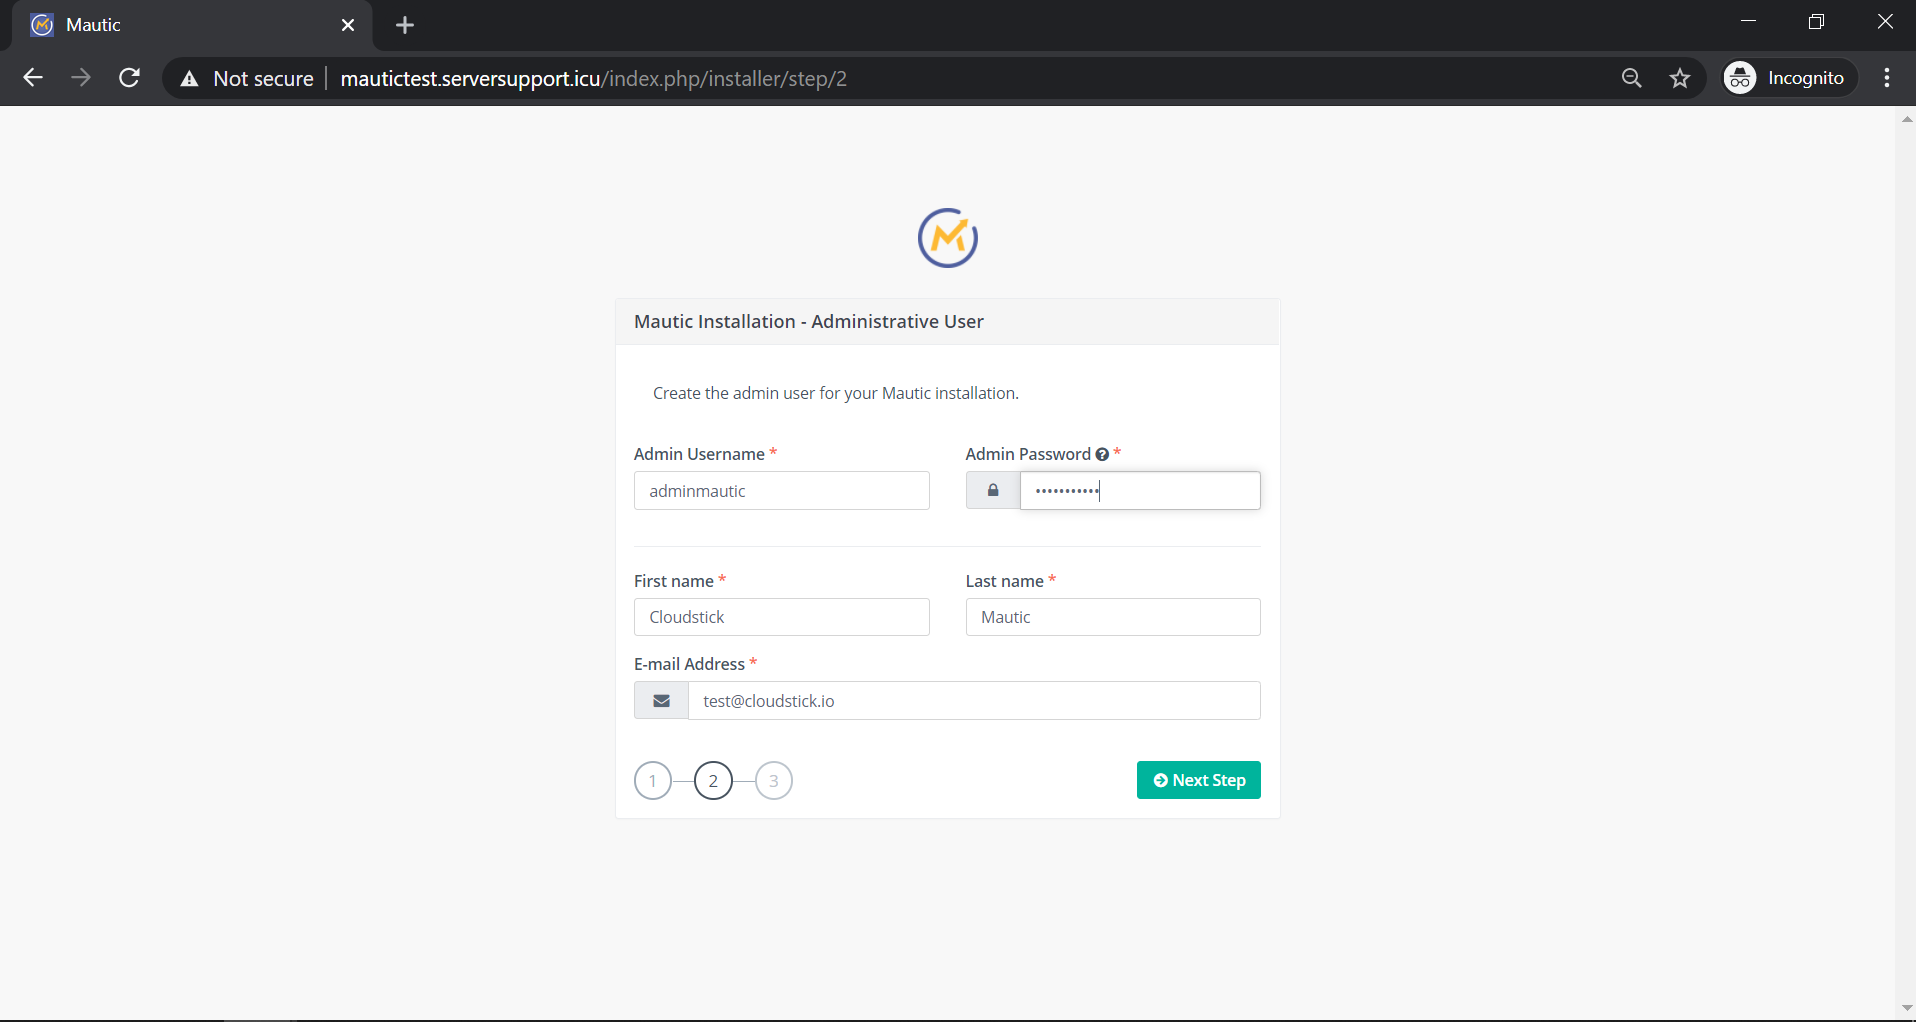
Provide Admin Username, password, and other required details and click ‘Next Step’ to continue.
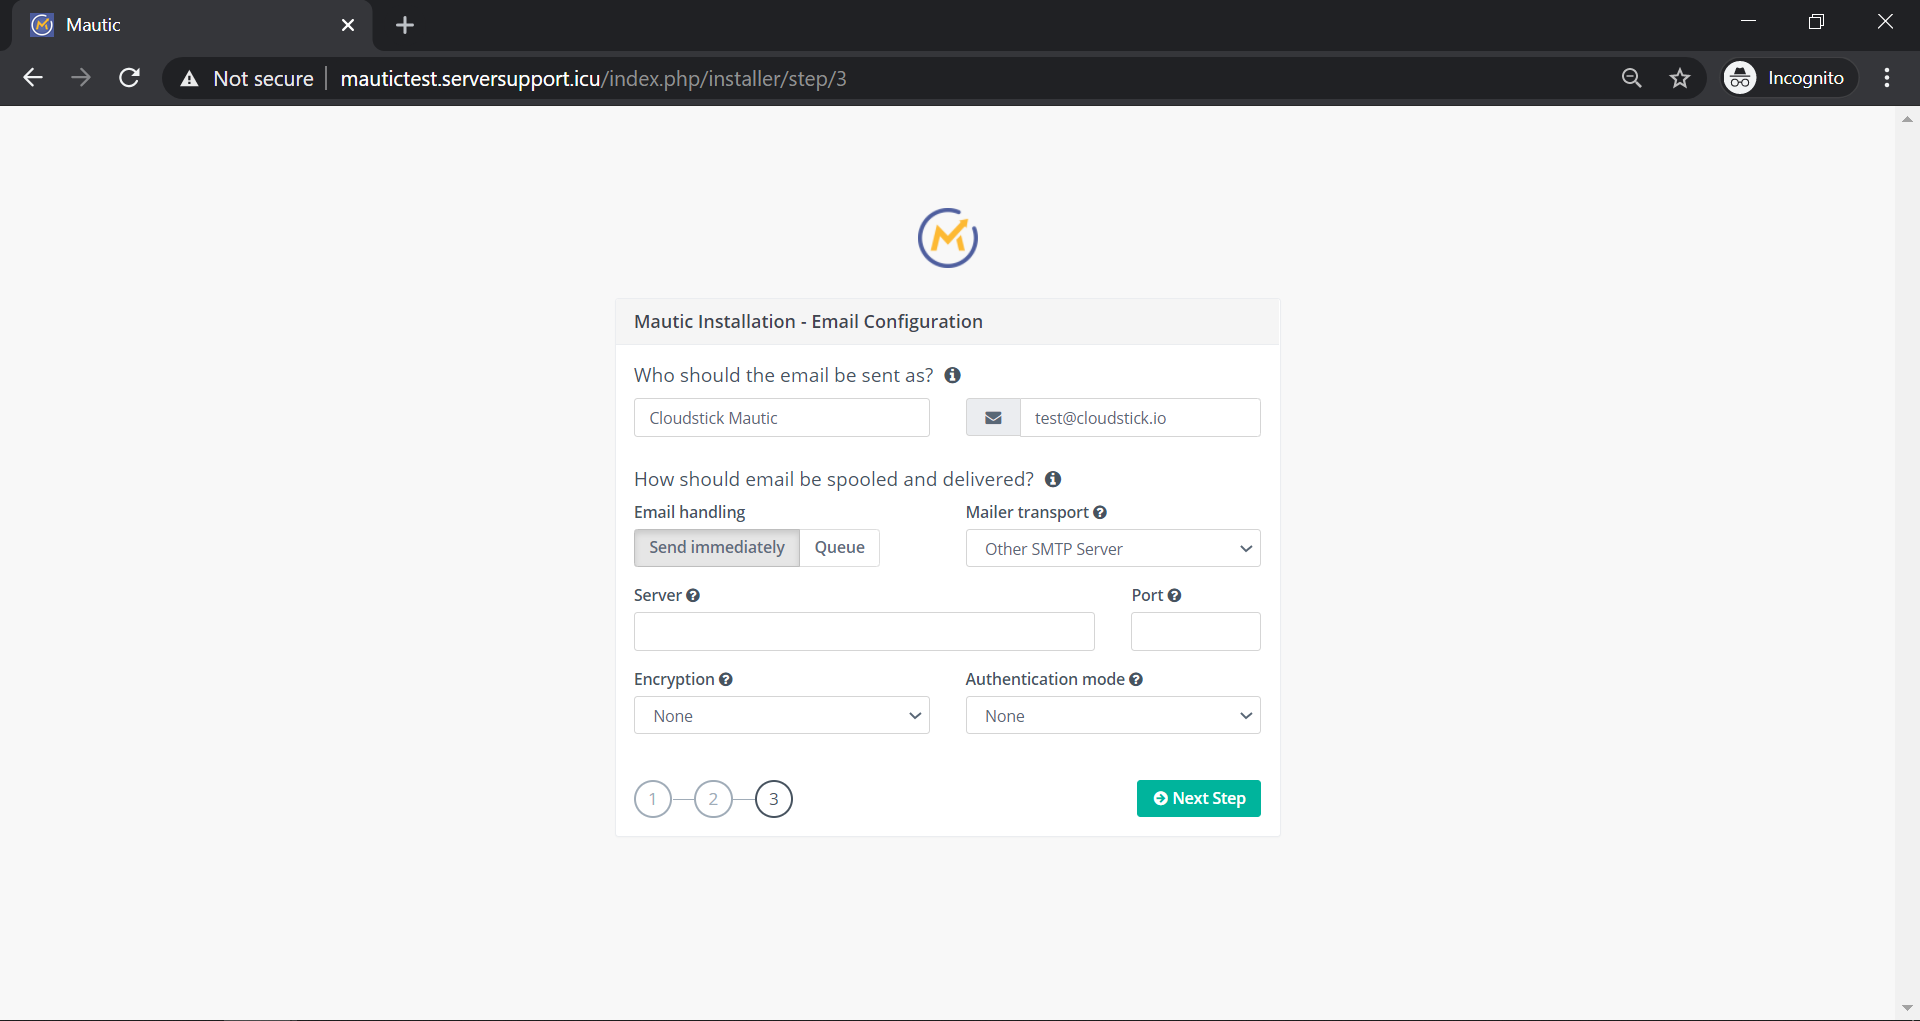
The next pane requires your mail settings. The drop-down “Mailer-transport” part has many platforms you can use to be receiving your mail from Mautic. Kindly use the one you prefer here and enter the details as required. Click “Next Step” once done. This will complete the installation.
Next, you will be required to log in to Mautic Dashboard using the Administrative User details.
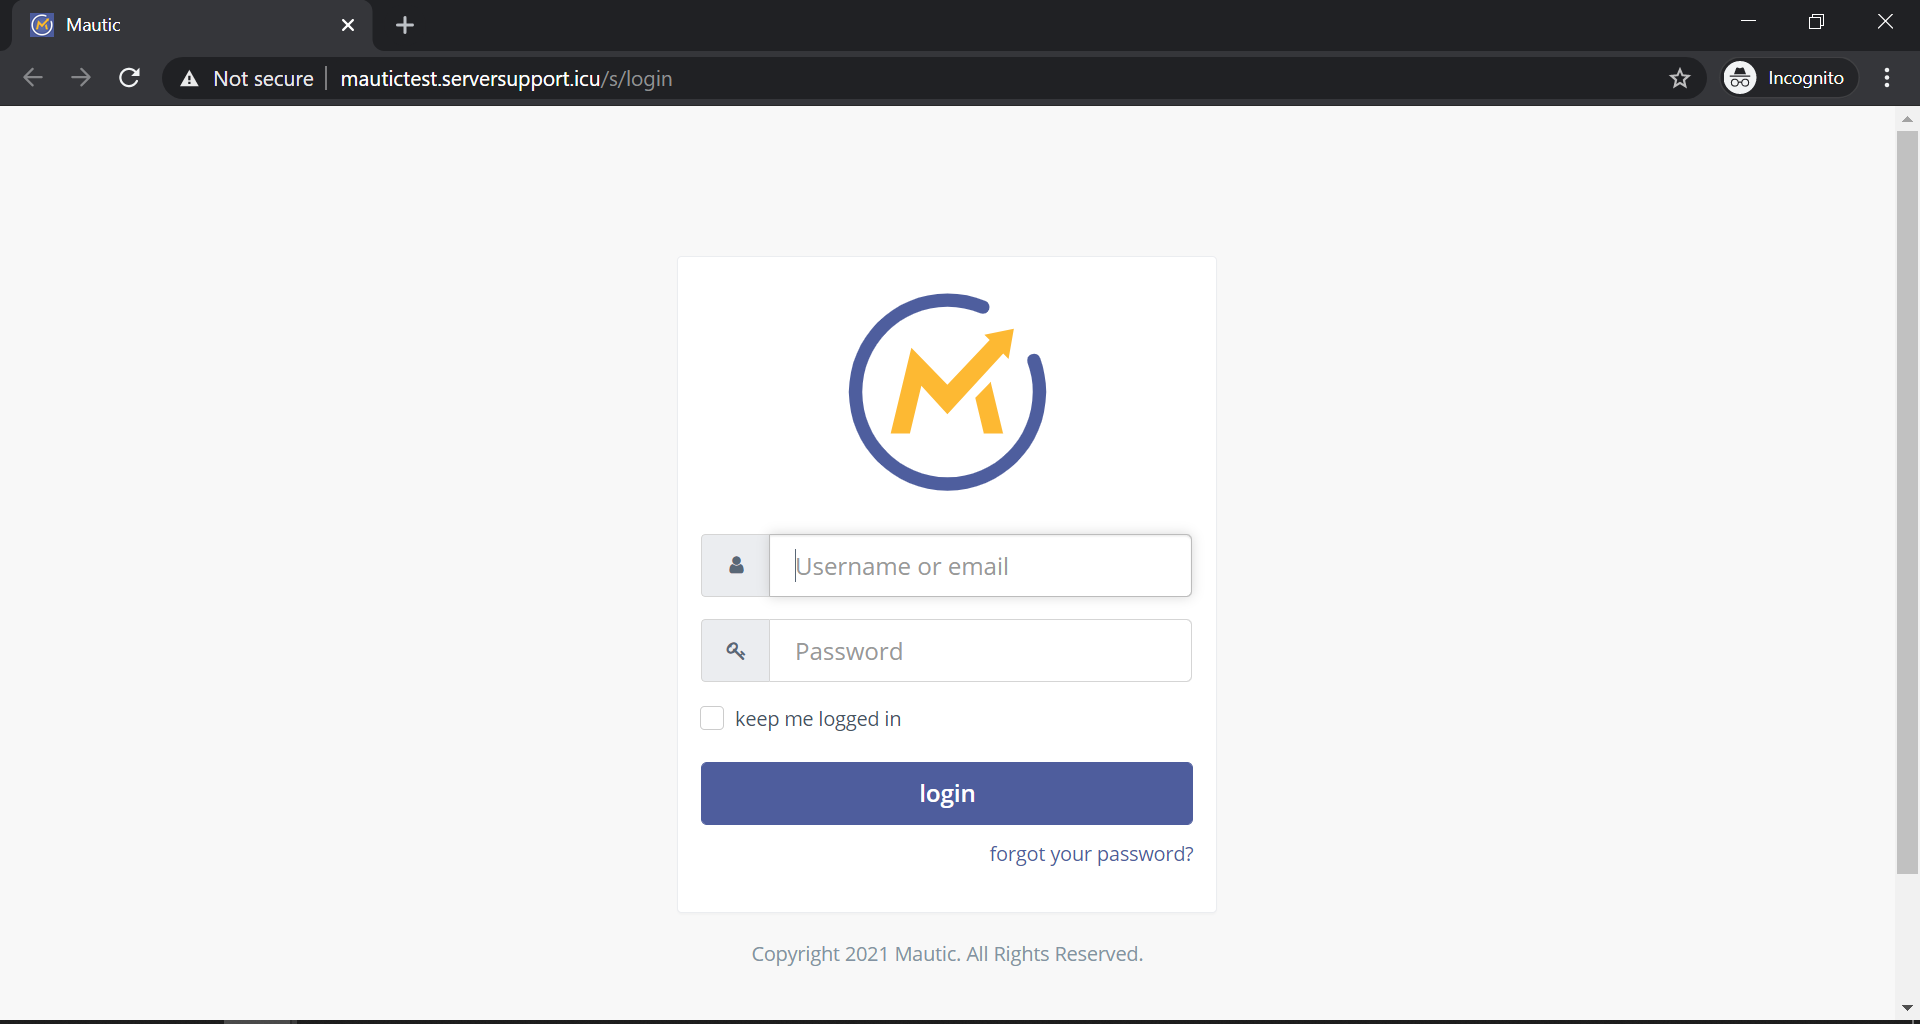
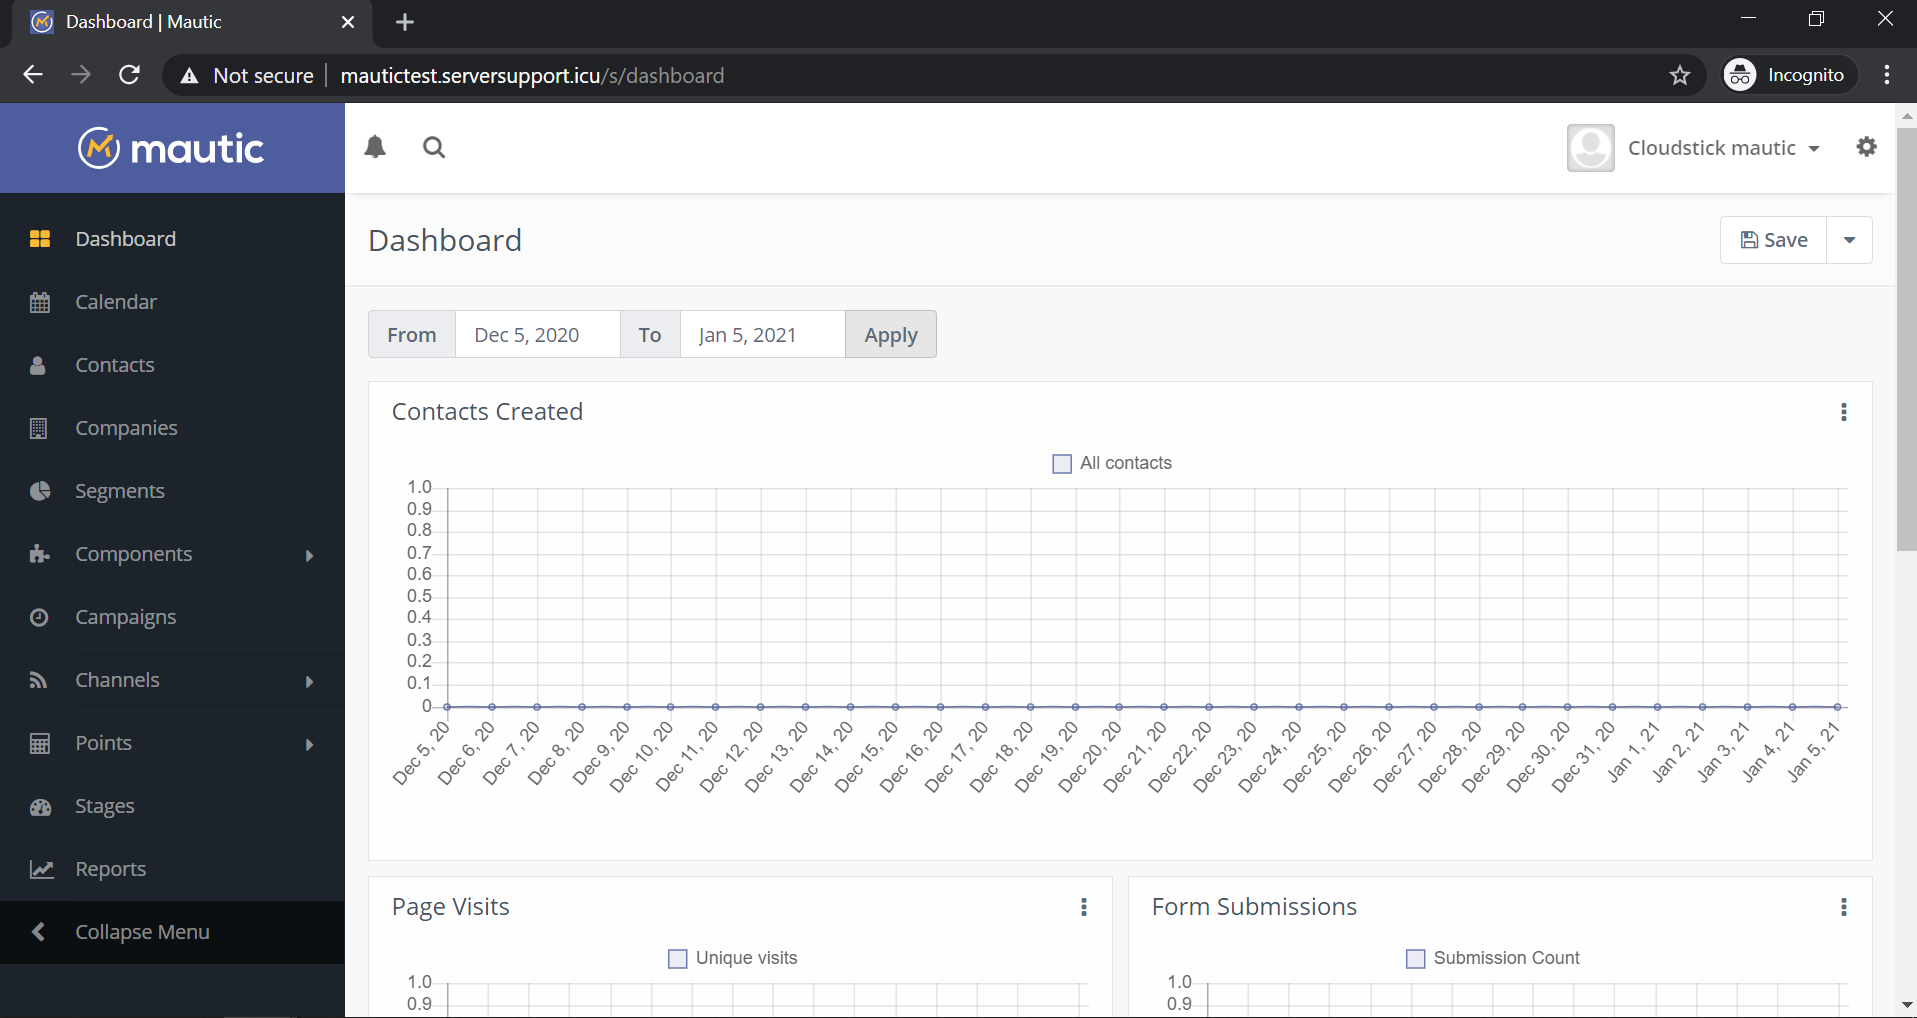
That’s it!! You have successfully installed Mautic on Ubuntu with CloudStick.
Step 6: Add Cron Jobs
Mautic requires a few cron jobs to handle some maintenance tasks such as updating contacts or campaigns, executing campaign actions, sending emails, and more. You should manually add the required cron jobs to the server. Follow the steps below to add cron jobs from the CloudStick dashboard one by one.
-
Cron Job – mautic:segments:update
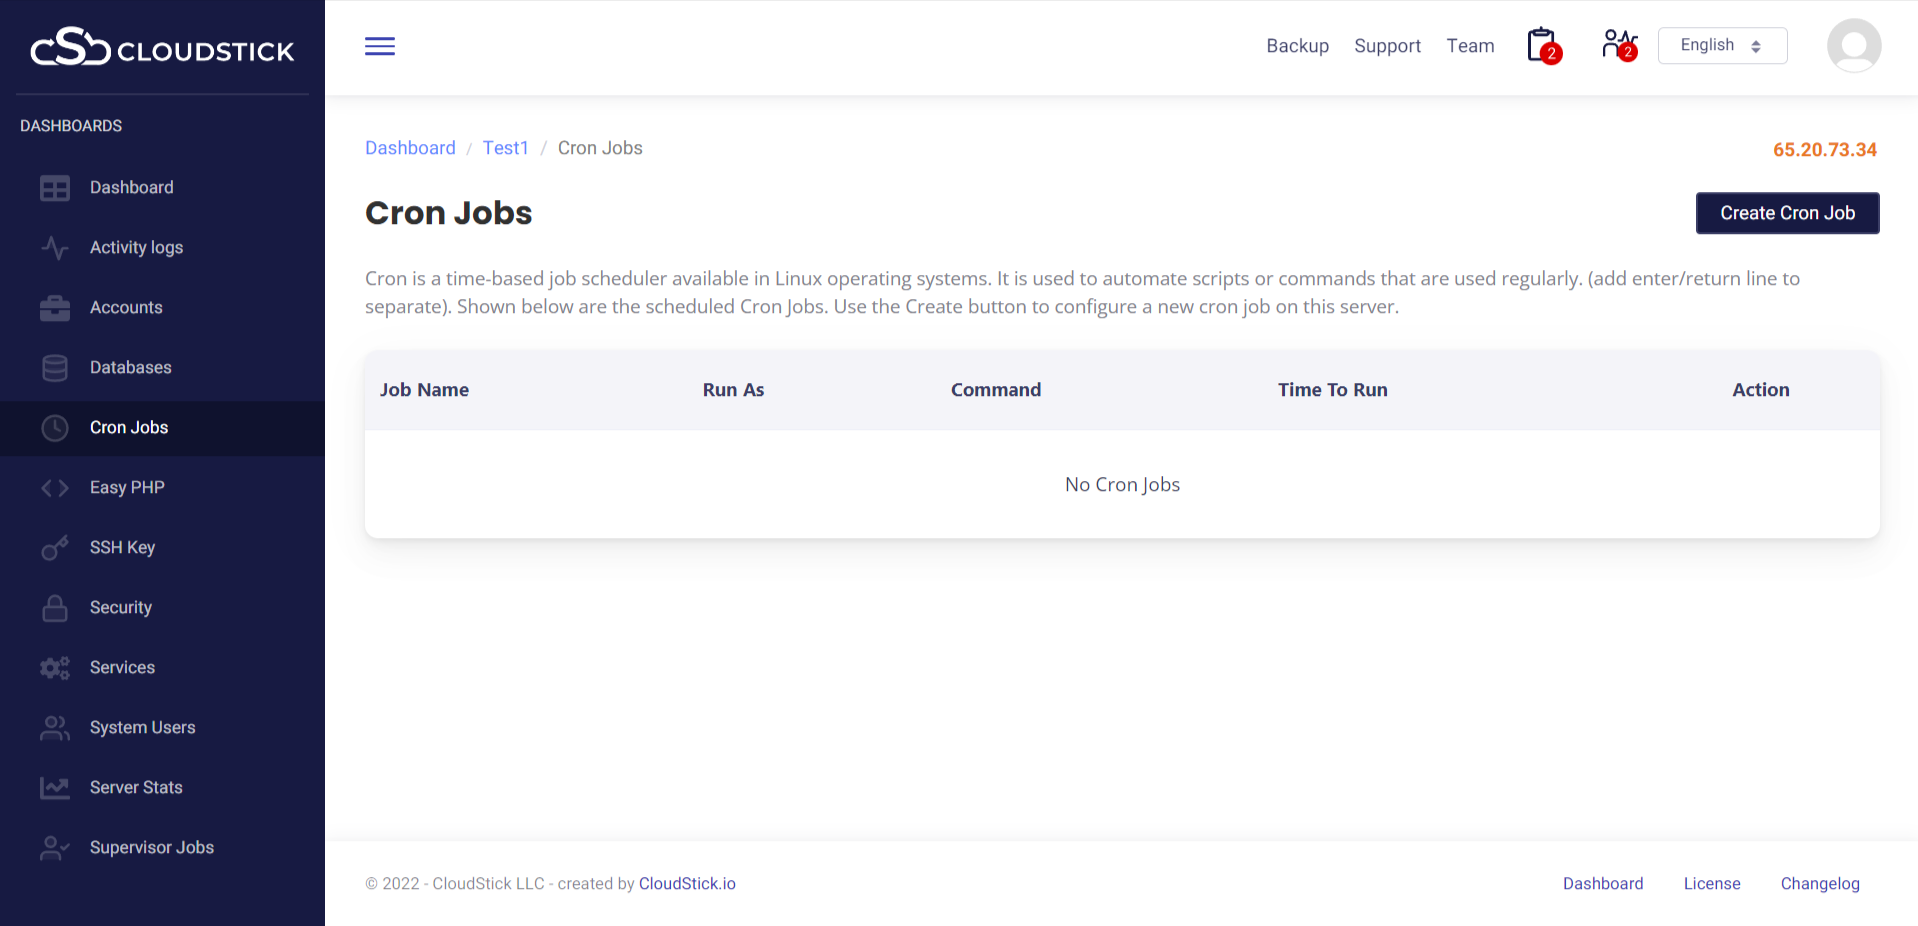
Go to the “Cron Job” menu under your server in CloudStick, and click the “Create” button to add a new cron job.
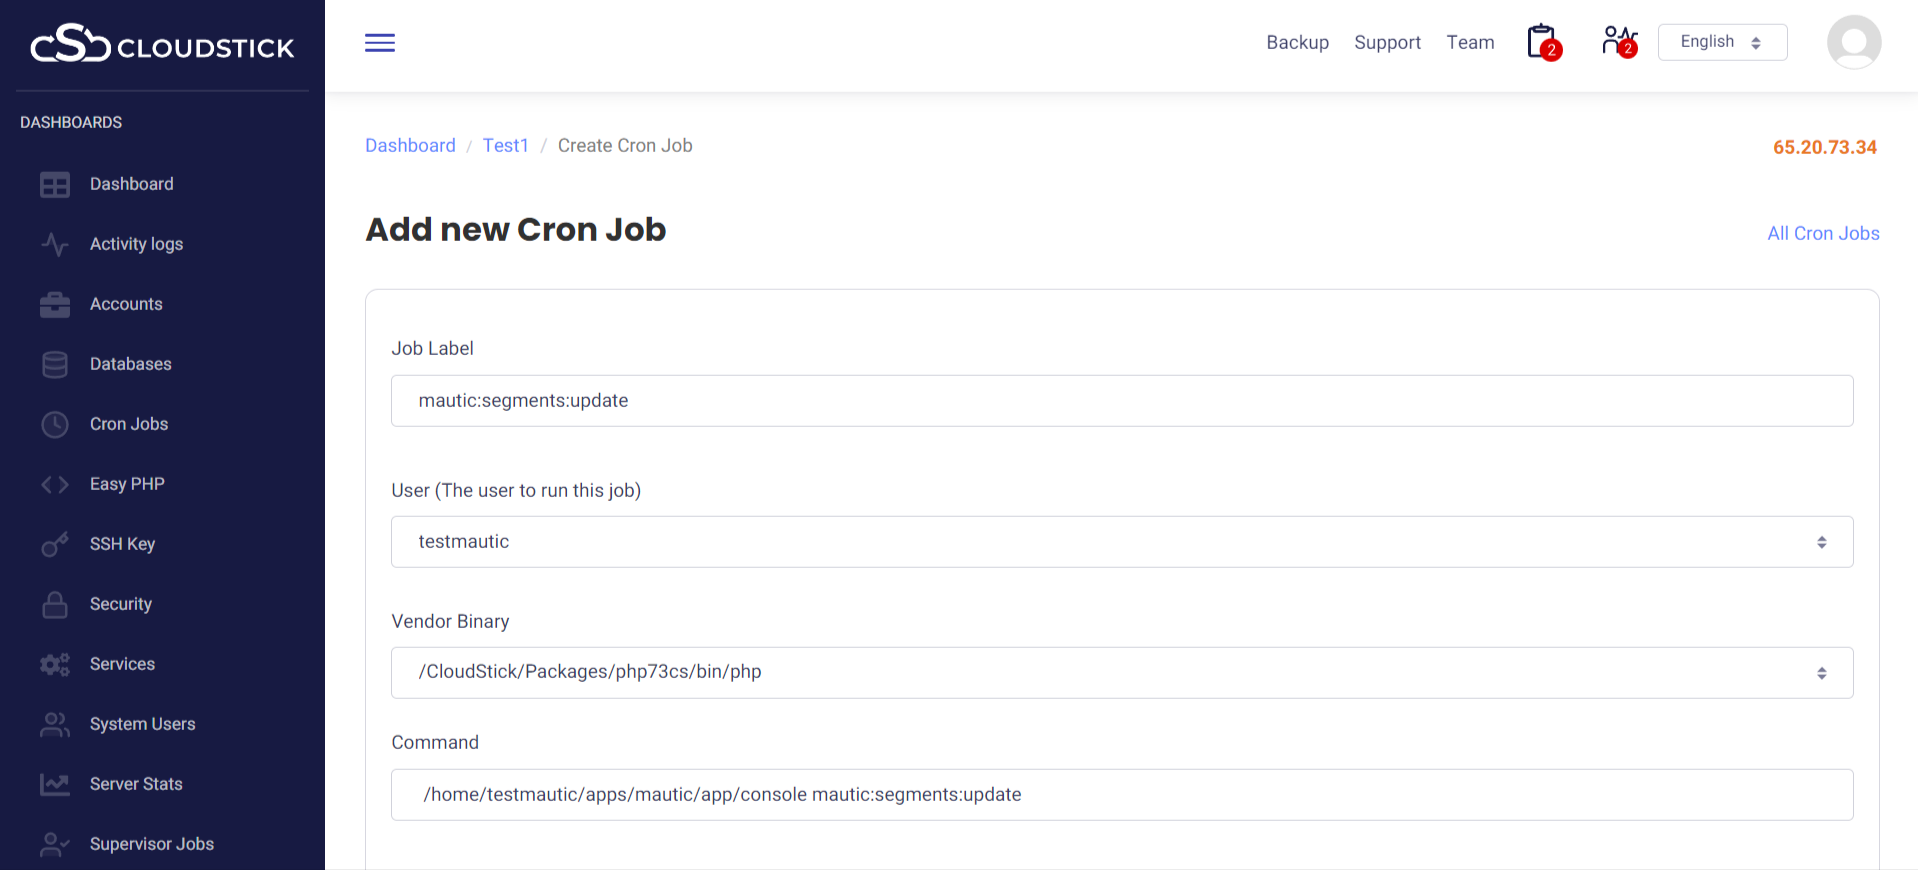
For ‘Job Label’ we can use ‘mautic:segments:update’.
For ‘User’ we can use the system user which we created for Mautic here, it is ‘testmautic’.
Select ‘/CloudStick/Packages/php73cs/bin/php’ from the drop down for ‘Vendor Binary’.
For ‘Command’ we use the command below;
/home/testmautic/apps/mautic/app/console mautic:segments:update
Replace ‘testmautic’ with your system user and ‘mautic’ with your web application name accordingly.
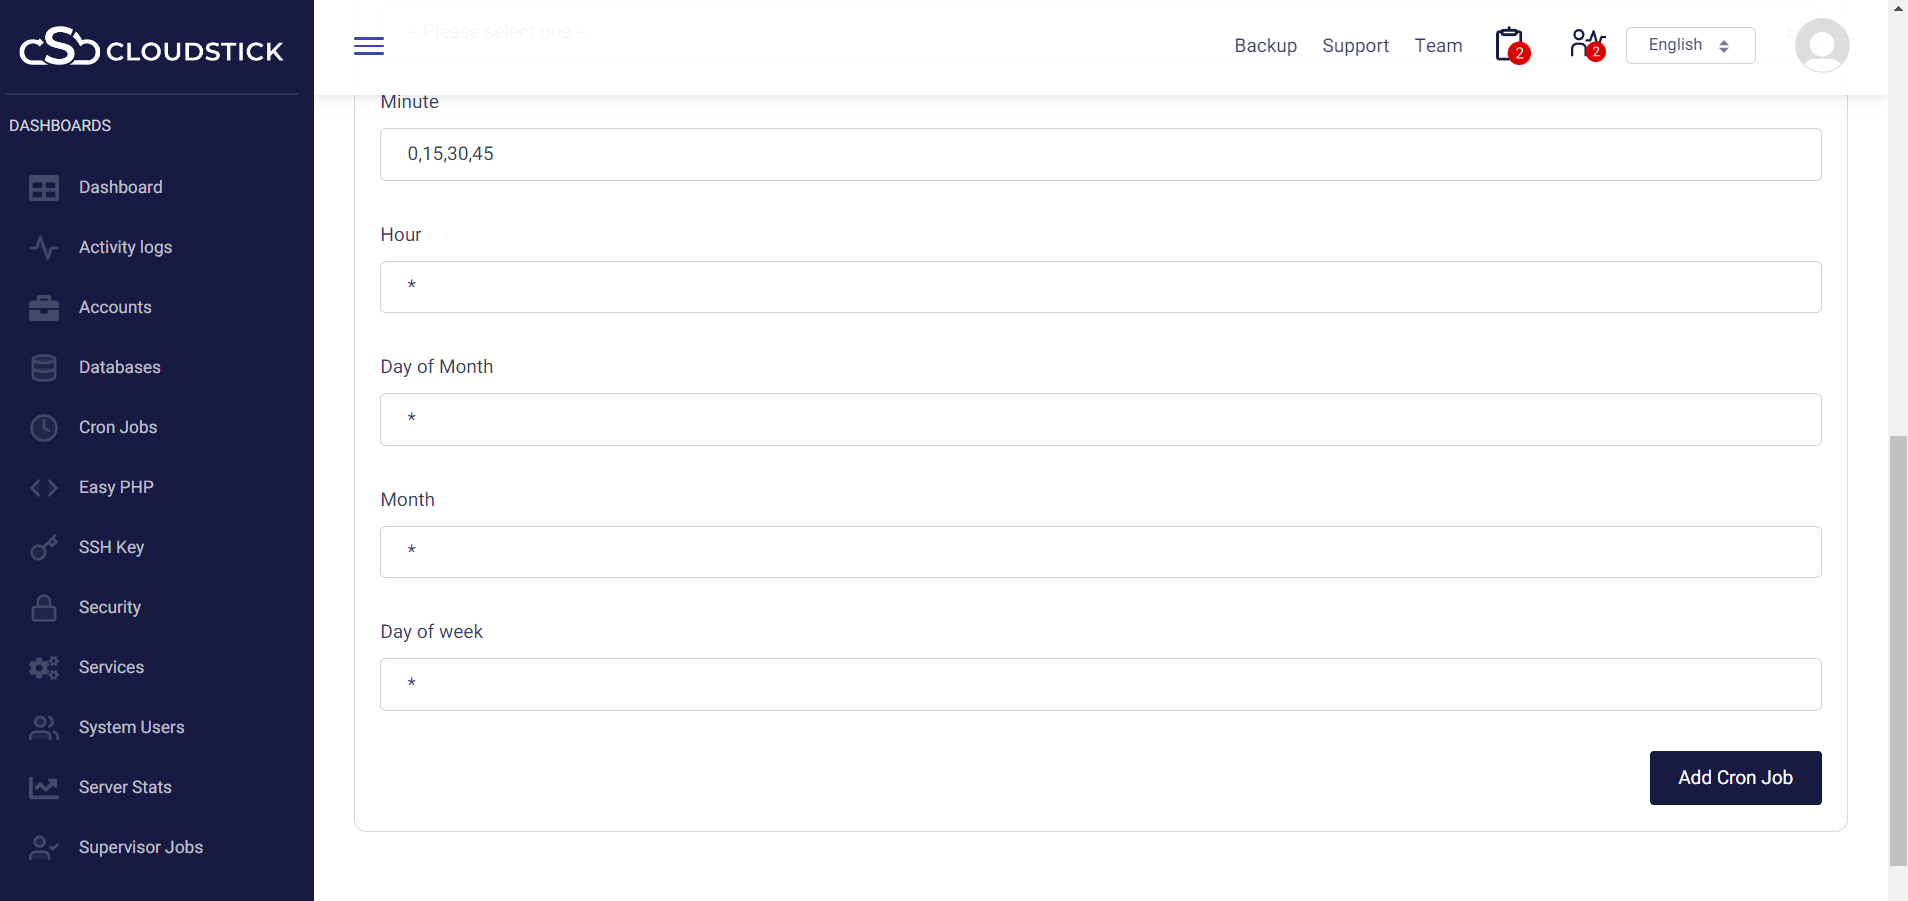
For “Minute”, you may use 0,15,30,45 to run this cron job every 15 minutes.
Then, click on “Create Cron Job” to add the new cron job.
Create the next three cron jobs with the same procedure.
-
Cron Job – mautic:campaigns:update
Set ‘Job Label’ as ‘mautic:campaigns:update’
Command:
/home/testmautic/apps/mautic/app/console mautic:campaigns:update
For ‘Minute’ enter 5,20,35,50
-
Cron Job – mautic:campaigns:trigger
Set ‘Job Label’ as ‘mautic:campaigns:trigger’
Command:
/home/testmautic/apps/mautic/app/console mautic:campaigns:trigger
For ‘Minute’ enter 10,25,40,55
-
Cron Job – mautic:emails:send
Set ‘Job Label’ as ‘mautic:campaigns:trigger’
Command:
/home/testmautic/apps/mautic/app/console mautic:emails:send
For ‘Minute’ enter 2,17,32,47
Perfect! you have added all the required cron jobs for Mautic.
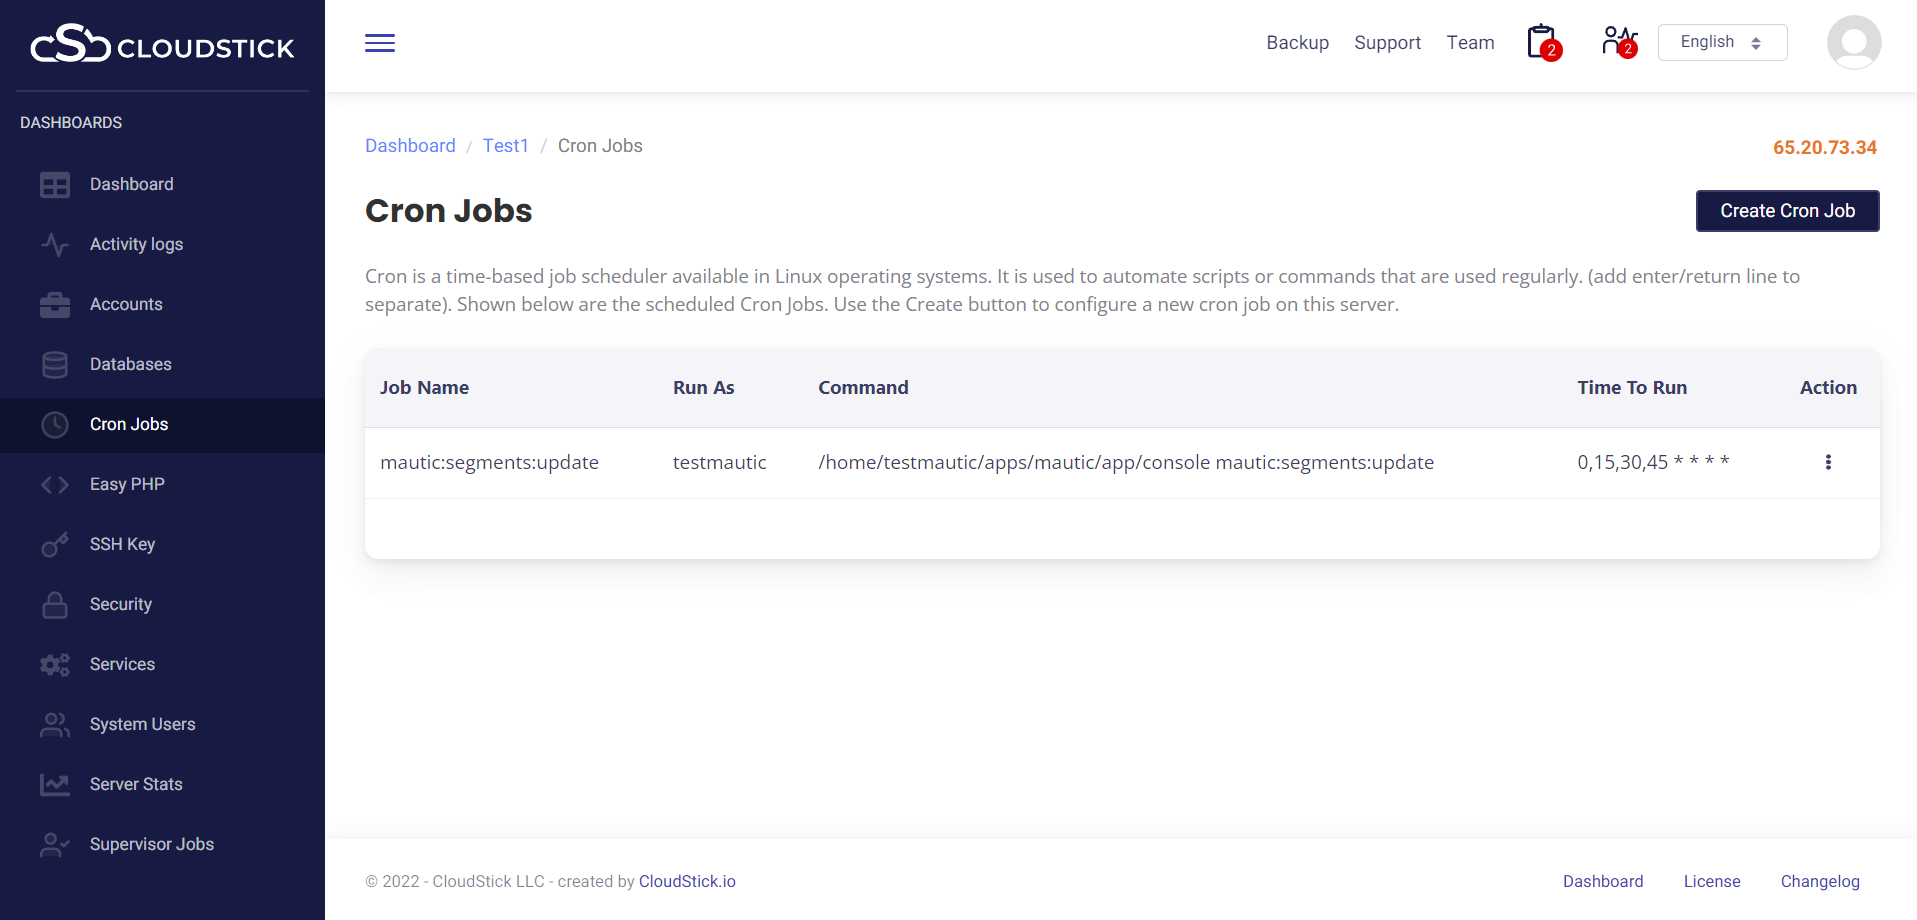
Done! Now you are ready to use Mautic Marketing Automation Software.
You may be interested in :
Learning Management Systems Introduction The digital transformation of education has escalated the need for robust, scalable,…
Introduction: WordPress 6.5 marks another milestone in the evolution of the world’s most popular content management…
Changing Mysql root passwords are easy when it comes to CloudStick, you do have to fill…

