How to Install Moodle on Ubuntu 20.04

This article will show how to install Moodle and configure it on an Ubuntu server managed by the CloudStick control panel.
Moodle is a well-known open-source learning management system written in PHP. It offers a wide range of activities and educational tools that enable schools, universities, and related institutions to offer students a flexible learning platform. Though there are lots of TMS (Teaching management Systems) available in the market, either they are costly or complicated to deploy and manage. Moodle is here to get rid of all of the challenges.
Contents
- Connecting server to CloudStick dashboard
- Creating a custom web application
- Creating Database
- Deploy SSL certificate for website
- Download Moodle Files
- Complete setup
How To Install Moodle on Ubuntu Server
Step 1: Connect your server with CloudStick, prior to understanding how to install Moodle,
Here, we are using an Ubuntu 20.04 server from Digital Ocean, which is installed with the CloudStick control panel. If you haven’t attached a server with your CloudStick dashboard, here is our tutorial on how to install a Digital Ocean server with CloudStick
Step 2: Create a custom web application to proceed with, how to install Moodle Software article. For that, sign in to your CloudStick dashboard, choose your Server, click on Accounts, click on Create Accounts and Choose Custom Web Applications.
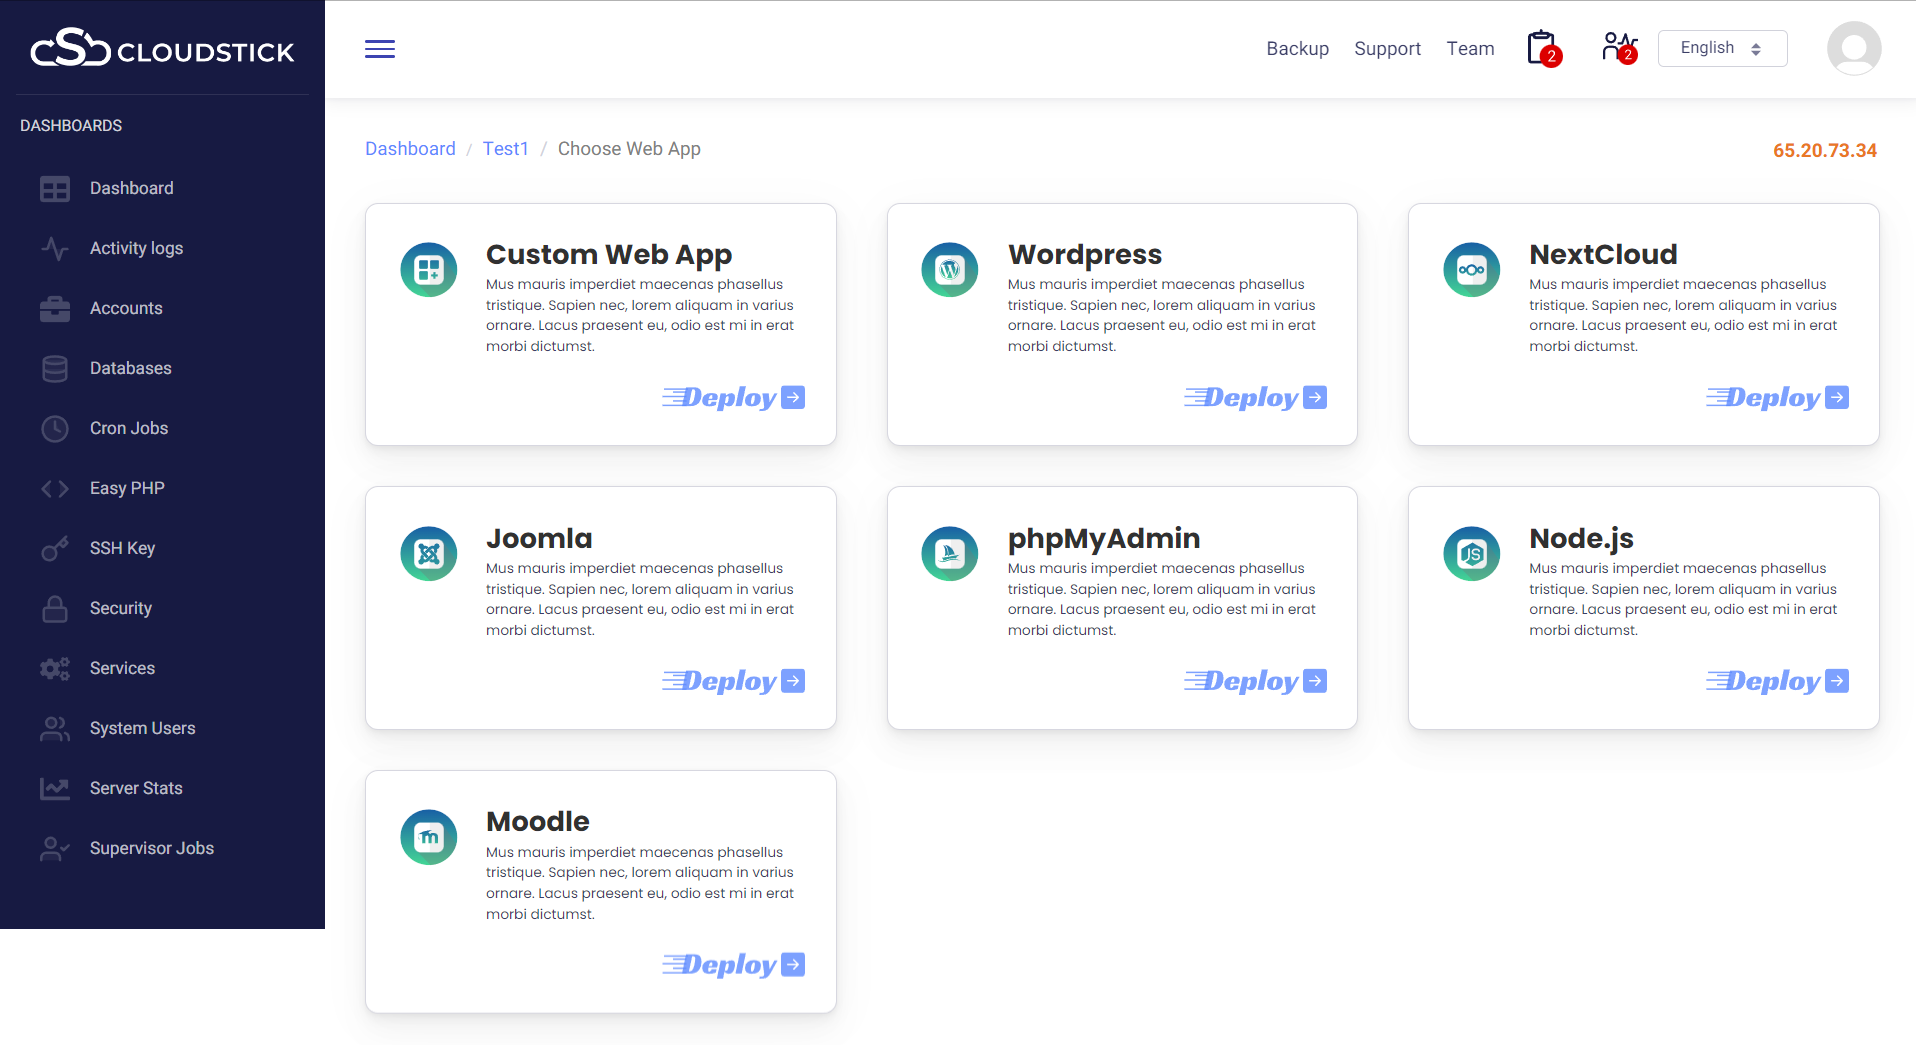
Step 3: Fill in necessary details and Click on the ‘Add Web Application’ button.
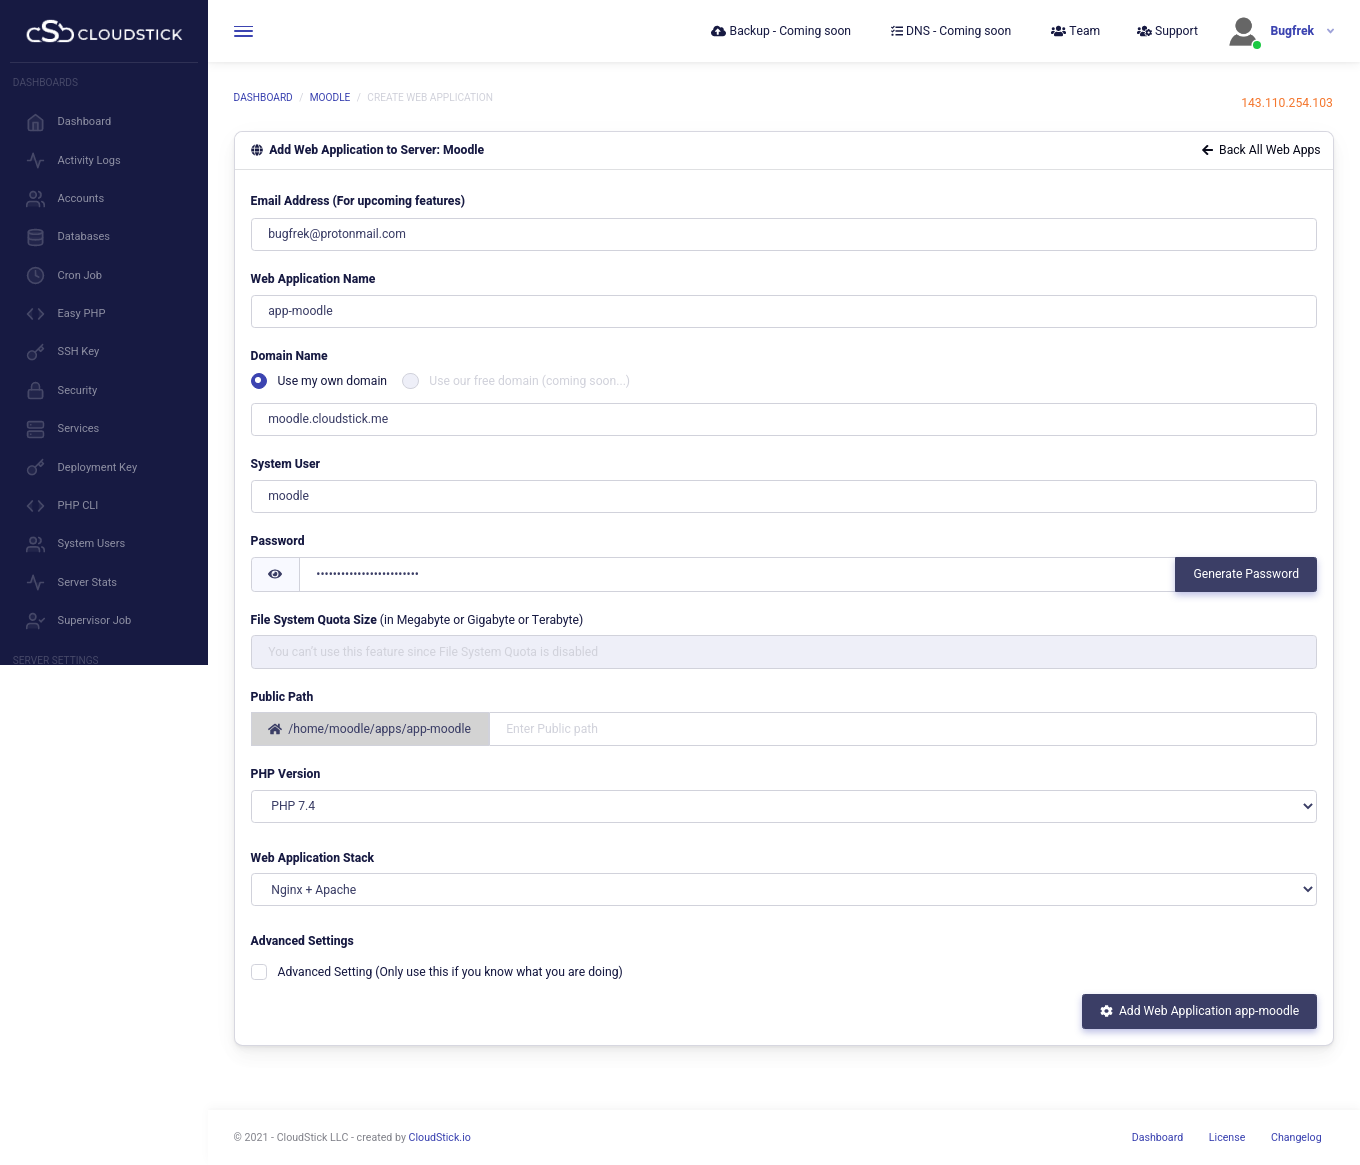
Step 4: Now let’s create a database and database user for Moodle, for that navigate to the App Database section on the dashboard by clicking on Accounts, choose your web application, click on the App Database menu. Then create a new database user, database and grant permission.
You can refer to our knowledge base section to create a Database.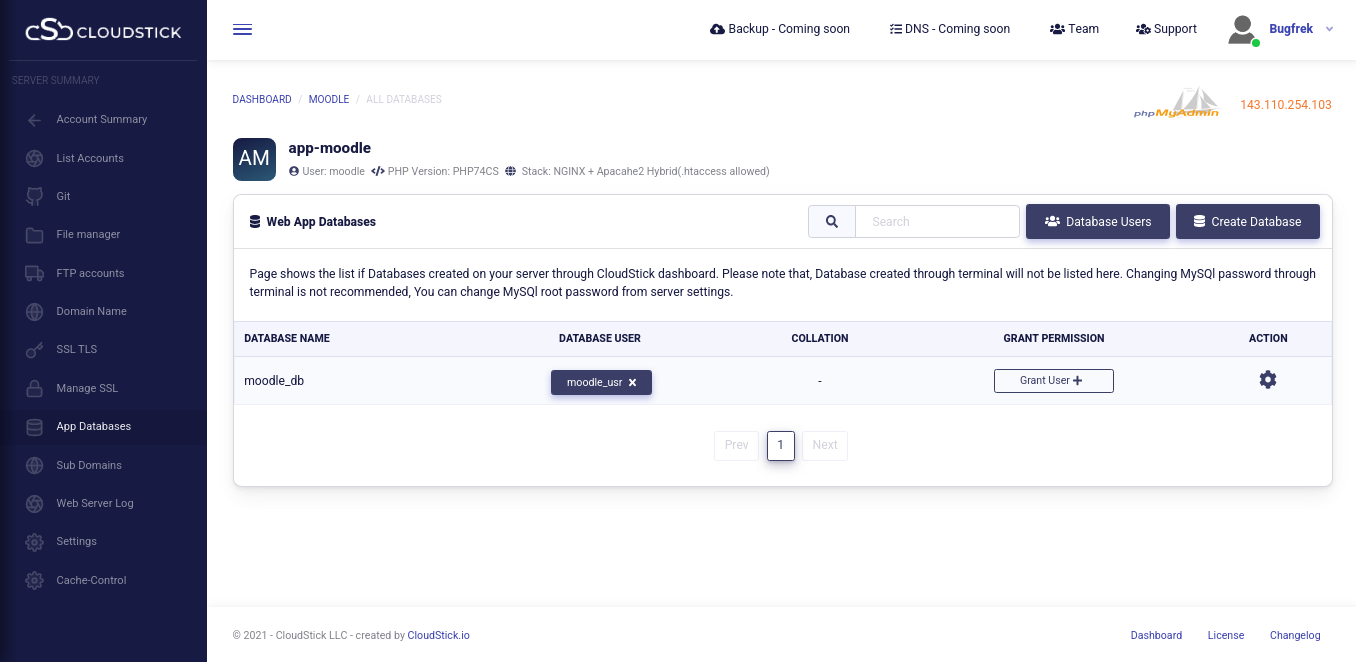
Step 5: let’s install an SSL certificate for our domain, for that navigate to the ‘SSL TLS’ menu, choose your web app, select Let’s Encrypt as certificate, and click on the Deploy button. SSL for your domain will get installed shortly.
Step 6: Let’s download moodle files into our webroot, for that we have to access our server through a terminal by adding our SSH public key. Here is our knowledge base resource on how to add ssh key and access a server through a terminal.
Once we access the server, let’s run the following commands to download moodle files.
Here, my webroot is /home/moodle/apps/app-moodle, so let’s download and extract files into webroot.
wget -qO- https://github.com/moodle/moodle/archive/refs/tags/v3.11.2.tar.gz | tar xzf – -C /home/moodle/apps/app-moodle/
mv /home/moodle/apps/app-moodle/moodle-3.11.2/* /home/moodle/apps/app-moodle/
Step 7: Now let’s complete installation by opening our domain on a web browser. Among the installation procedure, first, we have to choose a language and click on continue.
Next, we have to confirm paths, where we have to confirm Domain, Moodle Directory, and Data Directory and click on Next.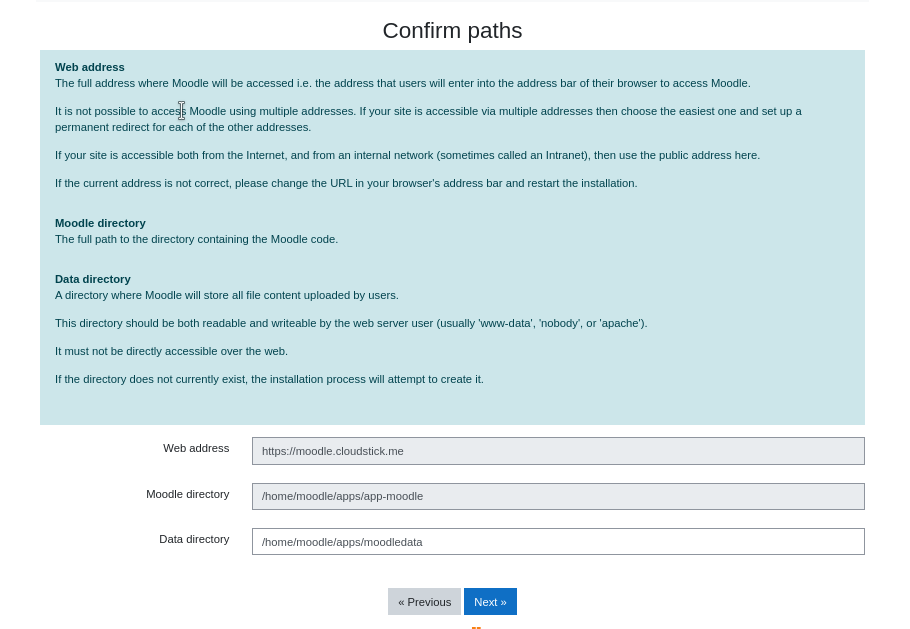
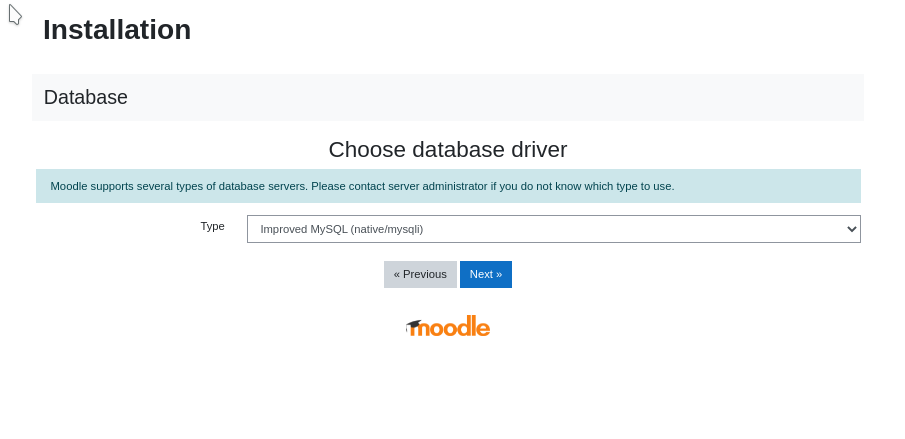
Next, let’s choose a database server as native/MySQL
Next, we will provide the database, user name as well as password, that we created in the previous steps.
Then, we have to accept the terms of service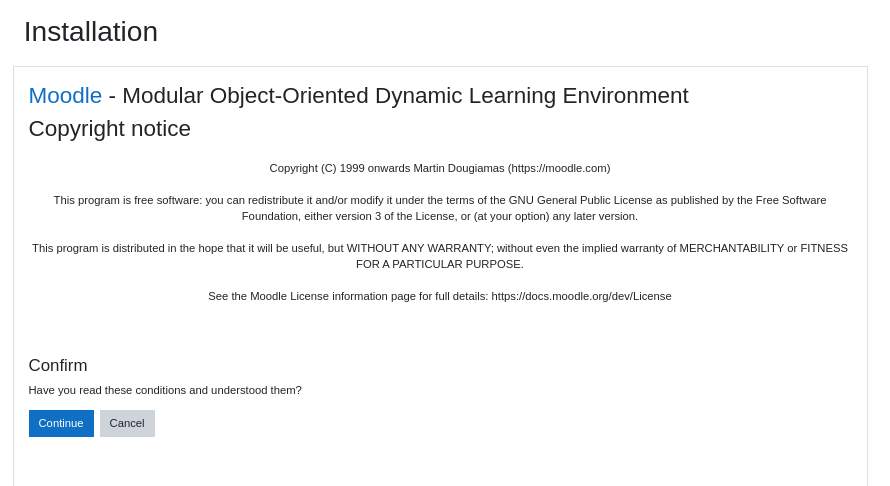
Then, we will be navigated to a page with a list of checking requirements for Moodle installation.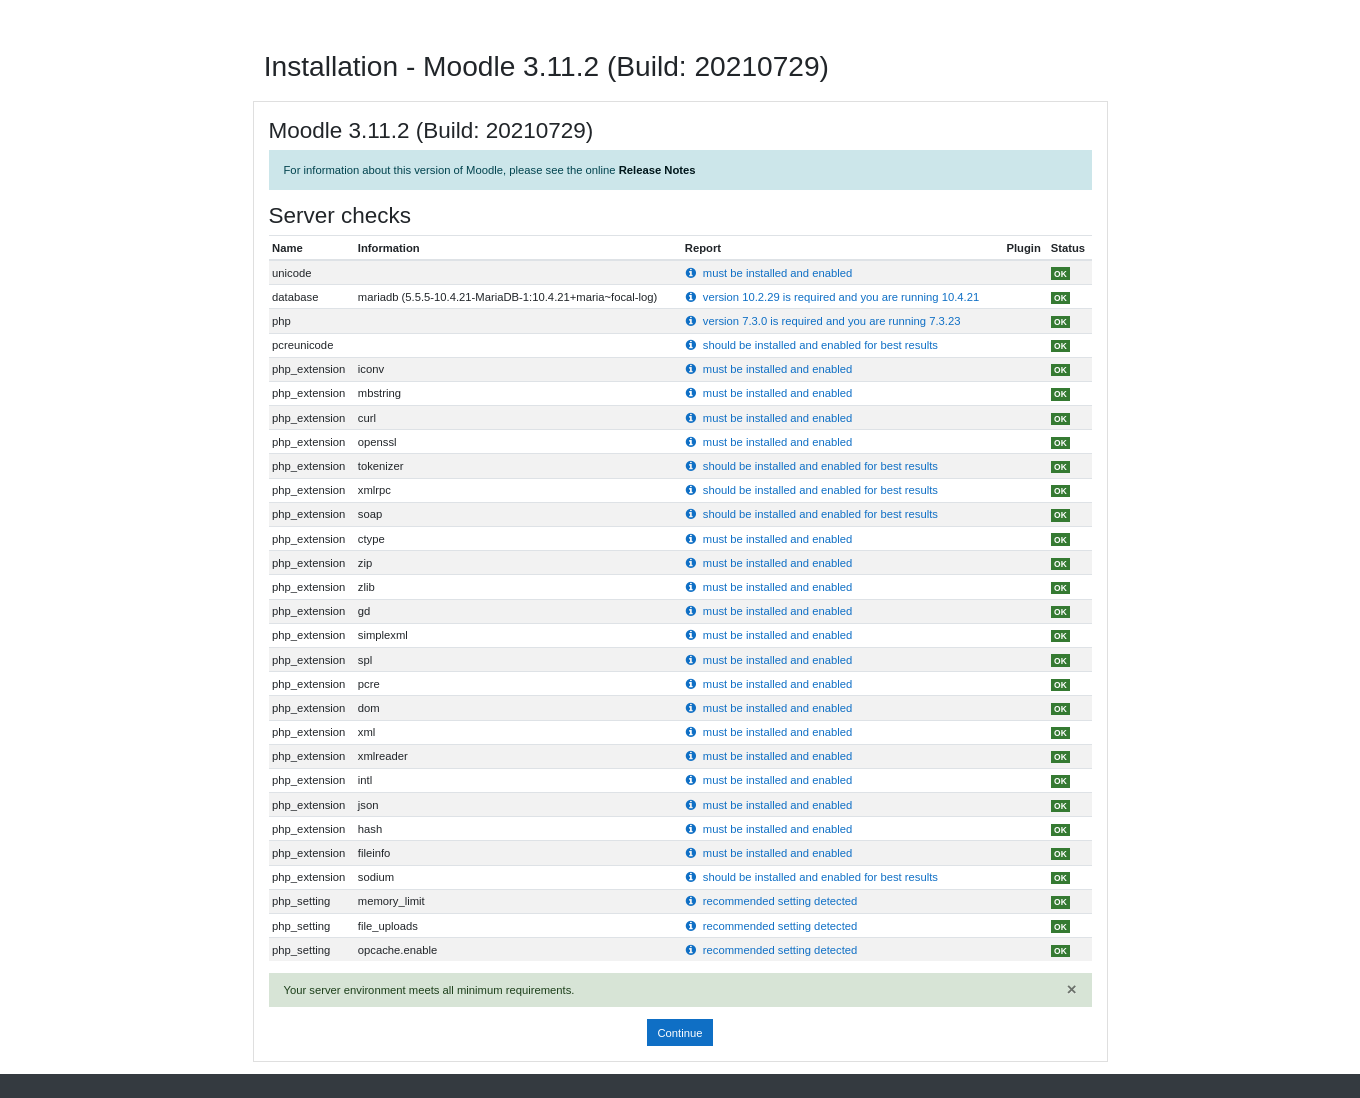
If the previous steps have been correct, all the fundamental requirements will be met and we will be able to continue with the installation process.
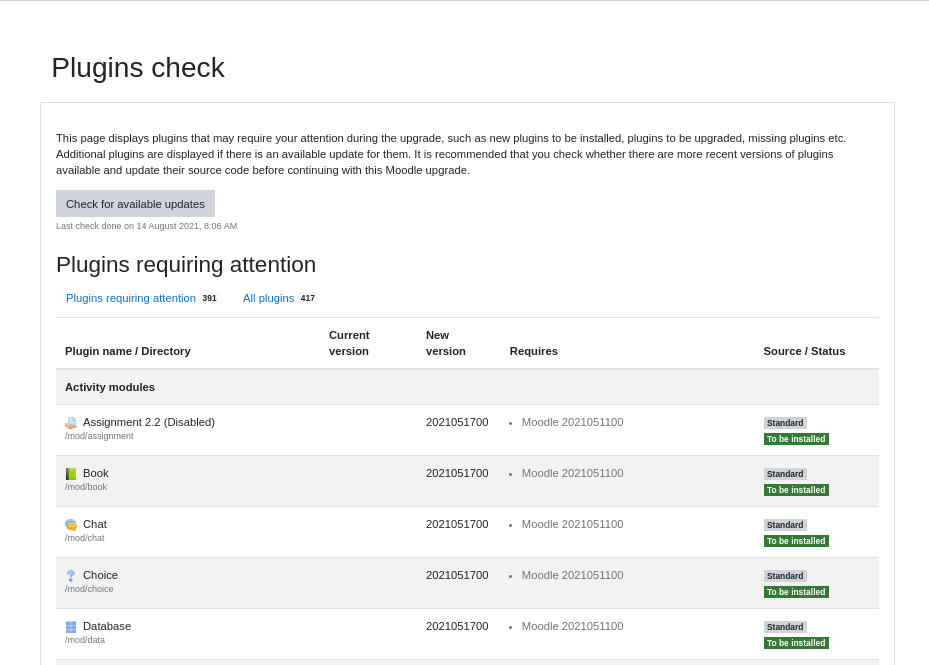
The next process is the Plugin check, and which can takes a long time to complete.
At the end of the installation, admin setup begins for the new site, we have to fill in necessary details to set up the Admin side.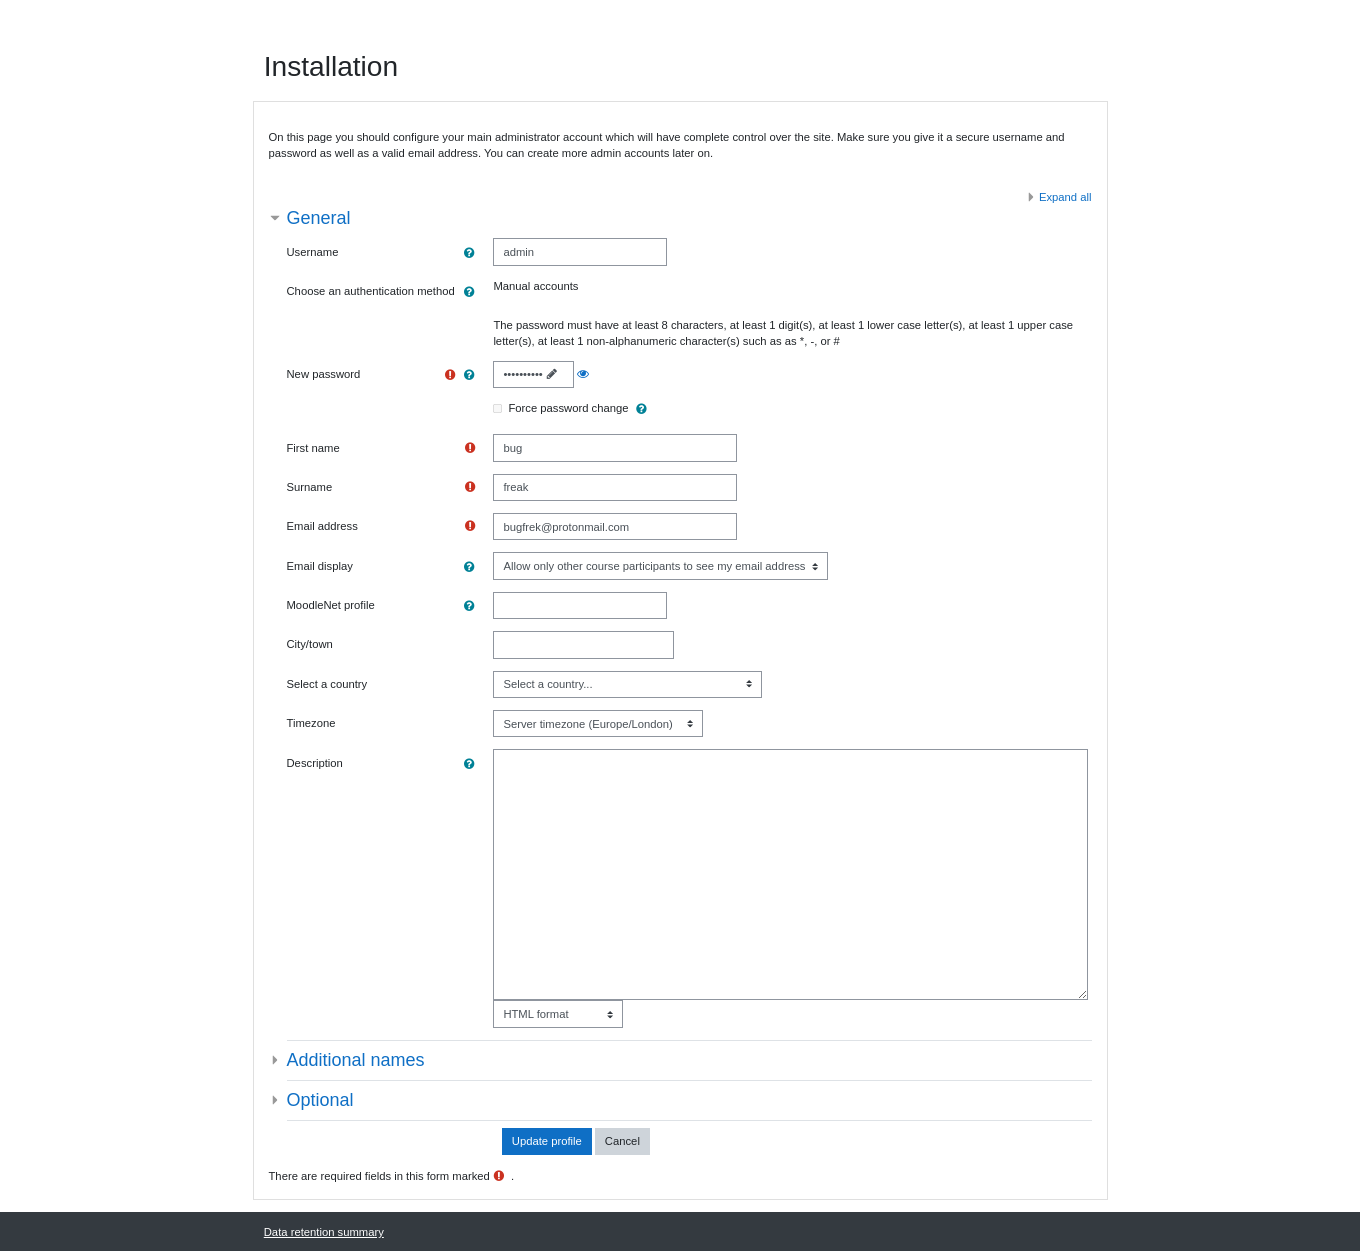
After setup, you are automatically logged into the site, showing the personal area:
And with this, we can start working on our new Moodle site and start using this e-Learning platform. You can refer to moodle documentation for further configuring. I hope this article illustrated how to install Moodle in the best possible way.
Happy learning 🙂
You may be interested in :

6 Must Know Learning Management Systems of 2024: Why Moodle Tops the List
Learning Management Systems Introduction The digital transformation of education has escalated the need for robust, scalable,…


Exploring the Innovative Features of WordPress 6.5: A Comprehensive Guide
Introduction: WordPress 6.5 marks another milestone in the evolution of the world’s most popular content management…

How to change MYSQL root password from CloudStick dashboard.
Changing Mysql root passwords are easy when it comes to CloudStick, you do have to fill…