Install WHMCS on CloudStick

WHMCS is a billing application for web development, web hosting companies, and many other companies are preferred to choose WHMCS as they can simply create subscriptions for their products and get paid, and the possibility of technical support and automation stick users with WHMCS.
Deploying WHMCS on your server is hassle-free on CloudStick and might take up to 10 minutes to finish. I am here noting down the step-by-step to finish the WHMCS installation.
Note: Make sure you have enabled the File System Quota prior to creating the web application(one time)
Step 1: Log in to the CloudStick dashboard and select your server install WHMCS.
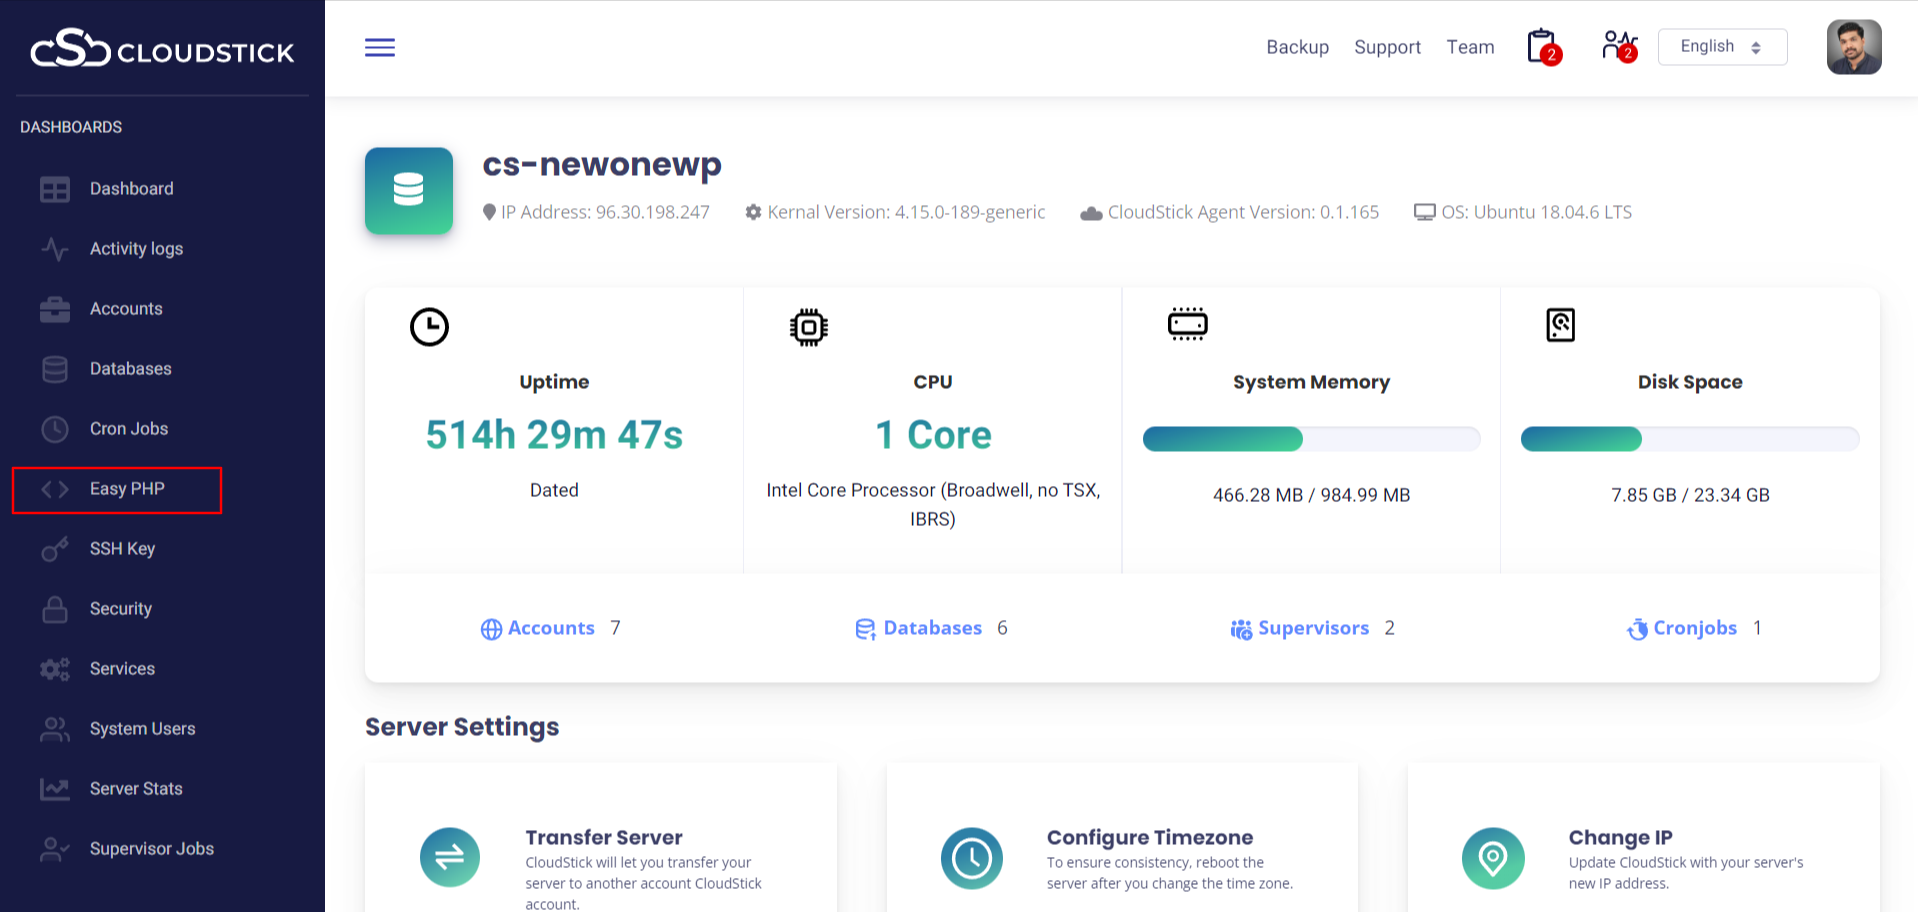
Step 2: Click on EasyPHP from the left-hand side menu:
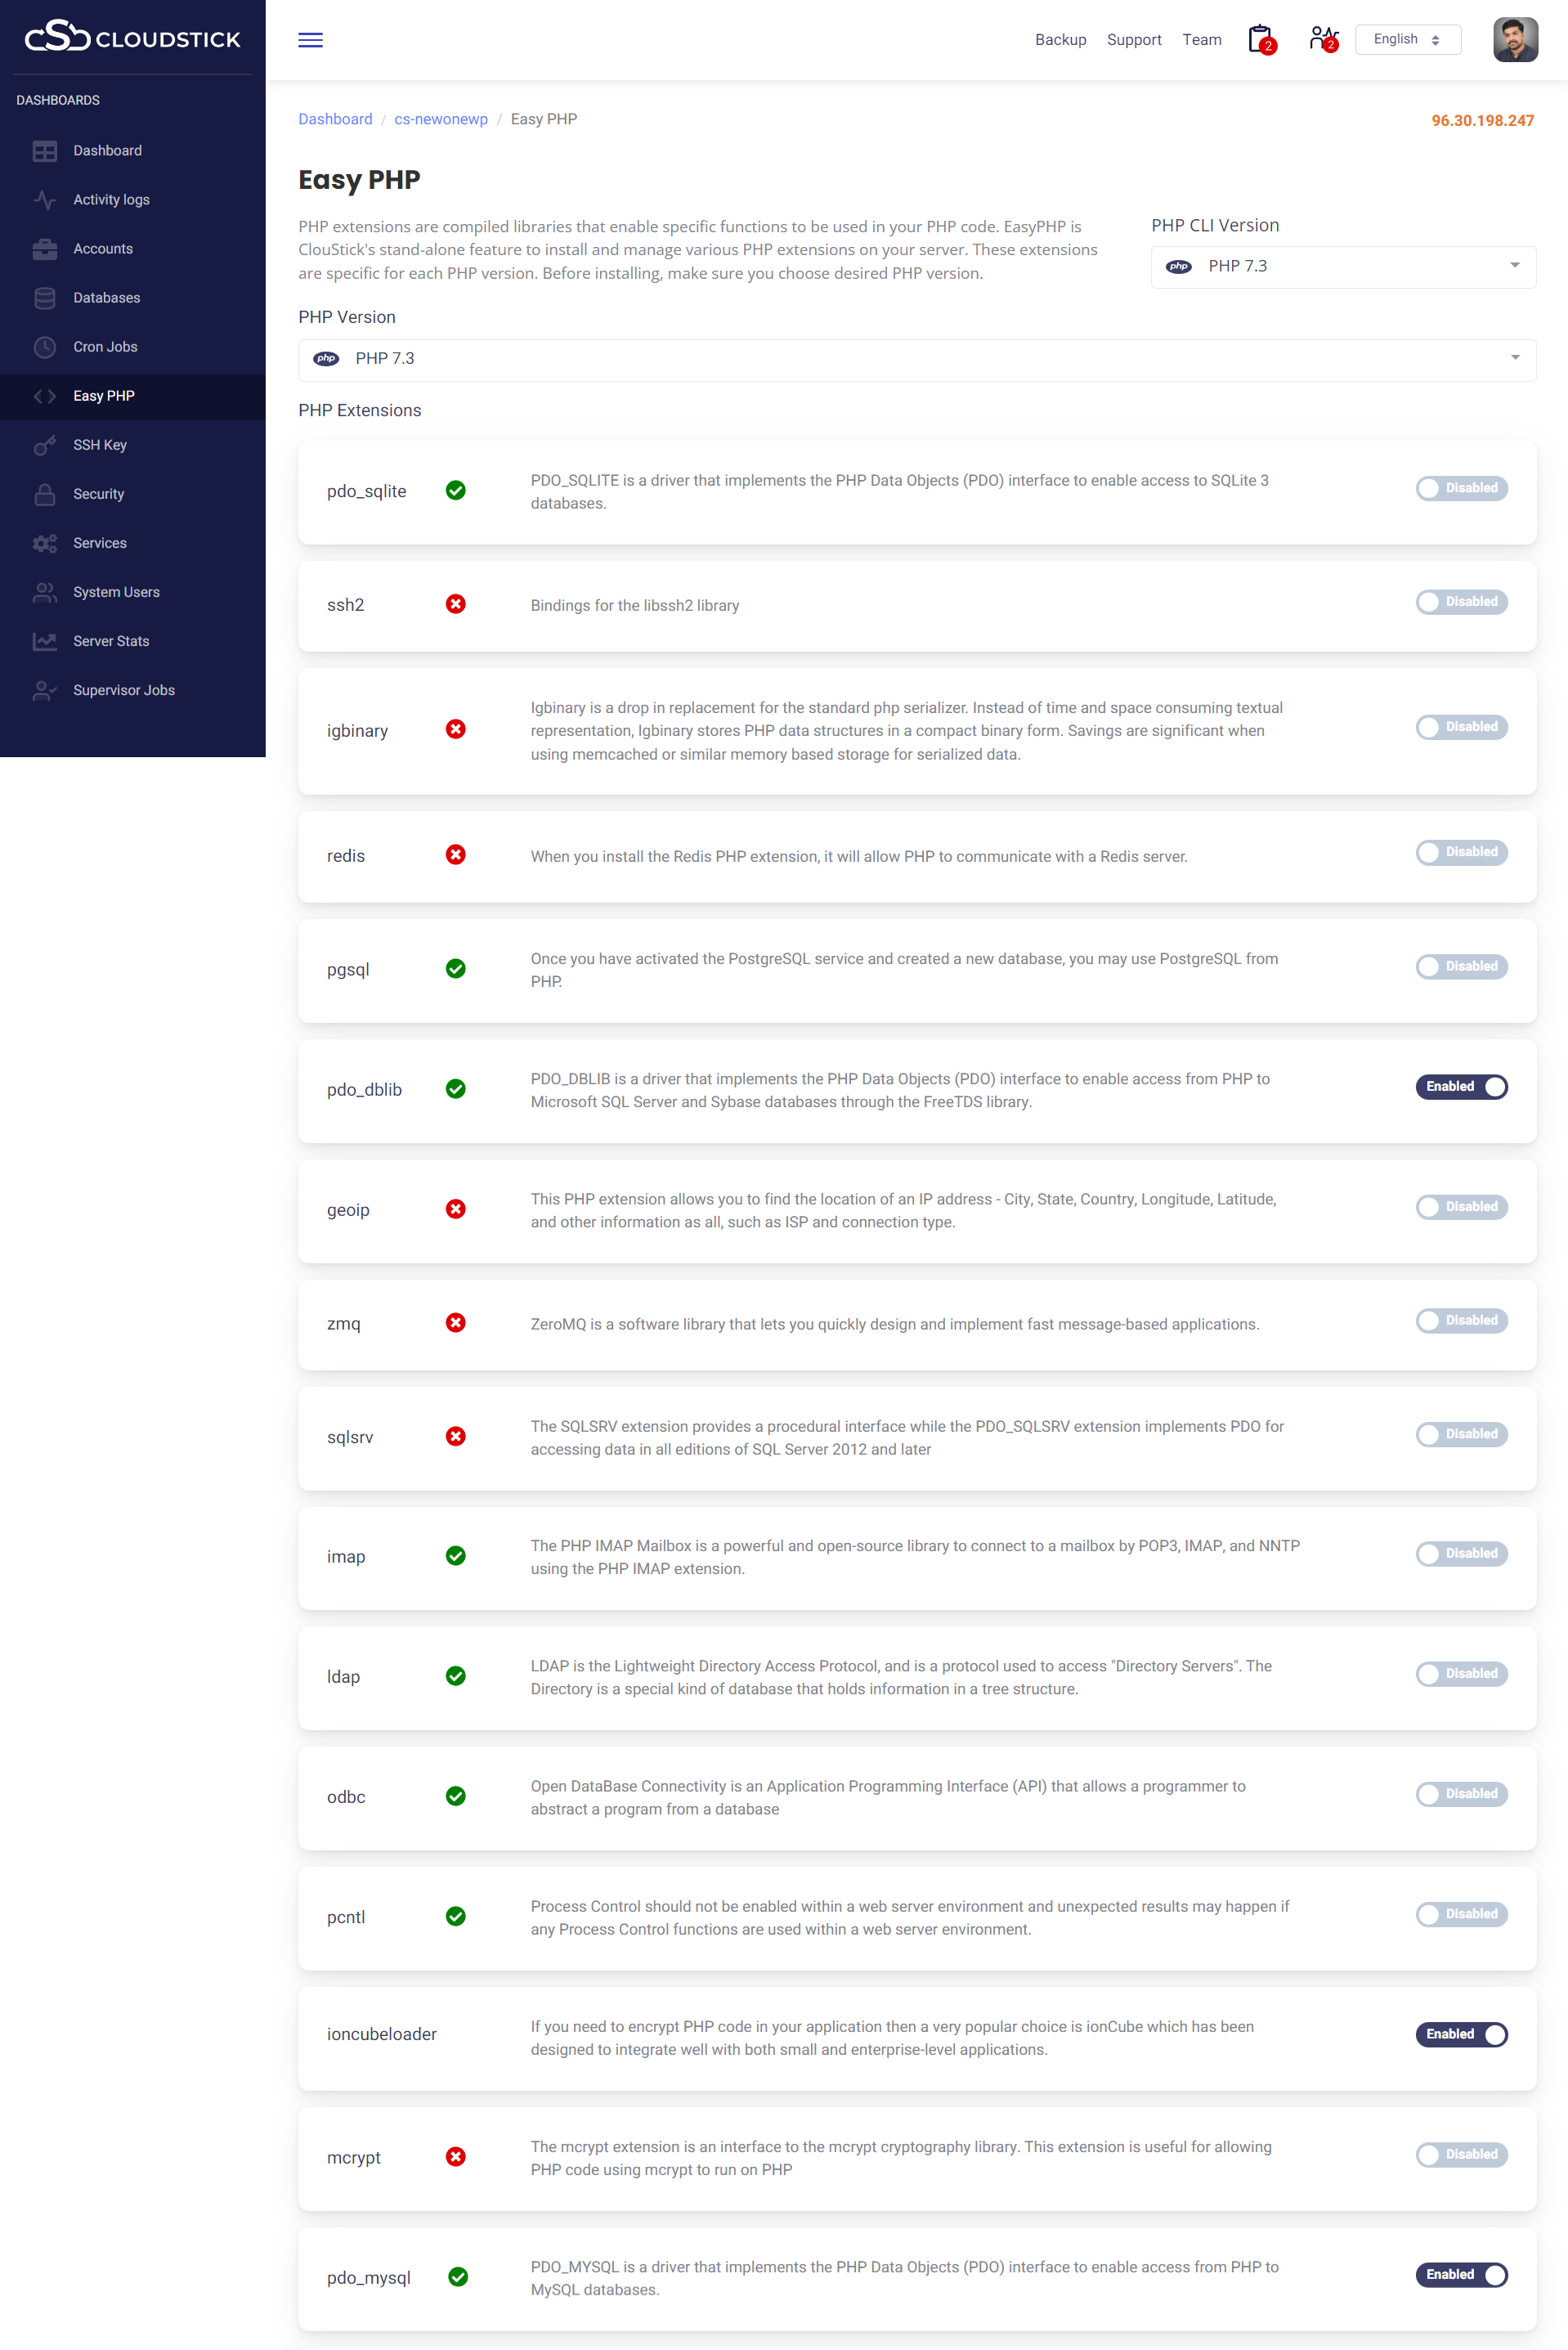
Note: It is important, that your preferred PHP version should have the extension preloaded with Ioncube Loader since you must install this before proceeding with the installation of WHMCS:
Select the PHP version that you wish to use. Here I am going to set up the WHMCS on PHP 7.3, since I am going to select PHP 7.3, then enable Ioncube Loader – it will take few seconds to finish the installation.
Step 3: Then, Click on “Accounts” from the left-hand side menu and click create on the custom web application box:

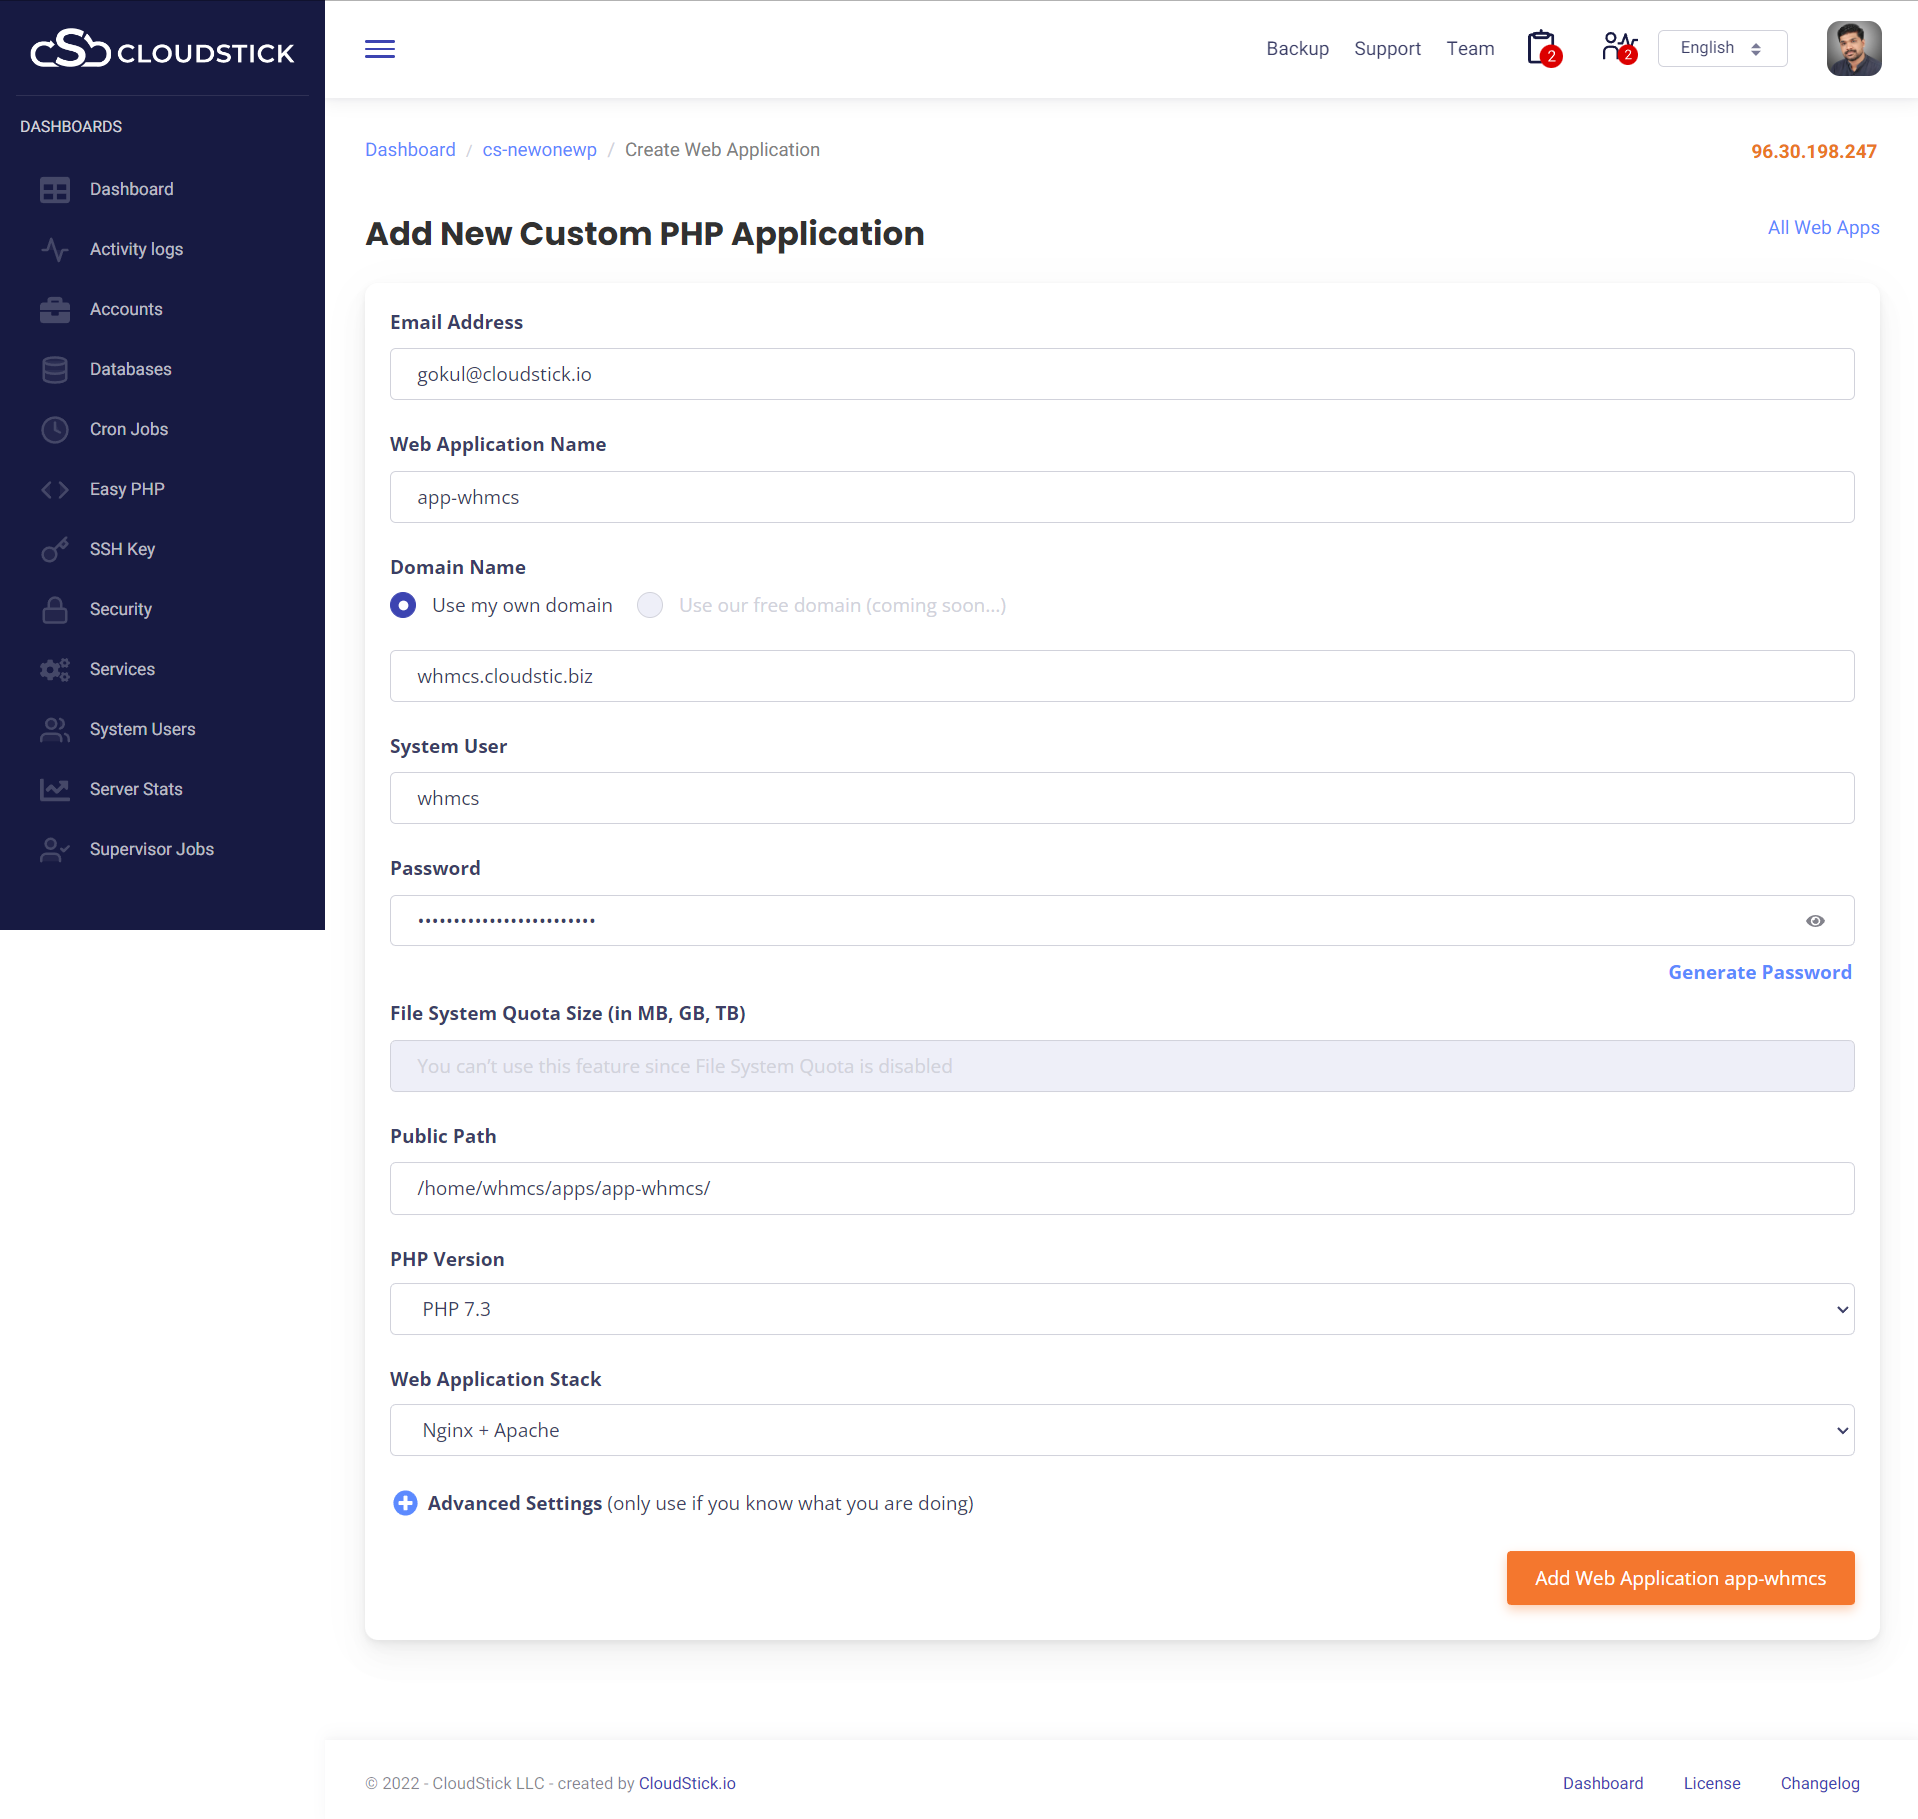
Step 4: Fill up the details in order to create the Account/Web Application to install WHMCS
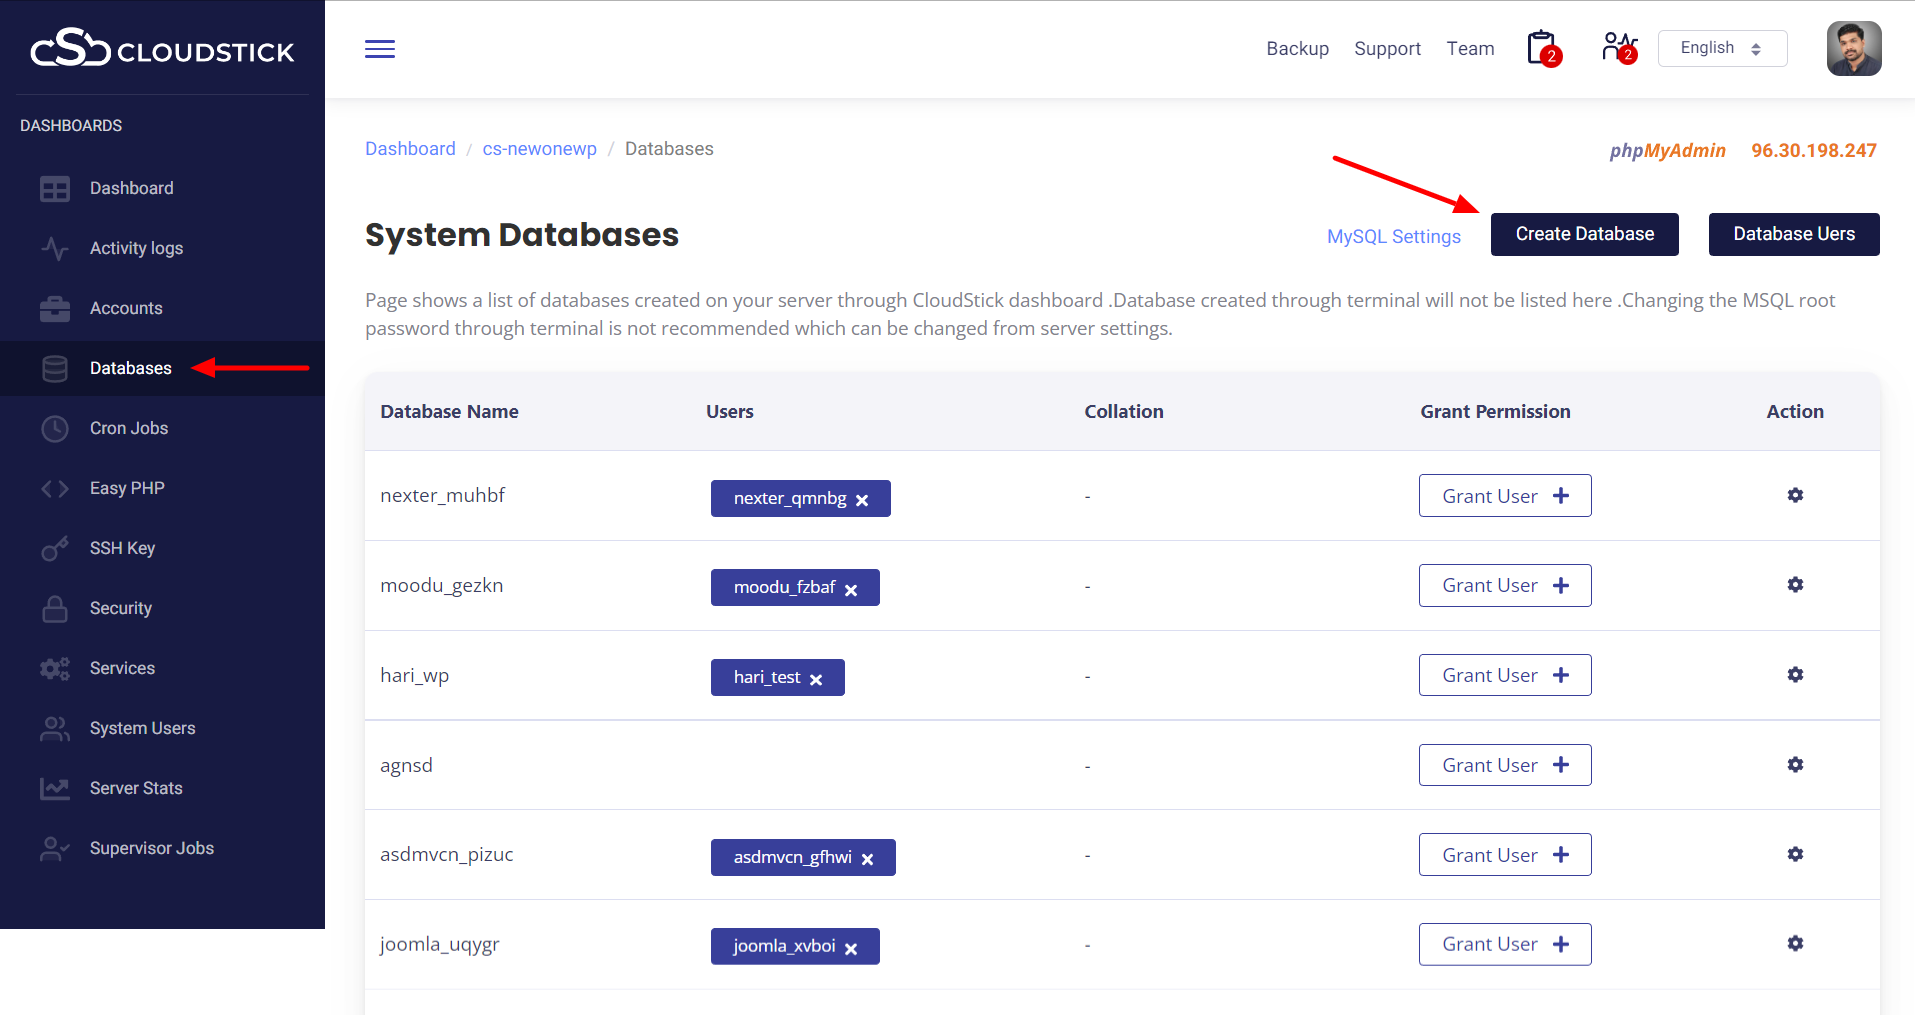
Step 5: It is time to create the database, database user, and grant permission: Click on Database from the left-hand side menu, then click on create the database:
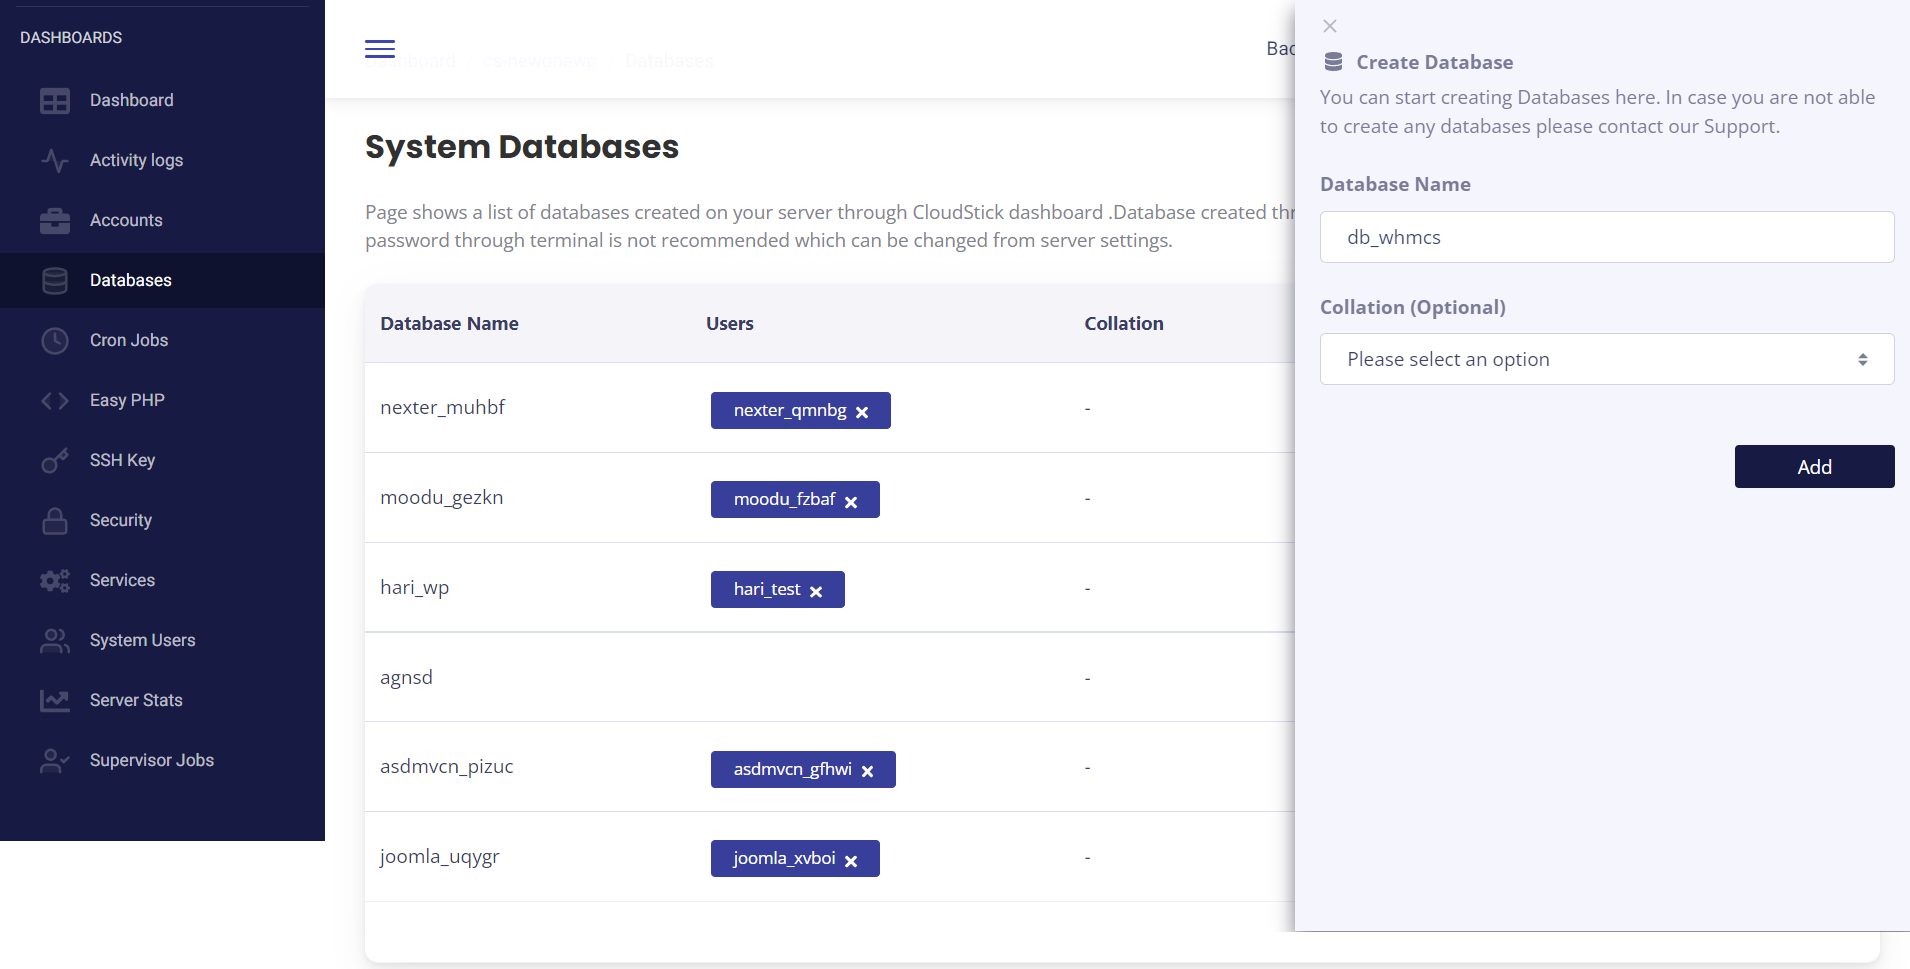
Step 6: Enter the database name that you wish to add and click on the button Add new database:
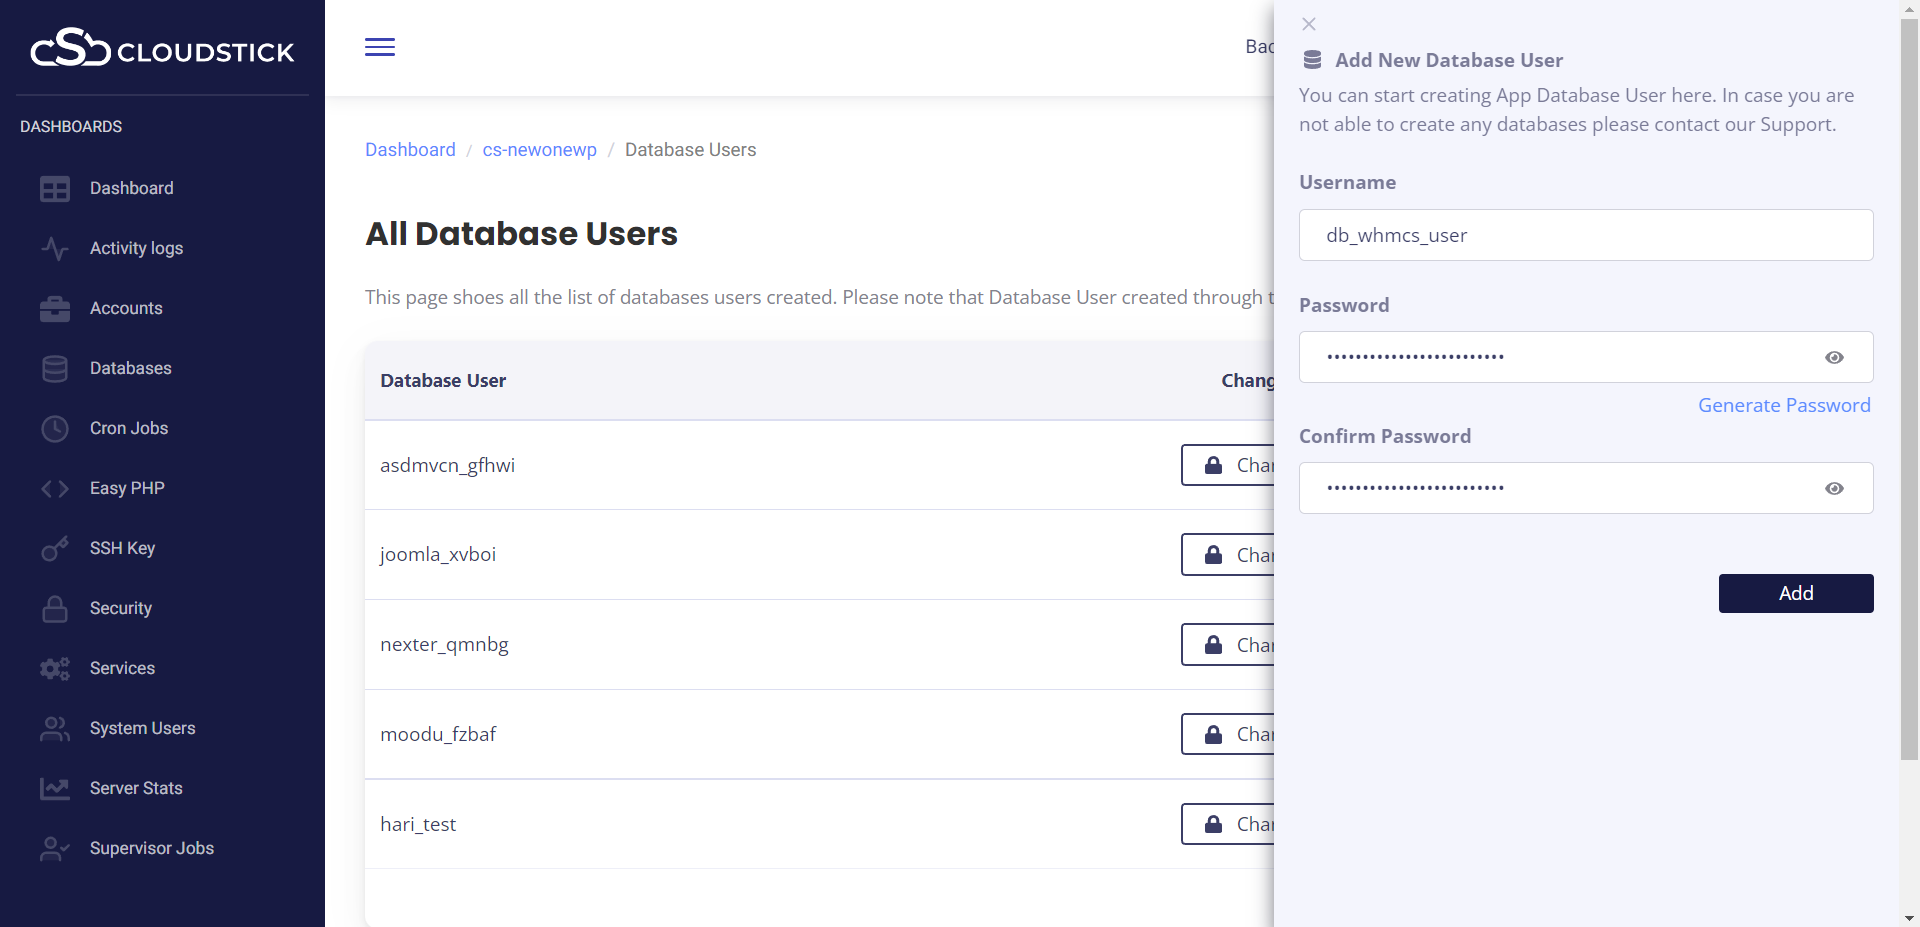
Step 7: Enter the database user name and password then click on the button Create the Database user, also please save these details somewhere on your notepad:
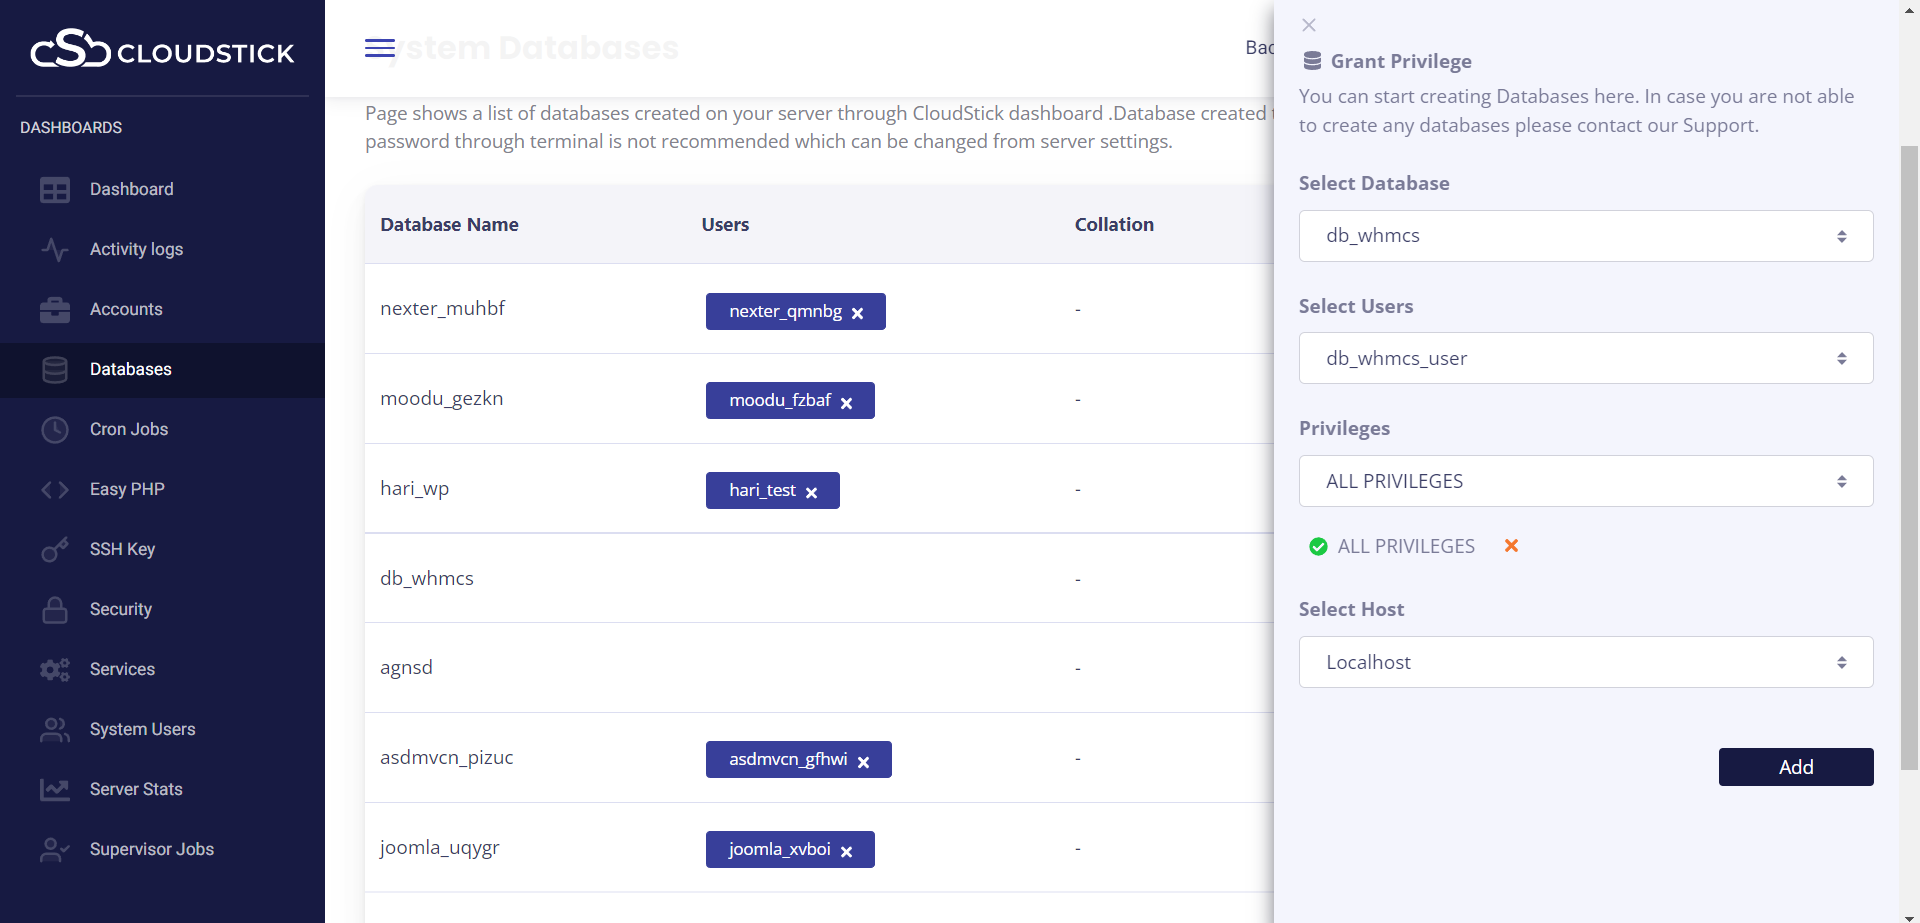
Step 8: Go back to the database list page and click on the grant user button corresponding to the database:
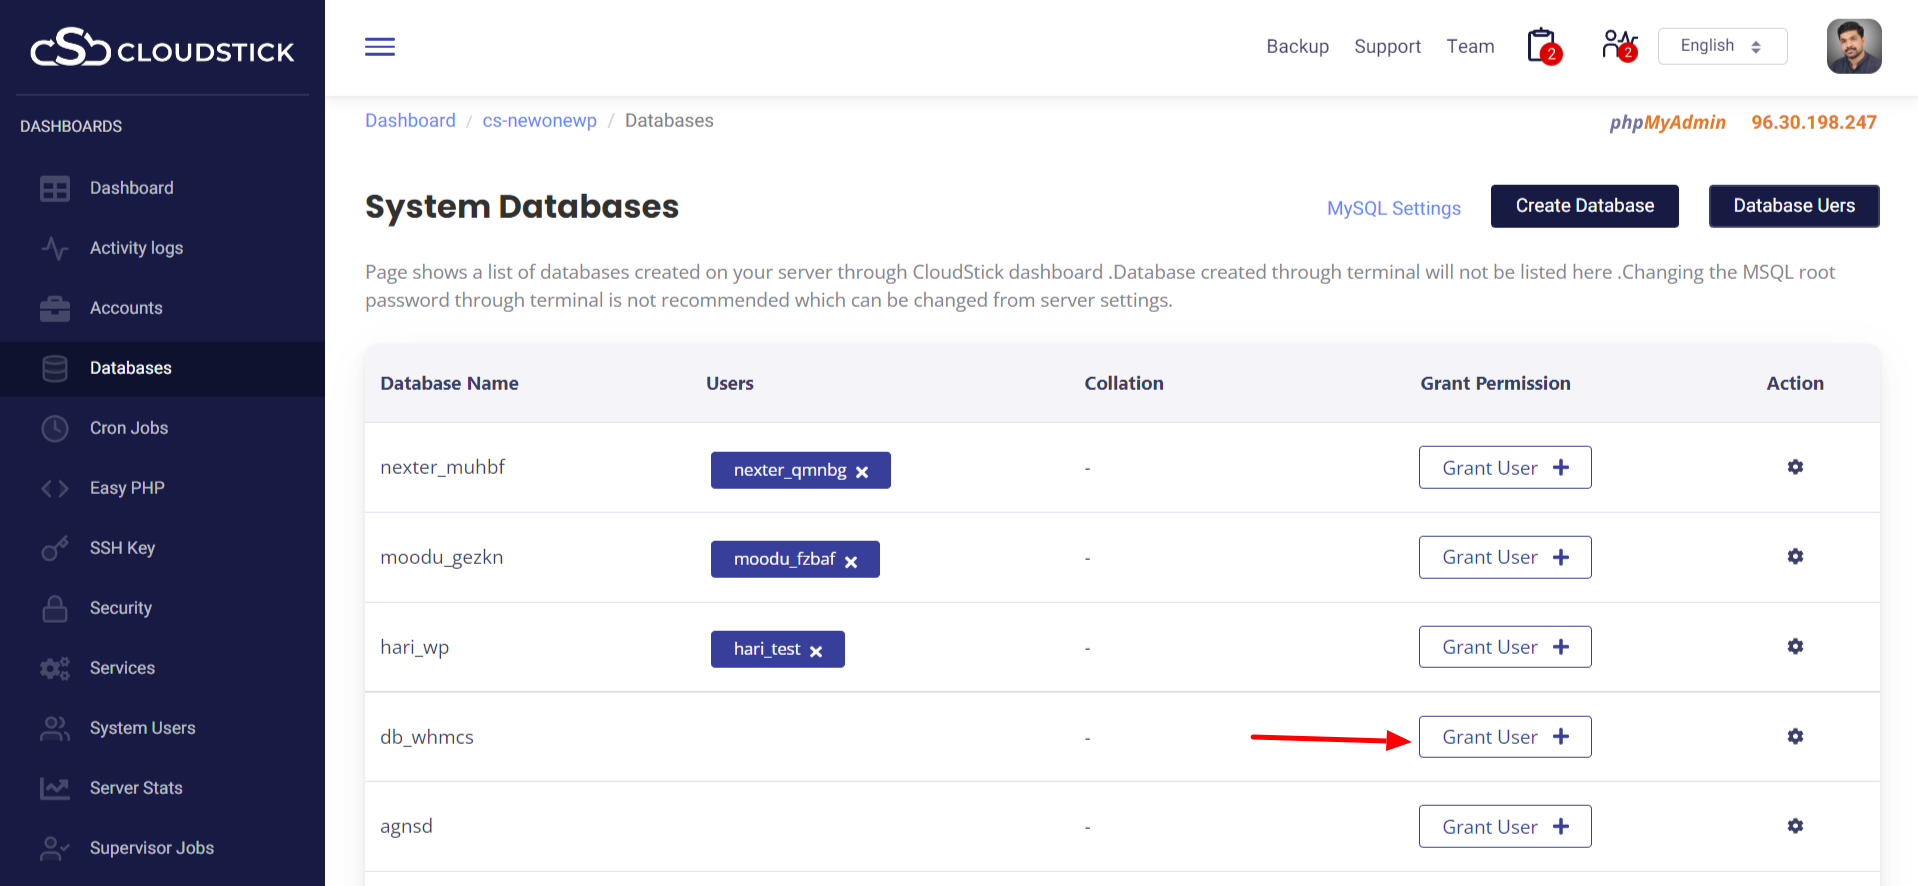
Step 9: I would recommend setup full permission for the user to the database for localhost:
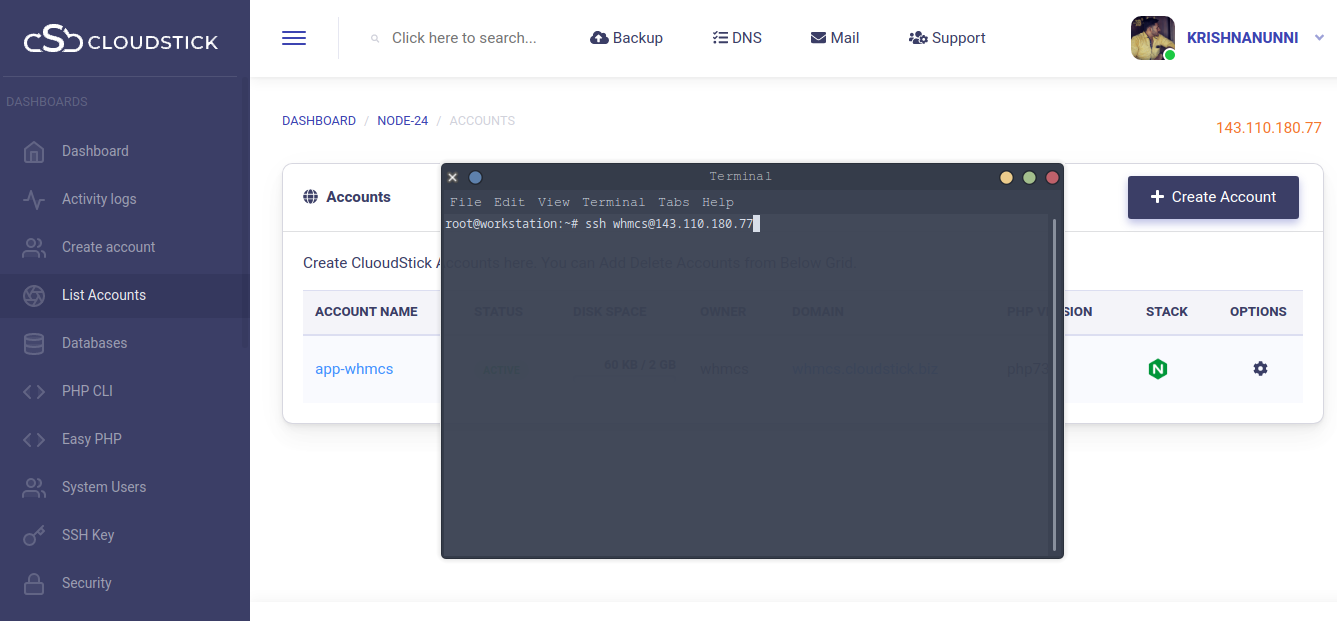
Step 10: Now you have to open putty or connect your server from the SSH console to connect the server over SSH. You may receive the SSH/SFTP login details over the email that you used to create the Account/web application.
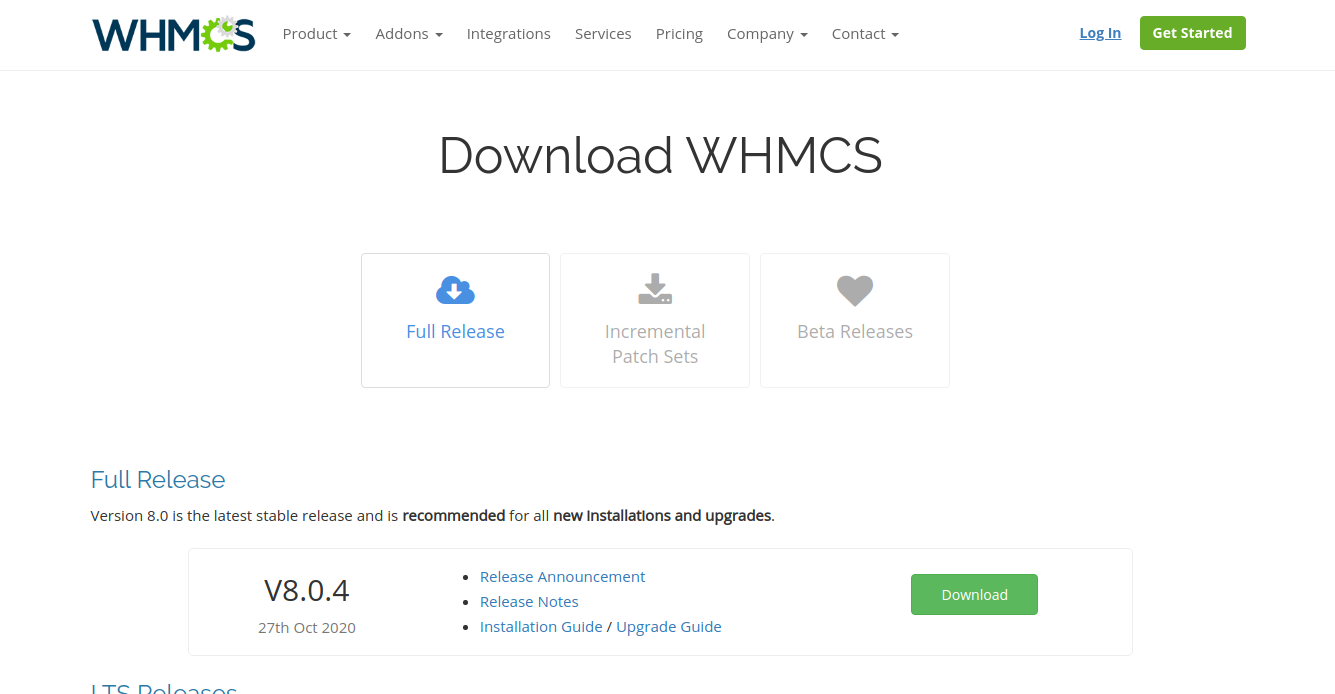
Step: 11: Now you have to download the WHMCS source files from the WHMCS website
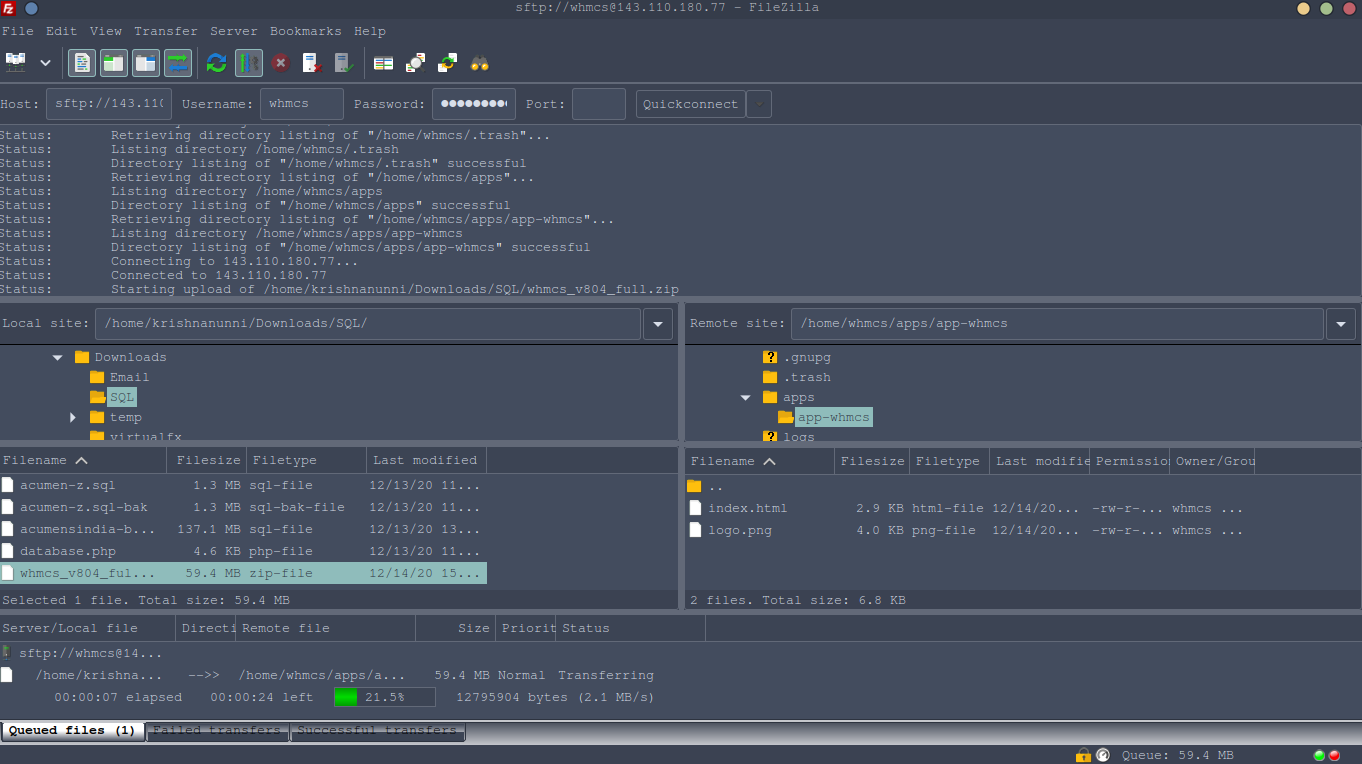
Step 12: Connect Filezilla using the same credentials and navigate to the public path of your application, then upload the zip file:
Step 13: Now, Open putty and change the directory to the public path, then execute the following commands:
First, we have to remove the existing index.html
rm -rf index.html
then we have to unzip the WHMCS source code
unzip whmcs_download_filename.zip
Now, we have to move files of folder ‘whmcs’ to the current folder
mv whmcs/* .
Step 14: Now your application is ready to connect with the database and WHMCS license, you must open the website/application URL used to create an account on a web browser.
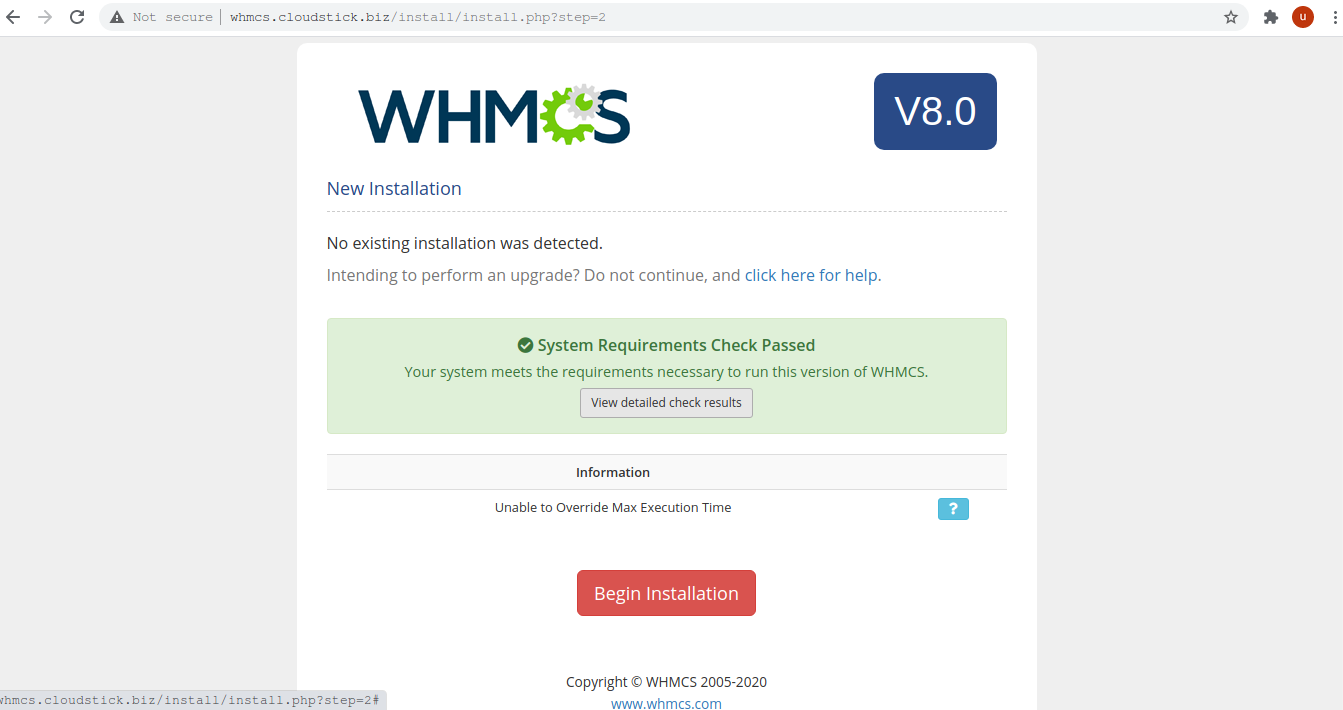
Step 15: Enter the License you have purchased from WHMCS and database credentials with the port number as 3306:

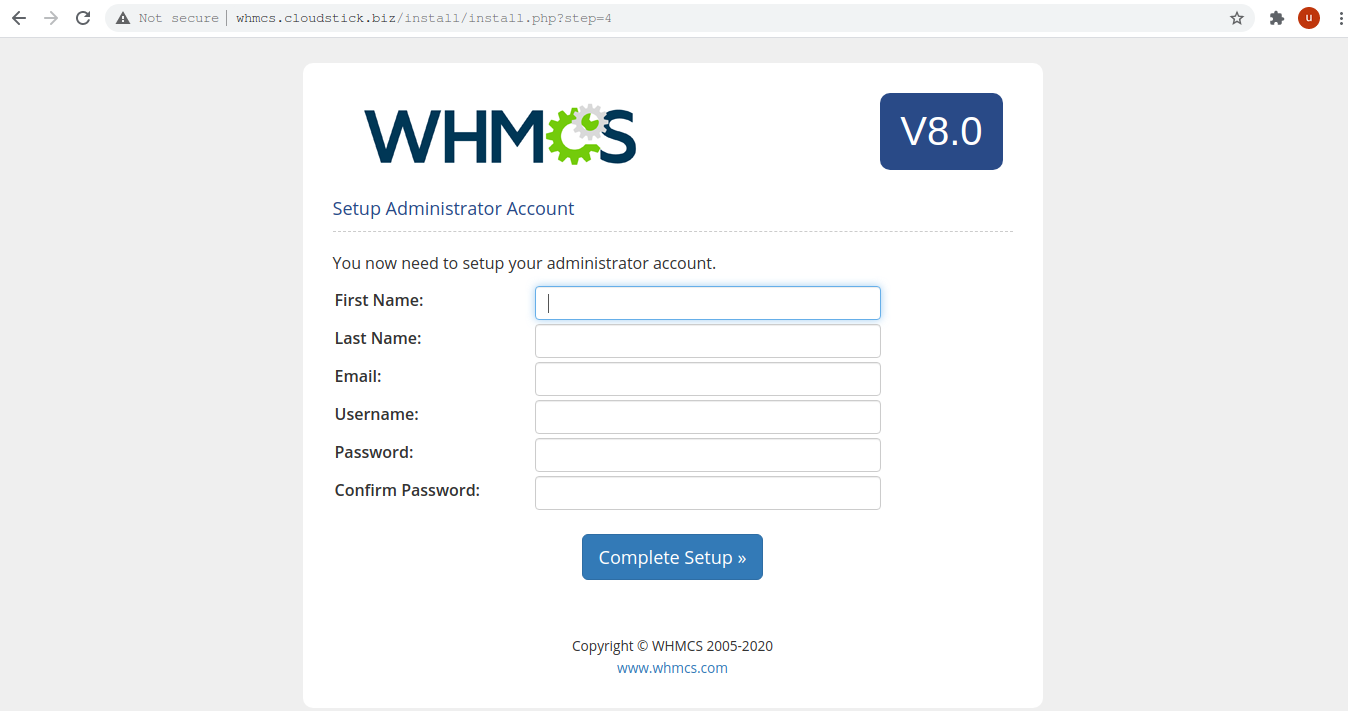
Step 16: Enter your personal details, then finish the installation:
 Step 17: Now you will get a message that the ‘Installation Completed Successfully’
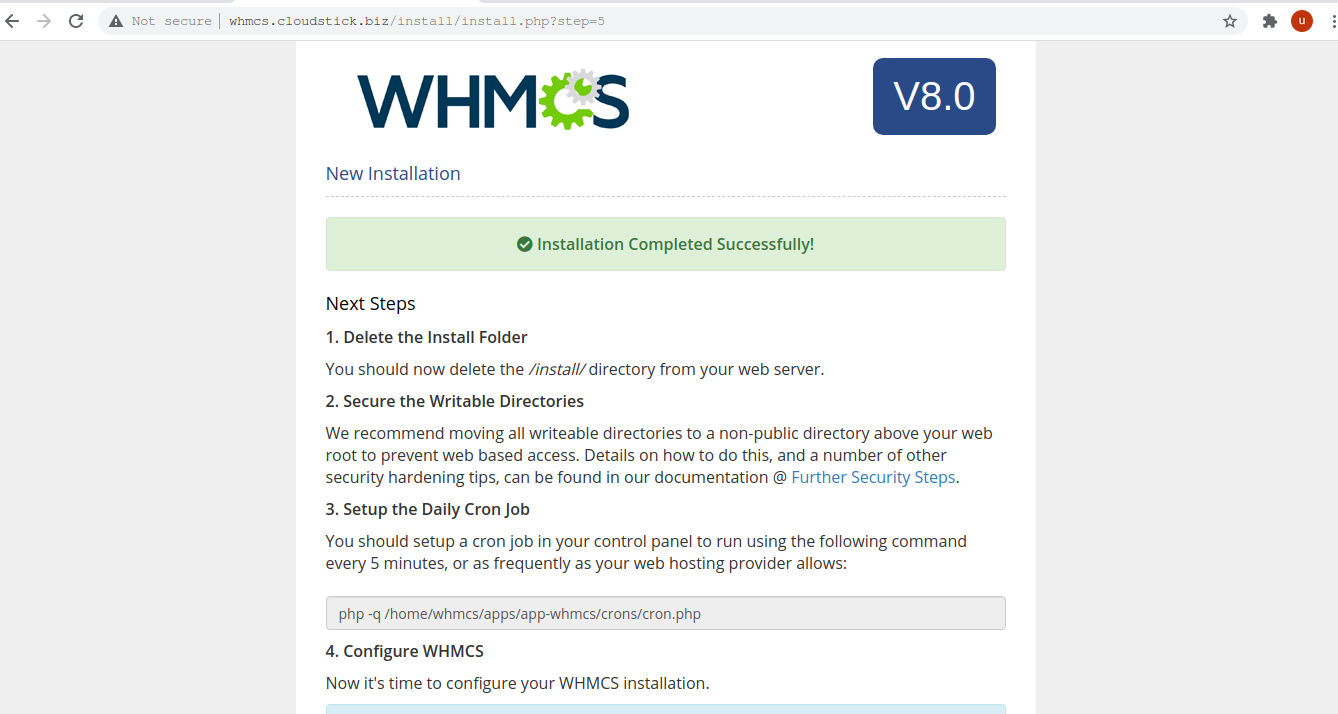
Before Proceeding further, we have to remove the installation directory by executing the following command on the public path
rm -rf install/
(Optional) For additional security, you can move the attachments, downloads, and templates_c directories outside of any publicly accessible directories.
- You can follow the walkthrough provided by WHMCS to move the directories.
Step 18: Setup your Cron to ensure WHMCS is performing its required scheduled tasks once a day. This can be done through CloudStick’s Cron Job feature
note: refer to this documentation on how to add corn jobs in CloudStick
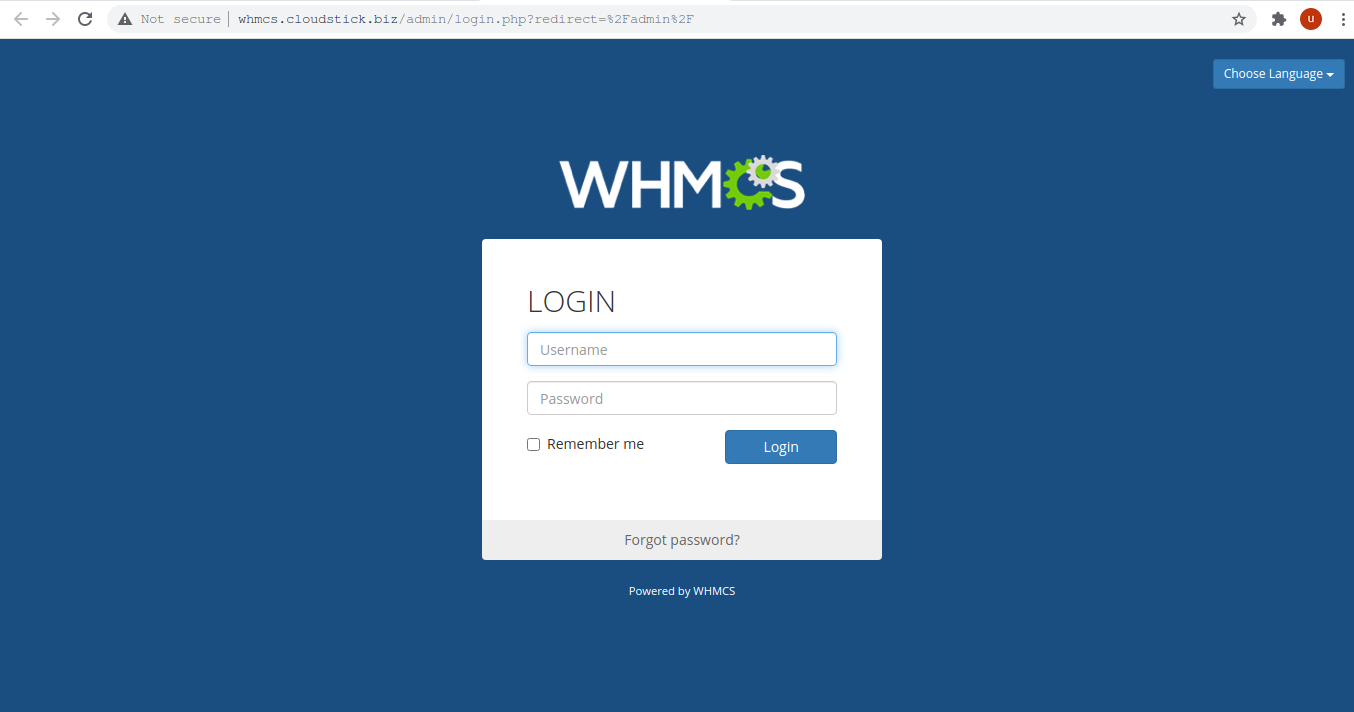
Step 19: Congratulations! You have successfully installed WHMCS on CloudStick.
Post Installation Suggested Steps
After you complete installation, WHMCS recommends doing the following configuration set up in order:
- Perform the recommended Further Security Steps.
- Log in to the Admin Area and configure your general settings (Configuration () > System Settings > General Settings or, prior to WHMCS 8.0, Setup > General Settings).
- Set up your payment gateways (Configuration () > System Settings > Payment Gateways or, prior to WHMCS 8.0, Setup > Payment Gateways).
- Set up your products and services (Configuration () > System Settings > Products/Services or, prior to WHMCS 8.0, Setup > Products and Services).
- Configure your domain pricing (Configuration () > System Settings > Domain Pricing or, prior to WHMCS 8.0, Setup > Domain Pricing).
- Set up your support ticket departments (Configuration () > System Settings > Support Departments or, prior to WHMCS 8.0, Setup > Support Departments).
- Set up email piping so you can manage tickets using the WHMCS Support Desk. For more information, see Email Piping.
- Make sure that the WHMCS cron job is set up and configure automated tasks (Configuration () > System Settings > Automation Settings or, prior to WHMCS 8.0, Setup > Automation Settings).
- Place some test orders on your website to check your setup.
WHMCS is now installed and ready to use.
You may be interested in :

6 Must Know Learning Management Systems of 2024: Why Moodle Tops the List
Learning Management Systems Introduction The digital transformation of education has escalated the need for robust, scalable,…


Exploring the Innovative Features of WordPress 6.5: A Comprehensive Guide
Introduction: WordPress 6.5 marks another milestone in the evolution of the world’s most popular content management…

How to change MYSQL root password from CloudStick dashboard.
Changing Mysql root passwords are easy when it comes to CloudStick, you do have to fill…