How To Install ImageMagick PHP Extension

Are you fed up with the traditional command-line installation of ImageMagick? Say GoodBye then! We are here with the One-Click ImageMagick PHP Extension that will take less than one minute. The main concern while using certain web apps is that some need special image formats.
What is ImageMagick?
ImageMagick is an open-source platform that is popular among system administrators and offers ways to edit, resize, optimize and display images easily. Using this can ease the conversion process of images from one format to another without compromising the quality of images. Multiple files can be converted at the same time with the aid of ImageMagick.
Besides file format conversion, it helps in color quantization by decreasing the number of colors, dithering, which is done while changing the parameters like color and shadow, liquid rescaling, artistic effects, and so on.
How to Install ImageMagick PHP Extension?
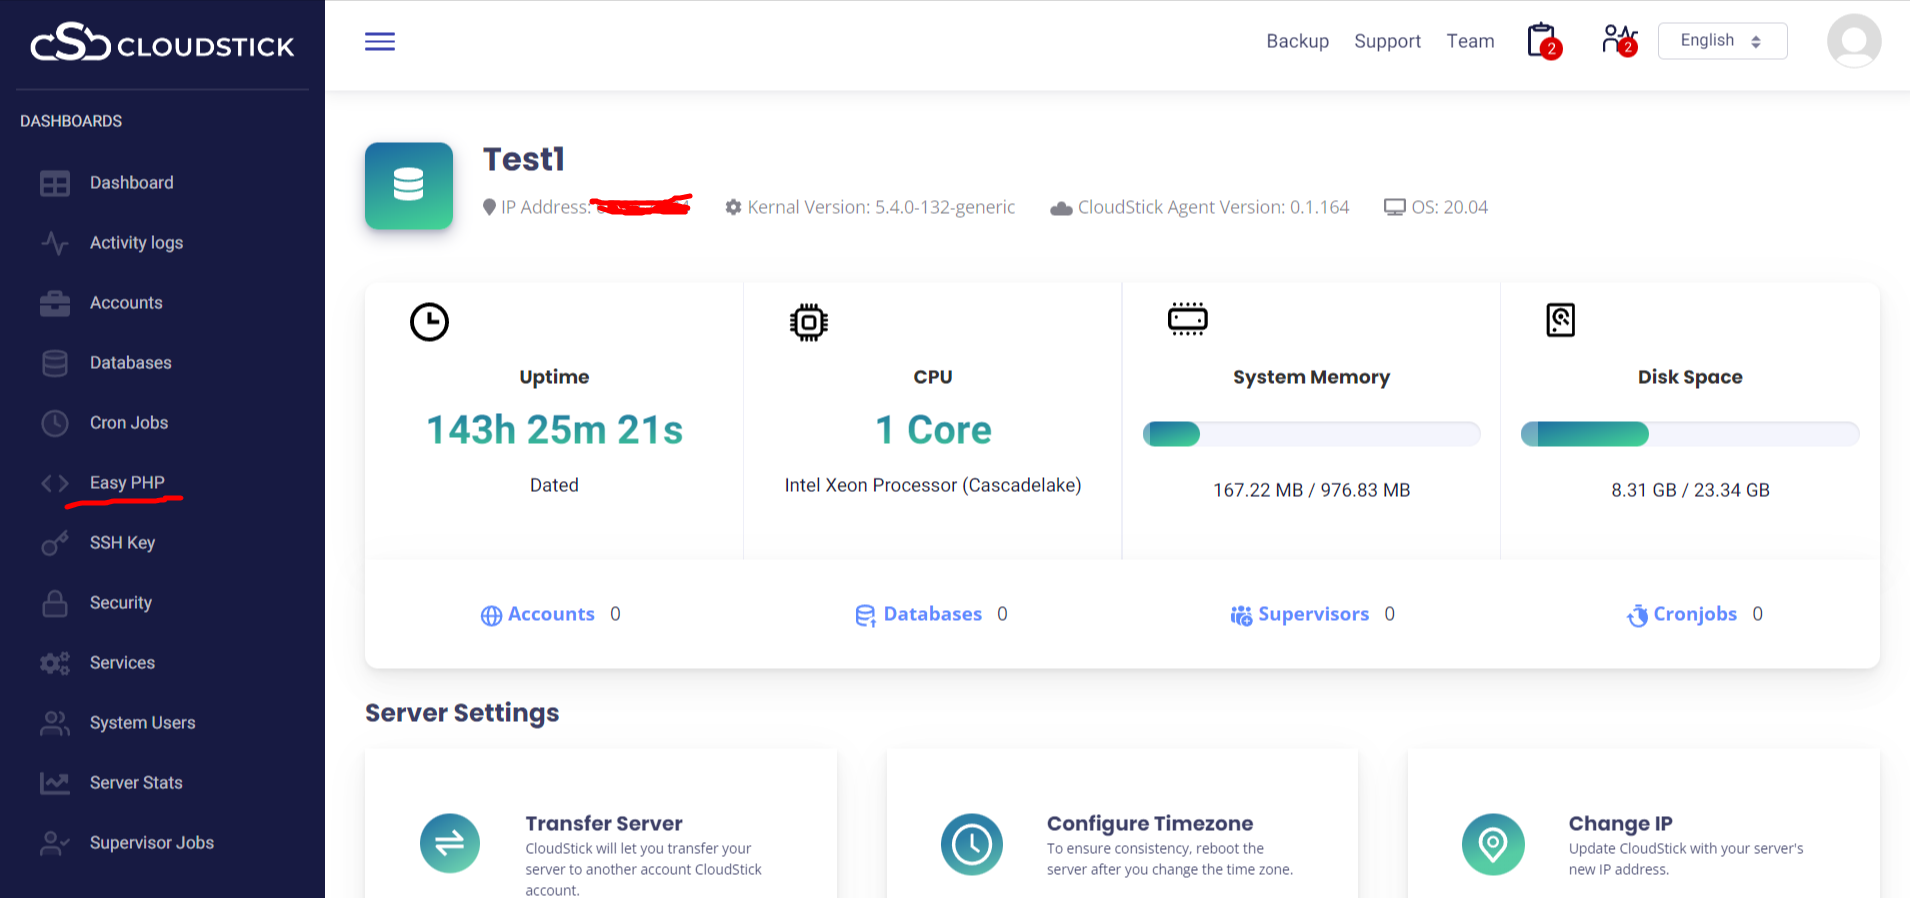
Login in your CloudStick Dashboard:

Select your server.

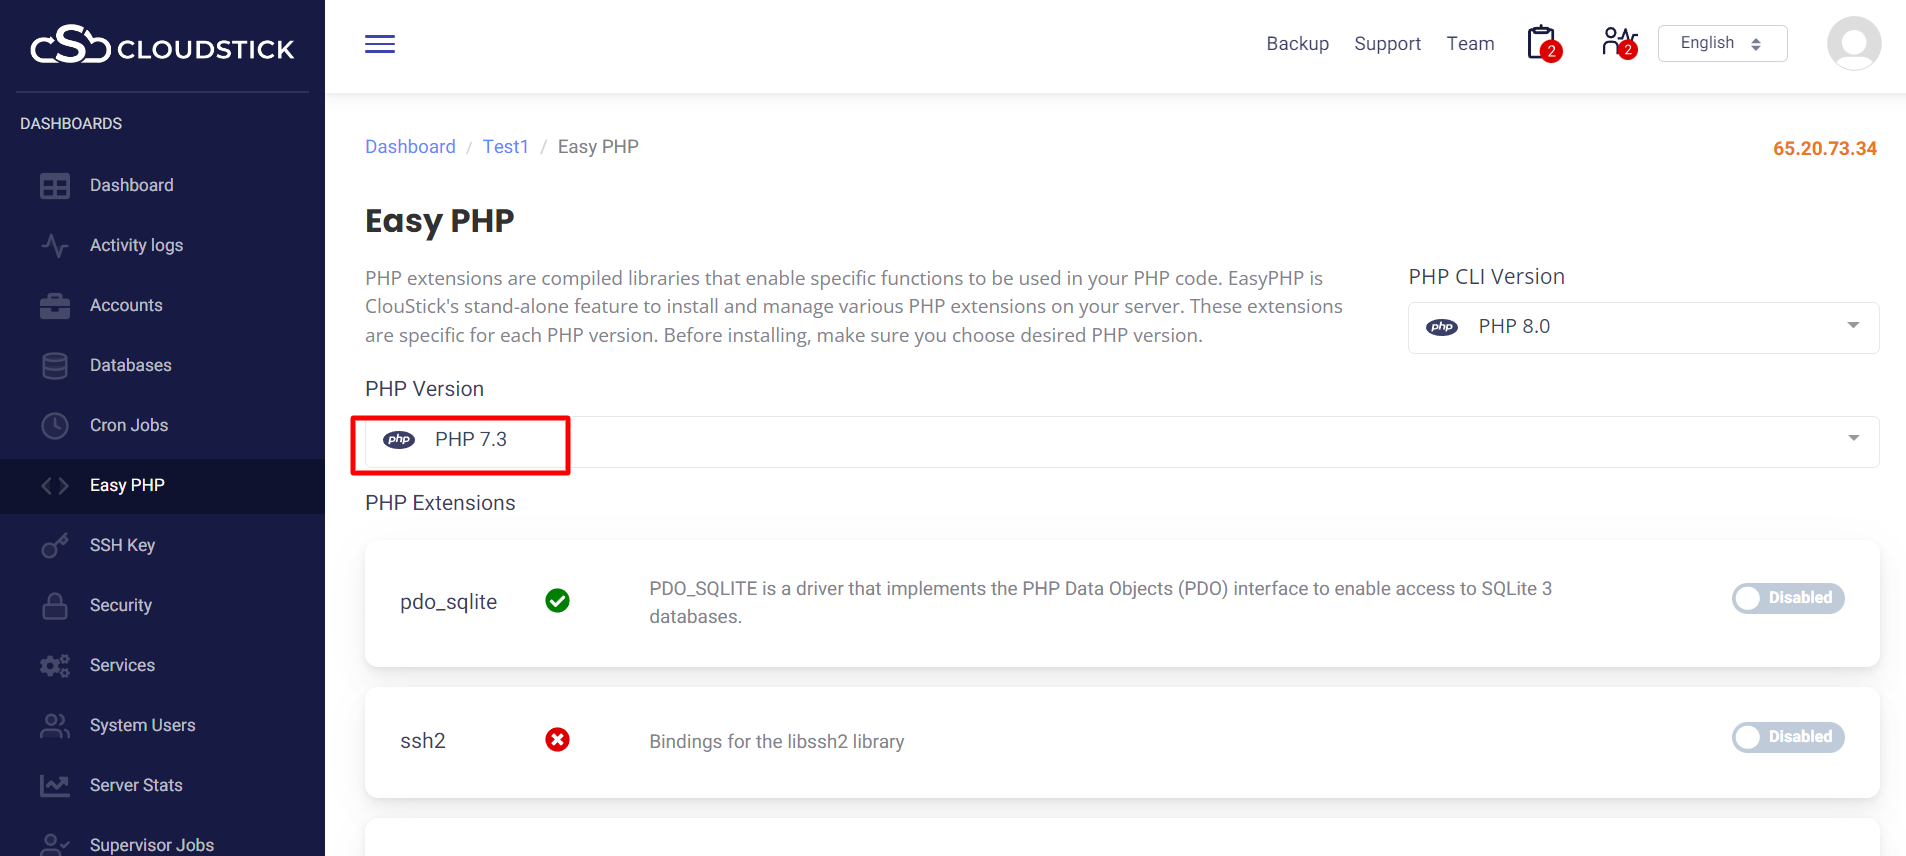
Navigate to EasyPHP from the left-hand side menu. Then select the PHP version for which version you want the ImageMagick to be installed using a tutorial on how to install ImageMagick PHP extension. In this example, I am using PHP 7.3.

Then scroll down, and enable ImageMagick from the bottom of the page.
Now ImageMagick and ImageMagick PHP extensions have been installed on your server with the tutorial on how to install ImageMagick PHP extension.
Let’s see how to set up ImageMagic on your WordPress website using the plugin WebP Converter for Media-Convert WebP & Optimize Images
The below code snippet will Imagick::resizeImage() function in PHP::
<?php
// Create a new Imagick object
$imagick = new Imagick(
‘https://www.gipra.in/assets/frontarea/images/resource/we-are-slide1.png‘);// Resize the image
$imagick->resizeImage( 620, 300, Imagick::FILTER_LANCZOS, 1);// Display the image
header(“Content-Type: image/png”);
echo $imagick->getImageBlob();
?>
Parameters: This function accepts six parameters as mentioned above and described below:
- $columns: It indicates the width of the image.
- $rows: It indicates the height of the image.
- $filter: It indicates an integer corresponding to one of FILTER constants.
- $blur: It indicates the blur factor where > 1 is blurry, < 1 is sharp.
- $best_fit (Optional): It indicates the fit parameter.
- $legacy (Optional): It indicates the legacy.
Return Value: This function returns TRUE on success.
Exceptions: This function throws ImagickException on error.
You may be interested in :
Learning Management Systems Introduction The digital transformation of education has escalated the need for robust, scalable,…
Introduction: WordPress 6.5 marks another milestone in the evolution of the world’s most popular content management…
Changing Mysql root passwords are easy when it comes to CloudStick, you do have to fill…

