
Creating an Email Address in CloudStick for Your Domain: A Step-by-Step Professional Guide
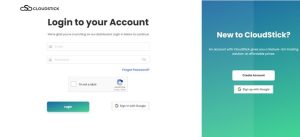
Access Your CloudStick Dashboard: Begin by logging into your CloudStick dashboard. This is your central control panel where you can manage all aspects of your server and hosted domains. So, first of all you need to enter your email and password their and click on login or you can directly use google account to sign in the dashboard. Note: It is mandatory to setup the server hostname, click on the link here to setup server hostname.
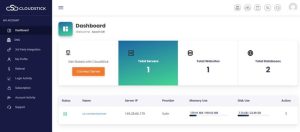
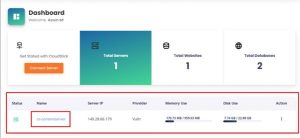
Select the Relevant Server: In the dashboard, locate and select the server where your domain is hosted. This step is crucial as it directs you to the specific server environment associated with your domain. Once you have selected the server, like in the below image I have selected contentserver
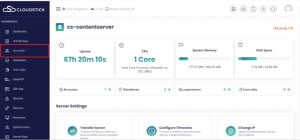
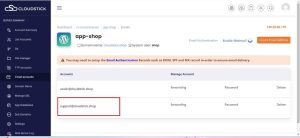
Navigate to the ‘Accounts’ Section: proceed to the ‘Accounts’ section. Which is the left side of the dashboard as you can see in the below image. This area allows you to manage various aspects of your domain and associated services.
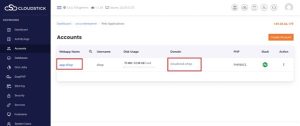
Locate Your Domain Name: Within the ‘Accounts’ section, you will see a list of domain names. Identify and click on the specific domain name for which you wish to create an email address.
Access the Web Application Settings: Click on the name of the web application associated with your domain. For this example, let’s assume the domain is “CloudStick.shop”. This action will lead you to the settings and options specific to the chosen web application. Here you need to click on the web app name like I am selecting app.shop
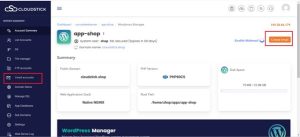
Open ‘Email Accounts’ Section: In the web application settings, find and click on the ‘Email Accounts’ option. Which is the left side of the dashboard or you can directly click on Create Email which is the right side of the dashboard as you can see in the below image. This will take you to the section where you can manage and create email accounts for your domain.
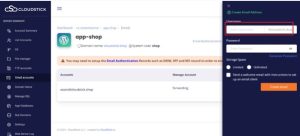
Create a New Email Address: Look for the ‘Create Email Address’ option. Here, you will only need to enter the desired email name (like “info” or “contact” or any other name of your choice ) as the domain (e.g., @CloudStick.shop) is already pre-selected.
Set Up the Password: Generate a secure password for the new email account. By clicking on Generate password or you can choose a strong password with your choice Ensure that the password is strong and unique for security purposes.
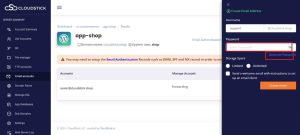
Define Storage Limit: Decide on the storage limit for this new email account. You have the option to set a specific limit, such as 50 MB, or choose ‘Unlimited’ if you do not wish to impose any storage restrictions.
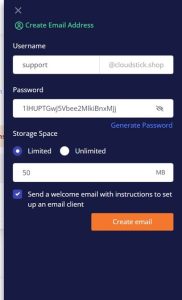
Complete the Creation Process: After setting the password and storage limit, finalize the process by clicking on the ‘Create Email’ button. This action will successfully create the new email account associated with your domain.
Remember, it’s important to regularly check and manage your email accounts to ensure they remain secure and function efficiently.